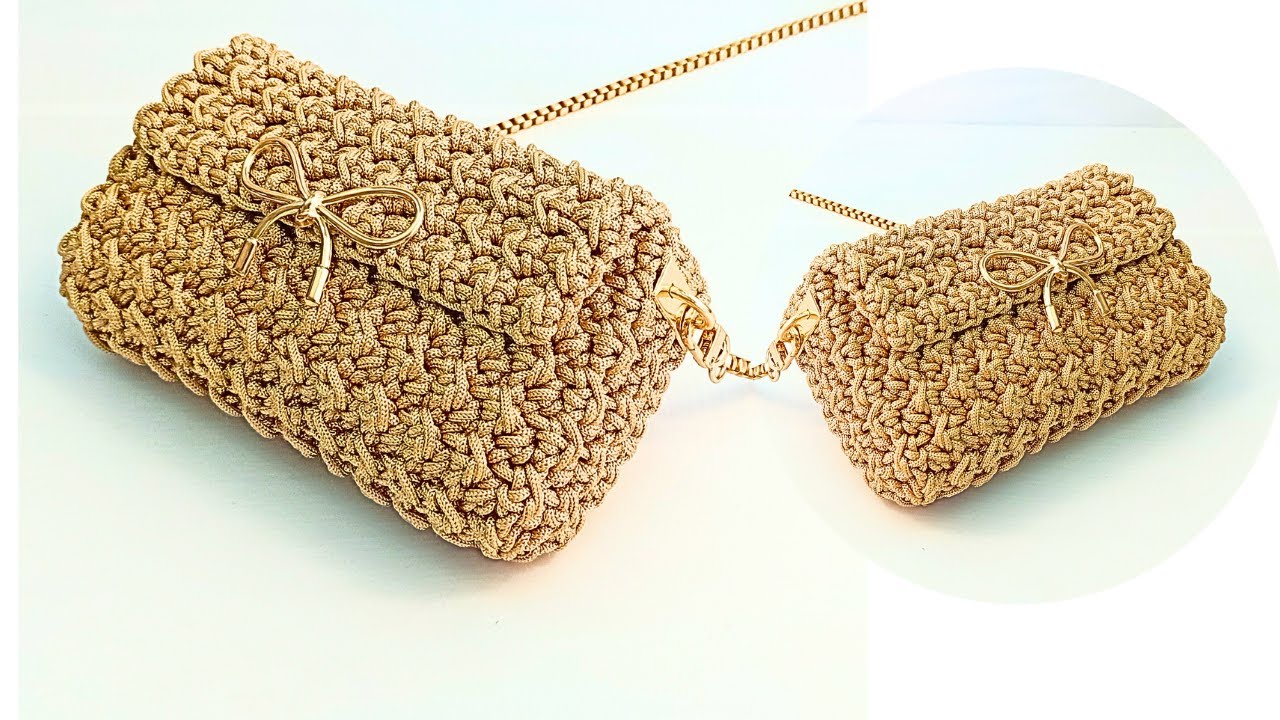
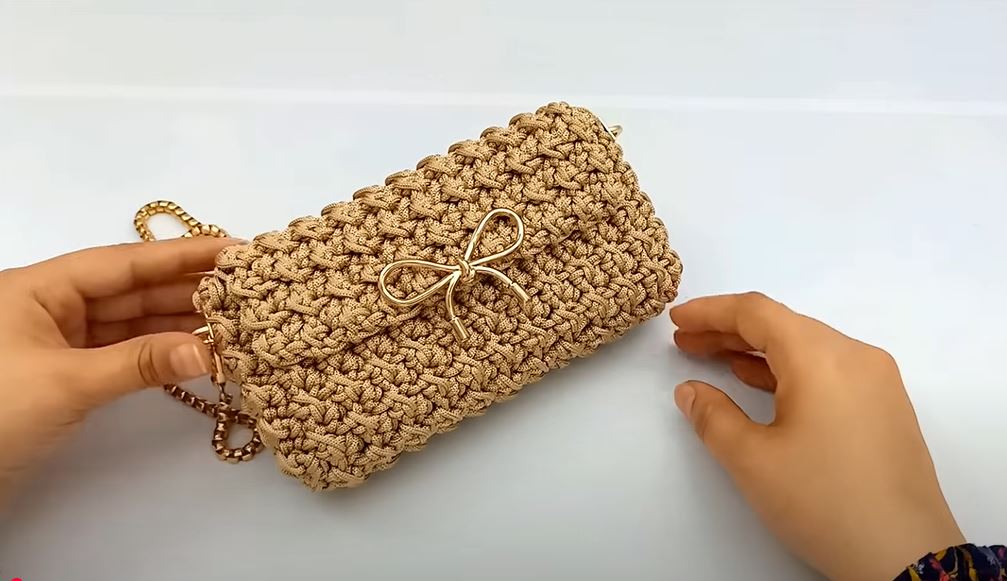
In the world of crochet, the allure of a small, perfectly crafted accessory is undeniable. A mini bag, whether for essentials like a phone and keys, or simply as a chic statement piece, combines practicality with personal style. While many bag patterns involve joining multiple pieces, there’s a particular satisfaction in creating a bag from a single, continuous flow of stitches. This not only results in a cleaner, more seamless finish but also simplifies the construction process, allowing the focus to remain on the refined details.
This article will guide you through the process of crocheting a one-piece mini bag that exudes elegance and sophistication. We’ll explore design considerations, ideal stitches, and a general approach to crafting a bag that looks as good as it feels.

The Charm of One-Piece Construction
Creating a bag in one piece offers several advantages for a truly refined look:
- Seamless Finish: Eliminates bulky seams, resulting in a sleeker, more professional appearance.
- Structural Integrity: Can provide better stability and shape retention, especially with dense stitches.
- Simplified Assembly: No need to meticulously sew pieces together, saving time and frustration.
- Flowing Design: Allows for more organic stitch patterns that transition smoothly across the bag’s body.
Design Principles for Elegance
Before picking up your hook, consider these design elements that contribute to a refined aesthetic:
- Yarn Choice is Key:
- Fibers: Look for yarns with a good drape and subtle sheen. Mercerized cotton, silk blends, linen, or even fine acrylics with a smooth finish are excellent choices. Avoid overly fuzzy or thick yarns that can detract from a refined look.
- Weight: Fingering (1) to DK (3) weight yarns are ideal for mini bags. They create a finer fabric, allowing intricate stitch patterns to shine and keeping the bag lightweight.
- Color Palette: Opt for sophisticated colors: deep jewel tones, classic neutrals (black, cream, gray, taupe), or muted pastels. Variegated yarns can be elegant if the color changes are subtle and harmonious.
- Stitch Definition and Texture:
- Dense Stitches: Stitches that create a solid fabric are preferred for bags, offering structure and preventing items from falling through. Single crochet (sc), half double crochet (hdc), or variations like moss stitch (also known as granite stitch or linen stitch) and waistcoat stitch (center single crochet) are excellent.
- Subtle Textures: Bobbles or puff stitches can add texture, but use them sparingly and strategically to avoid a bulky look. Ribbing (using back loop only stitches) can add a tailored detail.
- Avoid Lacy Stitches: While beautiful, openwork or lacy patterns are generally not suitable for a structured bag unless reinforced with a lining.
- Shape and Structure:
- Simple Silhouettes: A rectangular, square, or gently tapered shape often looks most elegant. Avoid overly complex or “novelty” shapes for a refined design.
- Flat Base: A well-defined, flat base is crucial for the bag to sit nicely. This is achieved by working in rounds for the base and then turning to work up the sides.
- Integrated Flap or Closure: Design the closure to be part of the bag’s overall structure, rather than an afterthought.
General Construction Approach for a One-Piece Mini Bag
While specific patterns vary, most one-piece crochet mini bags follow a similar construction flow:
Step 1: The Base (Working in Rounds)
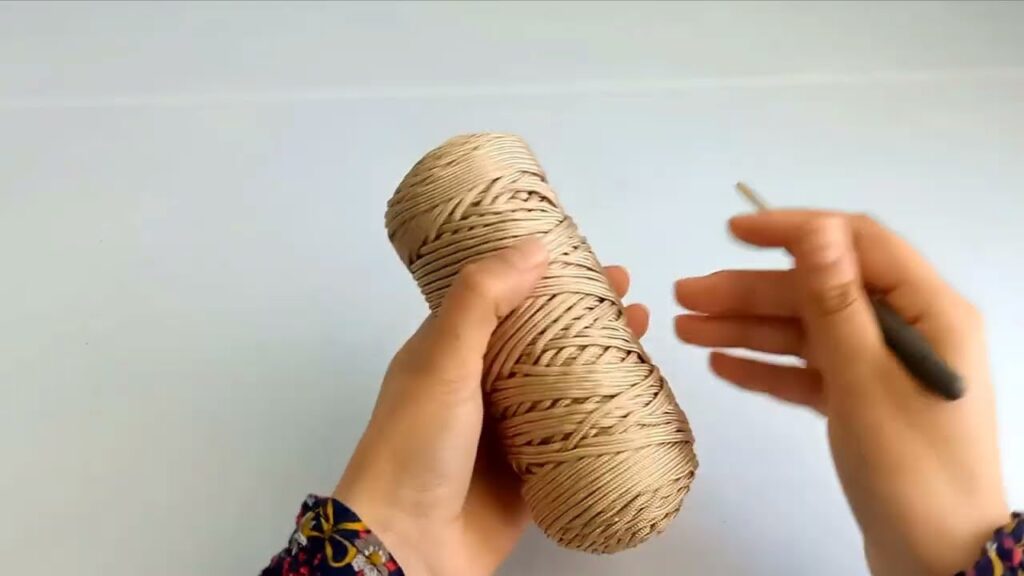
- Foundation Chain: Start with a foundation chain of the desired length for your bag’s base.
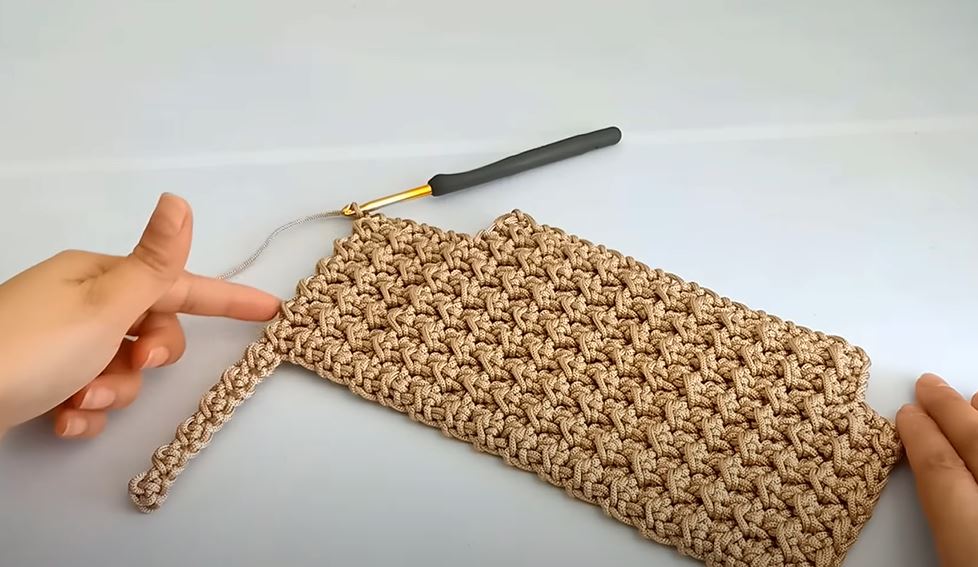
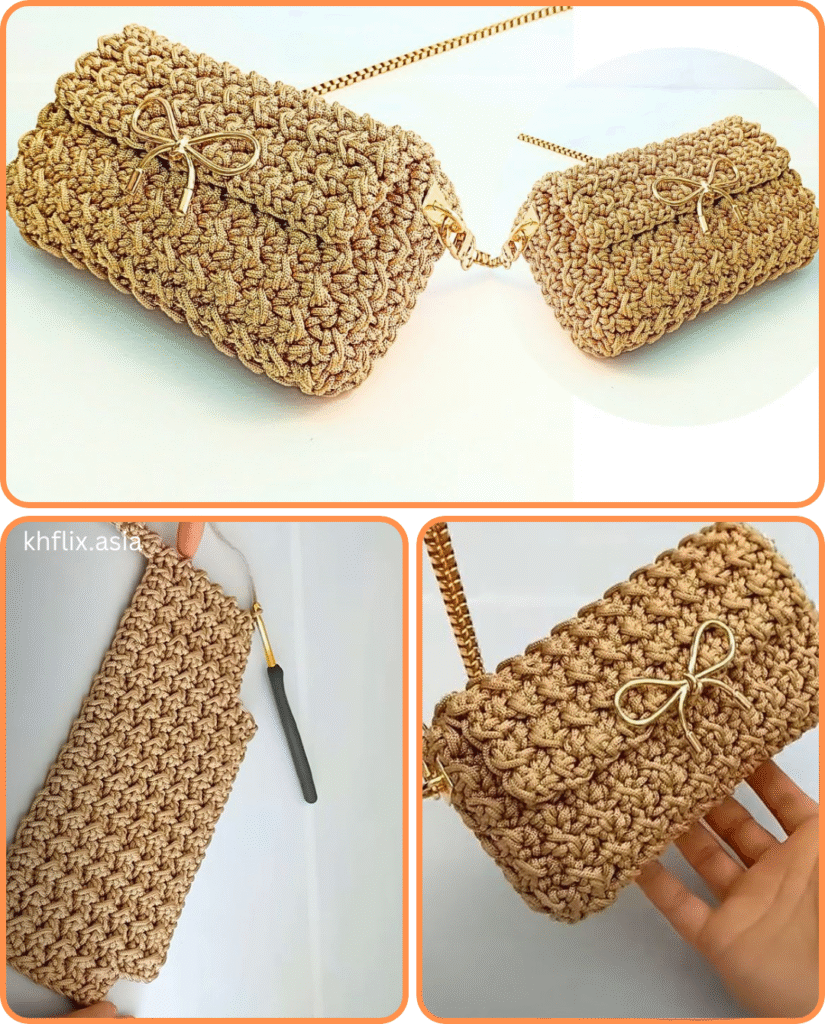
- Work Around the Chain: You’ll work stitches down one side of the chain, then around the end, and back up the other side. This creates an oval or rectangular base.
- Example for a rectangular base: Ch X (length of base). Sc (or hdc/dc) in 2nd ch from hook and across to the last ch. Work 3-5 sc (or hdc/dc) into the last ch (this creates the turn). Continue working sc (or hdc/dc) along the other side of the foundation chain. Work 2-4 sc (or hdc/dc) into the first ch of the foundation chain (where your first stitch was made) to complete the turn. Join with a sl st.
- Continue in Rounds: Work 1-2 more rounds, increasing at the corners (usually 2-3 stitches in the corner stitch) to maintain the flat shape. The goal is a flat, stable rectangle or oval.
Step 2: Building the Sides (Working in Continuous Rounds or Joined Rounds)
- Establishing the Sides: Once the base is complete, you’ll stop increasing and begin working only into the back loop or third loop of the stitches in the next round. This creates a defined edge that makes the sides pop up.
- Main Body Stitch: Continue working in your chosen main stitch (e.g., sc, hdc, moss stitch) for the height of the bag.
- Continuous Rounds (Spiral): If working in single crochet or half double crochet, you can often work in a continuous spiral, using a stitch marker to keep track of the beginning of the round. This avoids a visible seam.
- Joined Rounds: For taller stitches like double crochet, or if you prefer a clean seam, join each round with a slip stitch and chain up for the next round.
- Maintaining Shape: Ensure your tension is consistent to avoid bulging or cinching.
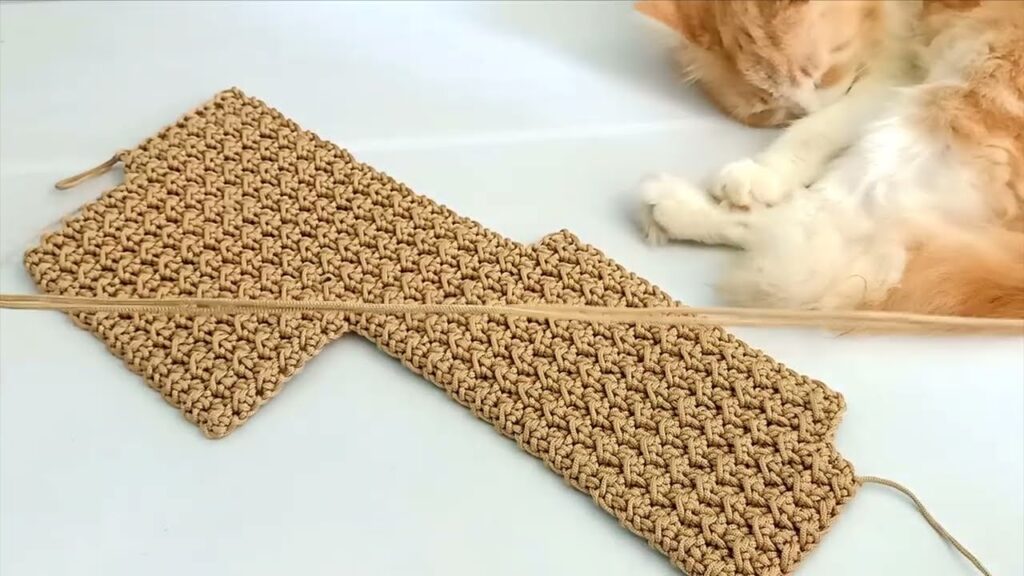
Step 3: Creating the Flap or Opening Edge
- Bag Opening: If your bag doesn’t have a flap, work 1-2 rounds of a clean finishing stitch (like slip stitches or reverse single crochet) around the top opening.
- Integrated Flap:
- Determine the back center of your bag.
- Working Flat: Identify the stitches across the back of the bag that will form the base of your flap. Work rows back and forth flat from these stitches, shaping the flap as desired.
- Flap Shaping: You can create a rectangular flap, or add subtle shaping by decreasing stitches at the corners for a rounded or pointed tip.
- Stitch Choice for Flap: Use the same main stitch as the bag body, or a complementary textured stitch.
- Edging: Once the flap is complete, add a clean border of sc or sl st around the entire flap to give it a polished edge.
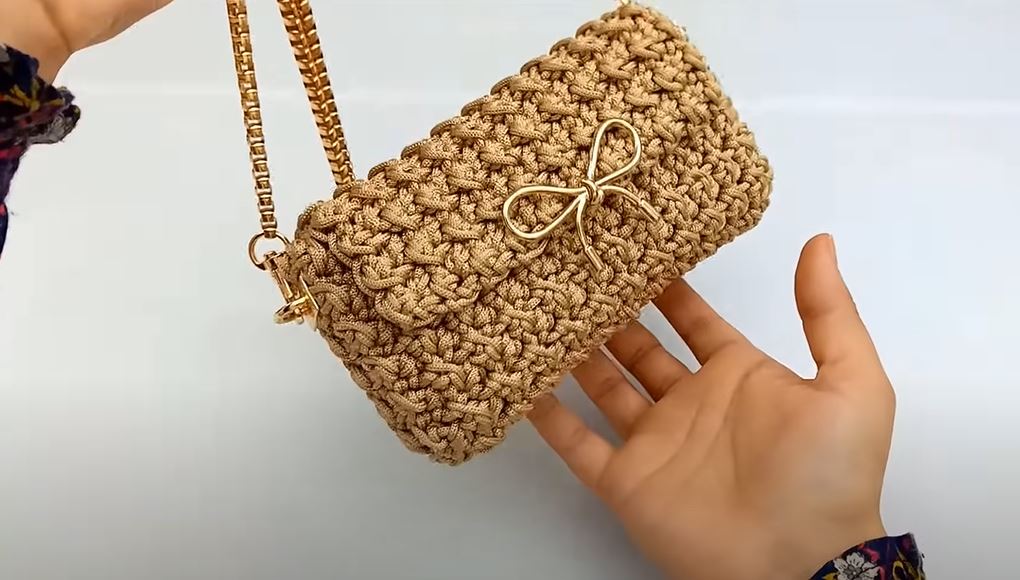
Step 4: Strap Integration
There are several elegant ways to add a strap:
- Integrated Strap Loops: As you work the top rounds of the bag (or the flap attachment point), create small chain-spaces or reinforced loops on the side seams to attach a separate strap (e.g., a slim metal chain, a leather strap, or a crocheted cord).
- Crocheted Cord: A simple chain-stitch cord, i-cord, or a round crocheted cord can be attached to the sides of the bag. For refinement, avoid bulky or overly wide crocheted straps on a mini bag.
- Directly Crocheted Strap: For a truly one-piece design, you can continue crocheting a long chain directly from one side of the top opening, then attach it to the other side after you’ve created the desired strap length. This works well for a wristlet or a short shoulder strap.
Refinements and Embellishments
To truly elevate your mini bag:
- Lining (Optional but Recommended): For a professional finish and added durability, consider sewing a simple fabric lining. This also prevents items from stretching the crochet fabric.
- Magnetic Snap or Button: A small magnetic snap (sew-in or crimp-on) is ideal for a secure and invisible closure. A sophisticated button with a crocheted loop can also work beautifully.
- Hardware: Small D-rings or swivel clasps for strap attachment, or delicate metal feet for the base, add a touch of luxury.
- Subtle Adornments: A small, elegant tassel, a minimalist charm, or a single bead can enhance the design without overwhelming it.
Example Stitch Combinations for Refined Design:
- Classic Elegance: Single crochet worked consistently for the main body, with a contrasting slip stitch border around the flap and opening.
- Textured Chic: Moss stitch (alternating sc, ch 1, skip 1) for a subtle, woven texture.
- Dense & Structured: Waistcoat stitch (single crochet worked into the center of the ‘V’ of the previous stitch) for a knit-like fabric. This requires good tension.
Conclusion
A one-piece crocheted mini bag is a rewarding project that allows you to showcase your skills and attention to detail. By carefully selecting your yarn, employing dense and elegant stitches, and paying mind to the overall shape and finishing touches, you can create a truly refined and sophisticated accessory that will be cherished for years to come. So, choose your perfect yarn, find your favorite hook, and begin crafting your own little masterpiece of crochet elegance.
Video tutorial:


