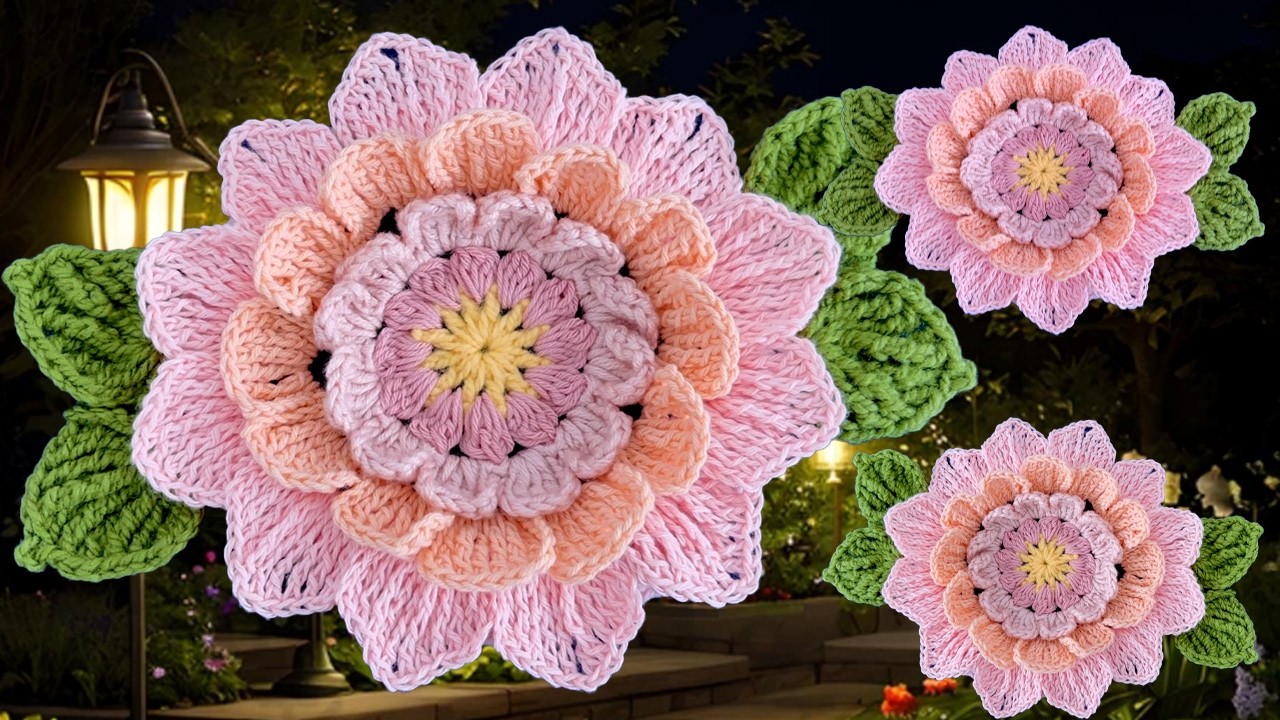
The beauty of this design lies in its four distinct petal layers created by using stitches of escalating height, from Double Treble to Quadruple Treble, giving the flower incredible depth and texture.
🌸 Project Overview & Materials
- Designer: Inspired by Liliana of Taller Manual Perú
- Skill Level: Intermediate
- Estimated Finished Size: Varies based on yarn, but results in a substantial, dimensional appliqué.
- Suggested Use: Centerpieces, table runners, blankets, or decorative appliqués.

Tools & Materials:
| Item | Details | Video Reference |
| Hook | 3.0 mm (or size to achieve desired tension) | |
| Color A | Bright Yellow (Center) | |
| Color B | Darker Rose/Fuchsia (Base Shells) | |
| Color C | Pale Pink/Light Rose (Layer 1 Petals) | |
| Color D | Light Salmon/Coral (Layer 2 Petals) | |
| Color E | Paler Rose (Layer 3 Petals & Firming Layer) | |
| Color F | Green (Leaves) | |
| Additional | Thicker yarn/wool in Color E (Optional Firming Round) |
🧶 Special Stitches & Abbreviations
| Abbreviation | Stitch Name | Description (Yarn Overs) | Video Reference |
| ch | Chain | ||
| sl st | Slip Stitch | ||
| sc | Single Crochet | ||
| dc | Double Crochet | ||
| 5-Inc-DC Puff | 5 Incomplete DC Puff Stitch | 5 incomplete DC closed together. | |
| DTR | Double Treble Crochet | Yarn over 2 times (Doble lazada). | |
| TRP | Triple Treble Crochet | Yarn over 3 times (Triple lazada). | |
| QTR | Quadruple Treble Crochet | Yarn over 4 times (Cuatro lazadas). | |
| st(s) | Stitch(es) | ||
| sp | Space | ||
| FO | Fasten Off |
📝 Step-by-Step Pattern Instructions
Part 1: The Central Ring (Color A: Yellow)
This part establishes the 12 anchor points for the rest of the flower.
Rnd 1:
- Start with a slip knot and ch 3, sl st to the first chain to form a ring.
- Ch 3 (counts as 1 dc), ch 1 (separation chain).
- Work [1 dc, ch 1] in the ring 11 times. Total: 12 dc and 12 ch-1 spaces.
- Sl st to the 3rd ch of the starting ch-3.
- FO Color A.

Part 2: Layer 1 Base Shells (Color B: Darker Rose)
Rnd 2:
- Join Color B in any ch-1 space from Rnd 1.
- Ch 3 (counts as 1 incomplete dc). Work 4 incomplete dc in the same space. Pull through all 6 loops to complete the 5-Inc-DC Puff.
- Ch 2 (separation).
- Repeat 11 times: Work a 5-Inc-DC Puff in the next ch-1 space, ch 2.
- Sl st to the top of the starting Puff stitch.
- FO Color B.
Part 3: Layer 2 Petals (Color C: Pale Pink)
This layer sits directly on top of the Puff layer.
Rnd 3:
- Join Color C with a sl st to the top of any 5-Inc-DC Puff from Rnd 2.
- Petal Repeat (12 times):
- Ch 4.
- Work 4 DTR (Double Treble Crochet) stitches into the same Puff stitch.
- Ch 4.
- Sl st into the same Puff stitch.
- Sl st into the top of the next Puff stitch to begin the next petal. Continue around.
- Sl st to the starting point.
- FO Color C.

Part 4: Layer 3 Petals (Color D: Light Salmon)
This layer is worked behind the previous layer, anchored into the Ch-2 spaces of Rnd 2.
Rnd 4 (Base Arch):
- Turn your work to the back. Join Color D with a sl st in any ch-2 space from Rnd 2 (the spaces between the Puff stitches).
- Repeat 12 times: Ch 4. Sc into the next ch-2 space, securing the arch behind the Layer 2 petal.
- Sl st to the starting point. (12 Ch-4 arches).
Rnd 5 (Petal):
- Sl st into the first Ch-4 arch.
- Petal Repeat (12 times):
- Ch 6.
- Work 6 TRP (Triple Treble Crochet) stitches into the Ch-4 arch.
- Ch 6.
- Sl st into the same Ch-4 arch.
- Sl st to the starting point.
- FO Color D.
Part 5: Layer 4 Petals (Color E: Paler Rose)
This final, most elaborate layer is worked behind the previous layer, anchored into the Ch-4 arches of Rnd 4.
Rnd 6 (Base Arch):
- Turn your work to the back. Join Color E with a sc into an anchor point (the sc in Rnd 4).
- Repeat 12 times: Ch 5. Sc into the next anchor point between the petals from Rnd 5.
- Sl st to the starting point. (12 Ch-5 arches).
Rnd 7 (Petal):
- Sl st into the first Ch-5 arch.
- Petal Repeat (12 times):
- Ch 6.
- Work 3 TRP into the Ch-5 arch.
- Work 2 QTR (Quadruple Treble Crochet) into the Ch-5 arch.
- Ch 1 (separation).
- Work 2 QTR into the Ch-5 arch.
- Work 3 TRP into the Ch-5 arch.
- Ch 6.
- Sl st into the same Ch-5 arch.
- Sl st to the starting point.
- FO Color E.
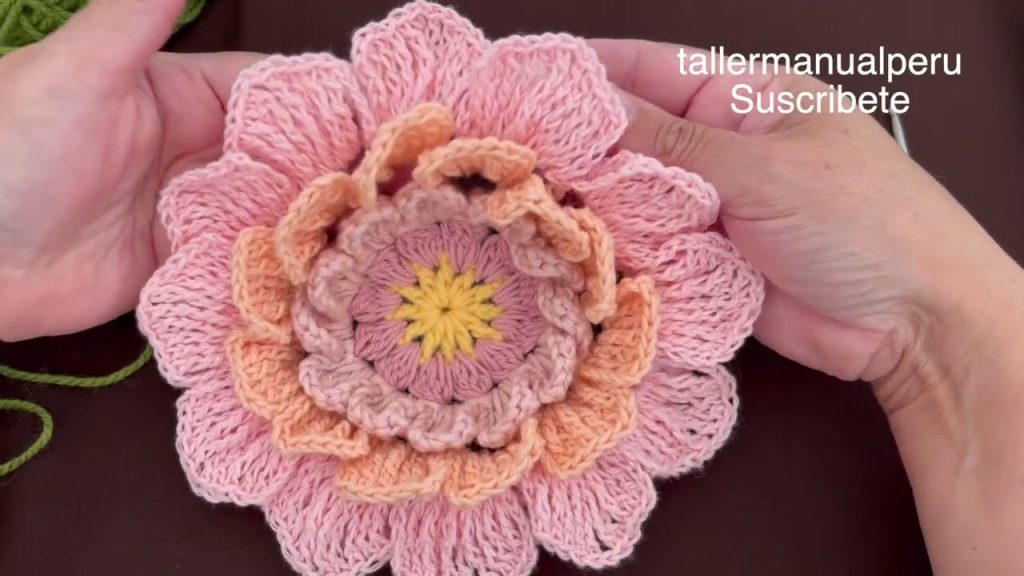
Part 6: Petal Firming Layer (Optional) (Thicker Color E)
This layer is crucial for achieving the 3D lift, especially when using thread or thin yarn. Use a slightly thicker yarn or wool here.
Rnd 8 (Base Arch):
- Turn your work to the back. Join the Thicker Color E yarn/wool into an anchor point behind the petals.
- Repeat 12 times: Ch 6. Sc in the next anchor point (at the center where the petals from Rnd 7 meet).
- Sl st to the starting point. (12 Ch-6 arches).
Rnd 9 (Filling Round):
- Ch 3 (counts as 1 dc).
- Work 6 dc into the first Ch-6 arch.
- Work 1 dc into the sc between the arches.
- Repeat 11 times: Work 6 dc into the next Ch-6 arch. Work 1 dc into the sc between the arches.
- Sl st to the 3rd ch of the starting ch-3.
- FO Thicker Color E. This firming layer helps the petals stand up.
Part 7: Integrating the Leaves (Color F: Green)
The leaves are worked directly onto the firming layer (Rnd 9) to make them part of the continuous piece.
Positioning:
- Locate a segment on Rnd 9 (a section of 7 dc) where you want your first leaf set to begin.
- Join Color F with a sl st.
- Sc in the next 3 stitches (This creates a slight distance from the center).
- Work the Leaf Pattern into the 4th sc.
- Sc in the next 6 dc to move to the next position.
- Work the Leaf Pattern again.
- Sc across approximately 14 stitches to reach the opposite side.
- Repeat the pattern for the last two leaves.
Leaf Pattern:
- Ch 5. Sl st into the same stitch. (This creates the base loop).
- First Half: Work 1 DTR, ch 1, 2 TRP, ch 1, 2 QTR, ch 2 (picot point), sl st into 4th ch from hook, all in the same starting stitch.
- Second Half: Work 2 QTR, ch 1, 2 TRP, ch 1, 1 DTR, all in the same starting stitch.
- Ch 5. Sl st into the same starting stitch.
Final Step: Sl st back to the starting point. FO Color F and weave in all remaining ends securely.
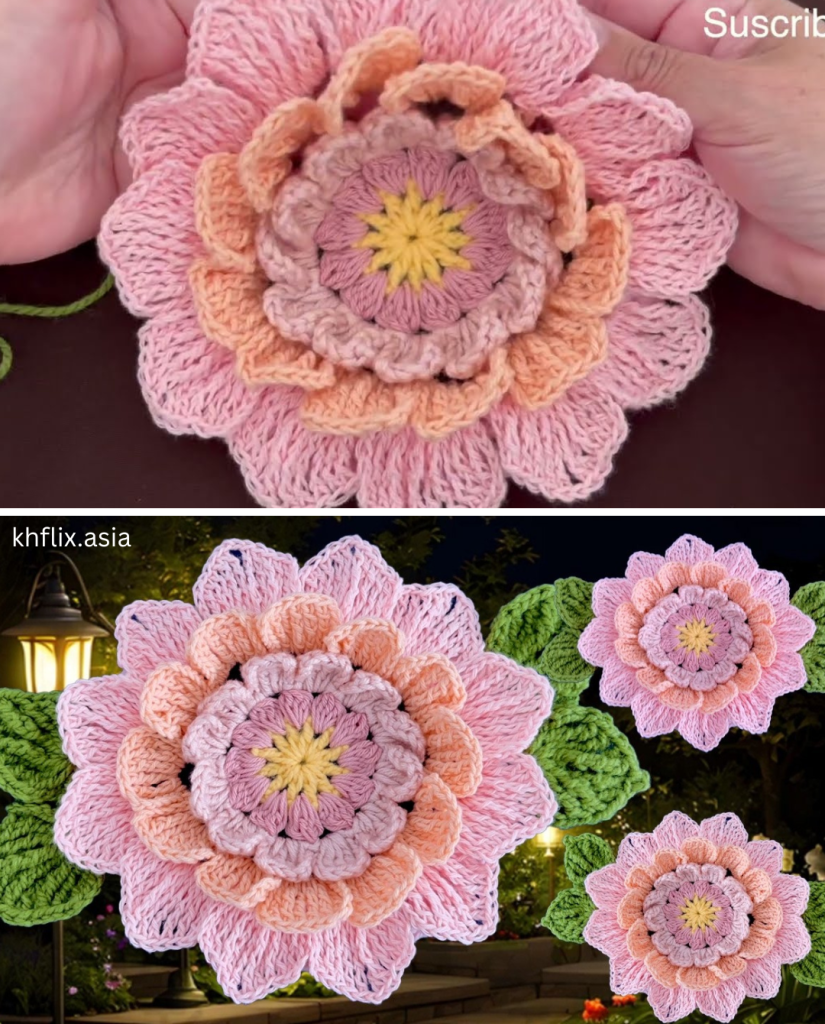
✨ Creative Uses for Your 3D Crochet Flower
The robust, dimensional quality of this flower makes it far more versatile than a simple appliqué.
- Table Linens: Create an exquisite centerpiece or table runner (camino de mesa) by joining several flowers, utilizing the green leaves as the continuous path.
- Continuous Work: Use the final leaf row as a foundation for connecting multiple flowers side-by-side to form a stunning garland (guirnalda) or window border (senefa).
- Textile Applications: Stitch onto the corner of a bedspread (colcha), cushion (almohadón), or manta for a luxurious, decorative touch.
Video tutorial:


