The granny square is an icon of the crochet world. Instantly recognizable, incredibly versatile, and surprisingly simple to master, it’s the perfect project for beginners and a satisfying go-to for experienced crocheters. From cozy blankets to stylish bags and vibrant garments, the humble granny square is the building block for countless beautiful creations.
In this article, we’ll guide you step-by-step through crocheting a classic granny square, share tips for choosing your yarn and hook, and inspire you with ideas for what you can make. Get ready to fall in love with this timeless craft!
Why the Granny Square?
Before we dive into the stitches, let’s appreciate why the granny square has endured through generations:
- Beginner-Friendly: It primarily uses just two basic stitches: the chain stitch (ch) and the double crochet (dc).
- Portable: Small and quick to work up, you can easily carry your project wherever you go.
- Scrap Buster: Perfect for using up leftover yarn from other projects, creating unique color combinations.
- Versatile: Once you have a collection of squares, the possibilities for assembly are endless.
- Mindful Craft: The repetitive nature of the stitches can be incredibly relaxing and meditative.
What You’ll Need
Gathering your materials is the first step to any successful crochet project.
- Yarn:
- Weight: For your first granny square, a worsted weight (or Aran weight) yarn is highly recommended. It’s easy to see your stitches and works up quickly.
- Fiber: Acrylic yarn is a great choice for beginners as it’s affordable, durable, and easy to care for. Cotton or wool blends also work beautifully for different textures and purposes.
- Color: Choose one or two contrasting colors for your first square to clearly see the stitch definition. As you get more confident, experiment with multi-color squares!
- Crochet Hook:
- The size of your hook will depend on the weight of your yarn. Check the yarn label for the recommended hook size (e.g., H/5.0mm or I/5.5mm for worsted weight).
- It’s always a good idea to have a few sizes on hand. If your stitches are too tight, go up a hook size; if they’re too loose, go down.
- Scissors: For cutting your yarn.
- Yarn Needle (Tapestry Needle): Essential for weaving in your ends neatly.
Understanding Basic Crochet Terms & Abbreviations
Before we begin, here are the terms you’ll encounter:
- ch: Chain
- sl st: Slip Stitch
- dc: Double Crochet
- sp: Space
- sk: Skip
- yo: Yarn Over
- st(s): Stitch(es)
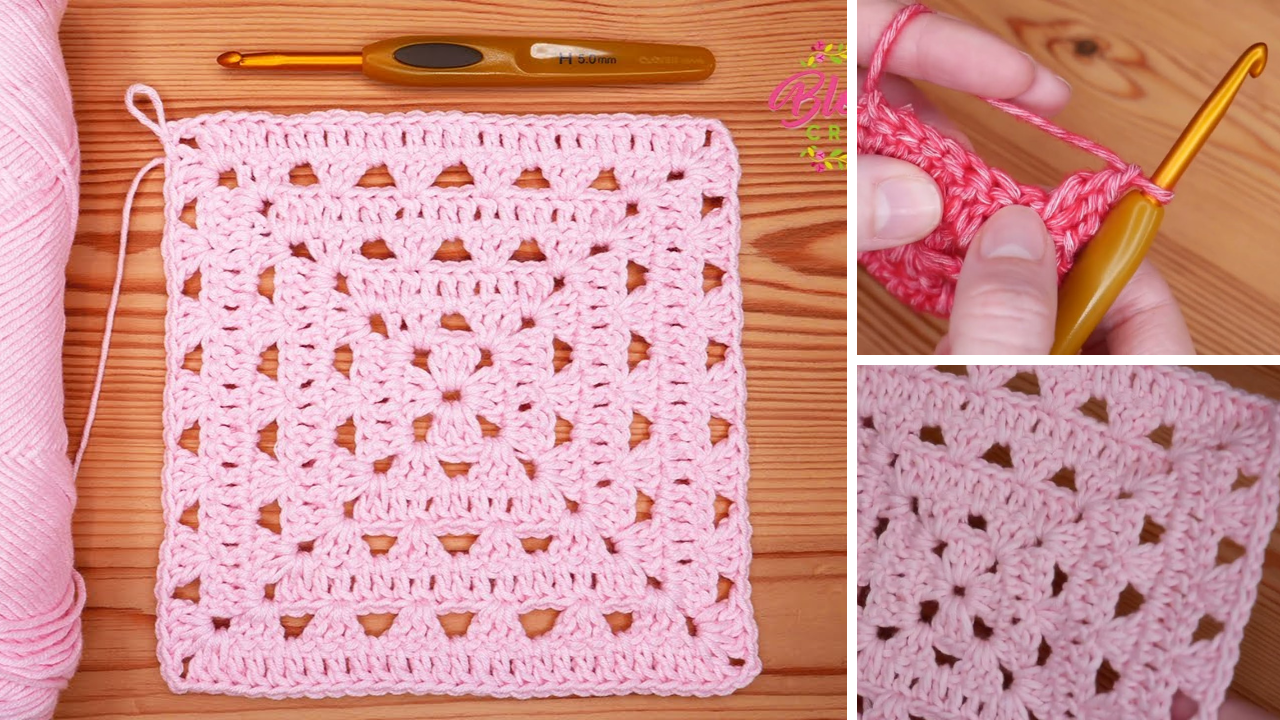
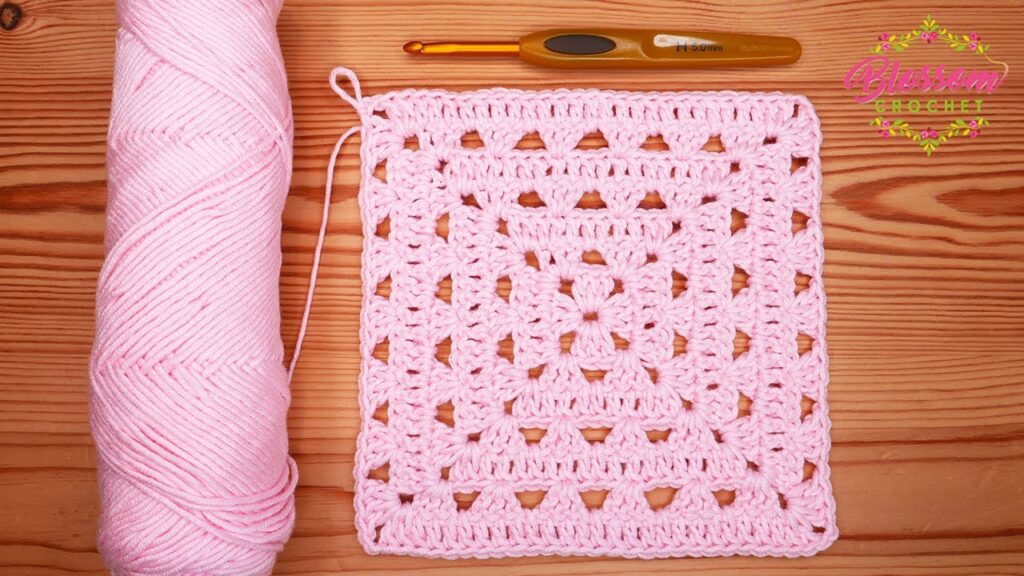
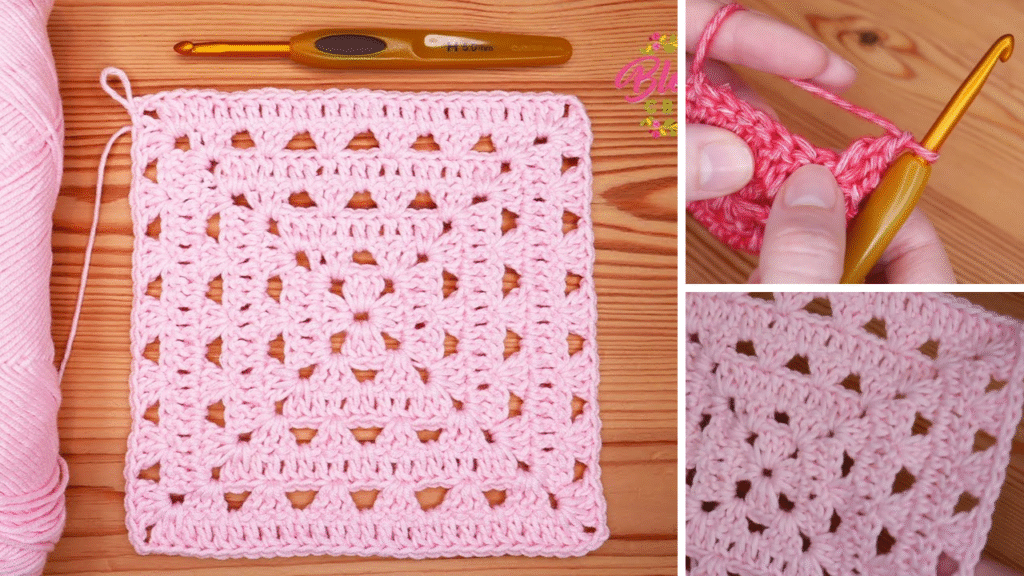
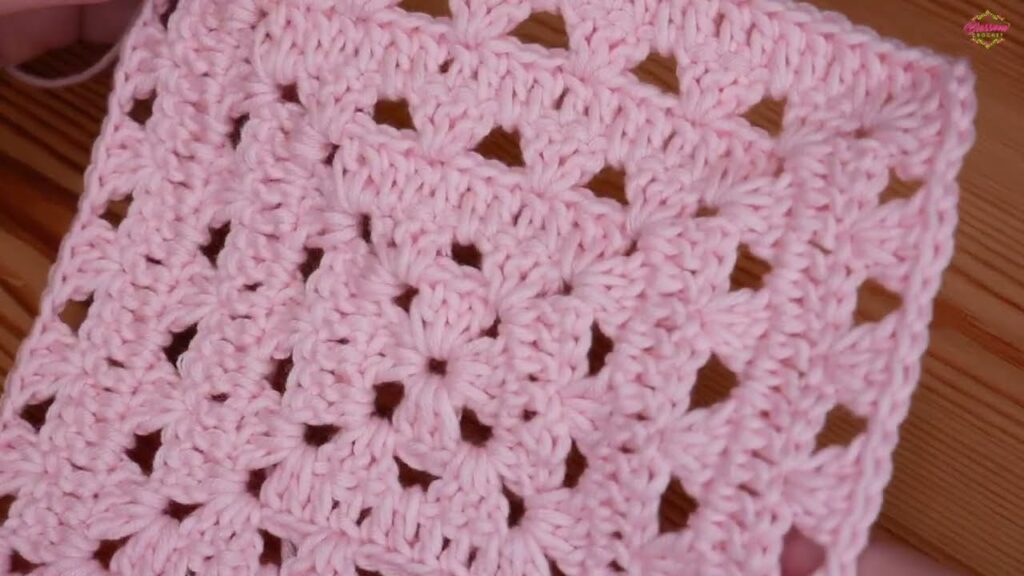
Let’s Crochet! The Classic Granny Square Pattern
This pattern creates a traditional granny square that expands from the center.
Round 1: Creating the Center Ring
- Ch 4: This creates your foundation chain.
- Sl st into the first ch to form a ring. Alternatively, you can use a magic ring (magic circle) for a tighter center, but for beginners, the chain ring is simpler.
Round 2: The First Clusters
- Ch 3 (counts as your first dc): This forms the “starting chain” for your first cluster.
- 2 dc into the ring: You now have a cluster of 3 double crochets (ch-3 + 2 dc).
- [Ch 2, 3 dc into the ring] 3 times: This creates the first side and corner, repeated three more times.
- Ch 2: This is the final corner space.
- Sl st into the top of the initial Ch 3 to join the round.
- You should now have 4 clusters of 3 dc, separated by 4 chain-2 spaces. This forms the basic square shape.
Round 3: Building the Sides and Corners
In this round, you’ll work into the chain-2 spaces from the previous round.
- Ch 3 (counts as first dc):
- 2 dc into the same ch-2 sp (the one you just joined into): This starts your first cluster for this round.
- Ch 2: This creates the corner.
- 3 dc into the next ch-2 sp: This is the second half of the corner cluster.
- Important: Each corner space will contain (3 dc, ch 2, 3 dc). This is what makes your square expand.
- [Ch 1, 3 dc into the next ch-2 sp, Ch 2, 3 dc into the same ch-2 sp] 3 times:
- The Ch 1 creates a space along the side of the square (between the clusters).
- The (3 dc, Ch 2, 3 dc) forms the next corner.
- Ch 1: This is the final side space.
- Sl st into the top of the initial Ch 3 to join the round.
- You should now have 8 clusters of 3 dc, with 4 chain-2 corner spaces and 4 chain-1 side spaces.
Round 4 and Beyond: Continuing the Pattern
Each subsequent round follows the same principle:
- Ch 3 (counts as first dc):
- Work 2 dc into the first side space (the one you just joined into, if starting in a side space). Or, if starting in a corner, (ch 3, 2 dc) will be the first half of your corner.
- Work (3 dc, Ch 2, 3 dc) into each Ch 2 corner space.
- Work 3 dc into each Ch 1 side space from the previous round.
- Ch 1 between all 3-dc clusters that are not in a corner.
- Sl st into the top of the initial Ch 3 to join.
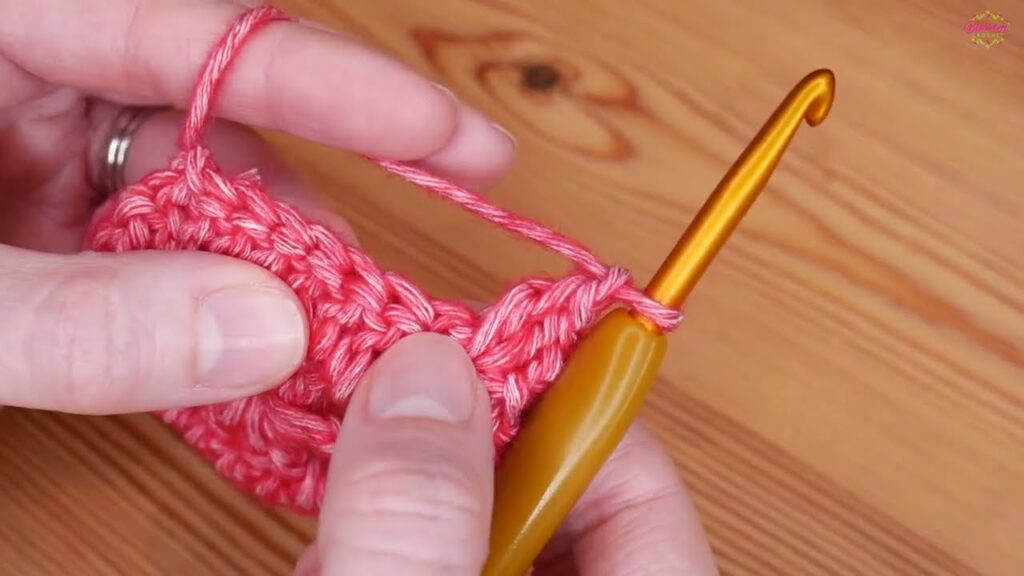
- To change colors: When you’re about to make the final slip stitch to join a round, stop just before the last yarn over. Drop your old color, pick up your new color, yarn over with the new color, and pull through to complete the slip stitch. Then, continue with your new color for the next round. Weave in both ends.
- Continue until your square is the desired size.
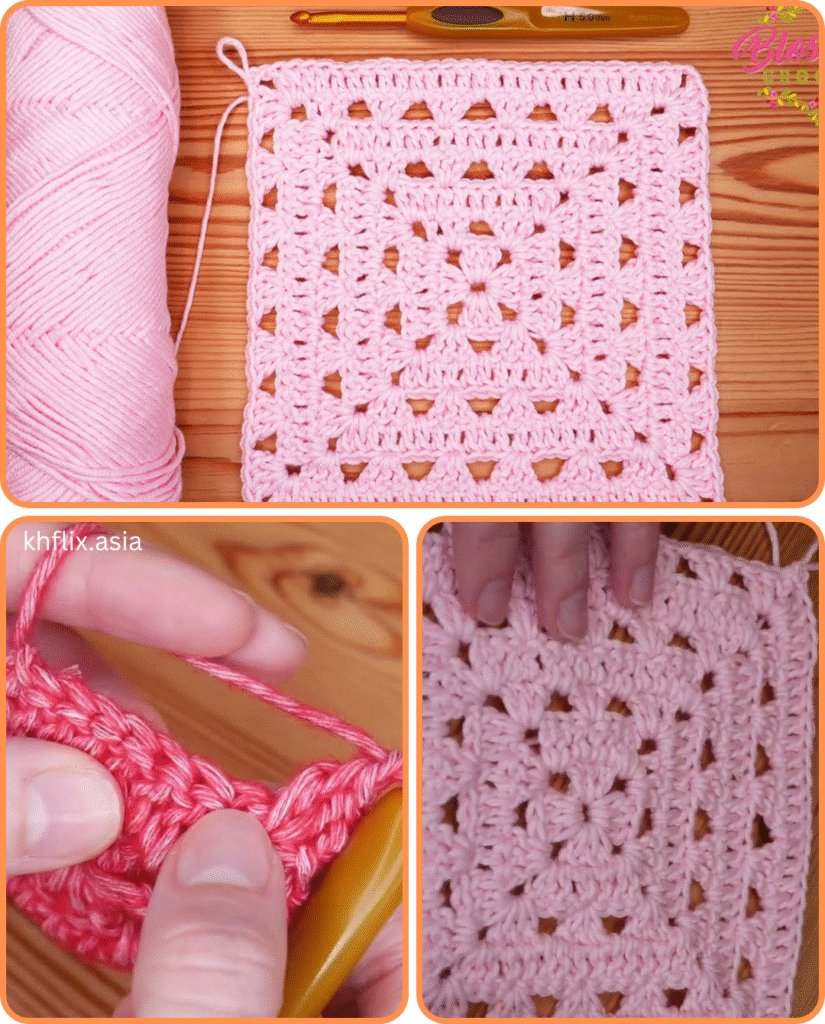
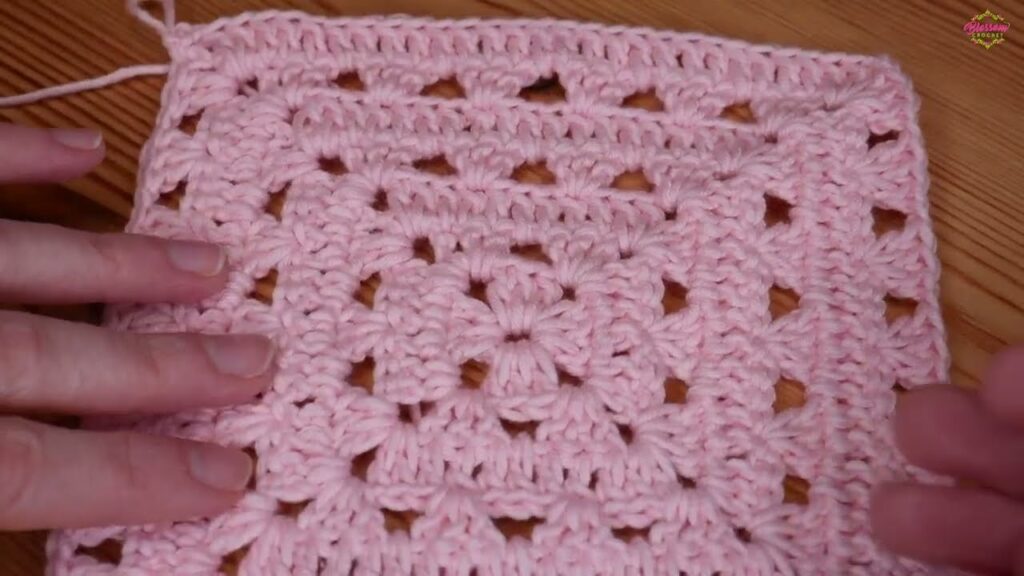
Finishing Your Granny Square
Once you’ve reached your desired size:
- Cut your yarn, leaving a tail of about 6 inches.
- Yarn over and pull the tail completely through the loop on your hook to fasten off.
- Weave in all loose ends using your yarn needle. This is crucial for a neat and durable finish. Thread the tail through the needle and discreetly weave it through the stitches of your square.
Tips for Success
- Gauge: Don’t stress too much about gauge (stitch density) for your first few squares, but consistency is key for joining multiple squares later.
- Tension: Try to maintain even tension in your stitches. If they’re too loose, the square might be floppy; too tight, and it will be stiff.
- Practice: Like any new skill, practice makes perfect. Your first square might not be flawless, but each one will get better.
- Watch Videos: If you’re a visual learner, there are countless free video tutorials available online that can show you the movements in real-time.
What Can You Make with Granny Squares?
The possibilities are truly endless once you’ve mastered the basic granny square:
- Blankets/Throws: The most popular use! Join many squares together to create a cozy afghan.
- Scarves: A simple strip of joined squares makes a beautiful scarf.
- Bags/Totes: Stitch squares together to form the body of a unique bag.
- Cushion Covers: An easy way to add a pop of color to your home decor.
- Cardigans/Sweaters: More advanced projects involve shaping garments with granny squares.
- Coasters/Hot Pads: Single, larger squares or a few joined squares can be practical household items.
- Garlands/Bunting: A festive way to decorate.
Conclusion
The granny square is more than just a crochet pattern; it’s a foundation for creativity, a testament to the joy of handmade items, and a beautiful way to connect with a timeless craft. With a hook, some yarn, and these instructions, you’re now ready to embark on your own granny square journey. Happy crocheting!
Video tutorial:


