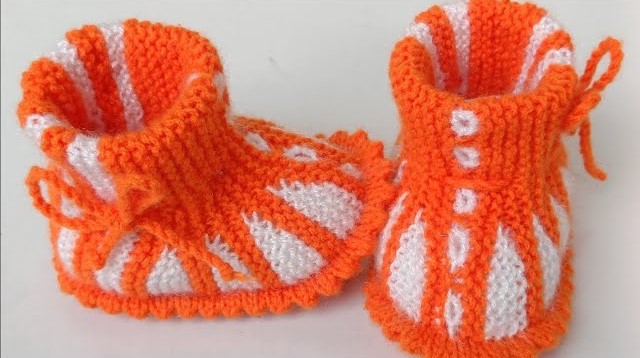
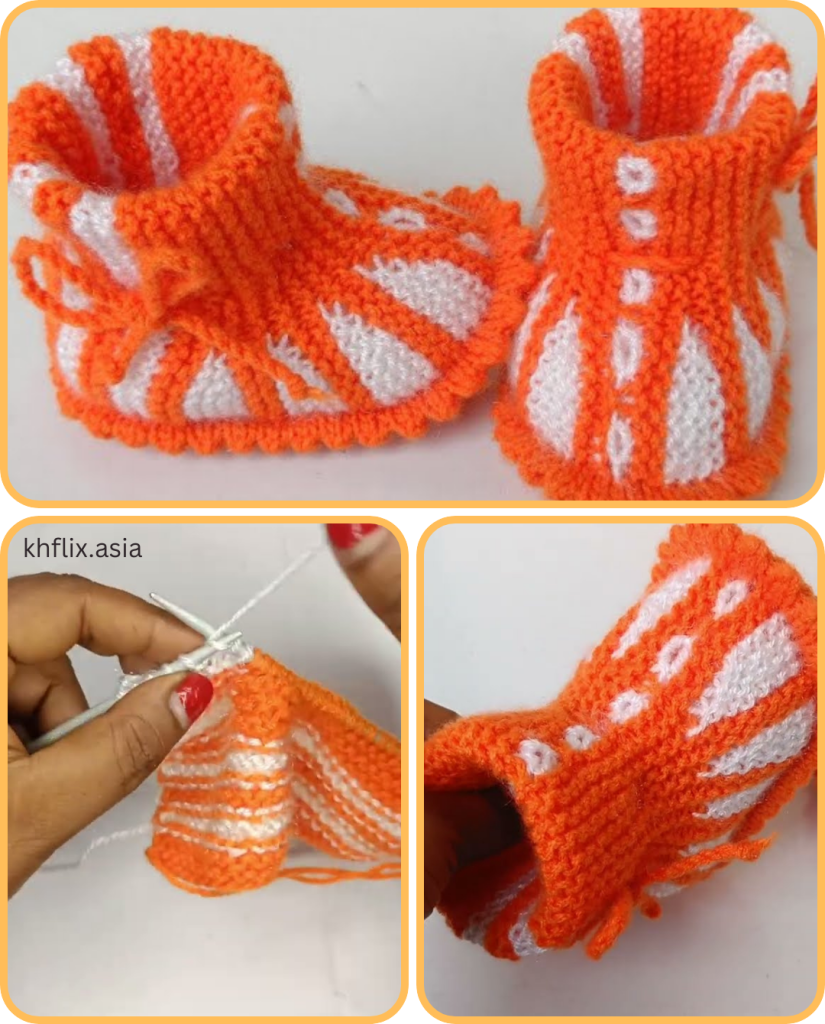
There’s something truly heartwarming about knitting for babies. Every stitch seems filled with love and care, especially when you’re creating something as cozy and personal as a tiny pair of baby socks. Whether you’re a new knitter looking to try your hand at a rewarding project or a seasoned crafter seeking a quick and adorable gift, baby socks are a perfect choice.
In this comprehensive guide, we’ll walk you through everything you need to know to knit your own soft and snug baby socks — from choosing materials to casting off. These socks are not only practical but also perfect for baby showers, gifts, or keepsakes.
🧰 What You’ll Need: Materials & Tools
Before we dive into the pattern, let’s gather the essentials. Fortunately, baby socks require minimal yarn and tools, making them a great project for scrap yarn or learning new techniques.
🧶 Materials:
- Baby or fingering weight yarn (category 1 or 2)
- Choose soft, machine-washable wool or cotton blend for comfort and durability.
- Yardage needed: approx. 100–150 yards
- Set of 4 or 5 double-pointed needles (DPNs)
- Size US 1–3 (2.25–3.25 mm), depending on your tension and yarn
- Tapestry (yarn) needle
- Stitch markers
- Measuring tape
- Scissors
✨ Optional: Try using circular needles with the magic loop method if you’re not comfortable with DPNs.
🧵 Key Skills You’ll Use
Baby socks are a fantastic introduction to sock knitting techniques. Here’s what you’ll learn:
- Casting on in the round
- Knitting and purling
- Creating ribbing for stretch
- Turning a heel
- Picking up stitches
- Shaping the toe
- Kitchener stitch (grafting)
If any of these sound intimidating, don’t worry — we’ll break it down step by step.
📏 Sizing Guide
This pattern is written for newborn to 6-month-old babies. You can adjust the length for older babies by adding more rounds to the foot section.
- Foot length: 3.5–4 inches (9–10 cm)
- Cuff height: 1–2 inches (adjustable)
- Circumference: 4–5 inches (10–13 cm), stretchy
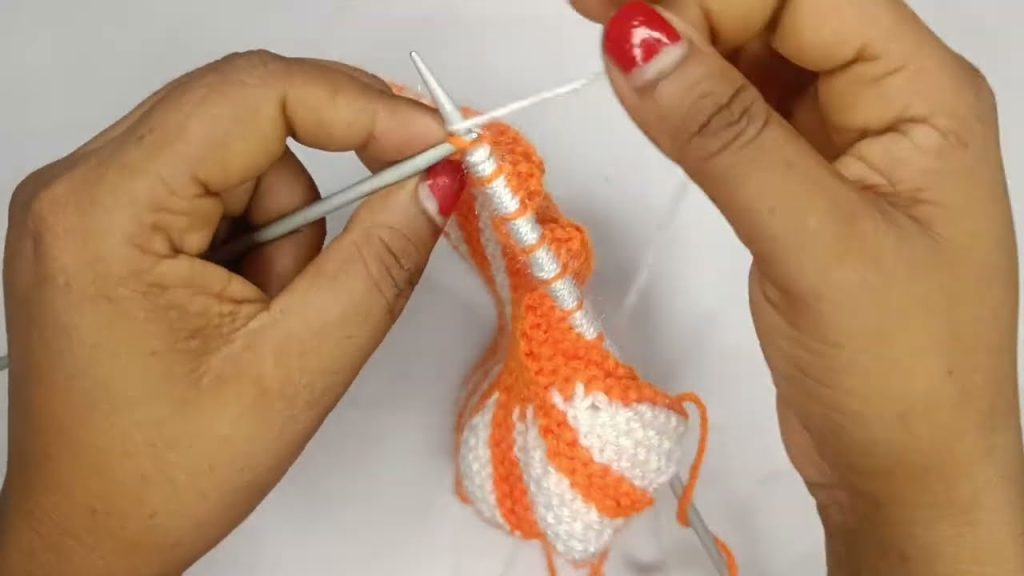
🧦 Baby Sock Knitting Pattern
Now, let’s knit your first pair of baby socks! We’ll break the pattern into clear sections for easy following.
🪢 Step 1: Cast On & Cuff
- Cast on 32 stitches using a stretchy cast-on method like the long-tail cast on.
- Divide stitches evenly across 4 DPNs (8 stitches per needle).
- Join in the round, being careful not to twist. Place a stitch marker at the beginning of the round.
- Knit 1, Purl 1 (K1, P1) ribbing for 10–15 rounds (about 1.5 inches) for a stretchy, comfortable cuff.
💡 Want a fold-over cuff? Knit more rounds of ribbing (up to 20).

🧶 Step 2: Leg Section
- Switch to stockinette stitch (knit all stitches in each round).
- Knit in the round for 10–12 rounds, or until the leg is the desired height.
This section can be as short or long as you like depending on how much coverage you want above the ankle.
👣 Step 3: Heel Flap
Now it’s time to create the heel using flat knitting on half the stitches.
- Transfer 16 stitches (half the total) onto one needle. This will be your heel needle.
- Row 1 (RS): Slip 1, Knit 1 across
- Row 2 (WS): Slip 1, Purl across
- Repeat rows 1 and 2 for 12 rows total (or about 1 inch), ending on a WS row.
🧵 This technique is called the “Eye of Partridge” heel if you alternate slip/knit on right sides, creating a reinforced fabric.
🔁 Step 4: Turn the Heel
Now we’ll shape the curve of the heel to hug the baby’s foot.
- Row 1 (RS): Knit 9, K2tog, K1, turn
- Row 2 (WS): Slip 1, P5, P2tog, P1, turn
- Row 3: Slip 1, Knit to 1 stitch before gap, K2tog, K1, turn
- Row 4: Slip 1, Purl to 1 stitch before gap, P2tog, P1, turn
Repeat rows 3 and 4 until all stitches are worked and 10 stitches remain on the needle.
🧷 Step 5: Pick Up Gusset Stitches
Now we’ll return to knitting in the round.
- Knit across the heel stitches.
- Pick up 8–10 stitches along the side of the heel flap.
- Knit across the 16 stitches that were set aside (instep).
- Pick up 8–10 stitches along the second side of the heel flap.
- Knit half the heel stitches again to center the round at the back of the heel.
You should now have approximately 48–52 stitches total.
🔽 Step 6: Shape the Gusset
We’ll decrease back to the original stitch count.
- Round 1:
- Needle 1: Knit to last 3 stitches, K2tog, K1
- Needle 2 & 3: Knit across
- Needle 4: K1, SSK, knit to end
- Round 2: Knit all stitches
Repeat Rounds 1 and 2 until you’re back to 32 stitches total (8 per needle).
🦶 Step 7: Knit the Foot
Continue knitting every round until the foot measures about 3 inches from the back of the heel, or ½ inch less than the desired foot length.
⛓️ Step 8: Shape the Toe
Now we’ll taper the sock for a rounded toe.
- Round 1:
- Needle 1: Knit to last 3 sts, K2tog, K1
- Needle 2: K1, SSK, knit to end
- Needle 3: Knit to last 3 sts, K2tog, K1
- Needle 4: K1, SSK, knit to end
- Round 2: Knit all stitches
Repeat Rounds 1 and 2 until 16 stitches remain (4 per needle).
🪡 Step 9: Finish the Toe (Grafting)
Cut yarn, leaving a 12-inch tail.
Use the Kitchener stitch to graft the toe together seamlessly:
- Thread the tail through a tapestry needle.
- Hold the two needles parallel.
- Work as follows:
- Front needle: knitwise off, purlwise on
- Back needle: purlwise off, knitwise on
Repeat until all stitches are joined. Weave in the ends.
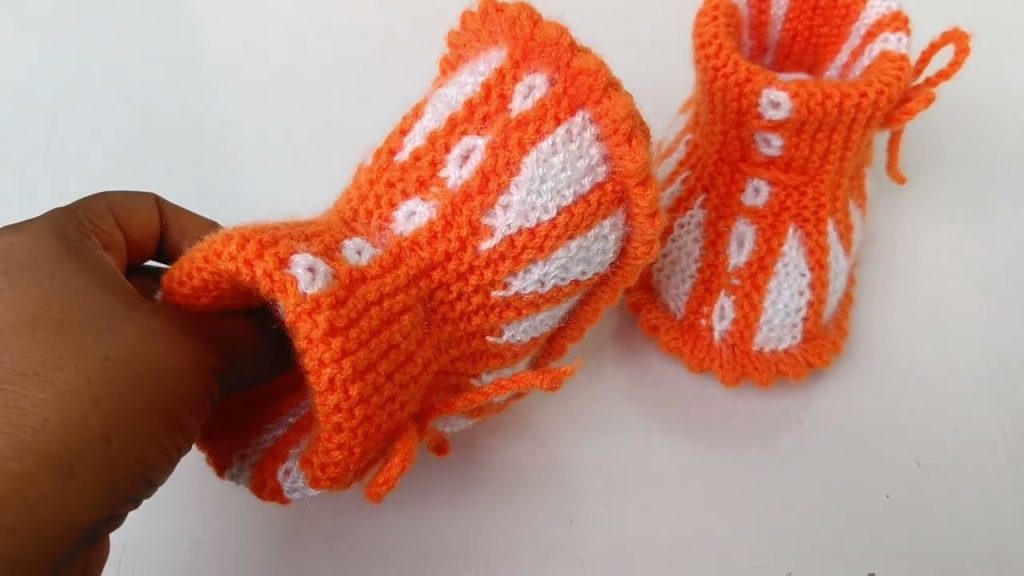
🎉 Congratulations!
You’ve just completed your first pair of adorable baby socks! These miniature masterpieces are not only incredibly cute, but they also provide a great introduction to sock-making that you can later apply to adult-sized socks.
🌈 Customization Ideas
Want to get creative? Try these fun variations:
- 🎨 Use self-striping yarn for colorful patterns without switching yarns.
- ❤️ Add a heart or star motif using duplicate stitch or intarsia.
- 🧵 Add non-slip soles with fabric paint for walkers.
- 🎀 Embellish with tiny bows or buttons (securely attached).
💡 Tips for Knitting Baby Socks
- Use soft, washable yarn — babies can be messy!
- Keep track of your row counts to ensure both socks match.
- Use stretchy bind-offs and cast-ons for comfort.
- If knitting for a gift, consider making multiple pairs in coordinating colors.
🧺 Care Instructions
- Machine washable yarn? Use gentle cycle, cold water.
- Hand-dyed yarns? Hand wash and lay flat to dry.
- Always check yarn label for specific care instructions.
🧦 Final Thoughts
Knitting baby socks is a charming way to hone your knitting skills while creating something full of love and warmth. The small size makes them quick to finish, and their usefulness is undeniable — perfect for hospital bags, stroller rides, or simply cozy toes at home.
Each pair tells a story — of care, creativity, and the joy of crafting for someone so small and special.
Video tutorial: