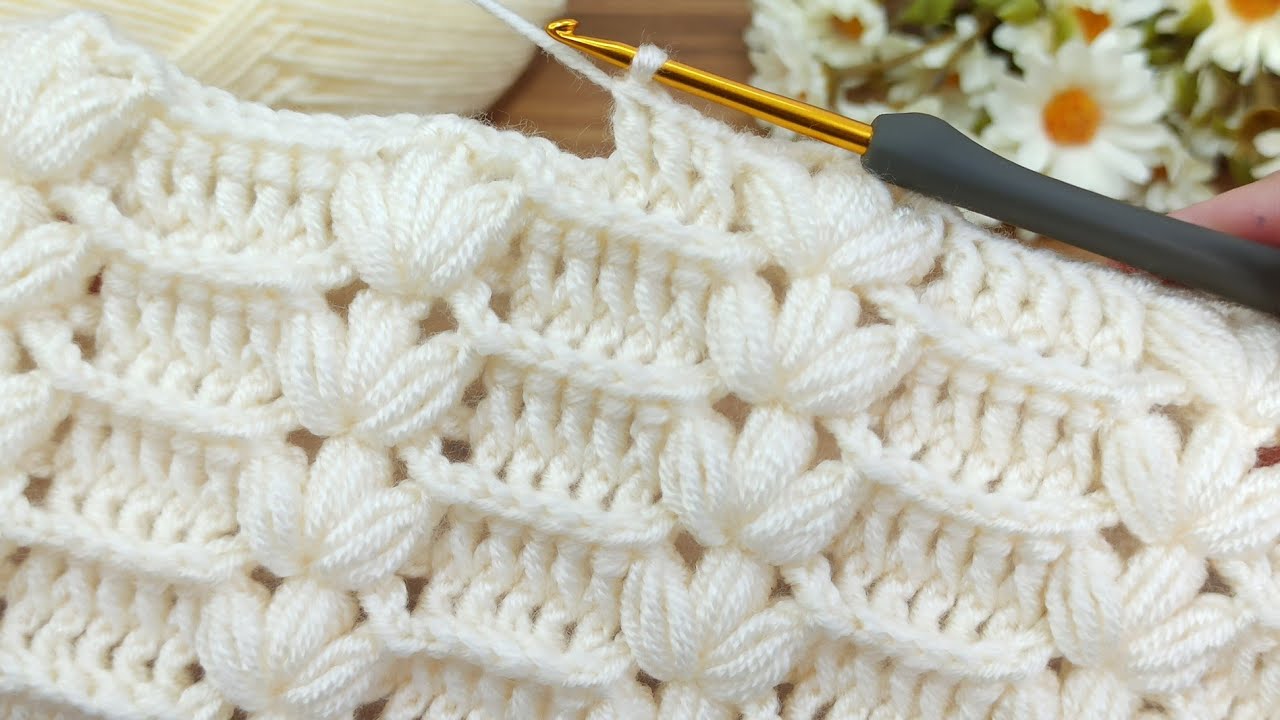
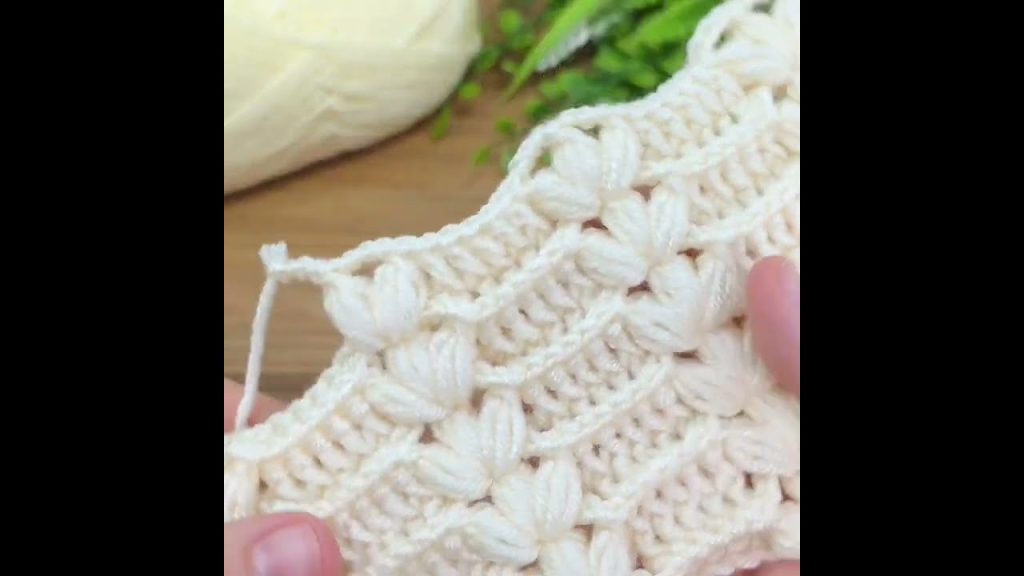
This pattern is an adaptation of the simple, yet densely textured stitch shown in the referral video. It uses a variation of the classic Granny Stitch combined with Single Crochet to create a fabric that is thick, soft, and warm—perfect for a baby blanket. The repetitive nature of the stitch makes it a rhythmic and relaxing project.
The final blanket has a beautiful, reversible texture that resembles small, soft shells or tightly packed bobbles.

🌟 Materials & Sizing
| Item | Details |
| Yarn | 700g – 800g (approx. 1500 – 1700 yards) of DK Weight (Category 3) or Worsted Weight (Category 4) yarn in a soft, washable fiber like Acrylic, Cotton, or a blend. |
| Hook | 4.0 mm (US G/6) for DK weight, or 5.0 mm (US H/8) for Worsted weight. (Choose a hook size that creates a soft, pliable fabric, not too stiff.) |
| Notions | Scissors, Yarn Needle, 1 Stitch Marker (optional). |
Finished Size & Gauge
- Approximate Finished Size: 32 inches wide x 38 inches long (Crib/Stroller Size).
- Gauge (approx.): 4 repeats of the pattern stitch (4 clusters and 4 SC) = 4 inches. (Gauge is not critical for a blanket, but consistency is key.)
📘 Terminology & Special Stitch
This pattern is written in standard US crochet terms.
| Abbreviation | Meaning |
| Ch | Chain |
| Sl St | Slip Stitch |
| SC | Single Crochet |
| DC | Double Crochet |
| St(s) | Stitch(es) |
| Sp | Space |
| Yo | Yarn Over |
| RS | Right Side |
| WS | Wrong Side |
| Beg | Beginning |
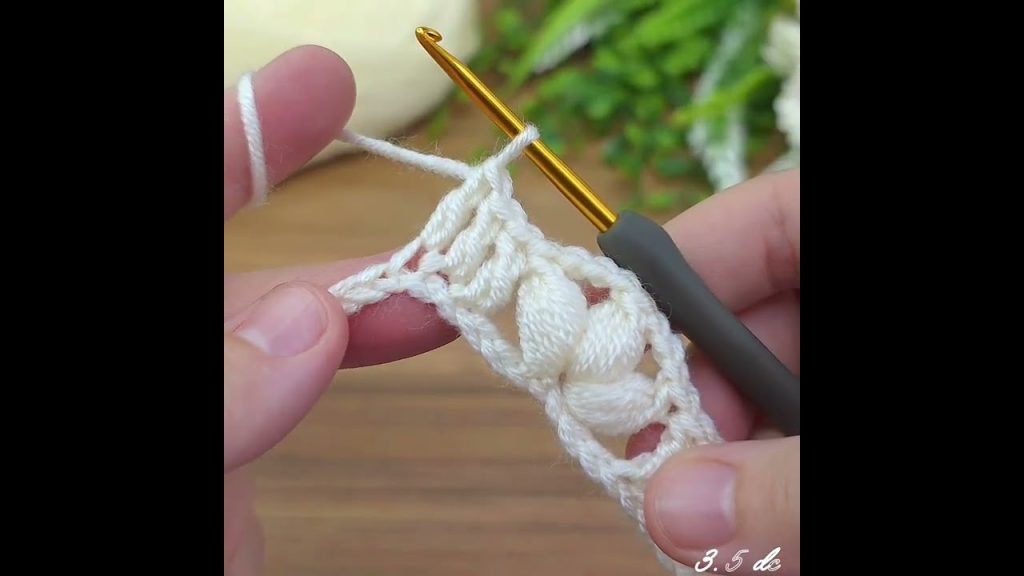
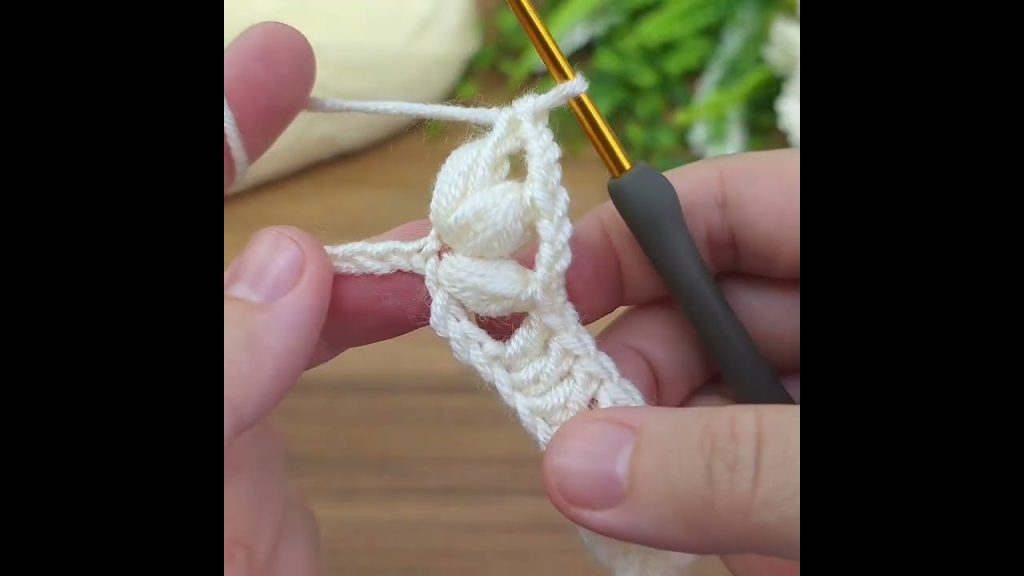
Special Stitch: The 3-DC Filled Cluster
This cluster creates the dense, rounded texture of the blanket.
- Work 3 Double Crochet (DC) stitches into the designated Single Crochet (SC) space. (It is worked like a mini-shell or Granny Stitch cluster.)
🧱 The Pattern: The Filled Cluster Block Stitch
This stitch requires a multiple of 4 + 3 stitches for the foundation chain.
Setup: Foundation Row
- Make a slip knot.
- Ch 123 (for 32 inches wide, or any multiple of 4 + 3 for custom width).
- Row 1 (WS): SC into the 2nd Ch from the hook and in every Ch across. (122 SC total).
- Ch 3 (counts as first DC), turn.
Row 2 (RS): The Cluster Row
- Work 3-DC Filled Cluster into the 2nd SC St (skip the first St at the base of the Ch 3).
- Skip 2 SC Sts.
- SC into the next SC St.
- *Skip 2 SC Sts. Work 3-DC Filled Cluster into the next SC St. Skip 2 SC Sts. SC into the next SC St.* Repeat from * across the row until 4 stitches remain.
- Skip 2 SC Sts.
- Work 3-DC Filled Cluster into the next SC St.
- DC into the last SC St of the row.
- Ch 1, turn. (You should have a series of clusters separated by SCs, framed by a Ch 3 and a DC.)
Row 3 (WS): The SC Linking Row
- SC into the first DC St.
- SC into the next 3 DC Sts (the top of the cluster).
- *SC into the next SC St. SC into the next 3 DC Sts (the top of the cluster).* Repeat from * across the row.
- SC into the top of the Beg Ch 3.
- Ch 3 (counts as first DC), turn. (This row creates a solid foundation of SCs over the clusters, preparing for the next Cluster Row.)
Row 4 (RS): Staggered Cluster Row
- This row staggers the clusters to create the basket-like texture, by working clusters into the SCs from Row 2.
- Skip the first 2 SC Sts at the base of the Ch 3.
- SC into the next SC St.
- *Skip 2 SC Sts. Work 3-DC Filled Cluster into the next SC St. Skip 2 SC Sts. SC into the next SC St.* Repeat from * across the row until 3 stitches remain.
- Skip 2 SC Sts.
- DC into the last SC St of the row.
- Ch 1, turn.
Row 5 (WS): The SC Linking Row
- SC into the first DC St.
- *SC into the next 3 DC Sts (the top of the cluster). SC into the next SC St.* Repeat from * across the row.
- SC into the next 3 DC Sts.
- SC into the top of the Beg Ch 3.
- Ch 3 (counts as first DC), turn.
Pattern Repeat
Repeat Rows 2-5 until the blanket measures 38 inches long (or your desired length).
- Row 2 & 3 establish the non-staggered cluster row.
- Row 4 & 5 establish the staggered cluster row.
Always end the final repeat after a Row 3 or Row 5 (an SC Linking Row).

✂️ Finishing and Edging
Once you reach your desired length, fasten off the yarn.
Border (Optional, but Recommended)
A simple Single Crochet border provides a clean, sturdy finish to the blanket.
- Join: Join yarn in any corner with a Sl St.
- Round 1 (SC Border):
- Work 3 SC into the corner stitch.
- Work SC evenly along the side, top, and bottom edges, placing your hook into the end of each row or the top of each stitch.
- Ensure you work 3 SC into the three remaining corners.
- Round 2 (SC Border):
- Sl St to join the round. Ch 1.
- Work SC into every stitch around, working 3 SC into the center stitch of each corner group (to ensure the corner remains flat).
- Sl St to join, Fasten Off, and weave in all remaining ends.
Final Care
- Gently wash or steam block the blanket to relax the yarn and define the texture of the clusters.
Video tutorial:


