
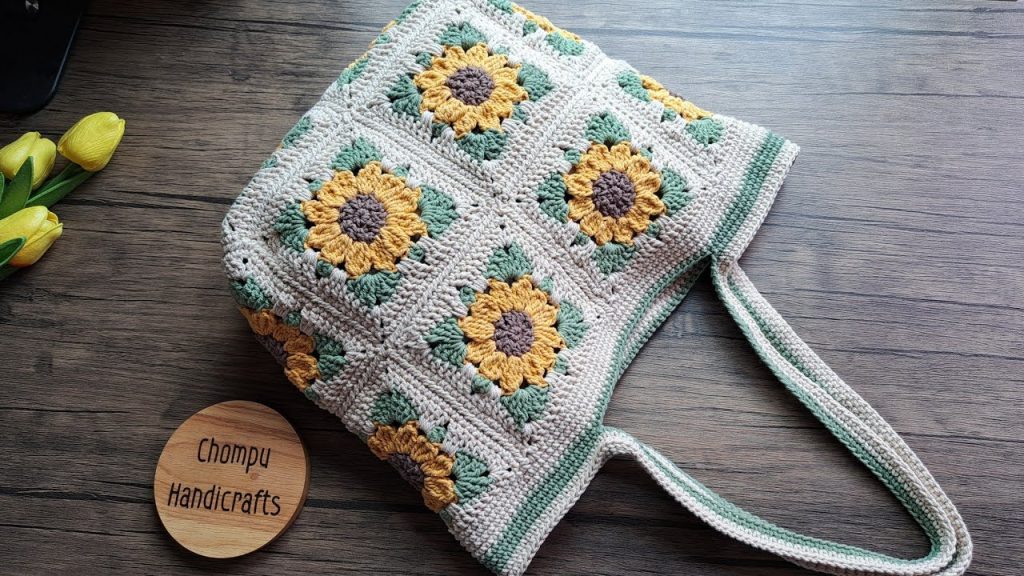
Crochet bags have always been a trendy and practical accessory, but when you combine the classic charm of granny squares with the cheerful look of sunflowers, you get a project that’s both beautiful and functional. The sunflower granny square bag is a popular DIY crochet project that brings together vintage aesthetics, nature-inspired designs, and everyday utility.
Whether you’re crafting it as a gift, a market bag, or a fashion statement, this guide will walk you through everything you need to create your own sunflower granny square bag — from the basic stitches to final assembly.
🧶 What You’ll Need
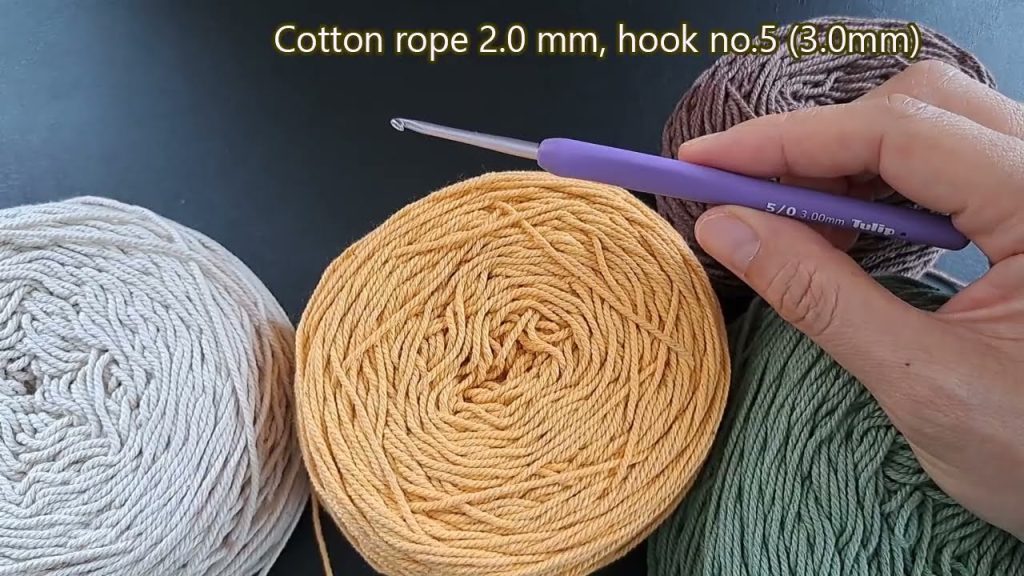
Yarn
- Worsted Weight Yarn (Category 4)
- Dark Brown (center of the sunflower)
- Yellow or Gold (petals)
- Green or Cream (background of the square)
- Optional: Contrasting or neutral color for joining and straps
Crochet Hook
- Size 5.0 mm (H-8) or as recommended on your yarn label
Other Supplies
- Yarn needle (for weaving in ends)
- Scissors
- Stitch markers (optional)
- Lining fabric and sewing supplies (optional, if you want to line the bag)
- Buttons, zipper, or magnetic clasp (optional closures)
🧵 Skills You Should Know
If you’re new to crochet, you might want to practice these stitches before starting:
- Magic Ring (also known as magic circle)
- Chain (ch)
- Slip Stitch (sl st)
- Single Crochet (sc)
- Double Crochet (dc)
- Treble Crochet (tr) (optional)
- Joining Squares (whip stitch or crochet join)
🌻 Step-by-Step Instructions
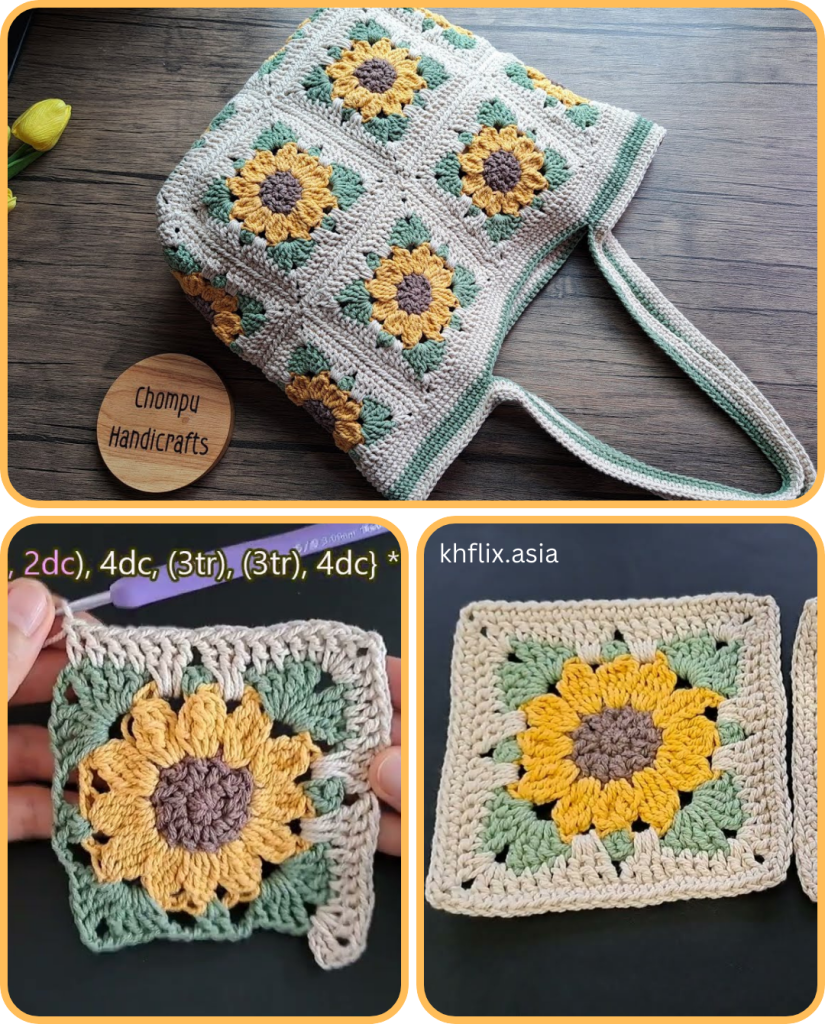
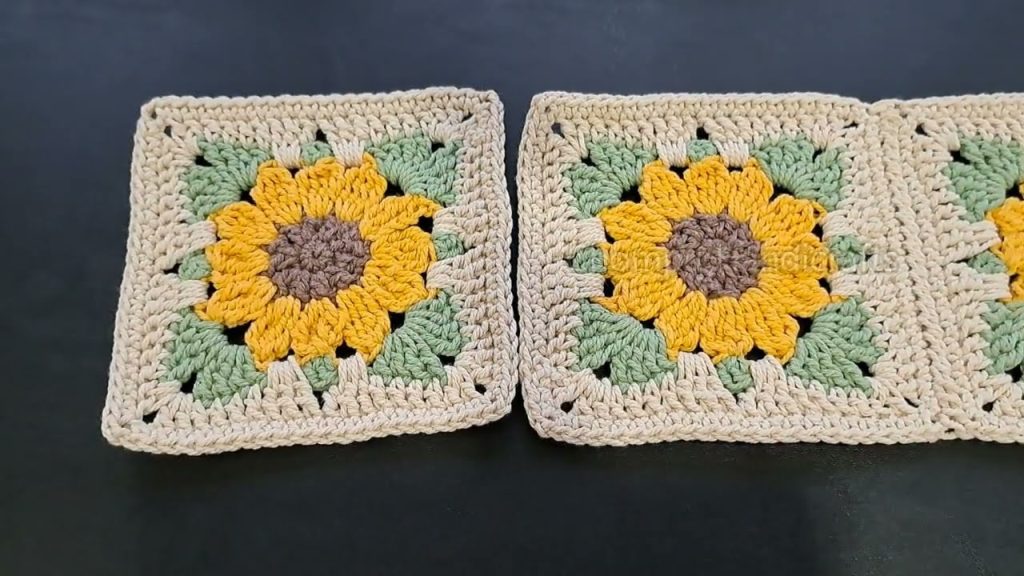
Part 1: Making the Sunflower Granny Squares
Let’s start by making the star of the show — the sunflower square. You’ll make several of these depending on your bag size (commonly 13, 17, or 24 squares for medium-sized bags).
🌼 Round 1: Flower Center (Dark Brown Yarn)
- Magic Ring.
- Ch 3 (counts as first dc), then make 11 dc into the ring. You should have 12 dc in total.
- Pull the ring tight and sl st into the top of the first ch-3 to close the round.
- Fasten off.
🌼 Round 2: Petals (Yellow Yarn)
- Attach yellow yarn into any dc.
- (Ch 2, 2 dc, ch 2, sl st) in the same stitch. This forms the first petal.
- Repeat the petal sequence in each dc around. You should have 12 petals.
- Sl st to the base of the first petal to close. Fasten off.
🌿 Round 3: Background (Green or Cream Yarn)
- Join yarn in space between two petals.
- Ch 3 (counts as dc), 2 dc in same space, then (3 dc in next space) around.
- After completing the round, sl st to the first ch-3 to close.
- Fasten off.
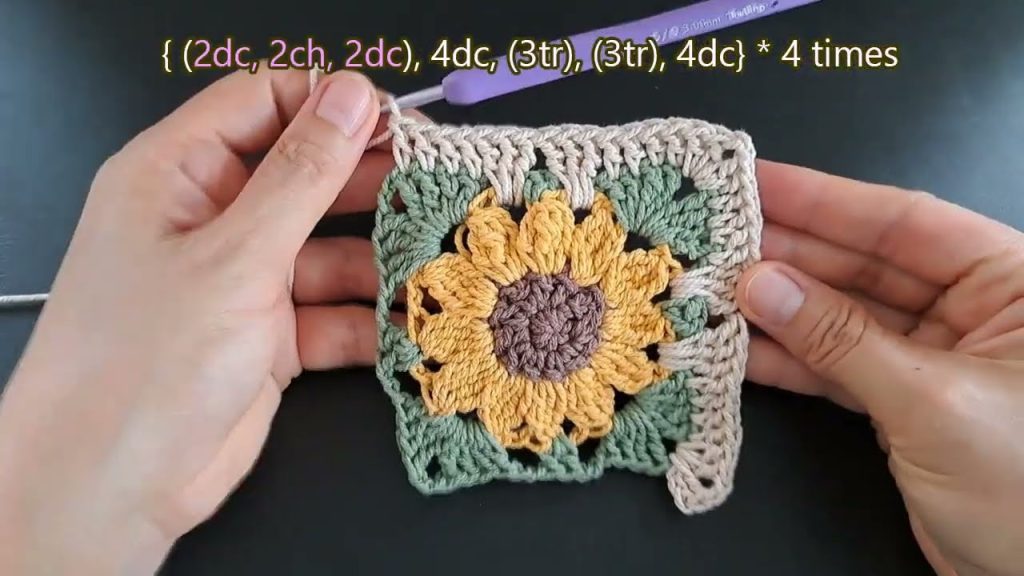
🟩 Round 4: Forming the Square
- Attach yarn in any dc group.
- Create corner: (3 dc, ch 2, 3 dc) in one stitch.
- Along the sides: (3 dc) in each space between groups, and work corners as above.
- Continue around, sl st to join. You now have a sunflower square.
✨ Pro Tip: Block your squares for even sizing. You can spray them lightly with water, pin them to a board, and let dry.
👜 Part 2: Designing the Bag Layout
Decide on Your Layout
You can make various bag shapes:
- Tote bag: 13–17 squares (arranged 3×3, 4×4, etc.)
- Crossbody pouch: 6–8 squares
- Backpack style: 24+ squares
Arrange your finished sunflower granny squares on a flat surface to decide your layout. Make sure the sunflowers all face the same direction (or mix it up for a boho vibe).
🧵 Part 3: Joining the Squares
There are several methods, but here are two beginner-friendly options:
1. Whip Stitch (Using Yarn Needle)
- Place two squares right sides facing.
- Sew through the back loops only using whip stitch.
- Continue to connect all squares row by row.
2. Single Crochet Join
- Hold two squares together, right sides facing out.
- Insert hook through both squares, sc across to join.
- This method creates a visible ridge (which can be decorative!).
Once all the squares are joined, crochet a border around the top edge of the bag using single crochet to give it a clean finish.
🪡 Part 4: Adding a Lining (Optional)
If you want extra strength and polish, add a fabric lining:
- Cut fabric to the shape of your bag, with a ½-inch seam allowance.
- Fold and sew the sides together.
- Insert the lining into the crochet bag and hand-stitch it to the inner edge using a sewing needle and thread.
- Optional: Add a magnetic snap, zipper, or pocket inside the lining.

🧶 Part 5: Making the Straps
You can crochet the straps or use leather/fabric handles.
Crochet Strap (Basic)
- Ch 7–10 (depending on desired width).
- Sc across each row until strap reaches desired length.
- Sew or crochet the strap ends to the top sides of the bag.
For more support, you can double the strap (fold in half and seam together), or line it with fabric.
🎁 Optional Embellishments
- Add tassels, buttons, beads, or embroidered stitches for decoration.
- Use different flower centers (e.g., black, rust, or cream) for variation.
- Attach keychains or charms for a custom look.
🧼 Care Instructions
- Hand wash in cold water with mild soap.
- Lay flat to dry.
- Avoid machine washing or drying to preserve shape and structure.
✅ Final Tips
- Make a small swatch first to test yarn tension and hook size.
- Weave in all yarn ends securely.
- Use stitch markers to keep track of your joins and rounds.
- Be patient! This is a creative and rewarding project.
🌻 In Conclusion
A sunflower granny square bag is a delightful way to express your creativity and carry a bit of sunshine wherever you go. Whether you’re new to crochet or a seasoned pro, this bag is a fun, stylish, and functional project. Plus, it makes for a heartwarming handmade gift!
So grab your hook, pick your favorite yarn shades, and start stitching your own little field of sunflowers — one square at a time. 🌼🧶👜
Video tutorial:


