
Introduction: The Joy of Instant Color
Welcome to a quick and vibrant crochet project! If you love the look of classic granny squares but crave a pop of modern color, the Sun-Kissed Mosaic Square is perfect for you. This pattern is designed to be incredibly beginner-friendly, utilizing simple double crochet clusters and easy color changes to create a dazzling, sturdy motif.
In just a few short rounds, you’ll transition from a simple circle to a perfectly crisp square, making it an excellent coaster, an eye-catching motif for a garland, or the foundation for a spectacular scrap blanket. It’s a wonderful way to use up those small, beautiful yarn remnants!
Grab your favorite colors, and let’s create a little burst of sunshine!
Section 1: Materials & Tools
The charm of this square comes from using 3 to 5 different colors, ensuring your finished piece resembles a sparkling, colorful tile.
| Material | Recommendation | Notes |
| Yarn | Worsted Weight (Category 4) or DK Weight (Category 3) | A smooth, tightly spun cotton or acrylic blend works best for a coaster. |
| Colors | Color A: Center (e.g., Bright Yellow), Color B: Inner Ring (e.g., White), Color C: Petal Accent (e.g., Teal), Color D: Main Square (e.g., Coral). | You only need small amounts of each color. |
| Hook | Size H/8 (5.0 mm) or G/6 (4.0 mm) | Choose the size recommended for your yarn weight. |
| Notions | Yarn Needle, Scissors, Stitch Markers (optional, helpful for marking the starting corner). |
Finished Size (Approximate):
Using Worsted Weight yarn and a 5.0 mm hook, the finished square will measure approximately 4.5 x 4.5 inches (11.5 cm), ideal for a mug coaster.
Section 2: Stitches & Abbreviations
This pattern uses standard US crochet terminology. We will use the Standing Double Crochet (StDC) method for joining new colors, which creates a neater seam than a CH 3.
| Abbreviation | Full Name | Notes |
| MR | Magic Ring | |
| CH | Chain | |
| SL ST | Slip Stitch | |
| SC | Single Crochet | |
| DC | Double Crochet | |
| StDC | Standing Double Crochet | Used to begin a round with a new color for a clean join. |
| DC Cluster | 3 Double Crochet stitches worked into the same space. | This is the core of the Granny Square. |
Section 3: The Pattern – Sun-Kissed Mosaic Square
Part A: The Circular Center
We begin with two rounds to establish a dense, colorful circle.
Round 1 (The Sun Center – Color A):
- Using Color A, create a Magic Ring (MR).
- CH 3 (counts as 1st DC). DC 11 into the ring.
- Pull the tail tight to close the ring. SL ST to the top of the starting CH 3 to join. (12 DC)
- Fasten off Color A.
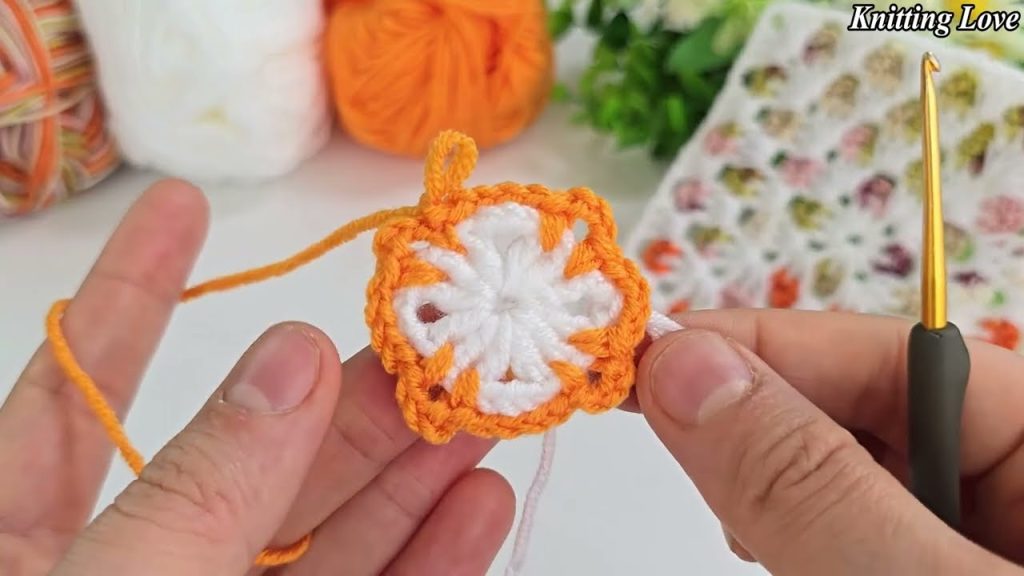
Round 2 (The Halo – Color B):
- Attach Color B with a StDC into any stitch of Round 1. DC into the same stitch.
- Work DC 2 into every stitch around.
- SL ST to the top of the starting StDC to join. (24 DC)
- Fasten off Color B.
Part B: Squaring the Circle
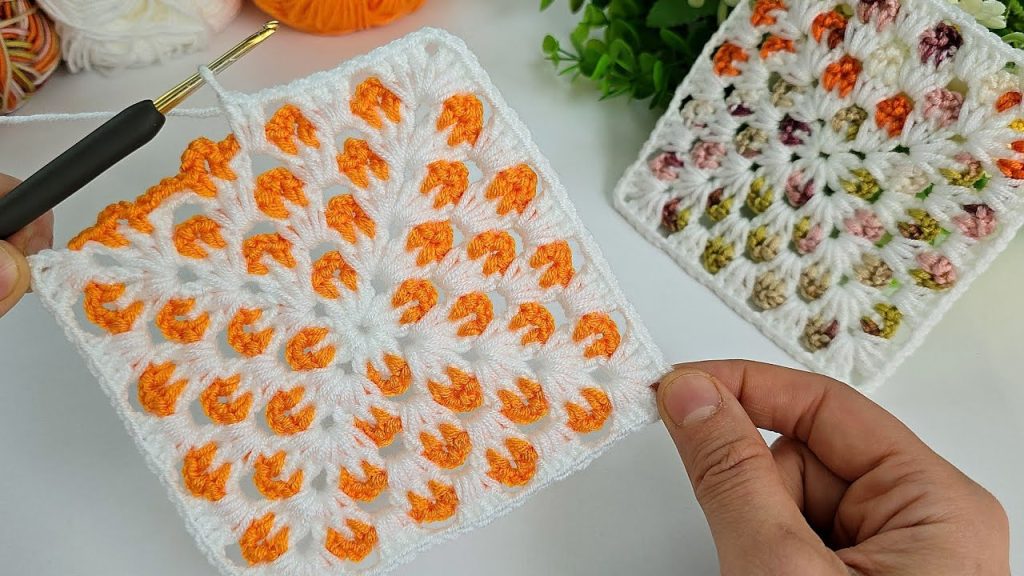
This is the key section where we transition from a 24-stitch circle to a square shape, using the Granny Cluster technique.
Round 3 (The Petal Accent – Color C):
- Attach Color C with a StDC into any stitch. DC 2 into the same stitch. (First DC Cluster)
- CH 1. Skip the next stitch.
- *Work DC 3 into the next stitch. CH 1. Skip the next stitch.*
- Repeat from * to * around (11 more times).
- SL ST to the top of the starting StDC to join. (12 DC Clusters, 12 CH 1 spaces)
- Fasten off Color C.
Round 4 (The Square Frame – Color D):
- Attach Color D with a StDC into any CH 1 space. DC 2 into the same space. (First Side Cluster)
- CH 1.
- Work DC 3 into the next CH 1 space. (Second Side Cluster)
- CH 1.
- First Corner: In the next CH 1 space, work (DC 3, CH 3, DC 3).
- CH 1.
- Side: Work DC 3 into the next CH 1 space. CH 1. Work DC 3 into the next CH 1 space. CH 1.
- Second Corner: In the next CH 1 space, work (DC 3, CH 3, DC 3).
- Repeat the Side and Corner Repeat sequences two more times around.
- SL ST to the top of the starting StDC to join.
Self-Check: You should have 4 corners (CH 3 space) and 2 DC clusters separated by CH 1 on each of the four sides.
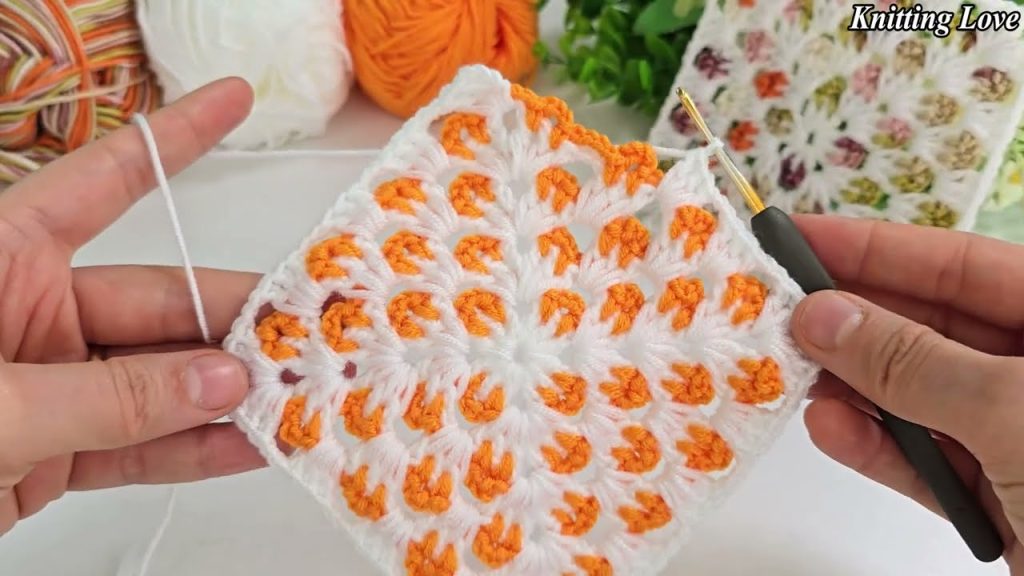
Part C: The Finishing Border
We will add a final, clean border that makes the square sturdy and ready for use.
Round 5 (Final Edge – Color D, or an optional 5th Color):
- SL ST into the next 2 DC, and then into the first CH 1 space.
- CH 3 (counts as 1st DC). Work DC 2 into the same CH 1 space. (First Cluster)
- Work DC 3 into every CH 1 space along the side.
- Corner: Work (DC 3, CH 2, DC 3) into the corner CH 3 space.
- Repeat Steps 3-4 around all four sides.
- SL ST to the top of the starting CH 3 to join.
- Optional Picot Edge: CH 1, SC into the first DC. *SC 3. CH 3 (Picot), SL ST into the 3rd CH from the hook.* Repeat from * to * around the entire edge, working a final SC into every stitch and a simple SC 3 into each corner CH 2 space.
- Fasten off and weave in all remaining ends.
Section 4: Finishing Touches & Project Ideas
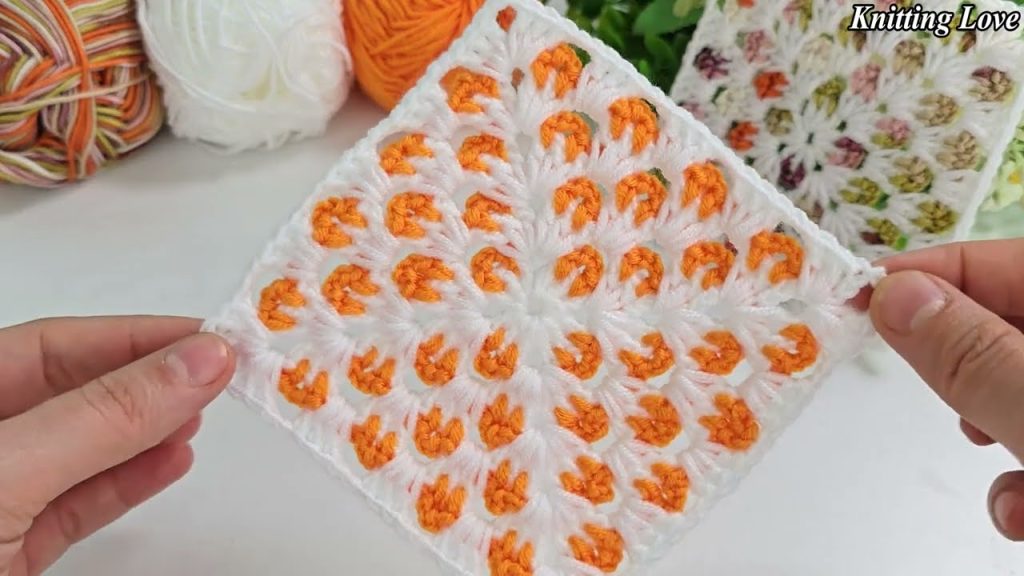
The Final Reveal:
Once all ends are woven in, your square should have a dense, tight center and crisp, defined corners. The contrasting colors emphasize the mosaic nature of the pattern!
Project Inspiration:
- The Desktop Set: Make four squares for a colorful coaster set—a perfect, quick gift.
- Bohemian Garland: Join 10-15 squares together with a simple chain and hang them for instant room decor.
- “Scrappy Chic” Bag: Use 6-8 squares to construct a small pouch or side panel for a tote bag.
- Woven Edge: For a unique finish, use the remaining yarn to weave a simple running stitch border around the solid edges of Round 5 in a contrasting color.

Enjoy your beautifully vibrant and easy-to-create Sun-Kissed Mosaic Square! Happy hooking!
Video tutorial:


