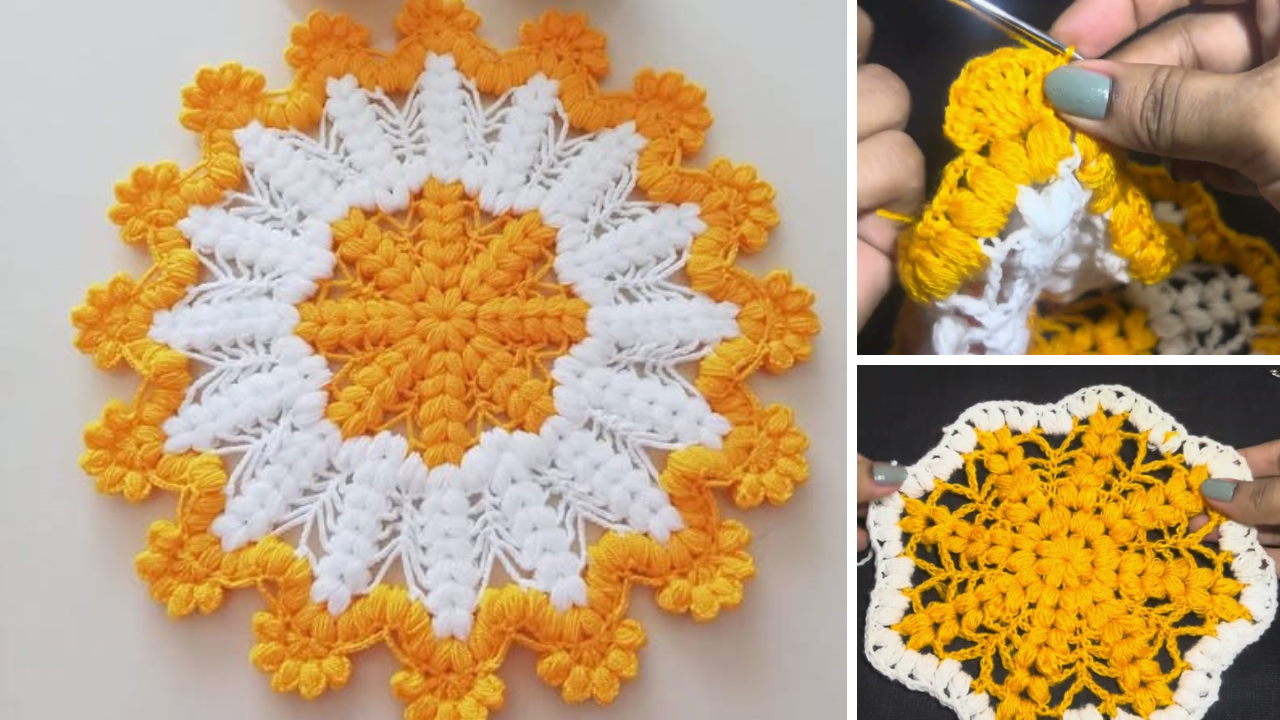
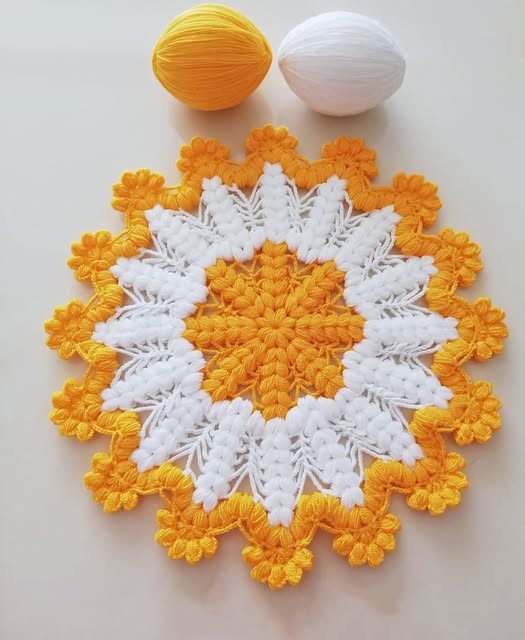
A handmade doily evokes a sense of timeless elegance, transforming a simple surface into a display of delicate artistry. Far from being old-fashioned, a fabulous crochet doily can be a stunning piece of home decor, a cherished heirloom, or a thoughtful gift that showcases the intricate beauty of fiber art.
Crafting Elegance: How to Make a Fabulous Crochet Doily
The art of doily making, with its intricate patterns and delicate textures, is a testament to the beauty of crochet. A doily, whether serving as a protective mat for furniture, a decorative centerpiece, or a cherished keepsake, brings a touch of handcrafted sophistication to any space. While they might appear complex, many doily patterns are built upon repetitive sequences of basic stitches, making them surprisingly accessible to anyone willing to embrace the meditative rhythm of the hook.
This detailed guide will walk you through the essential steps and techniques to create a truly fabulous crochet doily, ensuring a rewarding experience and a stunning finished piece.

Why Crochet a Fabulous Doily?
- Timeless Beauty: Doilies possess an enduring appeal, adding a vintage charm or modern elegance depending on the pattern and yarn choice.
- Skill Enhancement: Doilies are excellent projects for honing your precision in stitch placement, mastering working in the round, understanding increase patterns, and reading intricate charts or written instructions.
- Meditative Process: The repetitive nature of many doily patterns can be incredibly calming and satisfying, offering a wonderful way to unwind.
- Customizable Decor: Choose colors, sizes, and patterns that perfectly complement your home’s aesthetic.
- Thoughtful Gifts: A handmade doily is a unique and heartfelt gift, often becoming a treasured heirloom.
- Scrap Buster: Smaller doilies are perfect for using up leftover bits of fine yarn.
Key Considerations for a Fabulous Doily
To ensure your doily turns out beautifully and lays flat, keep these crucial aspects in mind:
- Yarn Choice (The Heart of the Doily):
- Fiber: For classic, crisp doilies, 100% mercerized cotton thread is the gold standard. It has excellent stitch definition, a subtle sheen, holds its shape beautifully after blocking, and is easy to wash. Other natural fibers like linen, bamboo, or silk can also create stunning doilies with lovely drape.
- Weight: Doily patterns are typically designed for crochet thread sizes. The most common are:
- Size 10: (Equivalent to a fingering/sock weight yarn in thickness) – most common, good for beginners.
- Size 20 or 30: Finer, creates more delicate, intricate results, but can be challenging for beginners.
- Avoid fuzzy or bulky yarns for traditional doilies, as they obscure the intricate stitch work.
- Color: White or ecru threads are traditional and best highlight complex patterns. However, doilies in vibrant solid colors or subtle variegated threads can also be stunning and modern.
- Hook Size: For doily thread, you’ll use a very small steel crochet hook. The size will be indicated on your thread label, usually in millimeters or US steel hook sizes (which are inversely numbered, meaning a higher number is a smaller hook).
- For Size 10 thread, a 1.50mm (US 7) or 1.75mm (US 5) steel hook is common.
- For finer threads (Size 20/30), you might use a 1.00mm (US 10) or even smaller.
- The correct hook size will create a firm but not stiff fabric with well-defined stitches.
- Gauge (Crucial for Flatness & Size): For doilies, maintaining consistent gauge is paramount. Slight variations can cause your doily to ruffle, cup, or not match the intended finished size. While formal swatches aren’t always given for doilies, pay close attention to your initial rounds. If your doily starts to “bowl” (cup upwards), you might need more increases or a slightly larger hook. If it “ruffles” excessively, you might have too many increases or a hook that’s too large.
- Reading Patterns: Doily patterns often combine written instructions with charts. Charts are incredibly helpful for visualizing the stitch placement and flow of the pattern, especially with intricate lace. Learning to read crochet charts (even basic symbols) will greatly enhance your doily-making experience.
- Lighting: Working with fine thread requires good lighting to see your stitches clearly and prevent eye strain.

Materials You’ll Need
- Crochet Thread: One ball of Size 10 mercerized cotton crochet thread (white or ecru recommended for first-timers).
- Steel Crochet Hook: Appropriate for Size 10 thread (e.g., 1.75mm (US 5)).
- Yarn Needle (Tapestry Needle): Small enough to fit through the tight stitches of the thread.
- Scissors:
- Stitch Marker (optional): A small clip or tiny safety pin can be helpful for marking the beginning of rounds.
- Blocking Supplies (Absolutely Essential!):
- Blocking mat or thick foam board.
- Rust-proof T-pins or blocking pins.
- Spray bottle with water (or a basin for wet blocking).
- Optional: Liquid starch for extra stiffness.
Essential Crochet Abbreviations
- ch: chain
- sl st: slip stitch
- sc: single crochet
- dc: double crochet
- tr: treble crochet (or triple crochet)
- dtr: double treble crochet
- sk: skip
- ch-sp: chain space (the space created by a chain)
- st(s): stitch(es)
- yo: yarn over
- rep: repeat
- lp(s): loop(s)
- (): indicates instructions to be worked into the same stitch/space, or a repeat of instructions
- …: repeat instructions within asterisks
- []: indicates stitch counts at the end of a round
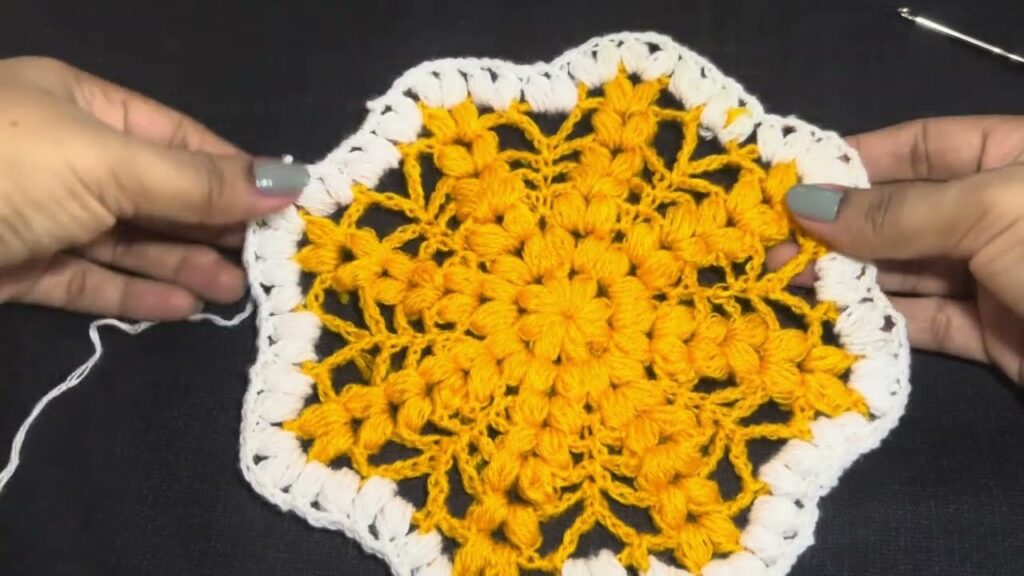
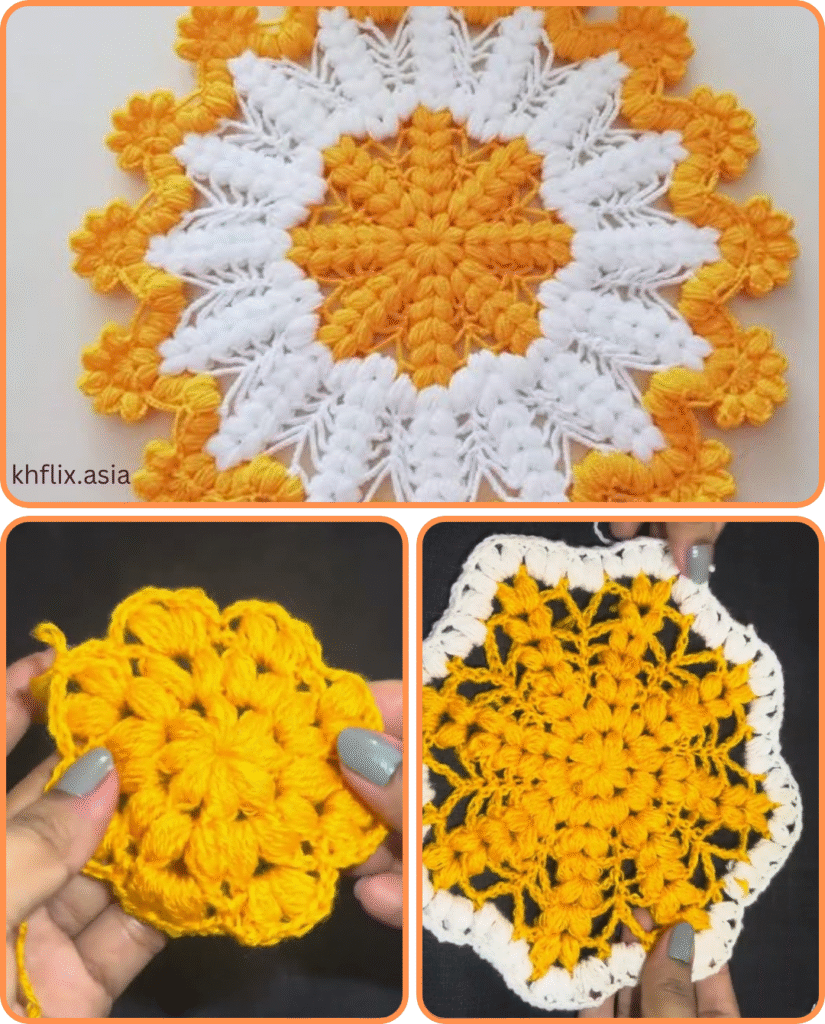
The Fabulous Doily Tutorial (Simple Starburst Doily)
This pattern creates a charming, relatively small doily, perfect for building confidence in doily techniques. We’ll start with a classic center and expand with simple increases and chain spaces.
Finished Size: Approximately 7-8 inches (18-20 cm) diameter.
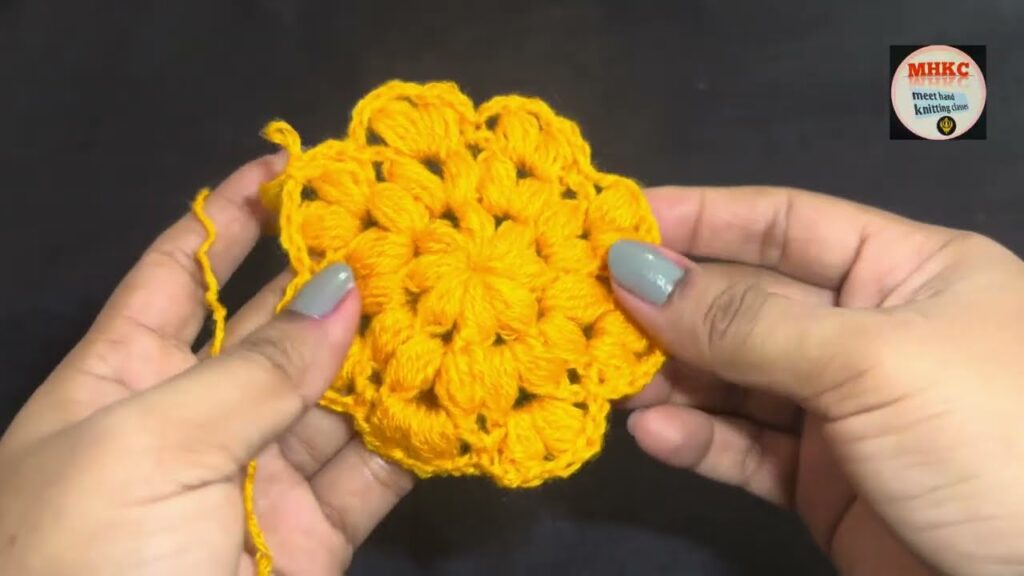
Part 1: The Center (Magic Ring or Chain Ring)
For a tight, hole-free center, the Magic Ring (also known as Magic Circle or Adjustable Ring) is highly recommended. If you find it tricky, you can use the Chain Ring method.
Magic Ring Method:
- Make a Magic Ring.
- Round 1: Ch 2 (does NOT count as a st). Work 12 dc into the Magic Ring. Pull the yarn tail to close the ring tightly. Join with a sl st to the top of the first dc. [12 dc]
Chain Ring Method (Alternative):
- Ch 4.
- Sl st into the first ch to form a ring.
- Round 1: Ch 2 (does NOT count as a st). Work 12 dc into the center of the ring. Join with a sl st to the top of the first dc. [12 dc]
Part 2: Expanding the Doily (Increase Rounds)
These rounds build the initial flat base of your doily, creating the “spokes” of the starburst.
- Round 2: Ch 3 (counts as 1 dc). Dc in same st (this is your first increase). 2 dc in each dc around. Join with a sl st to the top of the beginning Ch 3. [24 dc]
- Round 3: Ch 3 (counts as 1 dc). Dc in same st. *Dc in next dc, 2 dc in next dc.* Repeat from * around. Join with a sl st to the top of the beginning Ch 3. [36 dc]
- Round 4: Ch 3 (counts as 1 dc). Dc in same st. *Dc in next 2 dc, 2 dc in next dc.* Repeat from * around. Join with a sl st to the top of the beginning Ch 3. [48 dc]
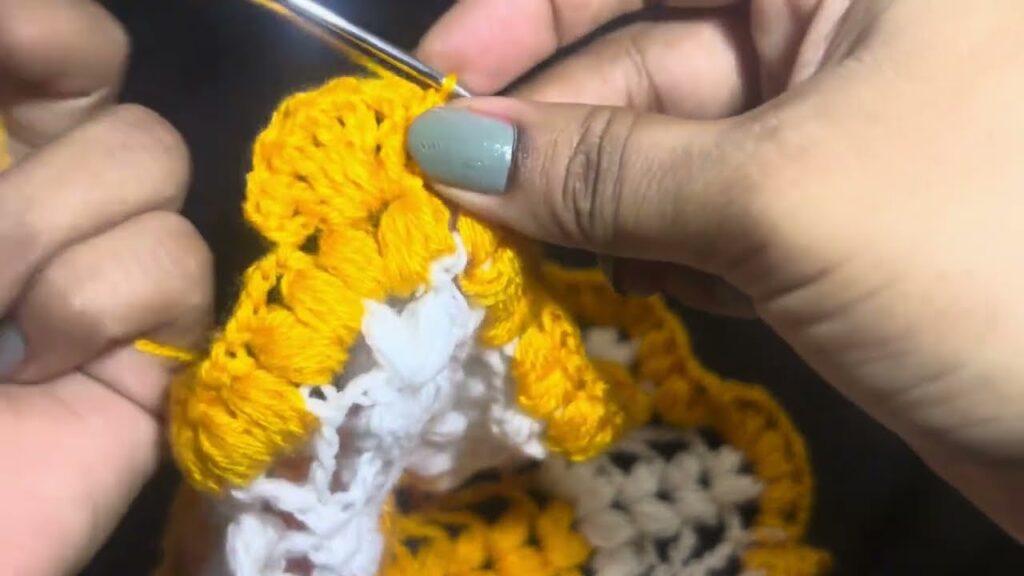
Part 3: Creating the Lace Pattern (Chain Spaces & Petals)
Now we’ll start introducing the openwork and decorative elements.
- Round 5 (Creating Arches): Ch 1. Sc in first dc. *Ch 5, sk 3 dc, sc in next dc.* Repeat from * around. You will end with Ch 5, sk 3 dc. Join with a sl st to the first sc. [12 ch-5 arches, 12 sc]
- Round 6 (Building Petals): Sl st into the first ch-5 sp. Ch 3 (counts as 1 dc). Work 6 dc into the same ch-5 sp. *Ch 1, 7 dc into next ch-5 sp.* Repeat from * around. Ch 1. Join with a sl st to the top of the beginning Ch 3. [12 petals of 7 dc, 12 ch-1 spaces]
- Round 7 (Connecting Petals): Ch 1. Sc in first dc. Sc in next 6 dc (making 7 sc over the first petal). *Ch 3, sc in first dc of next petal, sc in next 6 dc.* Repeat from * around. Ch 3. Join with a sl st to the first sc. [12 groups of 7 sc, 12 ch-3 spaces]
- Round 8 (Larger Arches): Sl st into next 3 sc (to center on the petal). Ch 1. Sc in next sc. *Ch 7, sk 6 sc (the rest of the current petal and the next ch-3 sp), sc in the center sc of the next petal (4th sc of the 7-sc group).* Repeat from * around. Ch 7. Join with a sl st to the first sc. [12 ch-7 arches, 12 sc]
- Round 9 (Final Petals/Points): Sl st into the first ch-7 sp. Ch 3 (counts as 1 dc). Work 9 dc into the same ch-7 sp. *Ch 1, 10 dc into the next ch-7 sp.* Repeat from * around. Ch 1. Join with a sl st to the top of the beginning Ch 3. [12 petals of 10 dc, 12 ch-1 spaces]
- FO, leaving a short tail.
Part 4: The Magic of Blocking (Absolutely Essential!)
This is the most crucial step for a fabulous doily. Blocking transforms your often slightly wonky, curled, or uneven crocheted piece into a perfectly flat, crisp, and beautifully defined work of art.
- Wet the Doily: Gently submerge your finished doily in lukewarm water for about 15-20 minutes. Ensure it’s thoroughly saturated. If using cotton thread, you can add a tiny bit of liquid starch to the water for extra crispness (follow starch instructions carefully).
- Remove Excess Water: Gently squeeze out as much water as you can without twisting or wringing the doily. You can roll it in a clean, dry towel and press firmly.
- Pin to Shape: Lay your damp doily on a clean blocking mat or a thick foam board. Using rust-proof T-pins or blocking pins, carefully pin the doily into its intended shape (a perfect circle for this pattern).
- Start by pinning the very center.
- Then, pin out the main points or arches evenly around the edge, gently stretching the lace open to define the pattern and ensure it’s symmetrical.
- Add more pins as needed to keep the edges straight and the doily perfectly flat.
- Dry Completely: Allow the doily to air dry completely. This can take 24-48 hours, depending on humidity. Do not rush the drying process with heat.
- Remove Pins: Once completely dry and stiff (if you used starch), carefully remove the pins.
Tips for Success & Crafting a Truly Fabulous Doily:
- Practice the Magic Ring: It’s worth mastering for doilies, as it gives the neatest center.
- Count Your Stitches: Doilies rely heavily on exact stitch counts and increases. Always count your stitches at the end of each round to avoid unevenness.
- Use Good Lighting: Working with fine thread can be hard on the eyes. Ensure you have ample light.
- Read Ahead: Before starting a new round, read the entire instruction for that round to understand where your stitches will land.
- Don’t Fear Frogging: If a round doesn’t look right, don’t hesitate to “frog” (unravel) it and re-do it. It’s part of the learning process and ensures a beautiful final piece.
- Blocking is Non-Negotiable: For doilies, blocking is not optional. It transforms a crumpled piece into a crisp, open, and beautiful work of art.
- Explore Patterns: Once you’re comfortable with this basic doily, search for more complex patterns with different stitches (like picots, clusters, or post stitches) to expand your skills.
Creating a crochet doily is a journey into intricate beauty and meticulous craftsmanship. With each stitch, you’re weaving elegance and personality into a piece that will add a touch of handmade charm to your home. Enjoy the process, and admire your truly fabulous creation!
Video tutorial:


