
Embrace the beauty of the ocean with a delightful crochet seashell bag! This unique accessory is perfect for beach trips, summer outings, or simply adding a touch of coastal charm to your everyday look. While it might seem intricate, the seashell stitch is surprisingly accessible, making this project enjoyable for intermediate crocheters and adventurous beginners alike.
This detailed guide will walk you through creating a charming seashell-inspired bag, focusing on the techniques that give it its distinctive texture and shape.

Inspiration and Design Elements:
A “seashell bag” can take many forms, but typically it incorporates:
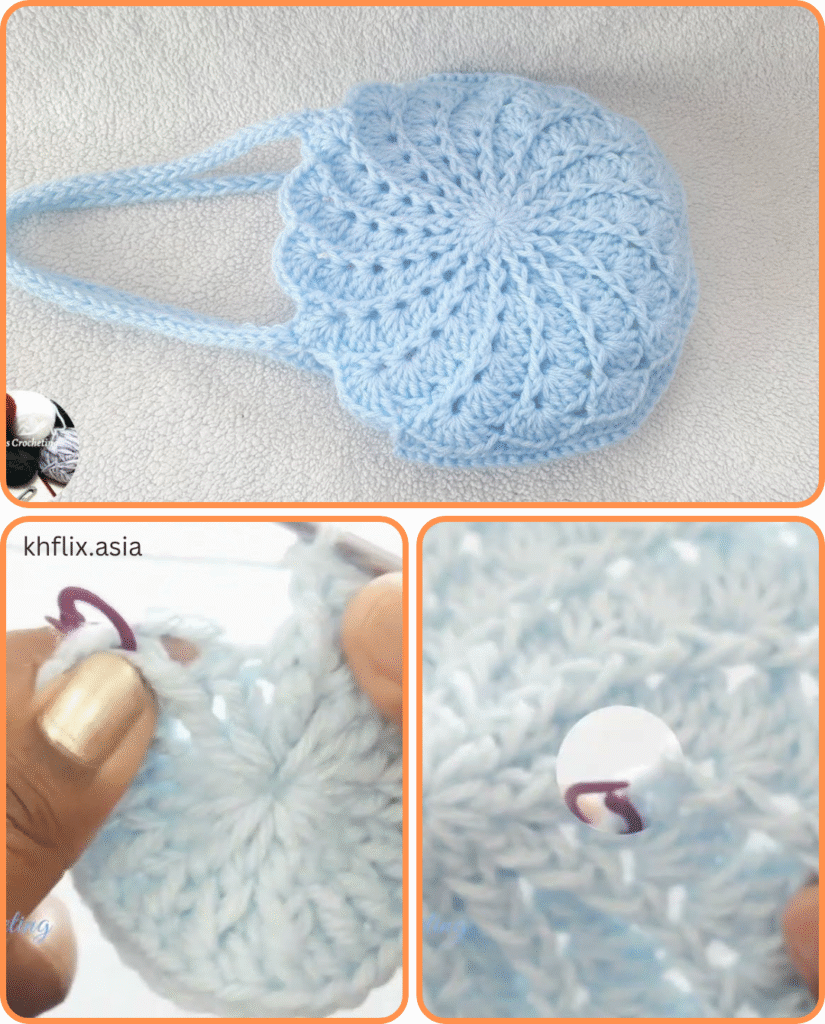
- Seashell Stitch: A repetitive stitch pattern that mimics the ridged, fan-like texture of a seashell. This is the core of the bag’s aesthetic.
- Neutral or Coastal Colors: Think creams, beiges, sandy browns, blues, and greens to evoke beachy vibes. Variegated yarns with subtle color changes can also be stunning.
- Bag Shape: Often a simple rectangle or circle that allows the seashell stitch to be the star. For a true “seashell” look, you might even consider shaping the bag more like a clam or scallop.
- Handles: Simple crocheted straps or even a drawstring closure for a pouch-style bag.
For this tutorial, we will focus on a rectangular-based bag that primarily uses the seashell stitch to create its distinctive texture.
Materials You’ll Need:
Gathering your materials before you start ensures a smooth crafting experience.
- Yarn:
- Weight: Worsted weight (Aran) cotton or cotton blend is highly recommended. Cotton provides excellent stitch definition, durability, and a lovely drape for this stitch.
- Quantity: Approximately 250-400 yards (230-360 meters), depending on your desired bag size and tension. Choose colors like natural, off-white, light blue, mint green, or a multi-tonal “beach” yarn.
- Crochet Hook: A size that complements your yarn. For worsted weight, a 4.0mm (G-6) or 5.0mm (H-8) hook is common. Check your yarn label for the recommended size.
- Scissors: For cutting yarn.
- Yarn Needle (Tapestry Needle): Essential for weaving in ends.
- Stitch Markers: Very helpful for marking the beginning of rounds or specific repeats, especially when learning a new stitch pattern.
- Optional:
- Fabric for Lining: If you want a more structured bag or to prevent small items from slipping through the stitch gaps.
- Magnetic Snap, Button, or Drawstring: For a closure.
- Pre-made Bag Handles: For a different look (e.g., rope, bamboo, or wooden handles).

Key Crochet Stitches and Techniques:
Beyond the basics, understanding these will be crucial:
- Chain Stitch (ch): Foundation.
- Slip Knot: Starting point.
- Slip Stitch (sl st): Joining and moving.
- Single Crochet (sc): Basic, sturdy stitch.
- Double Crochet (dc): Taller stitch, forming the “shell” clusters.
- Skip Stitch (sk st): Skipping stitches to create gaps for shell placement.
- Working in Rounds: We’ll be building the bag upwards in continuous rounds or joined rounds.
Understanding the Seashell Stitch (Basic Foundation)
The seashell stitch typically involves a group of double crochet (dc) stitches worked into a single stitch or space, often with skipped stitches in between to create the fan effect.
Example Seashell Stitch Pattern (used in this tutorial): [5 dc in one stitch/space, skip 3 stitches] or [5 dc in one stitch/space, skip 2 stitches, 1 sc]
For this bag, we’ll use a variation that integrates well with a sturdy base: (sc, skip 2 stitches, 5 dc in next stitch, skip 2 stitches)
Step-by-Step Tutorial: Crafting Your Seashell Bag
Let’s begin creating your beautiful bag!
Step 1: Create the Base of Your Handbag
We’ll start with a rectangular base worked in rows, then transition to working in the round.
- Make a Slip Knot and Chain: Chain an even number of stitches that will form the desired width of your bag.
- Example: For a medium-sized bag,
ch 32. (This will give you 31 working stitches in the next row).
- Example: For a medium-sized bag,
- Row 1 (Foundation):
Scinto the 2nd chain from your hook.Scin each chain across.- Example: You will have 31 sc stitches.
- Rows 2-X (Building Base Depth):
Ch 1(does not count as a stitch) andturn.Scin the first stitch and in each stitch across.- Repeat this row until your base reaches the desired depth (front to back) of your bag.
- Example: For a base about 3-4 inches deep, you might crochet 8-12 rows, depending on your tension.
- You should now have a flat, sturdy rectangular piece.
Step 2: Transition to Working in the Round and Establish Seashell Pattern
This is where the magic begins! We’ll work around the perimeter of the base, setting up the seashell pattern.
- Round 1 (Establishing Perimeter – Sc):
- After your last base row, do not turn.
Ch 1(does not count as a stitch).- Work along the long side (the last row you just crocheted):
Scin each stitch across the long edge. - At the corner:
3 scin the corner stitch (this helps create a smooth turn). - Work along the short side (the end of the rows):
Scevenly along the side edge of your base (approximately one sc per row end). - At the next corner:
3 scin the corner stitch. - Work along the opposite long side (the starting chain side):
Scin each loop of the starting chain. - At the next corner:
3 scin the corner stitch. - Work along the remaining short side:
Scevenly along the side edge. - At the final corner:
3 scin the corner stitch. Sl stto the firstscof this round to join.- You should now have a closed oval/rectangular shape. Count your stitches. The total stitch count for this round must be a multiple of 6 for the seashell pattern to work evenly. Adjust by adding or skipping a few
scstrategically if needed, or by changing the number ofscin the corners slightly (e.g., 2 sc instead of 3 if your count is too high).
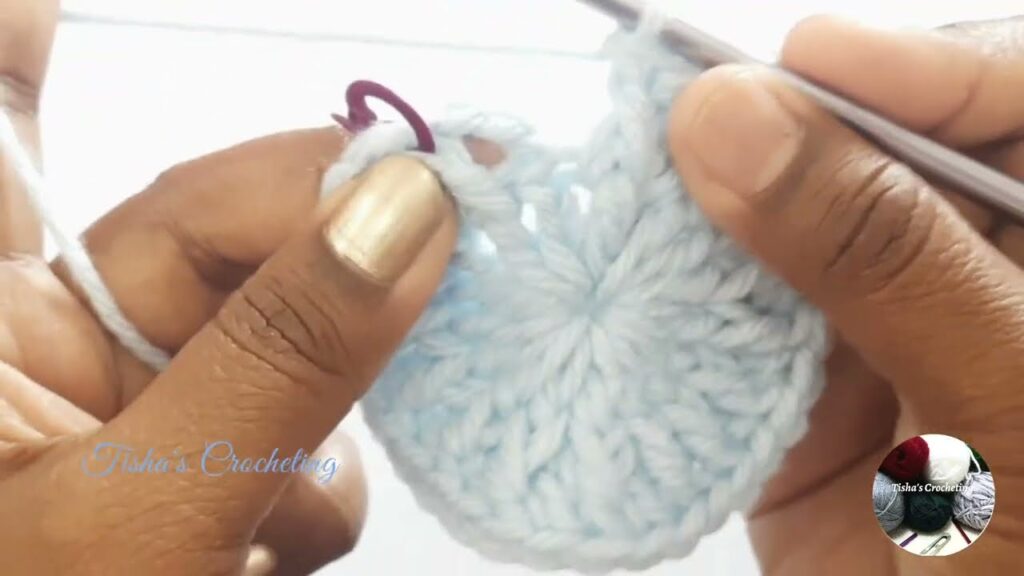
- Round 2 (First Seashell Row – Setting Up):
Ch 1(does not count as a stitch).Scin the same stitch as yoursl stjoin.*Sk 2 stitches, 5 dcin the next stitch,sk 2 stitches, scin the next stitch.*- Repeat from
*to*around the entire round. Sl stto the firstscof the round to join.- You will see your first fan-like “shells” forming.
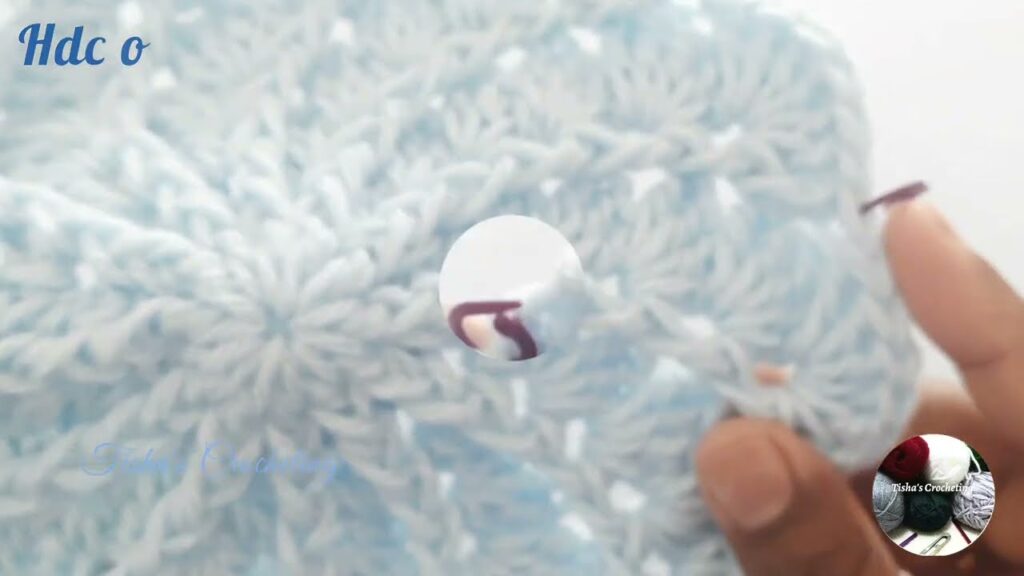
- Round 3 (Second Seashell Row – Offset):
Ch 1(does not count as a stitch).5 dcin the same stitch as yoursl stjoin (this should be thescfrom the previous round, placing a shell between two shells from the previous round).*Sk 2 dc, scin the middledcof the next 5-dc shell,sk 2 dc, 5 dcin the nextsc.*- Repeat from
*to*around the entire round. Sl stto the top of the firstdcof the round to join.- This round offsets the shells, creating the characteristic staggered look.

Step 3: Continue Building the Bag Height with Seashells
You’ll now alternate between Round 2 and Round 3 pattern repeats to build your bag.
- Round 4: This round will be like Round 2.
Ch 1.Scin the same stitch (thescfrom the previous round).*Sk 2 dc, 5 dcin thescof the next shell,sk 2 dc, scin the middledcof the next 5-dc shell.*- Repeat from
*to*around. Sl stto the firstscto join.
- Round 5: This round will be like Round 3.
Ch 1.5 dcin the same stitch (thescfrom the previous round).*Sk 2 dc, scin the middledcof the next 5-dc shell,sk 2 dc, 5 dcin the nextsc.*- Repeat from
*to*around. Sl stto the top of the firstdcto join.
- Repeat: Continue alternating Round 4 and Round 5 until your bag reaches the desired height.
- The pattern will flow seamlessly, with shells stacked and offset. Aim for a height that feels proportionate to your base.
Step 4: Finishing the Top Edge of the Bag
Once you reach your desired height, you might want a simpler top edge before adding handles.
- Final
ScRound:- If your last round ended with a
5 dcshell,sl stto the top of the firstdc. Ch 1.Scin each stitch around the entire top edge of the bag.- Try to place 1
scin the middledcof each shell, and 1scin eachscbetween the shells. This will create a relatively even top. Sl stto the firstscto join.- Repeat this
scround once more for a clean finish if desired.
- If your last round ended with a
Step 5: Creating the Handles (Crocheted Straps)
Crocheted straps are durable and match the bag’s aesthetic.
- Determine Handle Placement: With your bag flattened, identify where you want the handles to be. They should be equidistant from the sides and centered. Use stitch markers to mark the outer points of your handle openings on the front and back of the bag.
- Example: If your bag has 60 stitches around, and you want 10 stitches for each handle opening, you might mark 10 stitches in, then skip 10 stitches, mark 10 stitches, then skip 10 stitches, and so on.
- Working Across the Top for Handles:
Ch 1.Scin each stitch until you reach your first handle marker.- Chain for the Strap:
Chthe desired length for your strap. (e.g.,ch 50-70for a shoulder strap,ch 20-30for a hand strap). Skthe stitches between your two handle markers on the bag’s body.Scinto the stitch after your second handle marker.Scacross the top of the bag until you reach the next handle marker (for the back side).- Repeat the
ChandSkfor the second strap. Scto the end of the round.Sl stto the firstscof the round to join.
- Reinforce the Handles:
Ch 1.Scin each stitch around the entire bag, working into each chain of your strap chains.- Repeat this
scround 1-2 more times to make the handles sturdy. Sl stto the firstscto join.
Step 6: Finishing and Optional Additions
- Fasten Off: Cut your yarn, leaving a 6-inch tail. Yarn over and pull the tail completely through the loop on your hook to fasten off securely.
- Weave in Ends: Using your yarn needle, meticulously weave in all loose yarn tails. This is crucial for a neat and durable finish.
- Lining (Optional but Recommended):
- Measure your finished bag’s inner dimensions.
- Cut and sew a simple fabric pouch that fits snugly inside.
- Hand-stitch the top edge of the fabric lining to the inside of your crochet bag, just below the final
scrows.
- Closure (Optional):
- Magnetic Snap: Sew a magnetic snap to the top center of your bag’s opening.
- Button and Loop: Sew a button to the front, and crochet a small chain loop on the back to fit over it.
- Drawstring: Weave a crocheted chain or ribbon through the top
scrow to create a drawstring closure, suitable for a pouch-style bag.
- Blocking (Optional): If your bag is a bit uneven, gently wet it, shape it, and let it air dry on a flat surface. This can help define the stitches and shape.
Care for Your Seashell Bag:
Generally, cotton crochet items can be hand-washed in cool water with a mild detergent. Gently squeeze out excess water (do not wring), reshape, and lay flat to dry. Refer to your yarn label for specific care instructions.
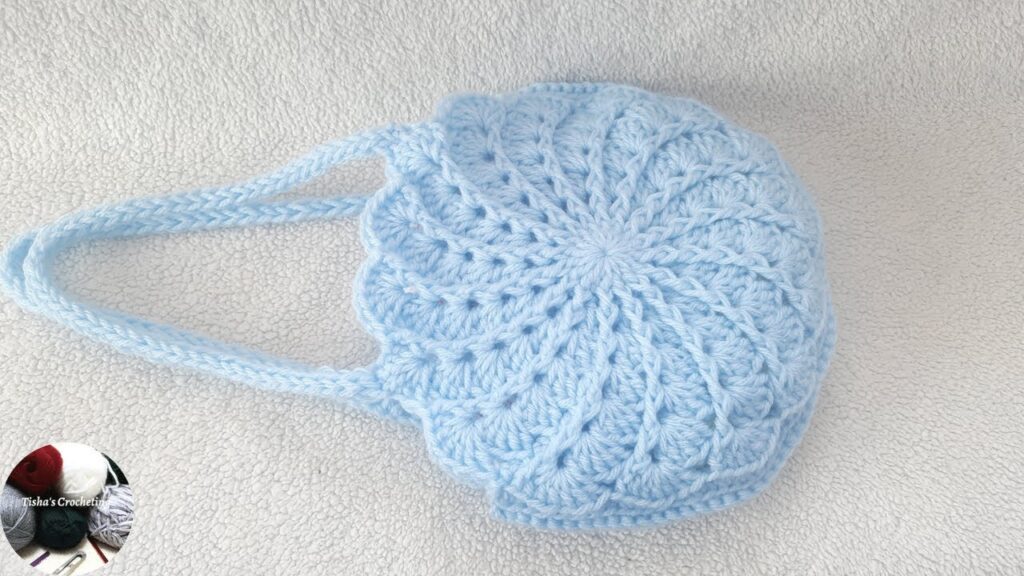
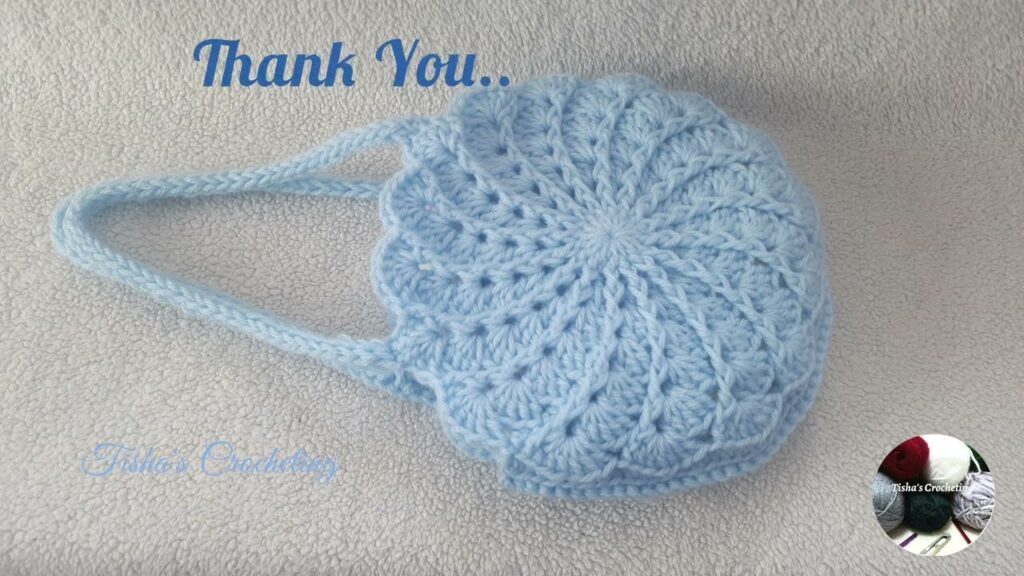
You’ve Created a Masterpiece!
Your handmade crochet seashell bag is now ready to be shown off! Enjoy the unique texture and charming design you’ve brought to life with your own hands. This project is a wonderful way to practice new stitches and create a truly personalized accessory that will remind you of sunny days and ocean breezes.
Video tutorial:


