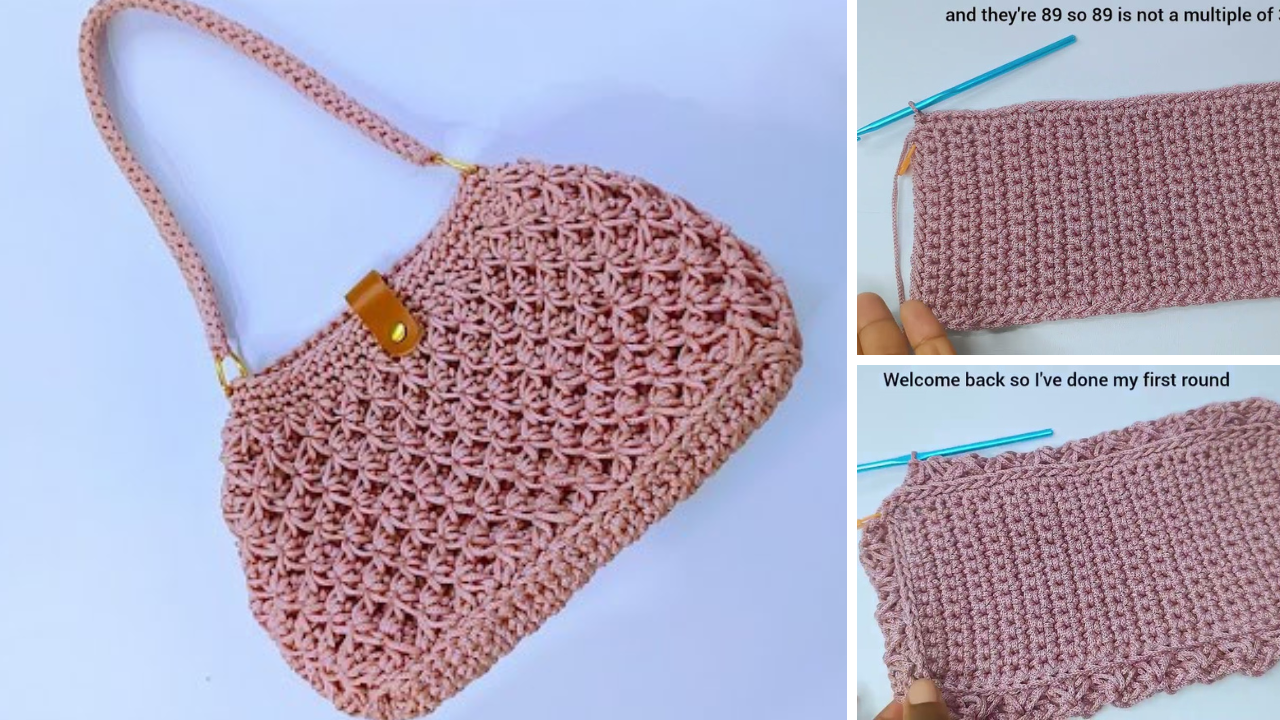
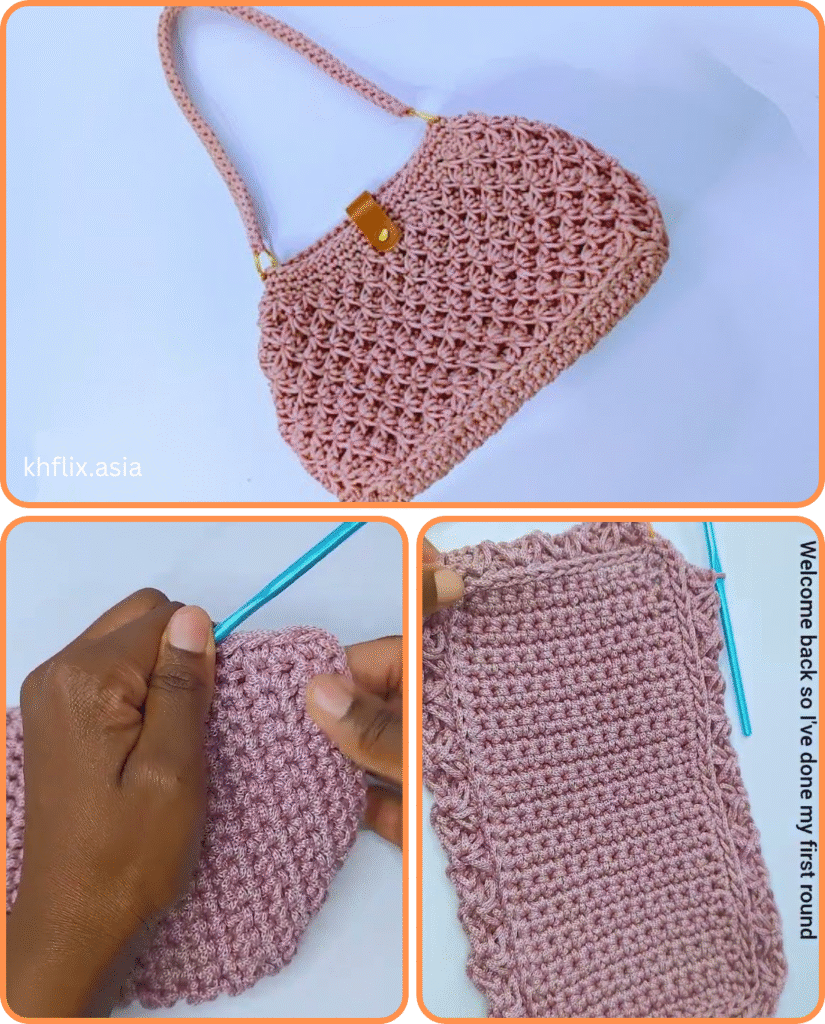
Crocheting your own handbag is a rewarding project that allows you to create a unique and personalized accessory. Whether you’re a beginner or an experienced crocheter, this detailed tutorial will guide you through each step, from choosing your materials to adding those finishing touches. Get ready to impress with your handmade creation!
Materials You’ll Need:
Before you begin, gather all your supplies. Having everything ready will make the process smoother and more enjoyable.
- Yarn: The type of yarn you choose will greatly impact the look and feel of your handbag.
- For a sturdy bag: Opt for a worsted weight cotton, chunky cotton, or even a macrame cord. These hold their shape well.
- For a softer, more draped bag: Acrylic or wool blends can work, but you might need to line the bag for added structure.
- Recommended: For a beginner-friendly and durable bag, start with a worsted weight cotton.
- Quantity: This will depend on the size of your bag, but typically 200-400 yards (180-360 meters) is a good starting point for a medium-sized handbag.
- Crochet Hook: The hook size should correspond to your chosen yarn. Check the yarn label for recommended hook sizes. A common size for worsted weight yarn is a 4.0mm (G-6) or 5.0mm (H-8) hook.
- Scissors: For cutting yarn.
- Yarn Needle (Tapestry Needle): Essential for weaving in ends neatly.
- Stitch Markers: Very helpful for marking the beginning of rounds or specific stitches, especially for beginners.
- Optional:
- Bag Handles: You can crochet your own, or purchase pre-made leather, bamboo, or metal handles for a professional finish.
- Fabric for Lining: If you want a more structured bag or to prevent small items from slipping through stitches.
- Magnetic Snap or Button: For a secure closure.
- D-rings and Swivel Clasps: If you plan to add a detachable strap.

Basic Crochet Stitches You Should Know:
This tutorial assumes you have a basic understanding of the following stitches:
- Chain Stitch (ch): The foundation of most crochet projects.
- Slip Knot: How to start your yarn on the hook.
- Slip Stitch (sl st): Used to join rounds or move yarn without adding height.
- Single Crochet (sc): A compact and sturdy stitch.
- Half Double Crochet (hdc): Taller than sc, shorter than dc.
- Double Crochet (dc): A taller, looser stitch.
If you’re new to these stitches, I recommend watching a few quick video tutorials to familiarize yourself before starting.
Choosing Your Bag Design and Stitch Pattern:
For your first crochet handbag, it’s best to start with a simple design. A rectangular or square base with straight sides is easiest.
Recommended Stitch for Beginners: The single crochet (sc) stitch creates a dense, sturdy fabric perfect for handbags. You can also experiment with half double crochet (hdc) for a slightly softer look.
For this tutorial, we will focus on a simple rectangular bag using single crochet stitches.
Step-by-Step Tutorial: Creating Your Crochet Handbag
Let’s get started!
Step 1: Create the Base of Your Handbag
The base will determine the width and depth of your bag. We’ll be working in rows for the base, then turning to work around it to form the sides.
- Make a Slip Knot and Chain: Start with a slip knot on your hook. Chain the desired length for the width of your bag.
- Example: For a medium-sized bag, chain 26. (This will give you 25 working stitches in the next row).
- Tip: Make your starting chain a little loose to avoid a tight edge.
- Row 1 (Working back across the chain): Single crochet (sc) into the 2nd chain from your hook. Continue to single crochet in each chain across the row.
- Example: If you chained 26, you will have 25 sc stitches.
- Turning Chain and Row 2: Chain 1 (ch 1) and turn your work. Single crochet (sc) into the first stitch and in each stitch across the row.
- Repeat Rows: Repeat Row 2 until your base reaches the desired depth (front to back) of your bag.
- Example: For a base that is 4 inches deep, you might crochet 10-15 rows, depending on your tension and yarn.
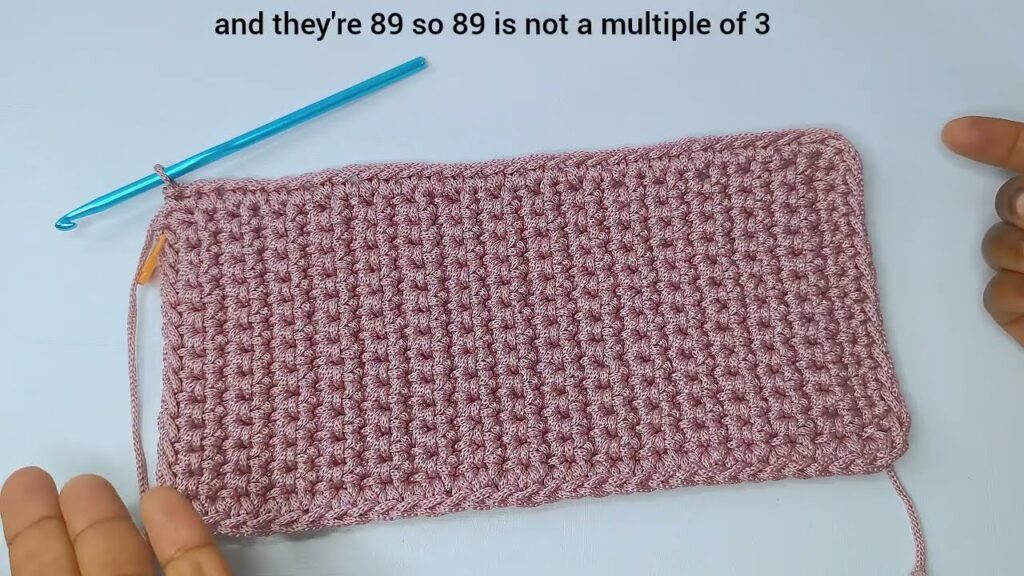
- You should now have a flat, rectangular piece.
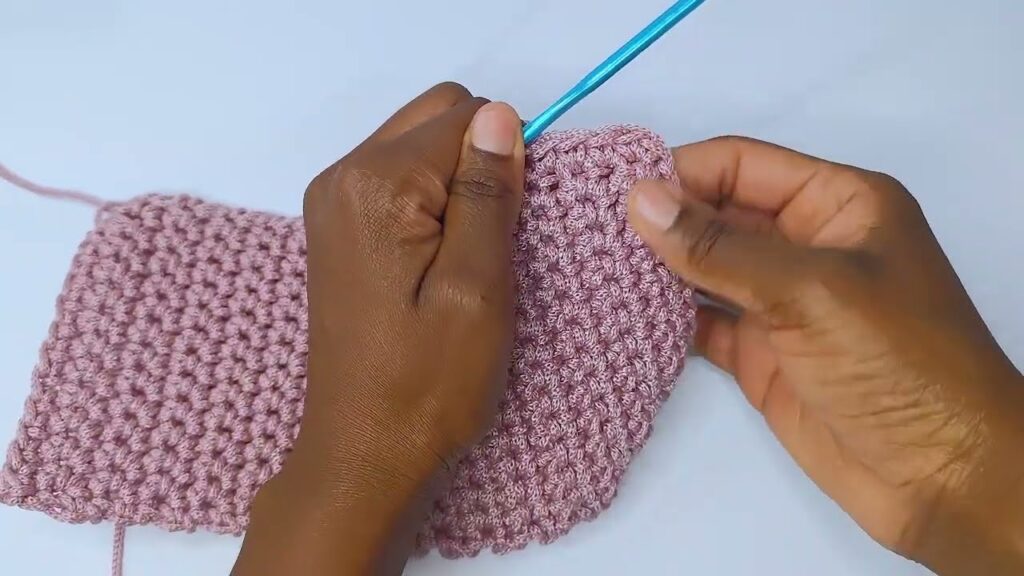
Step 2: Begin Working Up the Sides of the Handbag
Now, we’ll start crocheting in the round to build the height of your bag. This creates a seamless look.
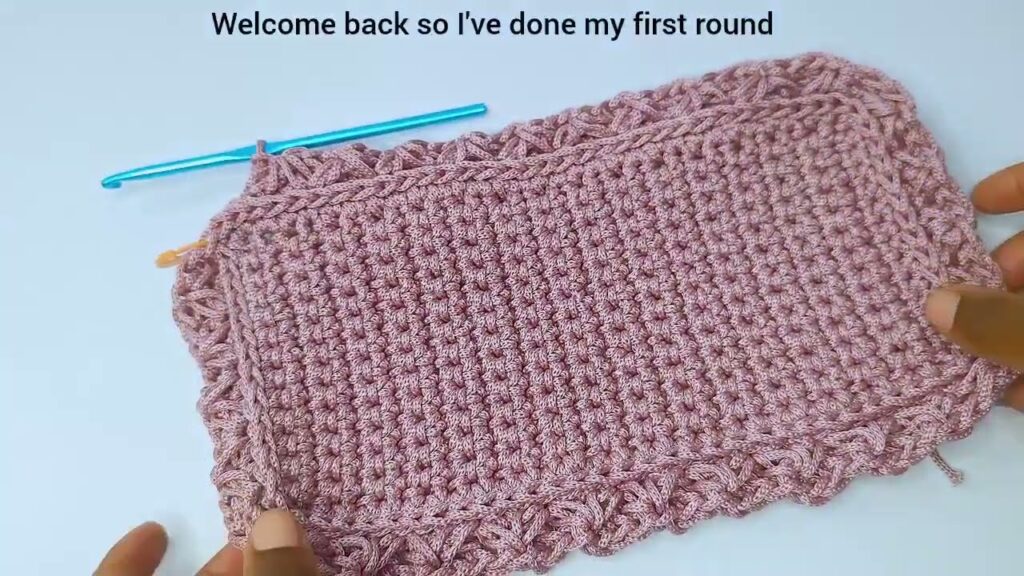
- First Round Around the Base: This step is crucial for shaping.
- After your last base row, do not turn.
- Chain 1 (ch 1).
- Single crochet (sc) evenly along the side edge of your base. Aim for one sc stitch per row. This can be a bit tricky, try to insert your hook into the end of each row.
- When you reach the corner: Place 3 single crochet stitches (3 sc) in the very last stitch of that side (or the corner of the base). This creates a neat turn.
- Single crochet (sc) along the long edge of the base (the opposite side of your starting chain). Work one sc into each stitch.
- When you reach the next corner: Place 3 single crochet stitches (3 sc) in that corner stitch.
- Single crochet (sc) evenly along the remaining short side edge. Aim for one sc stitch per row.
- When you reach the final corner: Place 3 single crochet stitches (3 sc) in that corner stitch.
- Single crochet (sc) along the remaining long edge (your starting chain side).
- Join with a slip stitch (sl st) to the first single crochet stitch of this round.
- This first round will define the perimeter of your bag. You should now have an oval shape if your base was rectangular, or a rounded square.
- Subsequent Rounds (Building Height):
- Chain 1 (ch 1).
- Single crochet (sc) in each stitch around the entire perimeter of the bag.
- Join with a slip stitch (sl st) to the first sc of the round.
- Repeat this round until your bag reaches the desired height.
- Tip: Use a stitch marker to mark the first stitch of each round so you know where to join. This helps prevent twisting.
Step 3: Creating the Handles (Option 1: Crocheted Handles)
There are several ways to add handles. Crocheted handles integrate seamlessly with your bag.
- Determine Handle Placement: Once your bag is at your desired height, decide where you want your handles to be. They should be equidistant from the sides and centered. Use stitch markers to mark the beginning and end points of where you don’t want to crochet for the handle opening.
- First Handle Side:
- Continue crocheting in single crochet (sc) as normal until you reach the stitch marker for the beginning of your first handle opening.
- Chain the desired length for your handle. (e.g., chain 30-50 stitches, depending on how long you want the handle to be).
- Skip the stitches between your two stitch markers (the opening for the handle).
- Single crochet (sc) into the stitch after your second stitch marker.
- Continue Around: Single crochet (sc) across the top of the bag until you reach the placement for your second handle.
- Second Handle Side: Repeat the chaining and skipping process for the second handle.
- Next Round (Securing Handles):
- Single crochet (sc) in each stitch around the bag, including into each chain of your handle chains. This will secure the handles to the bag.
- Continue for 1-3 more rounds of single crochet around the entire top of the bag and handles to reinforce them.
- Finishing Off: When you’re happy with the height and handle security, cut your yarn, leaving a 6-inch tail. Yarn over and pull the tail completely through the loop on your hook to fasten off. Weave in all loose ends neatly using your yarn needle.
Step 4: Adding Purchased Handles (Option 2: Purchased Handles)
If you’ve opted for pre-made handles (leather, bamboo, etc.), you’ll finish the top edge of your bag first.
- Finish the Top Edge: Once your bag is at the desired height, cut your yarn and fasten off. Weave in all ends.
- Attach Handles: Most purchased handles come with holes or loops for sewing.
- Position your handles evenly on the top opening of your bag.
- Using a strong needle and thread (matching your yarn or bag color), securely stitch the handles to the top edge of your crocheted bag. Go through the crochet fabric multiple times for durability.
Step 5: Optional: Adding a Lining
Adding a fabric lining can give your bag a more professional finish, provide extra durability, and prevent items from falling through stitches.
- Measure and Cut Fabric:
- Measure the dimensions of your finished crochet bag (width, height, and depth).
- Cut two pieces of fabric for the main body:
- Width: Bag width + 1 inch (for seam allowance)
- Height: (Bag height + Bag depth) + 1 inch (for seam allowance)
- Cut one piece for the base (if your bag has a distinct base):
- Width: Bag width + 1 inch
- Length: Bag depth + 1 inch
- Alternatively, you can create a simple fabric pouch that fits inside your bag.
- Sew the Lining:
- Fold each main fabric piece in half lengthwise, right sides together. Sew the side seams.
- For the base (if separate): Sew the base piece to the bottom edge of your main fabric body, creating a box shape.
- Press the seams open.
- Fold down the top edge of the lining fabric by about 1/2 inch and press, then fold down again by another 1 inch and press, creating a hem. Stitch this hem in place.
- Insert and Hand Stitch:
- Insert the finished fabric lining into your crochet bag, making sure it fits snugly.
- Pin the top edge of the lining to the inside top edge of your crochet bag, just below the last crochet row.
- Using a needle and strong thread (matching your bag), hand stitch the lining securely to the inside of your crochet bag. Use small, neat stitches.
Step 6: Optional: Adding a Closure (Magnetic Snap or Button)
- Magnetic Snap:
- Position the snap halves on the inside top edges of your bag, centered.
- Mark the prongs with a pen.
- Carefully push the prongs through the crochet fabric.
- Place the washer over the prongs on the inside and bend the prongs flat to secure.
- Button and Loop:
- Sew a decorative button securely to the front center of your bag, about 1-2 inches down from the top edge.
- On the back center of the bag (opposite the button), create a small chain loop (e.g., chain 10-15, depending on button size) that fits snugly over your button. Slip stitch it to secure.

Finishing Touches and Care:
- Weave in all loose ends: This is crucial for a professional-looking and durable bag. Use your yarn needle to carefully weave the tails through existing stitches.
- Block your bag (optional but recommended): If your bag is looking a bit floppy or uneven, blocking can help it hold its shape. Gently wet the bag, shape it, and let it air dry completely. For cotton, you can gently steam it.
- Care: Refer to your yarn label for specific washing instructions. Most crochet bags made with cotton can be hand washed in cool water and laid flat to dry.
Congratulations!
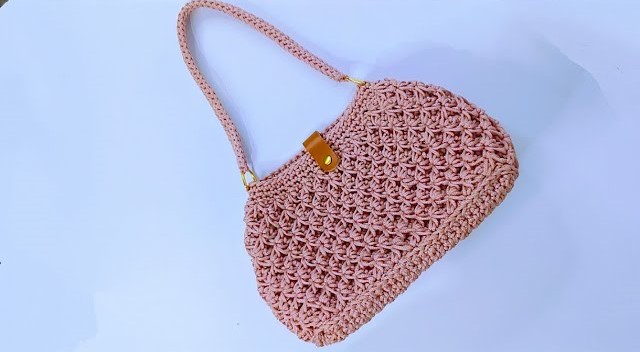
You’ve just crocheted your very own stylish handbag! Experiment with different yarn colors, stitch patterns, and embellishments to create a collection of unique bags that reflect your personal style. Enjoy carrying your handmade masterpiece with pride!
Video tutorial:


