
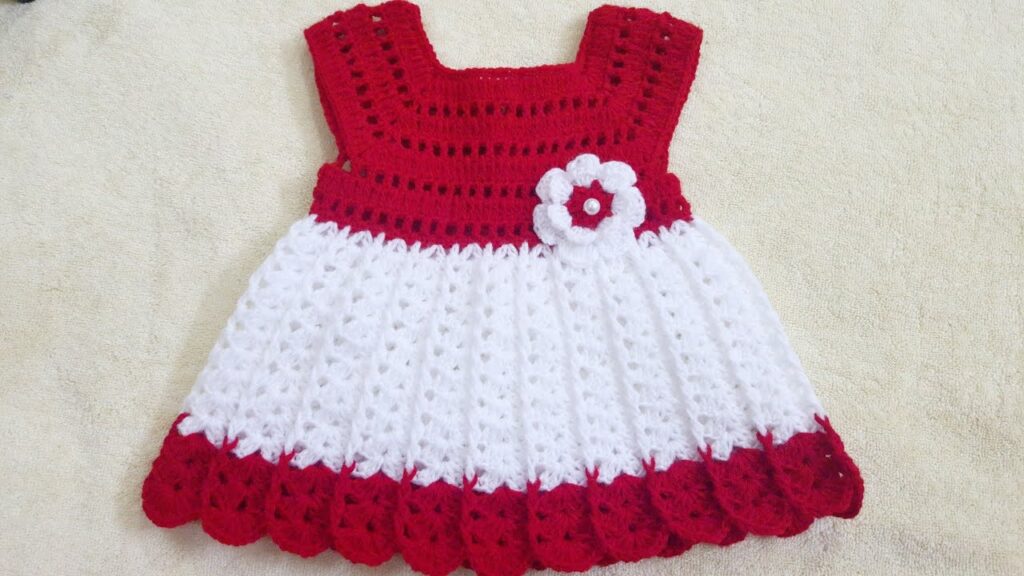
There’s something undeniably heartwarming about dressing a little one in a handmade item, and a crochet baby girl frock is a true labor of love. Imagine the soft yarn against delicate skin, the intricate textures, and the unique charm that only a handcrafted garment can offer. Whether you’re making one for your own baby, a gift for a loved one, or for an upcoming baby shower, crocheting a baby frock is a rewarding project that allows for endless creativity.
This article will guide you through the essential considerations and basic construction techniques for creating a beautiful and comfortable crochet baby girl frock.
Why Crochet a Baby Frock?
- Personalized Touch: You can choose the colors, yarn type, and design that perfectly suit your preferences or the baby’s personality.
- Unique Gift: A handmade frock is a thoughtful and cherished gift that stands out from mass-produced items.
- Comfort and Softness: With the right yarn, a crocheted frock can be incredibly soft and gentle on a baby’s sensitive skin.
- Creativity: From simple stitches to intricate lacework, crocheting offers a vast canvas for your artistic expression.
- Durability: Well-made crochet items can last for years and even become treasured heirlooms.
Essential Supplies for Your Baby Frock Project
Before you dive into crocheting, gathering the right materials is key to a successful and enjoyable experience:
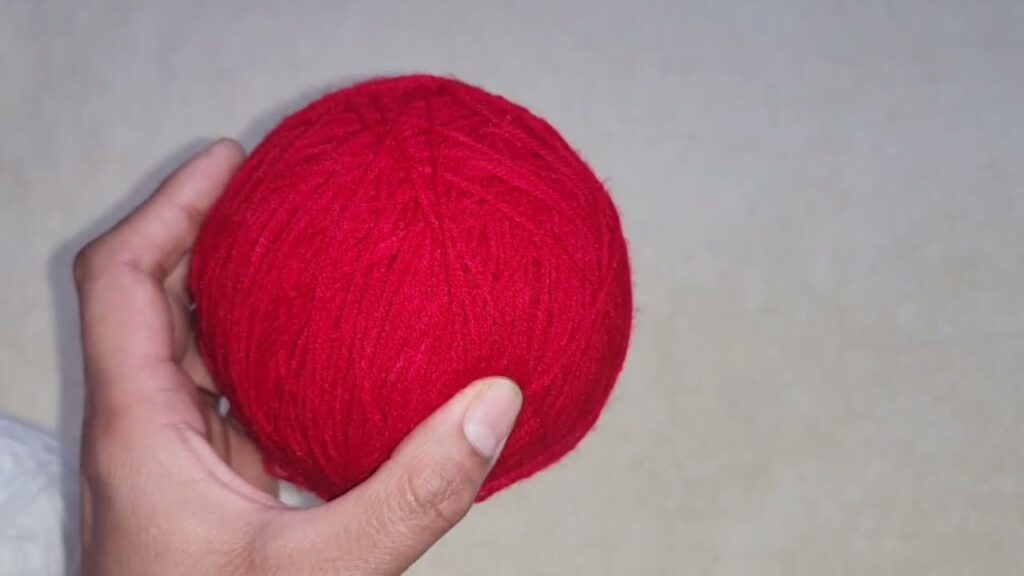
- Yarn: This is the most crucial element!
- Fiber Content: For baby items, softness is paramount. Look for yarns specifically labeled “baby yarn” or those made from:
- 100% Acrylic: Often very soft, durable, easy to wash, and hypoallergenic.
- Cotton or Cotton Blends: Breathable, soft, and great for warmer climates.
- Bamboo or Bamboo Blends: Silky soft, naturally antibacterial, and has excellent drape.
- Merino Wool (Superwash): Incredibly soft, warm, and often machine washable. Avoid regular wool for babies as it can be itchy.
- Weight: Light to medium weights are best for baby frocks to ensure they’re not too heavy or bulky. DK (Double Knitting/Light Worsted) or Sport weight are popular choices.
- Yardage: This will depend on the size of the frock and the complexity of the pattern. Always buy a little extra to be safe!
- Fiber Content: For baby items, softness is paramount. Look for yarns specifically labeled “baby yarn” or those made from:
- Crochet Hook: The size will depend on your chosen yarn weight and the desired drape of the fabric. The yarn label will recommend a hook size, but you might adjust it based on your gauge (see below).
- Tapestry Needle (Yarn Needle): Essential for weaving in ends and seaming.
- Scissors: For cutting yarn.
- Stitch Markers (Optional but Recommended): Helpful for marking the beginning of rounds, specific stitches, or pattern repeats.
- Measuring Tape: Crucial for checking gauge and ensuring your frock is the correct size.
- Buttons, Ribbons, or Embellishments (Optional): For closures or decorative touches. Choose baby-safe options (no small pieces that can be swallowed).
Understanding Gauge: The Key to a Perfect Fit
Gauge is arguably the most important step in any crochet garment project, especially for baby clothes. It determines the size and drape of your finished frock.
- Make a Swatch: Using your chosen yarn and hook, crochet a small square (at least 4×4 inches or 10×10 cm) using the main stitch pattern of your frock.
- Measure: Lay your swatch flat and measure how many stitches and rows you have within a 4-inch (10 cm) square.
- Adjust:
- If you have more stitches/rows than the pattern calls for, your stitches are too tight. Go up a hook size.
- If you have fewer stitches/rows, your stitches are too loose. Go down a hook size.
- Repeat until your gauge matches the pattern’s recommendation or your desired measurement.
Basic Construction Methods for Baby Frocks
Most crochet baby frocks follow one of two primary construction methods:

1. Top-Down Construction (Most Common and Beginner-Friendly)
This method starts at the neckline and works downwards, often in a single piece.
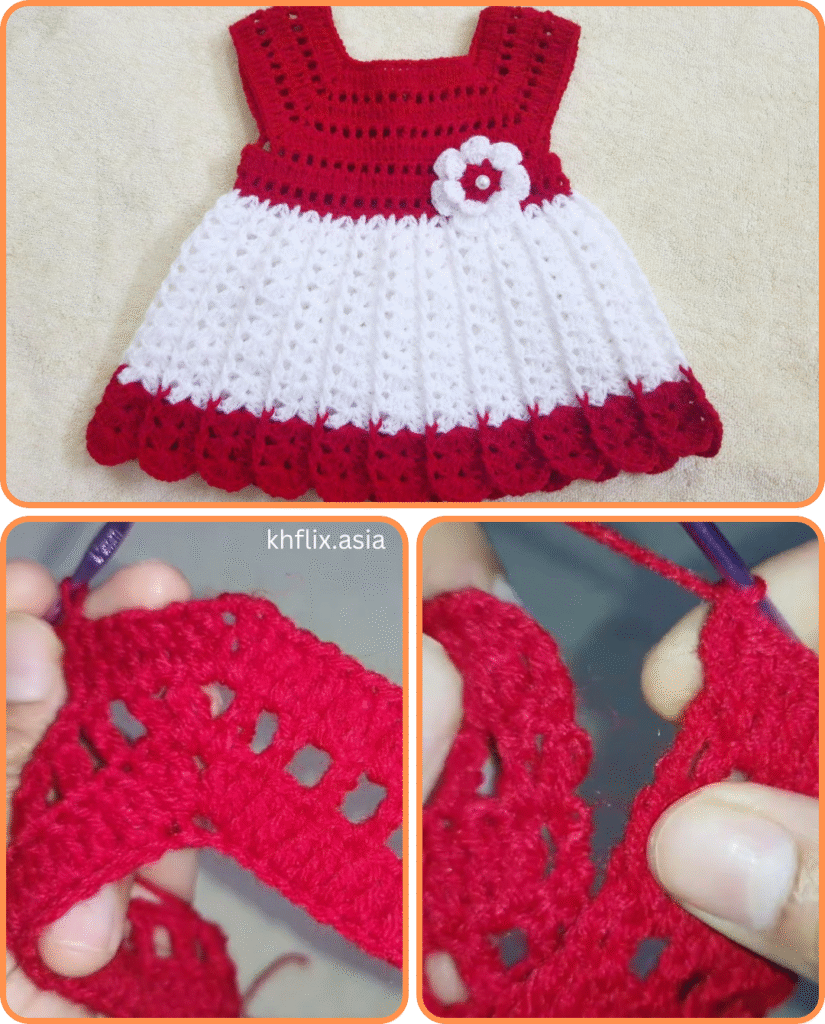
- Yoke: The top part of the frock, usually crocheted in the round. It begins with a chain for the neckline and increases are worked to shape the shoulders and armholes. Common yoke shapes include:
- Round Yoke: Increases are distributed evenly around the circle.
- Square/Raglan Yoke: Increases are worked at four specific points (corners) to create a square shape, which then forms the armholes and shoulders.
- Armholes: Once the yoke is large enough, stitches are skipped to create openings for the arms.
- Body: The main skirt part of the frock is then worked downwards from the yoke, often in continuous rounds. You can add increases for a fuller skirt or keep it straight for a simpler silhouette.
- Advantages: Minimal seaming, easy to try on as you go, and simple to adjust length.
2. Bottom-Up Construction
This method starts with the skirt and works upwards, usually in separate pieces or in the round.
- Skirt: The main body of the frock is crocheted first, either in the round or as a flat panel that’s later seamed.
- Bodice/Yoke: The top part is then crocheted and attached to the skirt. This might involve creating two separate front panels and a back panel, which are then seamed together.
- Sleeves (Optional): Sleeves are often crocheted separately and then sewn into the armholes.
- Advantages: Can allow for more complex skirt patterns or unique shaping for the bodice.
- Disadvantages: More seaming required.
Common Stitches for Baby Frocks
While any stitch can technically be used, some are more popular for their softness, drape, and visual appeal in baby garments:
- Single Crochet (SC): Creates a dense, sturdy fabric. Good for borders or structured parts.
- Half Double Crochet (HDC): A good balance of speed, drape, and density. Very versatile.
- Double Crochet (DC): Works up quickly and creates a looser, more drapey fabric. Excellent for a flowing skirt.
- Shell Stitch: Creates a beautiful, delicate, and often lacy texture, perfect for a special occasion frock.
- V-Stitch: Another simple yet elegant stitch that creates a lovely open pattern.
- Granny Stitch: Classic and charming, creates a lovely textured fabric.
Design Elements and Embellishments
This is where your creativity can truly shine!
- Color Choices: Pastels are traditional for baby girls, but don’t shy away from vibrant colors, ombré effects, or stripes!
- Sleeve Styles: Sleeveless for summer, short puff sleeves, or longer sleeves for cooler weather.
- Skirt Shape: A-line, full and gathered, or straight.
- Closures: Buttons (ensure they’re securely sewn and not too small), ties, or snap fasteners at the back or shoulder for easy dressing.
- Edging/Borders: A simple shell stitch, picot edge, or ripple border can add a beautiful finishing touch to the neckline, armholes, and hem.
- Appliques: Crocheted flowers, bows, or animal motifs can be sewn onto the frock for an extra adorable touch.
- Ribbons: Weave ribbon through a row of stitches at the waist or neckline.
Tips for Success
- Wash Your Swatch: For accurate gauge, wash and block your swatch the same way you plan to wash the finished frock, especially if using natural fibers.
- Read the Pattern Carefully: Before starting, read through the entire pattern to understand the construction and identify any unfamiliar stitches.
- Use Stitch Markers: They are invaluable for marking increases, decreases, the start of rounds, or specific sections.
- Count Your Stitches: Regularly counting your stitches, especially in the yoke and at the end of rounds/rows, will help maintain the correct shape and size.
- Weave in Ends as You Go: This is a small task that saves a lot of work at the end!
- Block Your Finished Frock: Blocking helps to even out stitches, relax the fabric, and give your frock a professional, polished look. Always follow the yarn care instructions for blocking.
- Safety First: When adding embellishments, ensure they are securely attached and safe for babies (no choking hazards).
Crocheting a baby girl frock is a delightful journey from a skein of yarn to a cherished garment. With careful attention to yarn choice, gauge, and basic construction, you’ll be able to create a beautiful and comfortable piece that will be treasured for years to come. Happy crocheting!
Detailed Conceptual Guide: Crafting a Top-Down Crochet Baby Girl Frock (Round Yoke)
Let’s break down the process of creating a beautiful crochet baby girl frock, step by step, using the popular top-down, round yoke method. This guide will provide the “how-to” framework, allowing you to adapt it with your chosen yarn, hook, and specific stitch patterns.
Before you start:
- Gauge Swatch: Seriously, make one! It determines your hook size and ensures the frock will fit. For a baby frock, aim for a soft, pliable fabric, not too stiff.
- Yarn & Hook: Have your chosen baby-friendly yarn and corresponding hook ready.
- Measurements: You’ll need an idea of standard baby sizes (e.g., newborn, 3-6 months, 6-12 months). Look up a baby size chart online to get approximate head circumference (for neck opening) and desired chest circumference/length.
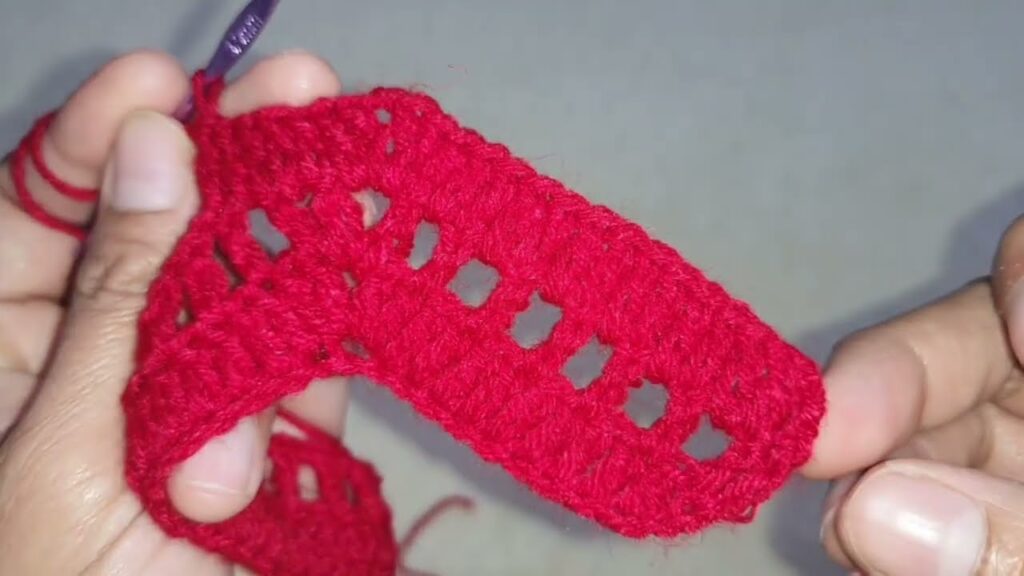
Phase 1: The Yoke (Top-Down, Round Construction)
The yoke is the most crucial part as it shapes the neckline, shoulders, and armholes. We’ll start with a foundation chain that forms the neckline.
Concept: You’ll start with a chain, join it into a circle, and then work rounds, increasing stitches evenly to create a flat, circular (or slightly oval) piece that will eventually drape over the baby’s shoulders.
Step 1: The Foundation Chain (Neckline)
- Determine Neck Circumference: This needs to be large enough to comfortably fit over a baby’s head, but not so loose that it sags. Refer to a baby size chart for average head circumference (e.g., 13-14 inches for newborn, 16-17 inches for 6-12 months).
- Chain Stitches: Chain a number of stitches that, when measured, equals the desired neckline circumference. Make sure the chain isn’t twisted before joining.
- Tip: Make sure your starting chain is loose enough. Crocheting too tightly here can make the neckline stiff.
- Join: Slip stitch (sl st) into the first chain to form a ring, being careful not to twist the chain.
- Chain up: Ch 2 (counts as first HDC in some patterns, or just a turning chain to bring yarn to height for HDC).
Step 2: Yoke Rounds – Building the Shoulders
This is where the magic of shaping happens. You’ll work HDC stitches and increase evenly in each round to make the circle grow.
General Principle of Increases: To make a flat circle, you need to increase a certain number of stitches evenly in each round. For HDC, a common increase rate is 6-12 stitches per round, depending on your gauge and desired rate of flare.
- Round 1: Work HDC stitches evenly around the foundation chain. The number of HDC stitches you make will be the number of stitches you started with in your chain.
- Example: If your chain was 60 stitches, you’ll make 60 HDC around.
- Sl st to join to the top of your starting ch-2 (or first HDC). Ch 2.
- Round 2 and Subsequent Yoke Rounds: This is where you introduce increases.
- You will work HDC stitches, and at regular intervals, you will work “2 HDC in the same stitch” (an increase).
- Example (Conceptual): If you started with 60 HDC and want to increase by 10 HDC per round:
- Round 2: HDC in next 5 stitches, 2 HDC in next stitch. Repeat … around (60 + 10 = 70 HDC). Sl st, ch 2.
- Round 3: HDC in next 6 stitches, 2 HDC in next stitch. Repeat … around (70 + 10 = 80 HDC). Sl st, ch 2.
- And so on… The number of HDC between increases will grow by one in each round to keep the increases evenly spaced.
- How Many Rounds? Continue crocheting rounds and increasing until the yoke measures roughly half of the baby’s desired chest circumference (from one side of the front to the other, or from center back to center back if laid flat).
- Fitting Check: You should be able to fold the yoke in half, and it should comfortably cover the top of the shoulders and approximate the armhole depth. It should also lie relatively flat. If it’s ruffling, you’re increasing too much; if it’s cupping, you’re not increasing enough.
Phase 2: Separating for Armholes & Shaping the Bodice
Once your yoke is the right size, you’ll divide the stitches for the front, back, and armholes.
Step 3: Dividing for Armholes
- Layout: Lay your circular yoke flat. Visually or with stitch markers, divide your total number of stitches into four sections:
- Back (1 section): Roughly 25% of stitches.
- First Armhole (1 section): Roughly 20-25% of stitches.
- Front (1 section): Roughly 30-35% of stitches (can be larger for more gathering, or split into two panels if you want a button front).
- Second Armhole (1 section): Roughly 20-25% of stitches.
- Self-Correction: The back and front sections should be slightly larger than the armhole sections. The sum should equal your total stitches.
- Crochet Across: You’ll crochet across the back section, chain some stitches for the armhole, skip the armhole stitches, crochet across the front section, chain for the second armhole, skip those stitches, and crochet across the remaining back section.
- Example (Conceptual for a Round Yoke):
- Ch 2 (or starting ch for HDC).
- HDC in the stitches designated for the back section.
- Chain for Armhole: Ch a small number of stitches (e.g., 2-4 for a newborn, more for larger sizes). This chain forms the “underarm” and adds width for comfort.
- Skip Armhole: Skip the designated armhole stitches on the yoke.
- HDC in the stitches designated for the front section.
- Chain for Second Armhole: Ch the same number of stitches as the first armhole chain.
- Skip Second Armhole: Skip the remaining designated armhole stitches on the yoke.
- HDC in the remaining stitches for the back section.
- Sl st to the beginning of the round (the first HDC you made in this step).
- Example (Conceptual for a Round Yoke):
Step 4: Bodice Rounds
Now you’re working on the main body of the frock, below the armholes.
- Work Evenly: Ch 2. HDC in each HDC stitch and in each chain stitch of the armholes around.
- Continue: Continue working rounds of HDC without increasing for a few rounds. This creates the “bodice” part of the frock, from the armpits down to just above the waist or where the skirt should begin to flare.
- Try on (carefully): If you have a doll or the baby nearby, you can try it on to check the fit and length of the bodice.
Phase 3: The Skirt (Flaring for Frock Shape)
This is where the frock gets its characteristic flare and charm!
Step 5: Increasing for the Skirt
You’ll need to increase stitches again to make the skirt widen. How much you increase will determine how full or flowing the skirt is.
- Start Flare: In the next round after your bodice rounds, begin increasing.
- Option 1 (Gradual Flare): Increase 1 HDC stitch every 5-10 stitches, or a consistent number (e.g., 10-20 stitches evenly distributed) in this first skirt round.
- Option 2 (Dramatic Flare): Use a different stitch pattern that naturally creates flare (like a shell stitch or a fan stitch) or increase more dramatically.
- Tip: You can increase every X number of rounds (e.g., increase every 3rd round) for a more subtle flare, or increase in every round for a very full skirt.
- Continue Working: Work rounds of HDC (or your chosen skirt stitch pattern), continuing to increase at regular intervals until the skirt reaches the desired width for the baby’s size.
Step 6: Skirt Length
- Work Evenly: Once you have the desired width for the skirt, continue working rounds of HDC (or your chosen stitch) without any further increases until the frock reaches the desired length.
- Measure from the baby’s shoulder down to where you want the hem to fall (e.g., mid-thigh, knee, or ankle).
Step 7: Finishing the Hem
- Final Round (Optional but Recommended): Work a final round or two of a simpler stitch like SC for a neat edge, or a decorative border like a picot stitch or a small shell stitch repeat. This adds stability and a finished look to the hem.
- Fasten Off: Cut your yarn, leaving a tail, and pull it through the loop on your hook to secure.
Phase 4: Finishing Touches
These details elevate your handmade frock.
Step 8: Finishing the Armholes & Neckline
- Armholes: Join yarn at the underarm of one armhole. Work rounds of SC or HDC evenly around the armhole opening to create a neat edge. This also helps to tighten any gaps. Sl st to join, fasten off. Repeat for the other armhole.
- Neckline: Join yarn at the back of the neckline. Work rounds of SC evenly around the neckline. This makes the neckline sturdy and neat. You might do 1-2 rounds of SC. Sl st to join, fasten off.
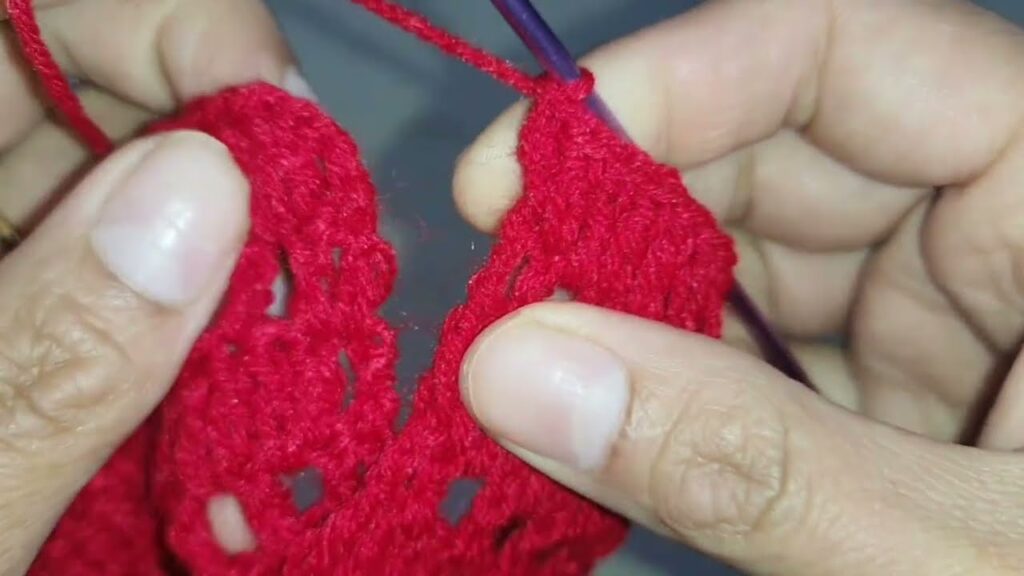
Step 9: Weave in Ends
Using your tapestry needle, carefully weave in all loose yarn tails. Go in multiple directions to secure them completely and make them invisible. This is crucial for a professional look and for durability.
Step 10: Embellishments & Closure (Optional)
- Buttons/Snaps: If you designed a split back or shoulder opening for easier dressing, sew on baby-safe buttons or snaps securely.
- Ribbon: Weave a ribbon through a row of stitches around the waistline or just below the yoke for a pretty detail.
- Crochet Appliques: Make small crocheted flowers, bows, or leaves and securely sew them onto the frock.
- Blocking: This is highly recommended for baby clothes!
- Gently wet the finished frock (following your yarn’s care instructions).
- Carefully shape it to its desired dimensions on a clean, dry surface or blocking mats.
- Allow it to dry completely. Blocking evens out stitches, opens up lacework, and gives a professional drape.
Key Considerations for Baby Frocks:
- Softness: Always prioritize soft, non-irritating yarns.
- Ease of Dressing: Consider adding buttons or snaps at the shoulder or back if the head opening is tight for easier dressing.
- Safety: Ensure all embellishments are securely attached and pose no choking hazards. Avoid small buttons or beads for very young babies.
- Washability: Choose machine-washable yarns for practicality.
By following this detailed conceptual guide, you’ll have a strong understanding of how to construct a beautiful and easy top-down crochet baby girl frock. Remember to consult specific patterns for precise stitch counts and shaping, but this framework will give you the confidence to start! Happy crocheting!
Video tutorial:


