
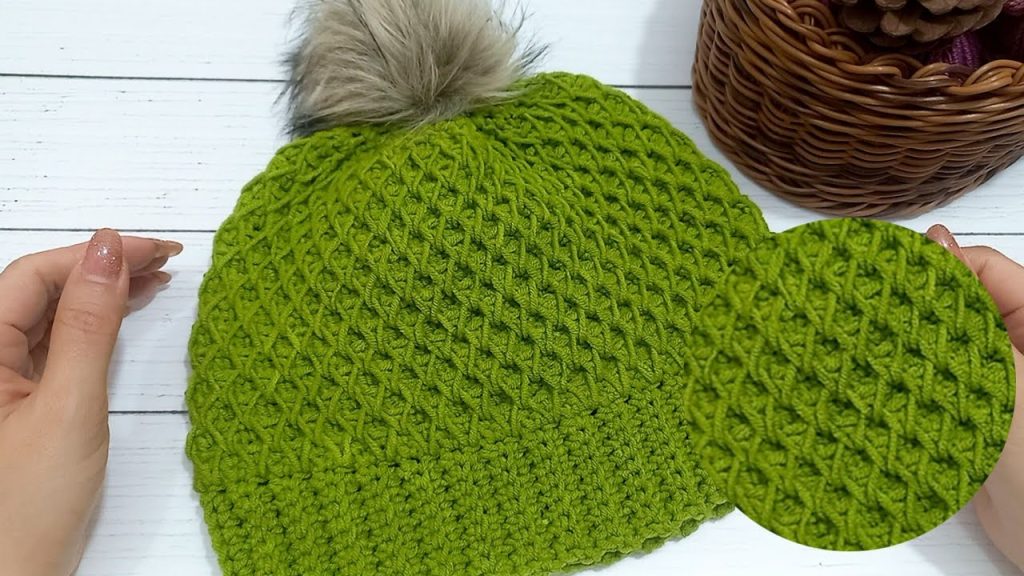
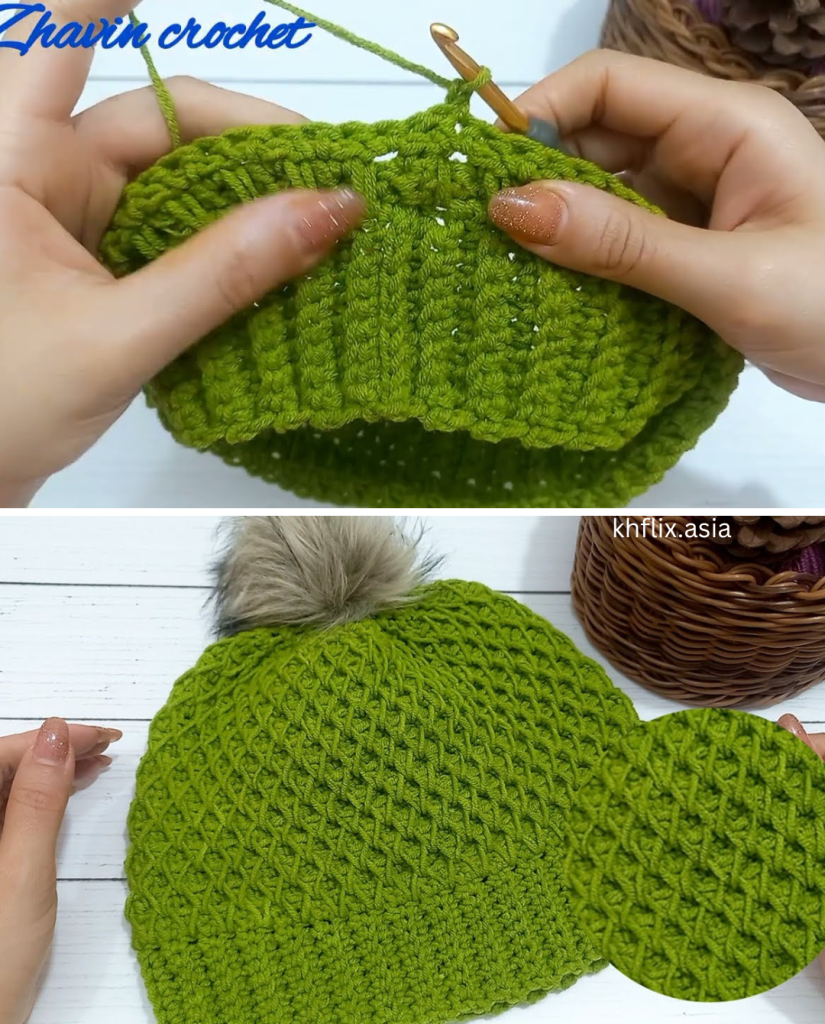
Are you looking for a crochet project that results in a gorgeous, intricate texture without being overly complicated? The Honeycomb Stitch is a favorite for a reason! It creates a dense, warm fabric perfect for winter wear, and it’s deceptively simple, relying on a four-round repeat of alternating spike stitches and joining techniques.
This pattern is constructed from the bottom up, starting with a ribbed brim that provides elasticity and a secure fit, and then transitioning seamlessly into the main body of the hat.
Pattern Details
- Size: Adult (One Size Fits Most)
- Circumference: Approx. 20–22 inches (can be adjusted)
- Height: Approx. 9–10 inches (before pom pom)
- Skill Level: Intermediate (due to turning/joining rounds and special stitches)
- Construction: Bottom-Up
Materials You Will Need
| Item | Details & Notes |
| Yarn | Worsted Weight (Category 4) yarn (The example uses a worsted weight yarn). |
| Hook A (Brim) | 4.5 mm crochet hook (for the brim). |
| Hook B (Body) | 5.0 mm crochet hook (for the body). |
| Notions | Scissors, tapestry needle for weaving in ends, and a pom pom (optional). |
Stitches and Abbreviations
| Abbreviation | Stitch Name |
| Ch | Chain |
| St(s) | Stitch(es) |
| Sl st | Slip Stitch |
| Sc | Single Crochet |
| BLO sc | Back Loop Only Single Crochet |
| Sc2tog | Single Crochet Two Stitches Together (Decrease) |
| SpSc | Spike Single Crochet: A single crochet made into the corresponding stitch two rounds below. |
| Jsc | Join Single Crochet: A decrease made by inserting the hook under one loop of a stitch, then under one loop of the next stitch, then pulling a loop through both, and completing the single crochet. |
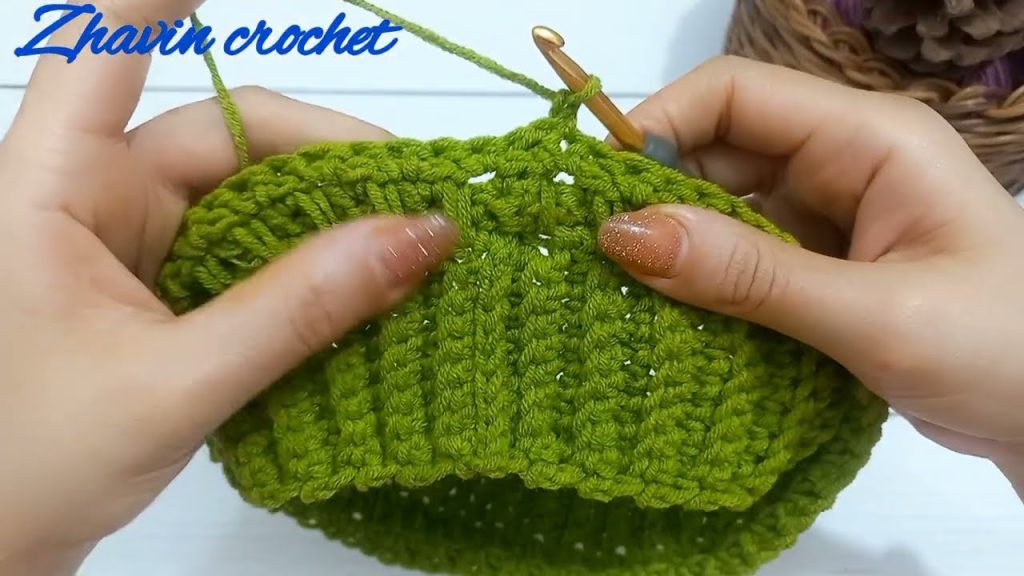
Part 1: The Ribbed Brim
Note: Work the brim with Hook A (4.5 mm). The number of rows determines the circumference of your hat. Ensure the total number of rows is a multiple of two.
Starting Chain:
Make a slip knot and Chain 10.
Row 1:
Skip the first chain from the hook. Sc into the next 9 chains. Ch 1, turn. (9 sts total).
Row 2:
Sc into the first stitch (under both loops). BLO sc into the next 7 stitches. Sc into the last stitch (under both loops). Ch 1, turn. (9 sts total).
Repeat:
Repeat Row 2 until the band measures the desired circumference of your head. The example pattern uses 70 rows.
Joining the Brim
Once the desired length is reached, you will join the first and last rows to form a loop.
- Turn the work so the beginning loop is at the bottom. Place the two short edges together.
- Insert hook into the remaining loop of the first stitch of Row 1 (the starting row) and pull the working loop through (like a slip stitch join).
- Ch 1. Insert hook back into the same loop of Row 1, then into the back loop of the front stitch from the last row, and make a Sl st.
- Repeat the Sl st join across all 9 stitches to create an invisible join.
- Do NOT turn the work after joining.
Part 2: The Hat Body (Honeycomb Stitch)
Note: Switch to Hook B (5.0 mm) after the join. The Honeycomb Stitch starts with a foundation round and then alternates between two unique four-round repeats.
Foundation Rounds
Round 1 (Foundation):
- Ch 1. (Do not turn).
- Make 1 Sc at the top of each row of the brim (around the tube). You will make 1 Sc into the space of each row. (For the example, this is 70 Sc).
- Sl st into the beginning Sc to join.
Round 2:
- Ch 1, turn the work to the right side.
- Sc in the joining stitch. Sc in each St around. (70 Sc).
- Sl st into the beginning Sc to join.
The Honeycomb Stitch Pattern
This pattern is a repeat of Rounds 3–6.
Round 3 (Spike/Sc Round):
- Ch 1, turn the work to the wrong side.
- Sc into the joining slip stitch/base of the Ch 1.
- *SpSc into the base of the next stitch (two rounds below, R1). Skip the stitch behind the SpSc. Sc into the next stitch.**
- Repeat from * to the end of the round. The last stitch should be a SpSc.
- Sl st to the beginning Sc to join.
Round 4 (Join Round):
- Ch 1, turn the work to the right side.
- Skip the joining slip stitch.
- Sc into the top of the next SpSc (the first visible stitch).
- *Jsc over the next two loops: (1) the left loop of the current SpSc, and (2) the right loop of the next SpSc. Sc into the top of the next Sc.**
- Repeat from * to the end. The last Jsc will use the last loop of the final SpSc and the first loop of the beginning SpSc (the skipped loop from the start).
- Sl st to the beginning Sc to join.
Round 5 (Spike/Sc Round 2 – Offset):
- Ch 1, turn the work to the wrong side.
- Skip the joining slip stitch.
- *SpSc into the base of the next stitch (two rounds below, R3), inserting the hook to exit between the two loops of the SpSc from R3. Sc into the next stitch.**
- Repeat from * to the end. The last stitch should be a normal Sc.
- Sl st to the beginning SpSc to join.
Round 6 (Join Round 2 – Offset):
- Ch 1, turn the work to the right side.
- Skip the joining slip stitch.
- Jsc over the next two loops: (1) the second loop of the previous SpSc, and (2) the first loop of the next SpSc.
- *Sc into the top of the next Sc. Jsc over the next two loops: (1) the second loop of the current SpSc, and (2) the first loop of the next SpSc.**
- Repeat from * to the end. The last stitch should be a normal Sc.
- Sl st to the beginning Jsc to join.
Body Repeat:
Repeat Rounds 3-6 until the piece measures your desired height (excluding the crown). The example repeated the 4-round sequence seven more times, ending on a Round 6.
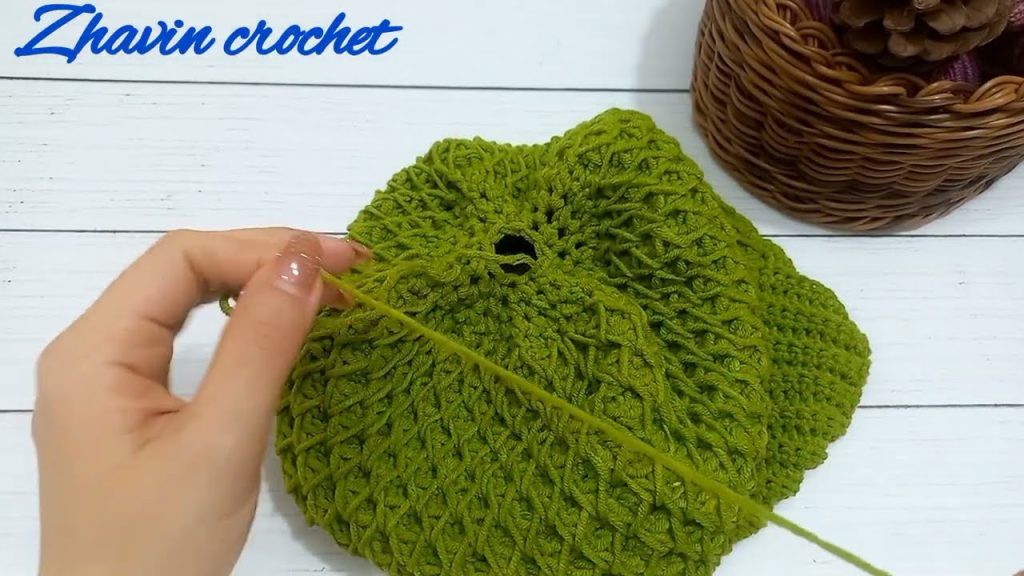
Part 3: Crown Shaping
Note: Continue with Hook B (5.0 mm). Do NOT turn the work for the crown shaping rounds.
Round 1 (Decrease):
- Ch 1.
- Sc2tog over the first two stitches.
- Continue making Sc2tog around the entire round. (You will reduce the stitch count by approximately half).
- Sl st into the beginning Sc2tog to join.
Round 2 (Decrease):
- Ch 1.
- Repeat Sc2tog around the entire round.
- Sl st into the beginning Sc2tog to join.
Round 3 (Optional Decrease):
If the hole at the top is still too large, repeat Round 2 one more time.
Part 4: Finishing
- Cut the yarn, leaving a long tail (at least 12–18 inches).
- Pull the tail through the last loop to secure the yarn.
- Thread the tail onto a tapestry needle.
- Weave the needle through the front loop of every remaining stitch around the final round.
- Once you have passed the needle through all the remaining loops, gently pull the tail tight to completely close the hole at the crown.
- Secure the hole with a few extra stitches on the wrong side of the hat.
- Weave in all remaining ends.
- Attach a handmade or faux fur pom pom to the crown if desired.
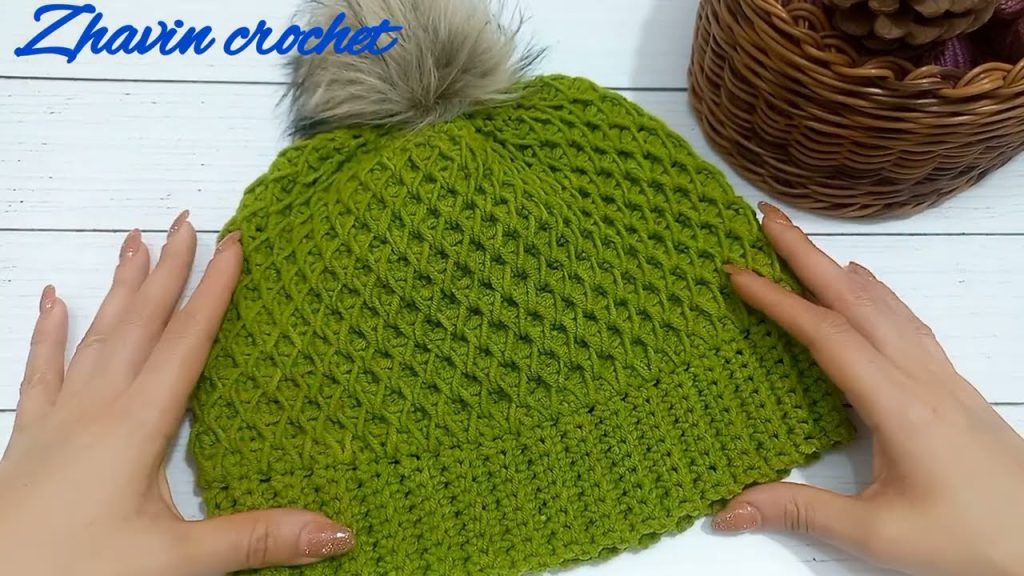
Your beautiful, textured Winter Hive Beanie is complete! Enjoy your new warm hat.
Video tutorial:


