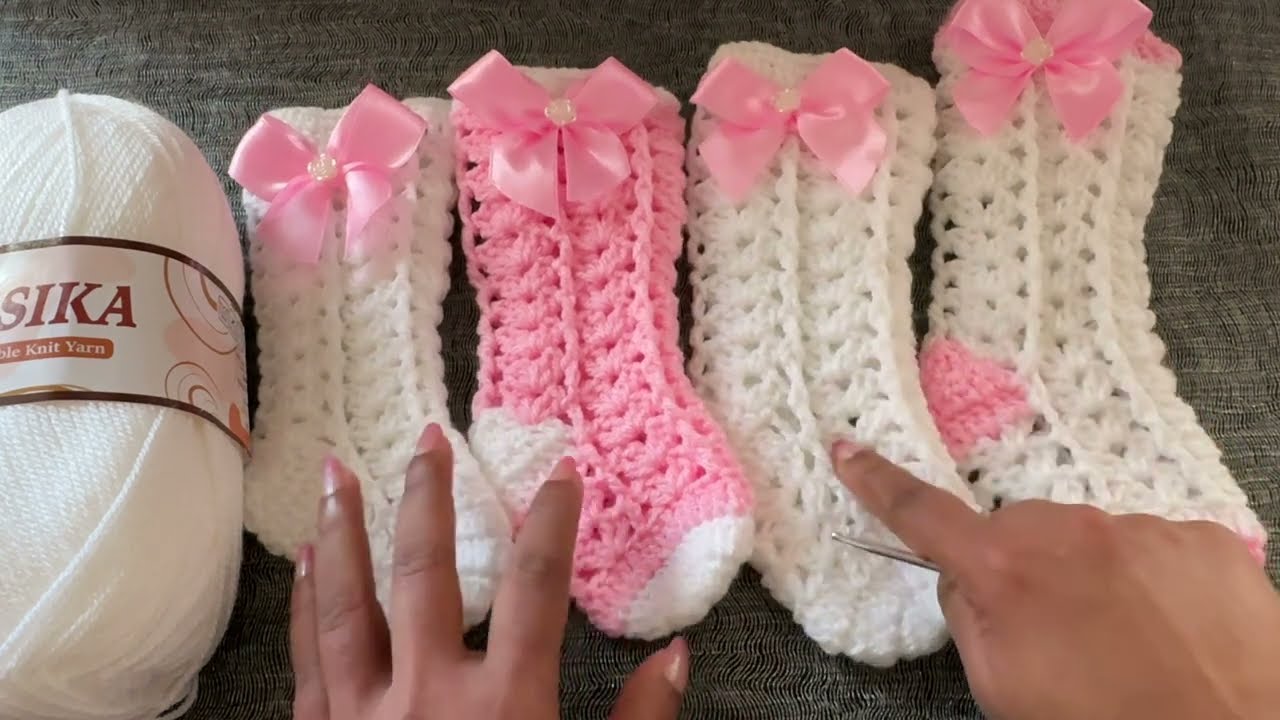
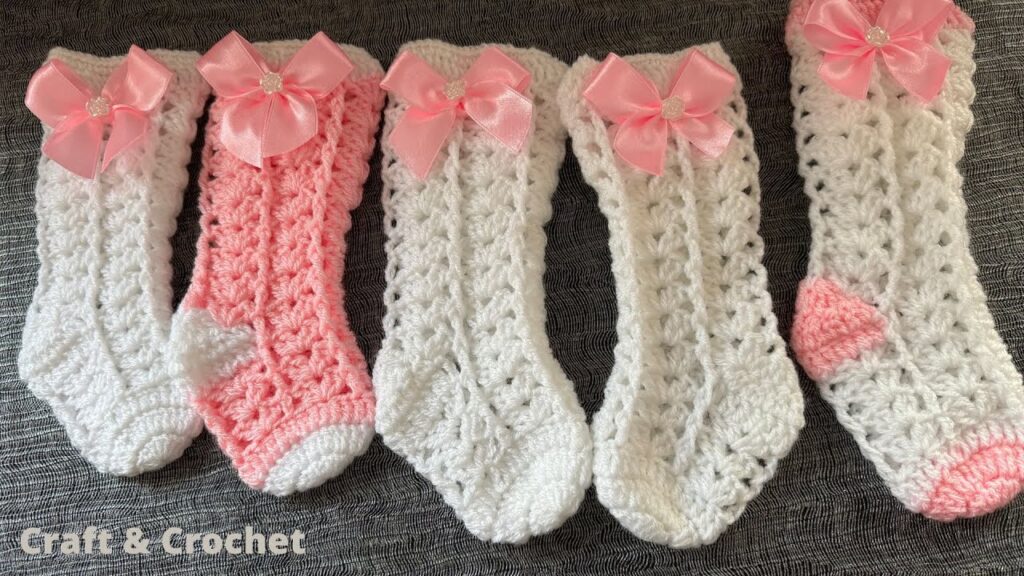
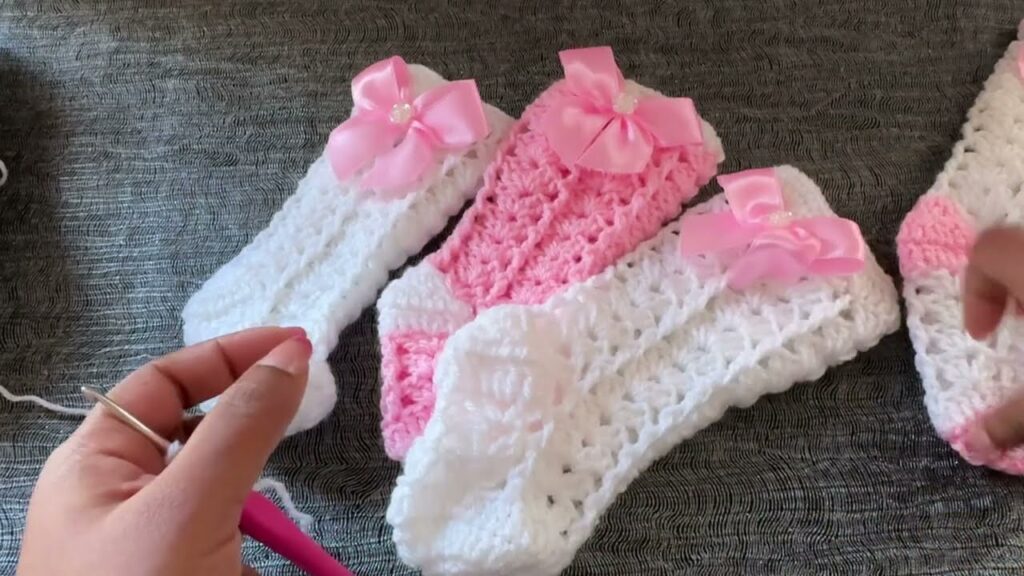
Cradling tiny feet in handmade warmth is one of the most delightful crochet projects. Baby socks are quick to make, use minimal yarn, and are an incredibly sweet and practical gift. This detailed guide will show you how to create easy crochet baby socks in four different sizes, ensuring you have a perfect fit for any little one, from newborn to toddler.
We’ll focus on a beginner-friendly approach, typically starting from the toe and working our way up, or working a simple rectangle and seaming. The goal is comfort, ease of construction, and of course, undeniable cuteness!
Why Crochet Baby Socks? 🌸
- Adorable Factor: Tiny socks are just inherently cute and make any outfit extra special.
- Quick Project: Many baby sock patterns can be completed in an hour or two, making them ideal for last-minute gifts or when you need a quick crafting fix.
- Stash Buster: They use very little yarn, perfect for using up those small leftover skeins.
- Personalized Gift: Handmade socks convey love and care, a truly thoughtful present for baby showers or welcoming a new arrival.
- Skill Building: You’ll practice fundamental techniques like working in the round, shaping, and basic seaming.
- Practical: Keeping tiny feet warm is essential, and handmade socks are often softer and more unique than store-bought options.
Key Considerations Before You Start:
- Yarn Choice (🌸 Crucial for Babies!):
- Fiber: Always prioritize softness, breathability, and washability. Acrylic, superwash merino wool, or cotton blends are excellent. Avoid anything that might feel scratchy or cause irritation.
- Weight: Light Worsted (DK/Category 3) or Worsted (Category 4) are most common. DK yarn will result in a lighter, thinner sock, while worsted will be cozier.
- Quantity: You’ll need very little! Often less than 50 grams (one small ball) per pair.
- Color: Fun pastels, bright pops of color, or variegated yarns all look lovely.
- Hook Size:
- Match your hook to your yarn weight, but lean towards the smaller end of the recommended range to create a denser fabric. This helps the socks hold their shape and stay on tiny feet.
- For DK yarn: C/2 (2.75 mm) to E/4 (3.5 mm)
- For Worsted yarn: G/6 (4.0 mm) to H/8 (5.0 mm)
- Gauge (Important for Sizing!):
- For socks, gauge is important to ensure they fit correctly. Make a small swatch (e.g., 10 dc or hdc stitches for 5 rows) and measure it. Compare it to the pattern’s suggested gauge. Adjust your hook size if necessary.
Measurements for Four Sizes (Approximate Foot Length):
These are standard approximations. Always remember that babies’ feet vary!
- Size 1: Newborn (0-3 months): Foot length approx. 3.0 – 3.5 inches (7.5 – 9 cm)
- Size 2: 3-6 Months: Foot length approx. 3.5 – 4.0 inches (9 – 10 cm)
- Size 3: 6-12 Months: Foot length approx. 4.0 – 4.5 inches (10 – 11.5 cm)
- Size 4: 12-18 Months: Foot length approx. 4.5 – 5.0 inches (11.5 – 12.5 cm)
Essential Crochet Abbreviations:
- ch: chain
- sl st: slip stitch
- sc: single crochet
- hdc: half double crochet
- dc: double crochet
- inc: increase (e.g., 2 sc in one st)
- dec: decrease (e.g., sc2tog – single crochet 2 together)
- st(s): stitch(es)
- BLO: back loop only
- FLO: front loop only
- (): indicates the number of stitches at the end of the round/row
- ***…***: repeat instructions within asterisks

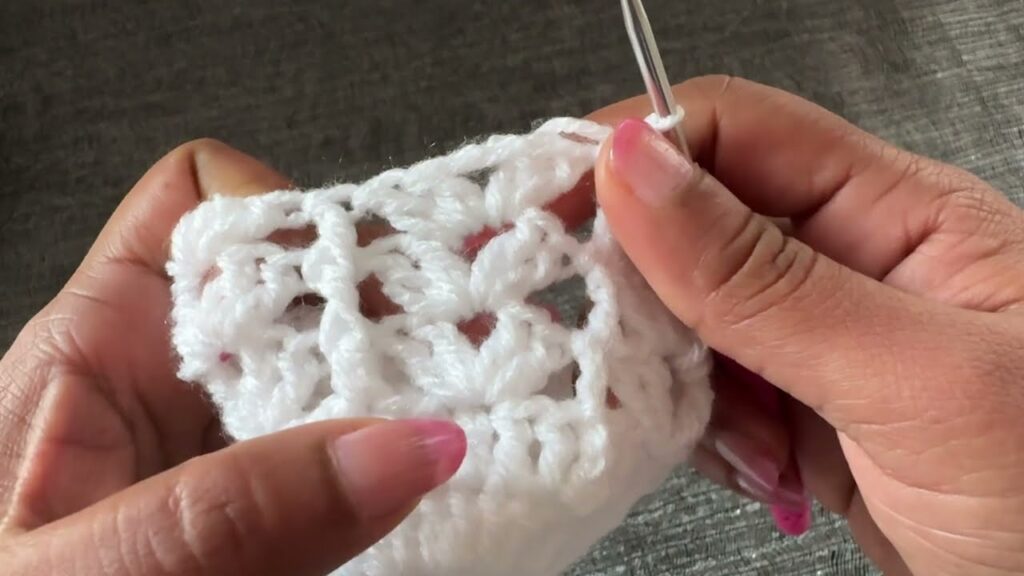
Easy Crochet Baby Socks Pattern (Toe-Up Method with Hdc) 🌸
This pattern is designed to be very straightforward, using primarily half double crochet (hdc) for a good balance of speed and fabric density. It’s worked in continuous rounds where indicated, meaning you don’t join with a slip stitch at the end of each round (unless specified). Use a stitch marker to keep track of your first stitch.
Yarn: DK or Worsted Weight (see hook suggestions below) Hook: E/4 (3.5 mm) for DK, G/6 (4.0 mm) for Worsted (Adjust for gauge!)
Size Chart & Initial Toe Stitches:
| Size (Months) | Initial Hdc in MR | Rounds for Toe Increase (Number of hdc in final toe round) | Rounds for Foot (Straight hdc rounds) |
|---|---|---|---|
| 0-3 | 8 hdc | R1: 8, R2: 16 | 8 rounds (16 hdc per round) |
| 3-6 | 8 hdc | R1: 8, R2: 16, R3: 20 | 10 rounds (20 hdc per round) |
| 6-12 | 10 hdc | R1: 10, R2: 20, R3: 24 | 12 rounds (24 hdc per round) |
| 12-18 | 10 hdc | R1: 10, R2: 20, R3: 24, R4: 28 | 14 rounds (28 hdc per round) |
Instructions for ALL Sizes:
Part 1: The Toe (Worked in continuous rounds)
- Magic Ring (MR): Create a magic ring.
- Round 1: Ch 1 (does NOT count as a stitch). Work the “Initial Hdc in MR” quantity from the chart above into the MR. Pull the tail tight to close the ring.
- Place stitch marker in the first hdc of this round.
- Round 2: Hdc inc in each stitch around.
- Move stitch marker to the first hdc of the new round.
- Subsequent Toe Increase Rounds (Refer to chart for your size):
- Work the increase rounds as per the chart. A common increase pattern is to hdc in X stitches, hdc inc in next st around.
- Example for 3-6 months (ending with 20 hdc):
- Round 1: 8 hdc in MR (8)
- Round 2: Hdc inc in each st around (16)
- Round 3: Hdc in next 3 st, hdc inc in next st around (20)
- Continue moving your stitch marker.
Part 2: The Foot (Straight Rounds – no increases/decreases)
- Next Round: Hdc in each stitch around.
- Continue moving your stitch marker.
- Repeat: Work the number of “Rounds for Foot” from the chart above. This creates the main length of the foot.
Part 3: The Heel (Worked in rows, back and forth)
- This part forms the heel and is created by working decreases.
- Heel Stitch Count: Your total stitch count for the foot will be divided for the heel. We’ll work on roughly half the stitches for the heel flap.
- For 0-3 months (16 sts): Work heel over 8 stitches.
- For 3-6 months (20 sts): Work heel over 10 stitches.
- For 6-12 months (24 sts): Work heel over 12 stitches.
- For 12-18 months (28 sts): Work heel over 14 stitches.
- Preparation for Heel:
- Count the number of stitches for your heel (see above).
- Sc in the first stitch (this anchors your yarn) from where your current round ended.
- Hdc in the next X stitches (X is your heel stitch count – 1). This is your first heel row.
- Ch 1, turn. (Does NOT count as a stitch).
- Heel Decrease Row 1:
- Dec (hdc2tog) over the first 2 sts. Hdc in each st until the last 2 sts. Dec (hdc2tog) over the last 2 sts.
- Ch 1, turn.
- Heel Straight Row 1: Hdc in each stitch across.
- Ch 1, turn.
- Heel Decrease Row 2 (if needed for larger sizes): Repeat Heel Decrease Row 1.
- Ch 1, turn.
- Heel Straight Row 2 (if needed for larger sizes): Hdc in each stitch across.
- Ch 1, turn.
- Heel Completion: You want the heel section to end with 4-6 stitches.
- 0-3 months (8-stitch heel): Just one decrease row should leave you with 6 sts.
- 3-6 months (10-stitch heel): One decrease row = 8 sts. One more decrease row = 6 sts.
- 6-12 months (12-stitch heel): One decrease row = 10 sts. One more decrease row = 8 sts. One more decrease row = 6 sts.
- 12-18 months (14-stitch heel): One decrease row = 12 sts. One more decrease row = 10 sts. One more decrease row = 8 sts. One more decrease row = 6 sts.
- Once your heel section has 4-6 stitches, you’re ready to seam it up.
- Seaming the Heel:
- Fold your heel flap in half, wrong sides together.
- Working through both thicknesses, sl st across the 4-6 stitches to close the heel.
- DO NOT fasten off.
Part 4: The Ankle/Cuff (Worked in rounds)
- Next Round: Ch 1 (does NOT count as a st).
- Sc evenly around the ankle opening (this includes the top of the heel flap and the remaining stitches of the foot section that were not part of the heel).
- Aim for approximately 2 sc per hdc row on the sides of the heel flap, and 1 sc per stitch for the main foot section.
- Join with a sl st to the first sc of the round.
- Next Rounds (Cuff Height): Ch 1. Sc in each stitch around. Join with a sl st to the first sc.
- Repeat this round:
- 0-3 months: 4-5 rounds
- 3-6 months: 5-6 rounds
- 6-12 months: 6-7 rounds
- 12-18 months: 7-8 rounds
- You can add or subtract rounds here for a shorter or longer cuff.
- Repeat this round:
- Optional Ribbed Cuff (more advanced, but nice!):
- Instead of plain sc rounds, work: Ch 1. Sc in the BLO of each stitch around. Join with a sl st. Repeat for 2-3 rounds. This creates a stretchy, ribbed effect.
Part 5: Finishing
- Fasten off: Cut your yarn, leaving a tail about 6 inches long. Yarn over and pull the tail completely through the loop on your hook to secure.
- Weave in All Ends: Thread your yarn needle with each yarn tail and carefully weave them into the inside of your sock stitches.
- Make a Second Sock! Repeat all steps to create a matching pair.

Congratulations! Your Easy Crochet Baby Socks are Complete! 🌸
Tips for Success & Customization:
- Practice with the Magic Ring: If you’re new to it, practice a few times. It creates a much neater toe than chaining.
- Stitch Markers are Your Best Friend: Especially when working in continuous rounds and for marking heel stitches.
- Tension is Key: Consistent, snug (but not overly tight) tension will make your socks hold their shape better and look neater.
- Yarn Choices: Experiment with different colors! Striped socks are adorable with simple color changes between rounds.
- Add Embellishments:
- Sew on a small flower applique or a tiny crocheted bow.
- Add a decorative button on the ankle.
- Embroider a small initial.
- Adjusting Size:
- Wider Foot: Add more increase rounds at the toe, or add more initial stitches in the magic ring, ensuring the final stitch count is still even.
- Longer Foot: Add more “straight” rounds in Part 2 before starting the heel.
- Tighter Ankle: Use a smaller hook for the ankle/cuff section, or try working single crochet instead of half double crochet.
- Care: Always check your yarn label for specific washing instructions. Most baby-friendly yarns are machine washable, which is ideal!
Crocheting baby socks is a truly heartwarming experience, and seeing those tiny feet in your handmade creations is incredibly rewarding. Enjoy making these little treasures!
Video tutorial:


