
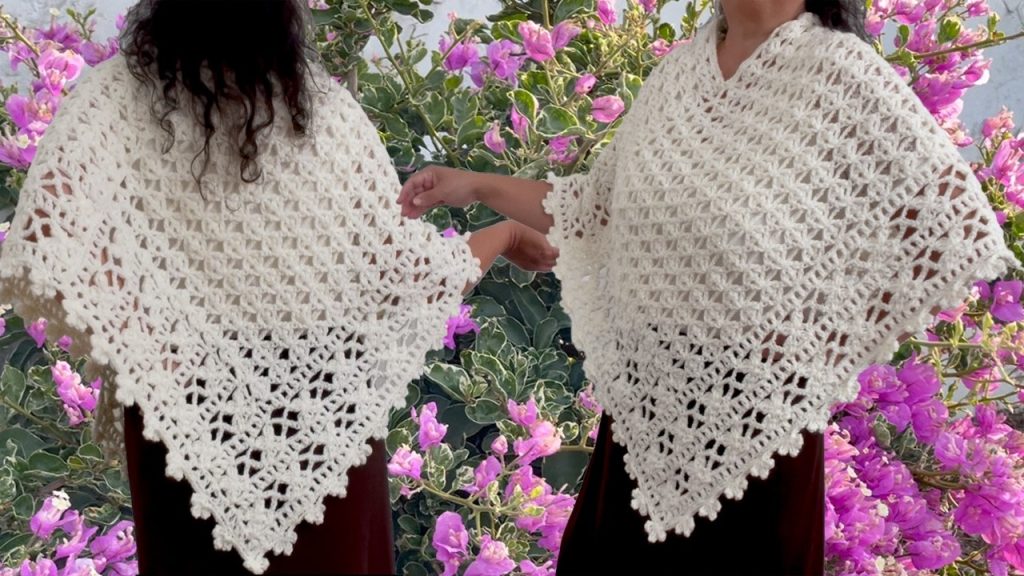
If you’re new to crochet or simply want a straightforward project, this two-rectangle poncho is the perfect beginner-friendly garment. With no complicated shaping, no sleeves, and no fuss, you’ll end up with a beautiful, cozy, and stylish poncho that looks much more advanced than it is.
In this tutorial, we’ll walk you through everything you need to know, from materials to finishing touches. Let’s get started!
✨ Why This Project is Great for Beginners
- No increasing or decreasing – just basic rectangles.
- Customizable size – adjust length or width easily.
- Flexible design – can be worn in multiple ways.
- Perfect for learning stitches – great practice project.
- No sewing machine needed – just a yarn needle.
📋 Materials You’ll Need
- Worsted weight yarn (or any yarn you like)
- Approx. 800–1200 yards depending on size and yarn thickness
- Crochet hook matching your yarn (check the yarn label)
- Usually 5.0mm (H-8) for worsted weight
- Yarn needle (for seaming and weaving ends)
- Scissors
- Stitch markers (optional but helpful)
📏 Choosing the Size
You’ll make two identical rectangles. Here’s a general size guide:
| Size | Rectangle Size (each) |
|---|---|
| Small | 18″ x 26″ |
| Medium | 20″ x 28″ |
| Large | 22″ x 30″ |
| Plus Size | 24″ x 32″ |
Note: You can measure from your shoulder to mid-thigh for length, and from shoulder to shoulder (plus some ease) for width.

🧵 Stitch Suggestions
Choose any beginner-friendly stitch pattern. Here are three easy options:
1. Single Crochet (SC)
- Dense and warm
- Great for wind protection
2. Half Double Crochet (HDC)
- A little more flexible and soft
- Nice texture
3. Double Crochet (DC)
- Looser and faster to make
- Airy, drapes nicely
For this tutorial, we’ll use Half Double Crochet (HDC).
🪡 Step-by-Step Instructions
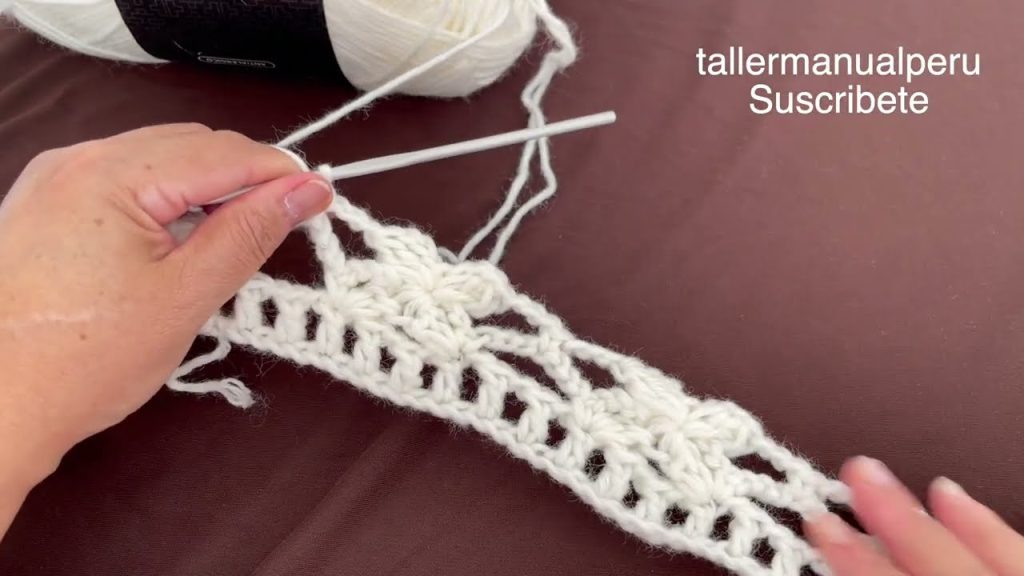
✨ Step 1: Make Two Identical Rectangles
Pattern for Rectangle Using HDC:
- Foundation Row:
Chain the number of stitches to match the desired width of your rectangle.
(Example: For a 20″ width using worsted weight, chain 60–70 stitches.) - Row 1:
HDC in 2nd chain from hook and across. Turn. - Row 2 and onward:
Chain 1, HDC across, turn. - Continue Rows until the rectangle reaches your desired length.
➡️ Repeat the process to make your second rectangle.

✨ Step 2: Lay Out the Rectangles
Here’s how to assemble your poncho:
- Lay both rectangles flat in an “L” shape:
- Place one rectangle vertically.
- Place the other horizontally, overlapping the top corner of the vertical one.
- Seam them together at the overlapping edge. This will form the neck hole.
Use the mattress stitch or whip stitch to join the fabric with a yarn needle.
You’ll be left with a draped, angled poncho shape.
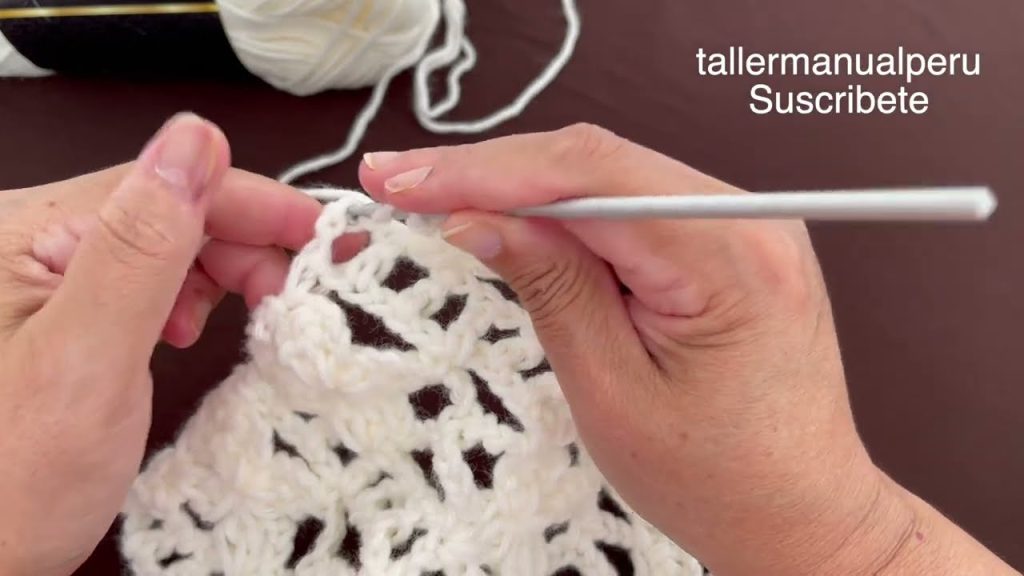
🧵 Step 3: Optional – Add Edging or Borders
To make it look more polished, you can add a simple border around the neckline and bottom edges:
- Single Crochet Edging: Work one round of SC around, placing 2 SC in corners and joining with a slip stitch.
- Shell Stitch Border (optional): Adds a nice decorative touch.
👚 Step 4: Try It On!
Slip it over your head – the point should sit centered in the front. It can be worn:
- With the seam at the shoulder – asymmetrical style
- With the seam centered – diamond style
Both ways are trendy and cozy.
🧺 Tips and Tricks for Success
- Use stitch markers to mark your corners and seams.
- Block your rectangles before joining if the edges curl.
- Choose a soft yarn if you want a poncho that drapes well.
- Don’t worry if your stitch count varies slightly – this pattern is very forgiving.
🎨 Customization Ideas
Want to make it your own? Try these variations:
- Add fringe or tassels to the bottom for a boho look.
- Use striped yarn or color changes for interest.
- Add a cowl neck by crocheting a tube and attaching it.
- Try a lace stitch for a spring/summer version.
📚 Beginner Crochet Glossary
- Chain (CH) – the foundation of most crochet projects.
- Half Double Crochet (HDC) – yarn over, insert hook, yarn over, pull through, yarn over, pull through all 3 loops.
- Slip Stitch (SL ST) – used to join or move across stitches.
- Turn – flip your work to the other side after each row.
- Gauge – stitches per inch; not critical here but good to learn.
✅ Summary
| Step | What to Do |
|---|---|
| 1. | Crochet two rectangles using HDC |
| 2. | Lay them in “L” shape and seam together |
| 3. | Add optional borders or edging |
| 4. | Try it on and style how you like |
🧶 Final Thoughts
This easy two-rectangle poncho is a wonderful project for beginners who want to move beyond scarves and dishcloths. With its minimal shaping and maximum comfort, you’ll feel proud wearing something handmade – and maybe even gift it to a friend or loved one!
It’s not just about the final product – it’s about enjoying the process. So grab your yarn, your favorite cozy drink, and let’s crochet something beautiful.
Video tutorial:


