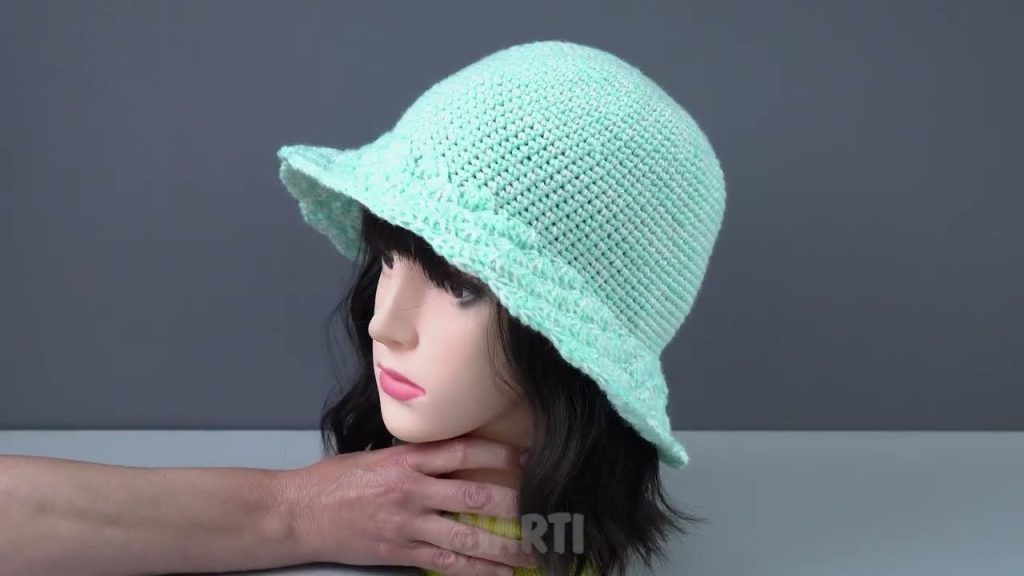
Crocheting is more than just a cozy winter hobby—it’s a year-round creative outlet that can produce stylish and functional accessories for every season. One of the most popular summertime crochet projects is the crochet bucket hat. Lightweight, trendy, and endlessly customizable, a crochet summer bucket hat is the perfect project to elevate your warm-weather wardrobe.
In this article, we’ll explore what makes a crochet bucket hat such a great summer accessory, what you need to make one, and walk you through an easy step-by-step guide for crafting your very own sun-ready hat.
Why Crochet a Summer Bucket Hat?
Bucket hats have made a strong comeback in fashion over the past few years, thanks to their laid-back aesthetic and practical sun protection. A crochet version offers several unique advantages:
- Breathable and lightweight: When made with cotton or bamboo yarn, crochet bucket hats provide airflow to keep your head cool.
- Customizable: Choose any color, stitch pattern, or embellishment to make it truly yours.
- Eco-friendly: Use natural, sustainable yarns to create an accessory that’s as gentle on the planet as it is on your skin.
- Portable project: Small and easy to carry, a bucket hat can be crocheted on the go, whether at the beach, in the park, or on a road trip.
Materials You’ll Need
Before diving into the pattern, gather the following materials:
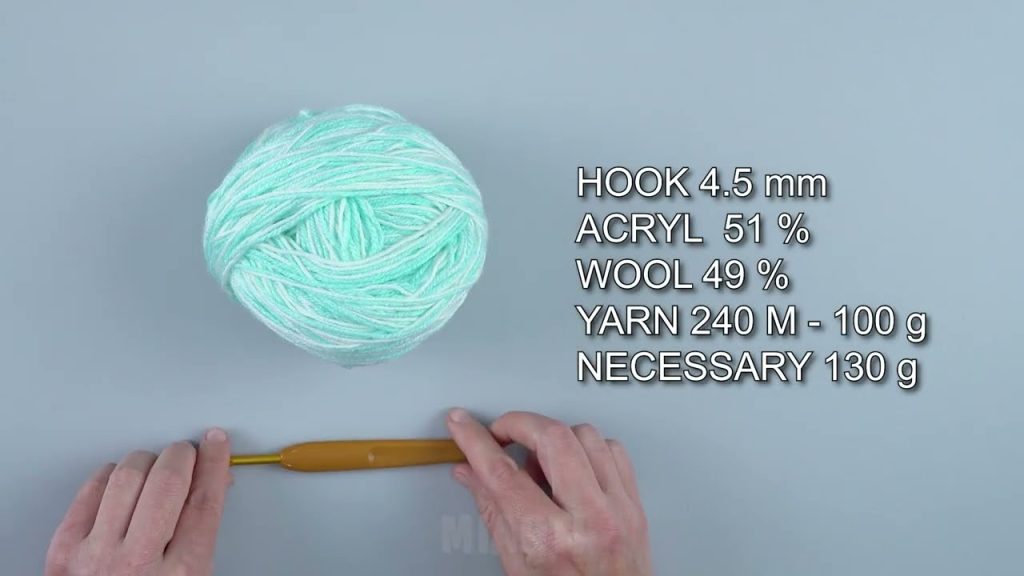
Yarn:
- Type: 100% cotton yarn is highly recommended for summer hats. It’s breathable, durable, and holds its shape well.
- Weight: DK (light worsted) or worsted weight yarn works best.
- Popular brands: Lily Sugar’n Cream, Paintbox Cotton DK, Lion Brand 24/7 Cotton.
Hook:
- Size H/5.0 mm or G/4.0 mm crochet hook (check your yarn label and adjust to maintain gauge).
Other Supplies:
- Yarn needle (for weaving in ends)
- Stitch markers (optional)
- Scissors
- Measuring tape
Basic Crochet Stitches You’ll Use
If you’re a beginner, don’t worry—this pattern uses only simple stitches:
- Magic ring (adjustable loop)
- Single crochet (sc)
- Half double crochet (hdc)
- Slip stitch (sl st)
- Increasing (two stitches in one)
- Decreasing (optional for shaping)
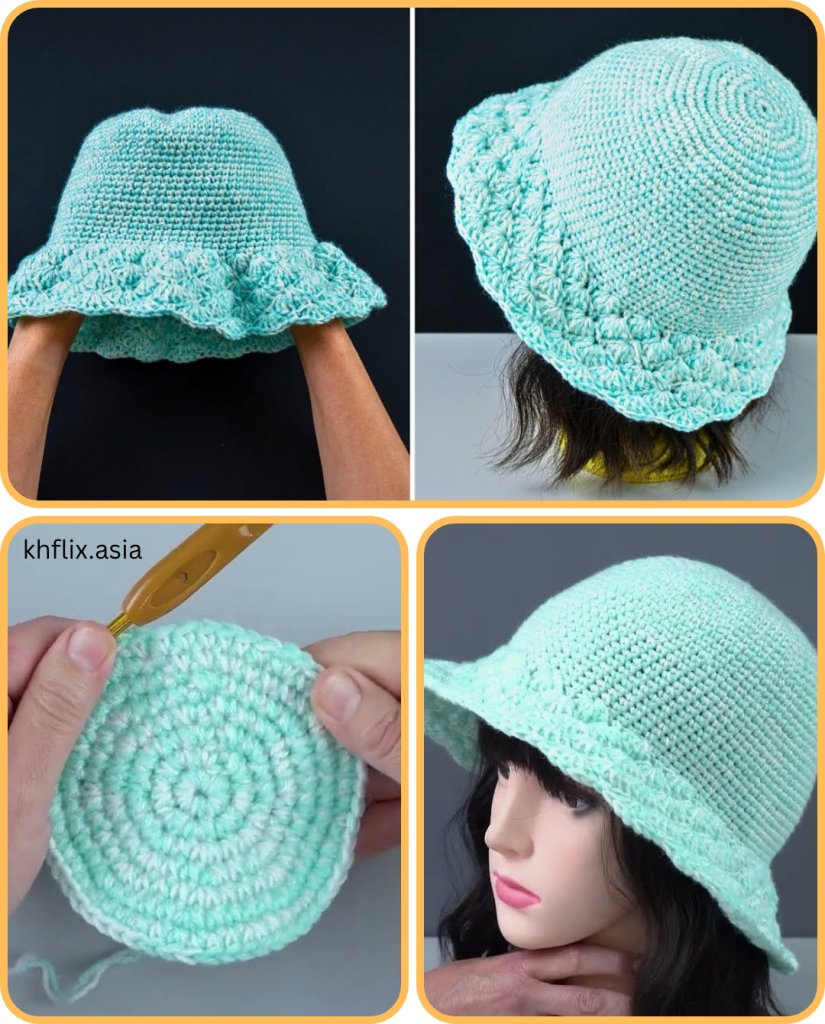
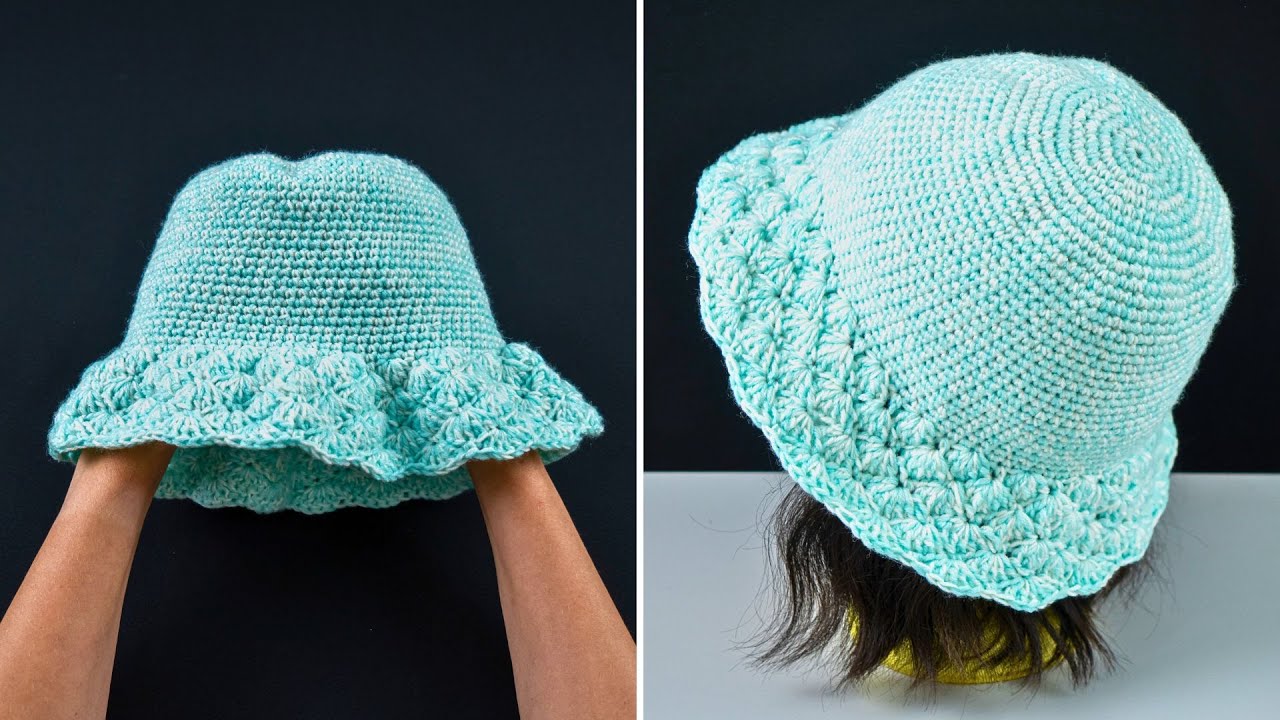
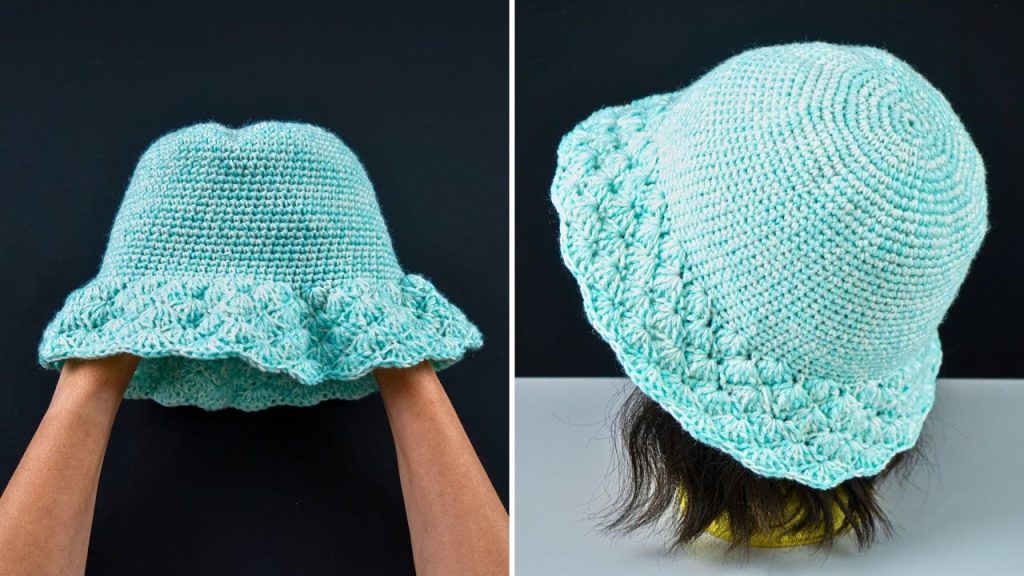
Easy Crochet Bucket Hat Pattern (Step-by-Step)
This basic bucket hat is made in the round, starting from the top of the crown and working downward toward the brim.
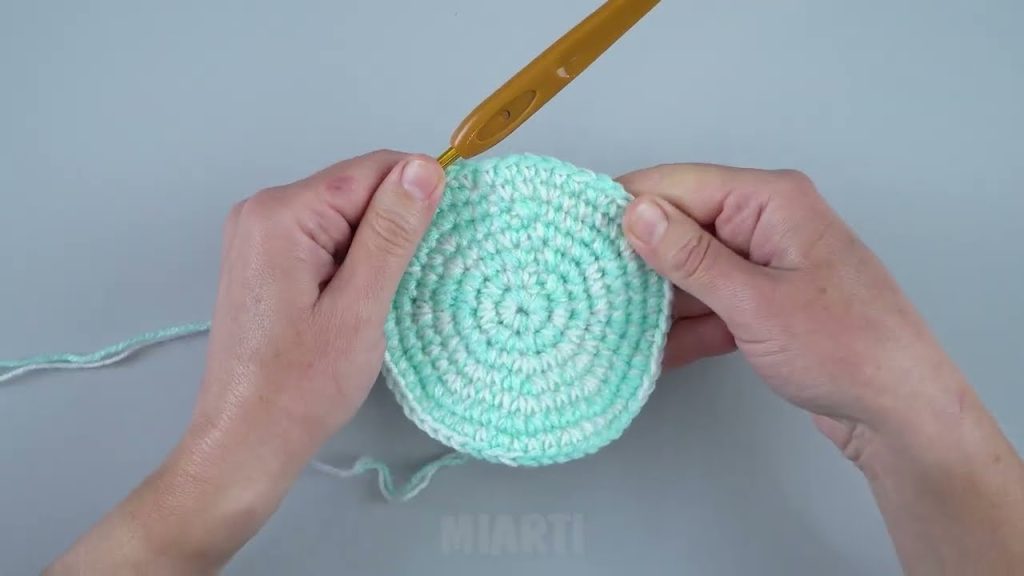
Step 1: Crochet the Crown
- Magic Ring: Begin with a magic ring. Chain 1.
- Round 1: 6 sc into the ring. Pull tight. (6 sts)
- Round 2: 2 sc in each stitch around. (12 sts)
- Round 3: 1 sc in next st, 2 sc in next st, repeat around. (18 sts)
- Round 4: 1 sc in next 2 sts, 2 sc in next st, repeat around. (24 sts)
- Continue increasing by adding 1 stitch between increases each round (e.g., Round 5: 3 sc, inc; Round 6: 4 sc, inc) until the circle is about 6.5 inches in diameter (for adult size). For children or smaller heads, stop at 5.5–6 inches.
Step 2: Shape the Sides
Once the crown reaches the desired width, stop increasing.
- Rounds 7–16: 1 sc in each stitch around. Continue working evenly in spirals or with joined rounds until the hat sides measure about 3.5–4 inches tall.
Tip: To prevent a seam from forming, you can work in a spiral—just mark the beginning of each round with a stitch marker.
Step 3: Create the Brim
Now it’s time to flare out the brim slightly.
- Round 17: 1 sc in next 2 sts, 2 sc in next st, repeat around. (Increase to widen the brim.)
- Round 18–22: Continue to sc around, adding increases every 3–4 stitches as needed to keep the brim flat. You can alternate between increase rounds and regular rounds.
Optional: Switch to hdc or dc (double crochet) for the final rows to add a gentle wave or ruffle effect.
- Final Round: Sl st around for a clean edge, or do a crab stitch (reverse single crochet) for a decorative finish.
Step 4: Finishing Touches
- Fasten off and weave in all ends with your yarn needle.
- Gently block the hat to shape the brim and crown evenly. You can lightly mist with water and pin it in place or use steam blocking if using natural fibers.
Customizations and Variations
Want to add your personal touch? Try these ideas:
- Color blocking: Use different colors for the crown, sides, and brim.
- Decorative edging: Add picot or shell stitches for a feminine flair.
- Appliqués: Attach crochet flowers, hearts, or fruit shapes.
- Chin strap or ties: Add braided or chained ties for kids’ hats or windy days.
- Textured stitches: Use puff stitch, mesh stitch, or granny stitch for a unique texture.
Tips for Success
- Gauge matters: A looser or tighter stitch can drastically alter the size. Make a small swatch to ensure you’re on track.
- Use stitch markers: Especially helpful for spiral rounds to avoid losing count.
- Choose the right yarn: Cotton or bamboo yarns are breathable and comfortable for warm weather.
- Experiment freely: The basic shape is forgiving—feel free to adjust size, length, and brim to your preference.
Caring for Your Crochet Hat
Hand-wash in cool water with gentle detergent. Reshape and lay flat to dry. Avoid machine washing, as it can stretch or distort the shape.

Conclusion: A Perfect Summer Craft
A crochet summer bucket hat is the ideal project for crafters of all skill levels. It’s quick to make, highly customizable, and incredibly practical. Whether you’re lounging at the beach, gardening, or heading to a summer festival, your handmade hat will offer both sun protection and style.
So grab your yarn, your hook, and a sunny spot to sit—it’s time to create your new favorite summer accessory.
Video tutorial:


