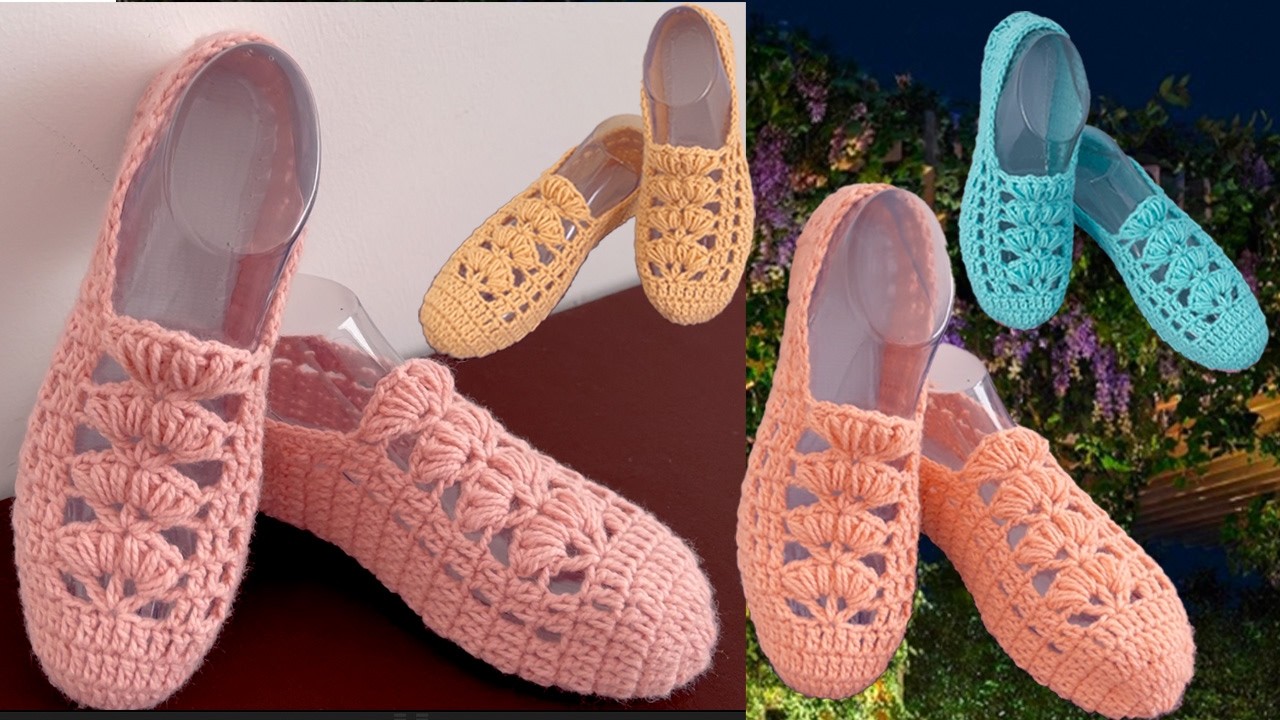
Crocheting slipper shoes is a practical and rewarding project for beginners and experienced crafters alike. These cozy footwear pieces can be customized for any foot size—from toddlers to adults—making them perfect for gifts, family members, or even selling at craft fairs. This guide will walk you through everything you need to know to crochet slipper shoes in all sizes, including choosing the right materials, measuring feet accurately, pattern adjustments, and step-by-step instructions.

✂️ Materials Needed
Before you begin, gather the following supplies:
- Yarn: Worsted weight (#4) yarn is a popular choice. Wool blends offer warmth, while acrylic yarns are budget-friendly and easy to care for.
- Crochet Hook: Typically H/8 (5.0 mm) or I/9 (5.5 mm) for worsted yarn, but check your yarn label and adjust for gauge.
- Scissors
- Yarn Needle: For weaving in ends.
- Stitch Markers (optional): To keep track of rounds or stitch counts.
- Measuring Tape: Essential for accurate sizing.
- Non-slip soles or puff paint (optional): To make slippers safer on smooth floors.
📏 Understanding Sizing
To crochet slipper shoes that fit well, understanding shoe sizing and measuring feet is key.
🔹 How to Measure Feet
- Length: Measure from the back of the heel to the tip of the longest toe.
- Width: Measure the widest part of the foot (usually across the ball of the foot).
- Foot Circumference: Wrap the measuring tape around the foot at the widest point.
Keep a chart to convert inches or centimeters to standard US/UK/EU shoe sizes.
🔹 General Sizing Chart (US Shoe Sizes to Foot Length)
| Size | Foot Length (inches) | Foot Length (cm) |
|---|---|---|
| Baby 0-3 mos | 3.5” | 9 cm |
| Toddler 4 | 5.5” | 14 cm |
| Child 10 | 6.5” | 16.5 cm |
| Women 7 | 9.25” | 23.5 cm |
| Men 10 | 10.5” | 26.5 cm |
🧵 Basic Crochet Techniques You’ll Need
Before you start the pattern, make sure you’re familiar with these stitches:
- Slip Knot
- Chain (ch)
- Slip Stitch (sl st)
- Single Crochet (sc)
- Half Double Crochet (hdc)
- Double Crochet (dc)
- Increase and Decrease (inc, dec)
If you’re a beginner, consider watching a few short tutorials on YouTube or checking stitch diagrams.
🧣 General Pattern Structure for Slippers
Crocheted slipper shoes are usually made in one of two ways:
- Sole Up (Worked in Rounds): You start at the sole and work up to the ankle.
- Flat Then Seamed: The piece is crocheted flat and sewn or crocheted together.
We’ll go through a sole-up round slipper shoe that can be easily adjusted for different sizes.
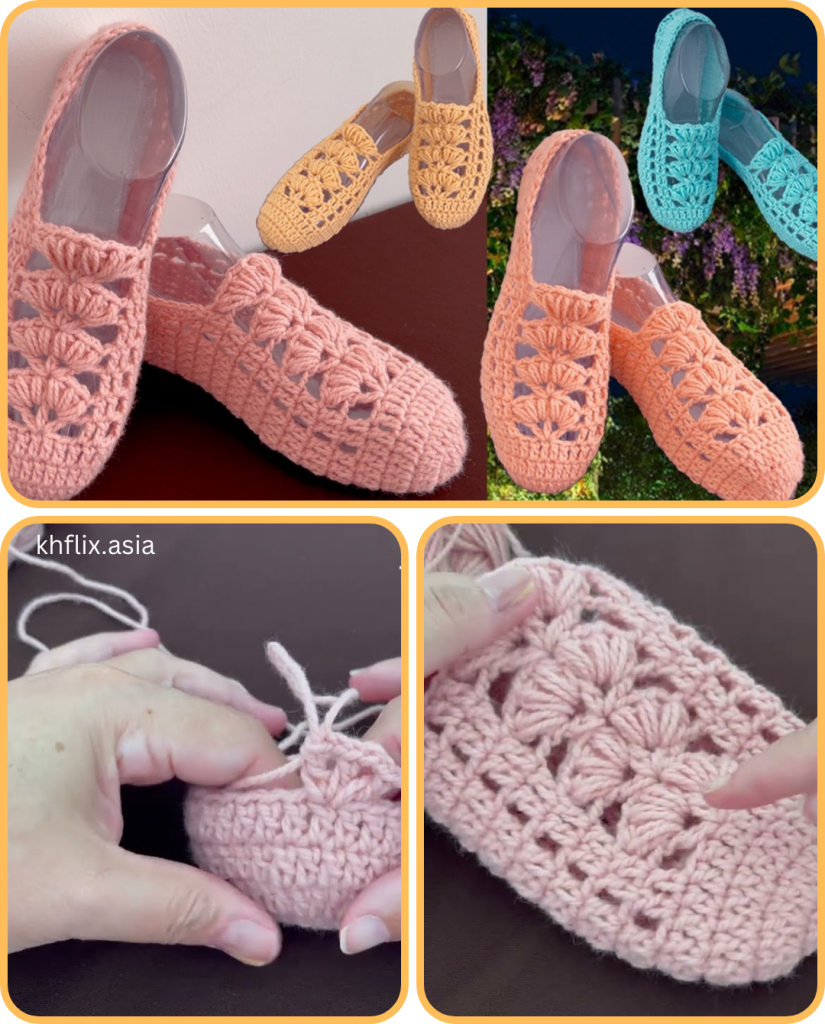
🪡 Crochet Slipper Shoes: Adjustable Pattern (Sole-Up Method)
This pattern is written for a base adult size (Women’s 7-8), with adjustments provided for other sizes. Adjust the stitch count and rows to make it smaller or larger.
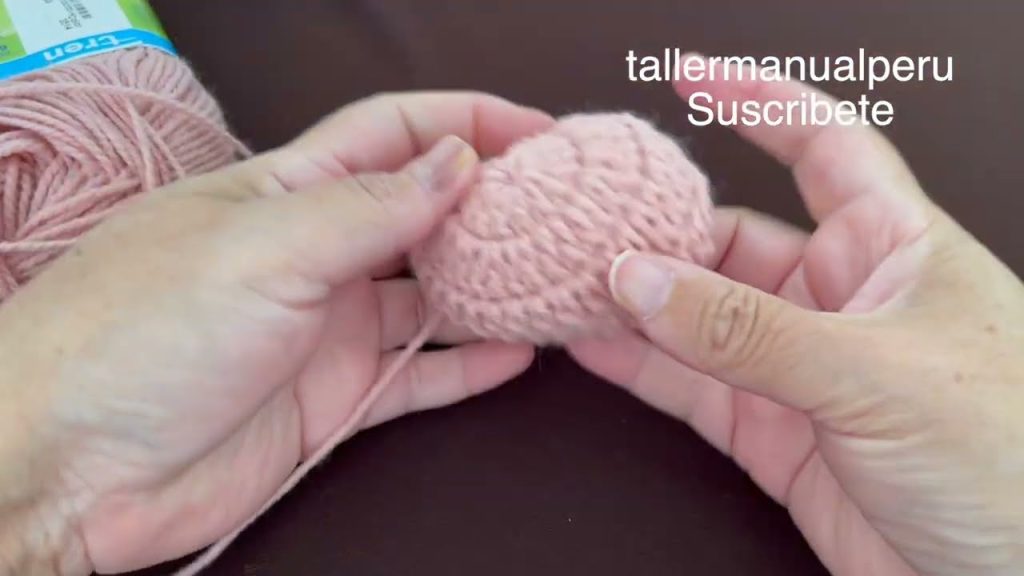
🔸 Step 1: Crochet the Sole
Chain 23 (adjust based on foot length).

Row 1: In the second ch from hook, sc in next 20 sts, 3 sc in last ch. Turn to work down the other side, sc in next 20 sts, 2 sc in end. Join with sl st to first sc. (45 sts)

Row 2: Ch 1, sc in next 20, 2 sc in next 3 sts (toe curve), sc in next 20, 2 sc in last 2 sts (heel curve). Join. (51 sts)

Row 3: Repeat increase pattern for toe and heel if needed for larger sizes. Adjust length by adding/removing chains in starting chain.
🔸 Step 2: Build the Sides
Round 4: Ch 1, sc in each st around. Join with sl st.
Repeat for 2-3 more rounds, or until the slipper side reaches the base of the ankle.
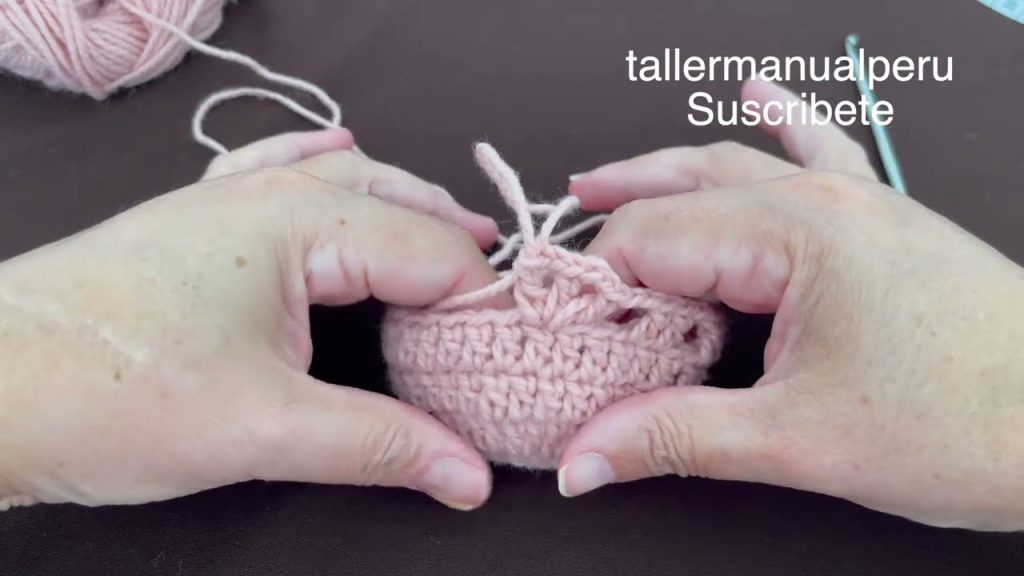
🔸 Step 3: Form the Top (Toe Box)
Work in rows across the toe portion only:
Row 1: Sc in 20 sts across the top.
Row 2-6 (or desired depth): Ch 1, turn, sc across.

Sew or slip stitch the toe top to the sides of the slipper.

🔸 Step 4: Shape the Heel (Optional)
For a snugger heel, decrease stitches in the back rows by crocheting 2 sts together in a few places.
🔸 Step 5: Add a Cuff or Finishing
Optional: Add ribbed cuff or ankle strap.

For a ribbed cuff:
Join yarn at back, ch 9.
Row 1: Sc in second ch from hook and across (8 sts).
Sl st into 2 sts on the slipper edge.
Repeat cuff pattern around the ankle.

🔁 Size Adjustments
Adjusting this pattern is easy once you understand the basic structure:
- Length: Add or remove chains from the starting chain for the sole.
- Width: Add or remove increase stitches at the toe and heel.
- Height: Add more rows to the sides or top to create taller slippers.
Always measure as you go. You can also try the slipper on (or have your model try it) throughout construction.
🌈 Customization Ideas
- Color Blocking: Use multiple yarn colors for stripes or toes.
- Appliqués: Add flowers, buttons, or animal faces.
- Soles: Sew felt or leather patches on the bottom for durability.
- Lining: Add fleece inside for extra warmth.
- Non-slip Bottom: Use puff paint or hot glue dots.
🧼 Care Instructions
Most worsted-weight yarn slippers are machine washable. To keep their shape:
- Machine wash cold or hand wash.
- Lay flat to dry.
- Avoid high heat or tumble drying unless the yarn label allows it.
🧮 Crochet Slipper Shoes Size Formula (Quick Reference)
Here’s a basic formula for customizing:
Starting Chain Length = Foot Length in Inches × 2 (approximate for both sides)
Number of Sole Rounds = Foot Width ÷ 0.5 (each round adds ~0.5″ width)
Top Flap Rows = Desired toe height ÷ 0.5″
🧵 Final Thoughts
Crocheting slipper shoes is a cozy, creative, and useful craft. Once you get the hang of adjusting for different foot sizes, you’ll be able to whip up a pair for every member of your family. Practice on a base size and experiment with yarn types, cuff styles, and embellishments to make each pair unique.
Whether you’re a hobbyist or selling your creations, these customizable crochet slippers are a crowd-pleaser year-round. Happy hooking! 🧶👣
Video tutorial:


