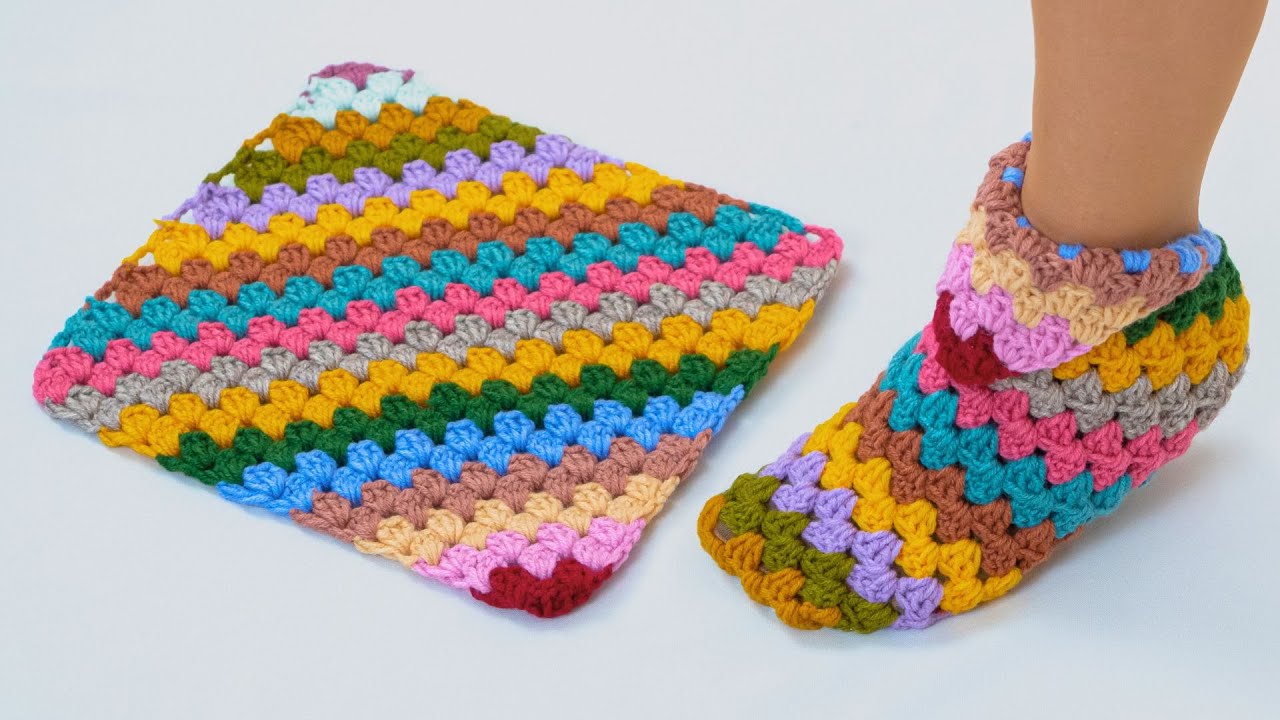
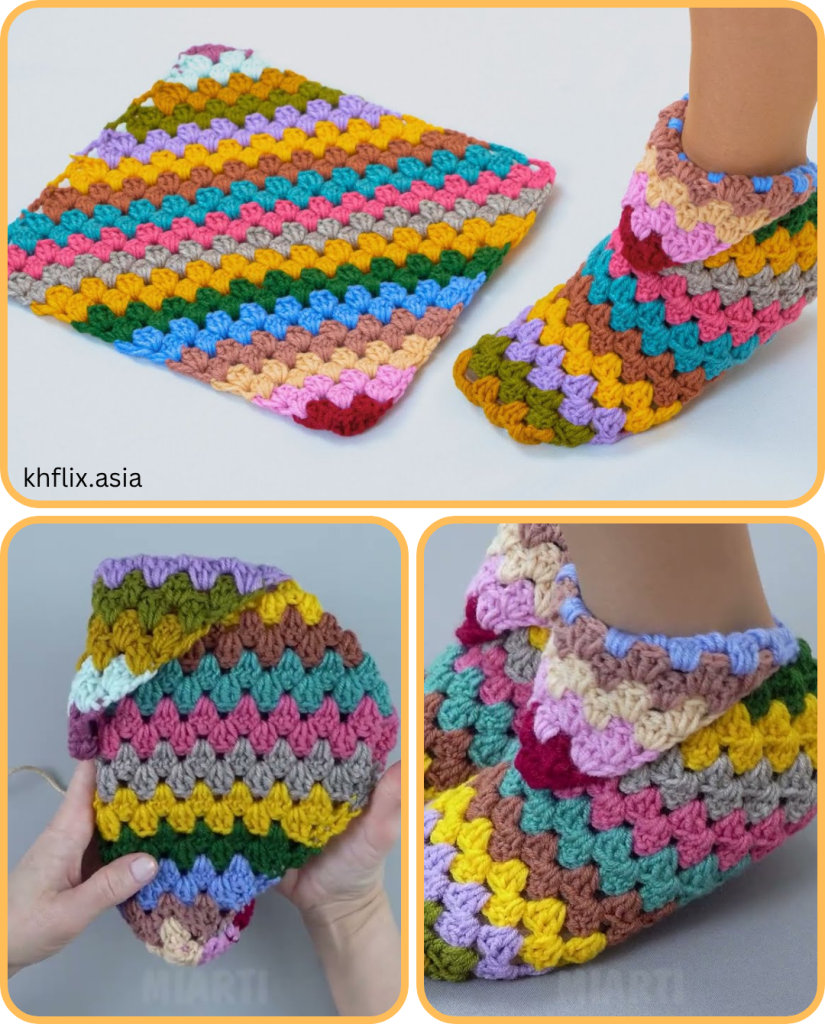
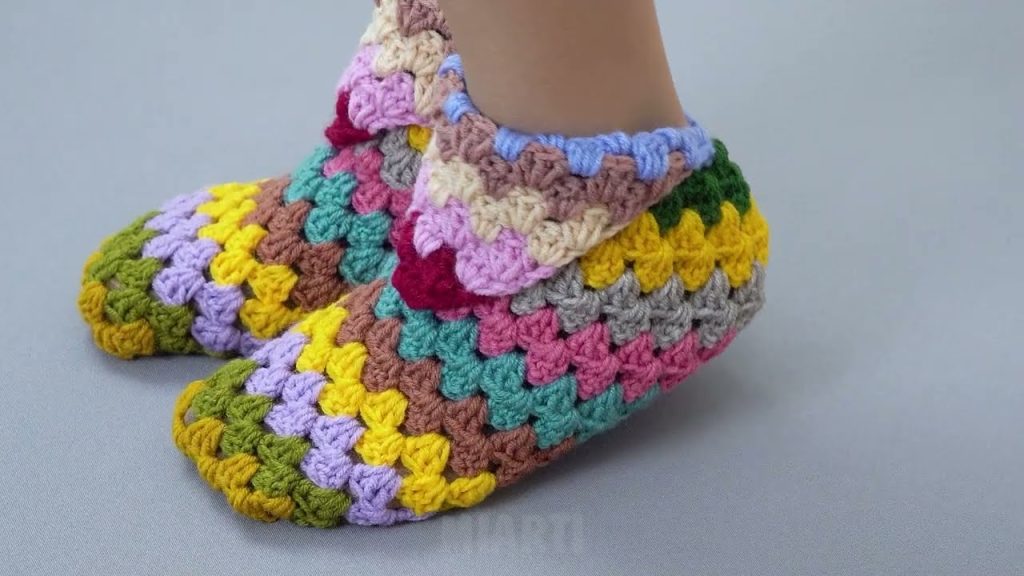
Crochet granny squares have been a beloved staple in the crafting world for decades. From cozy blankets to vibrant bags, these simple, versatile motifs have found their way into countless projects. One of the most charming and practical uses for granny squares is in making granny square slippers. Whether you’re a beginner looking to practice your stitches or a seasoned crocheter seeking a quick and satisfying project, granny square slippers offer the perfect blend of tradition, comfort, and creativity.
In this guide, we’ll explore the history behind granny squares, what makes them ideal for slipper-making, the materials you’ll need, how to crochet them step by step, and a few variations to customize your slippers.

🧶 A Brief History of the Granny Square
Granny squares originated in the early 19th century, though their exact origin is hard to trace. They gained popularity in the 1970s, becoming iconic symbols of the bohemian lifestyle. Their appeal lies in their simplicity and the ability to use up leftover yarns, making them an eco-friendly choice for crafters.
A traditional granny square starts from the center and works outward in rounds, using chains and double crochets to form a square shape. The repetitive nature of the stitches makes it meditative and accessible for beginners, while offering room for advanced crafters to get creative with colors and patterns.
🧵 Why Use Granny Squares for Slippers?
Granny square slippers are:
- Easy to construct: You just need to crochet a few squares and join them.
- Customizable: Change colors, yarn types, and square styles for a personal touch.
- Great stash busters: Use up small yarn scraps.
- Cozy and functional: Great for lounging around the house or as gifts.
Even better, they’re quick to make — often in just a couple of hours — making them a go-to project for a rainy afternoon or last-minute handmade gift.
🧰 Materials You’ll Need
Before you begin, gather the following supplies:
🧶 Yarn
- Worsted weight yarn (Category 4) is ideal for warmth and sturdiness.
- Cotton or acrylic blends are common, but you can also use wool for added warmth.
- Pick at least two or more colors for fun combinations.
🪡 Hook
- Size H/8 (5.0 mm) crochet hook is a standard choice for worsted weight yarn.
- Adjust hook size depending on your tension or desired slipper size.
✂️ Other Tools
- Yarn needle (for sewing and weaving in ends)
- Scissors
- Stitch markers (optional)
🧩 How Many Granny Squares Do You Need?
The classic granny square slipper uses 6 squares per slipper, so you’ll need 12 total. The finished size depends on the number of rounds in each square and the weight of your yarn.
| Slipper Size | Square Size (inches) | Number of Rounds |
|---|---|---|
| Small | 3.5 – 4 | 3 |
| Medium | 4 – 4.5 | 4 |
| Large | 5 | 5 |
You can easily adjust the slipper size by adding or removing rounds from each square.
🧵 Basic Granny Square Pattern
Let’s start by making a traditional 4-round granny square:
Classic Granny Square (4 Rounds)
Abbreviations:
- ch = chain
- dc = double crochet
- sl st = slip stitch
- sp = space
Round 1:
Ch 4, sl st to first ch to form a ring.
Ch 3 (counts as dc), 2 dc in ring, ch 2. (3 dc, ch 2) three more times. Sl st to top of starting ch-3. (You should have 4 clusters of 3 dc and 4 corner ch-2 spaces.)
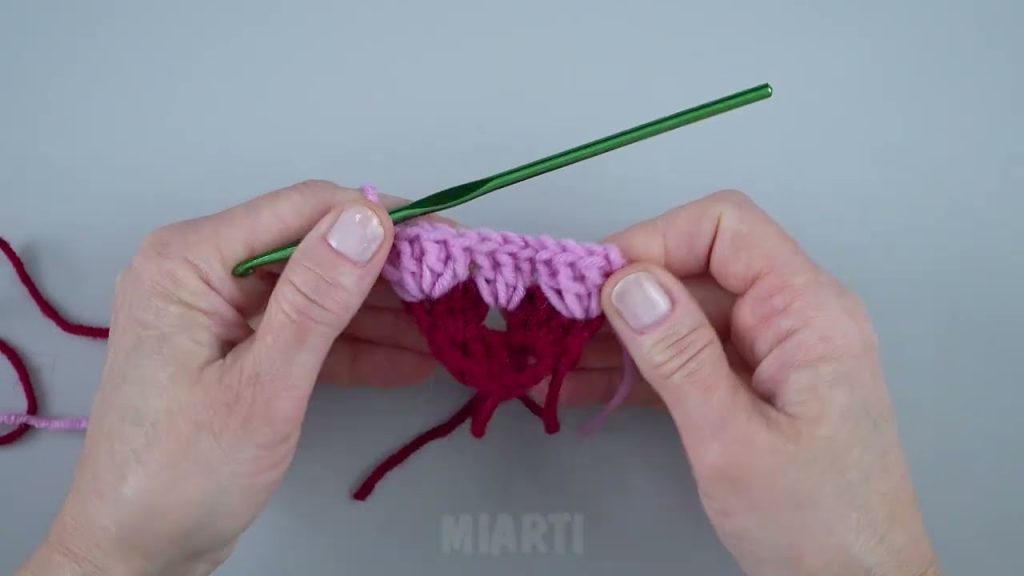
Round 2:
Sl st in next 2 dc and into the first ch-2 corner. Ch 3, 2 dc in corner, ch 2, 3 dc in same corner. Ch 1, 3 dc in next corner, ch 2, 3 dc in same corner. Repeat from * to * 2 more times. Ch 1, sl st to top of ch-3.
Round 3 & 4:
Continue as above, placing 3 dc, ch 2, 3 dc in each corner space, and 3 dc in each ch-1 side space. Ch 1 between side clusters. Sl st to join.
Fasten off and weave in ends.
Repeat this to make 12 squares.
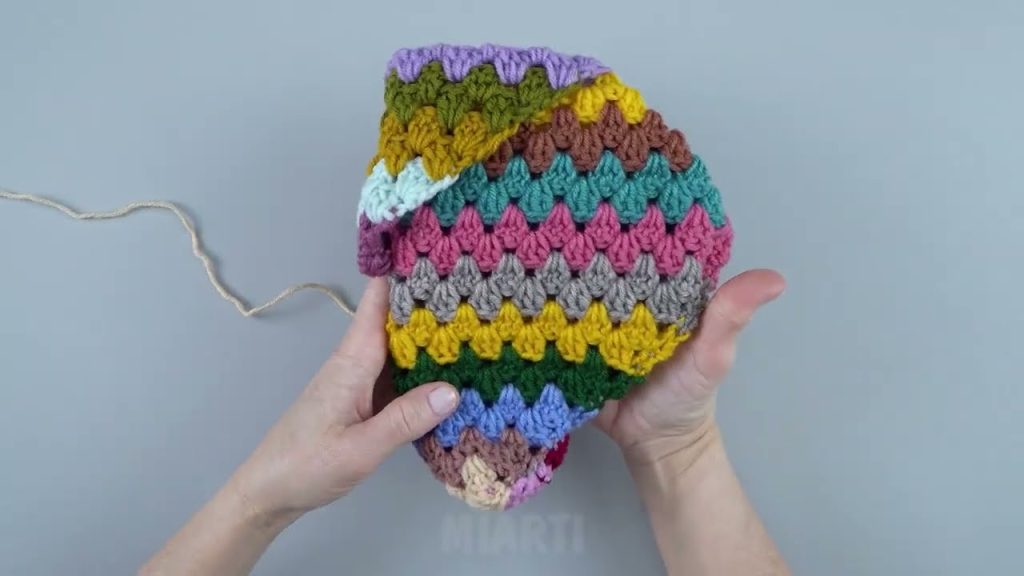
🧵 Assembling the Slippers
Step-by-Step Layout (Per Slipper)
- Lay out your 6 squares like this:
Square A - Square B
     |       |
Square C - Square D
     |       |
   Square E
     |
   Square F
- Join the squares:
- Sew or crochet together using whip stitch or slip stitch.
- Join A to B, C to D, and so on, matching the diagram.
- Fold the layout in half and seam up the heel and toe to form a slipper.
- Add a border (optional):
- Single crochet around the opening for a cleaner look.
- Add ribbing or a cuff for a snugger fit.
🧦 Tips for Customizing Your Slippers
- Add soles: Use felt or leather patches for a more durable, non-slip bottom.
- Use different square styles: Try a solid granny square, flower center, or puff stitch square.
- Play with colors: Make them striped, rainbow, or color-blocked.
- Adjust for size: Use fewer rounds for smaller feet, or add an extra row for larger ones.
🧼 Care Instructions
- Acrylic yarn: Machine washable on gentle, tumble dry low.
- Wool: Hand wash in cold, lay flat to dry.
- Cotton: Machine washable, air dry for best shape retention.
🎁 Perfect Gift Idea
These slippers make fantastic gifts for:
- Birthdays
- Christmas
- Mother’s Day
- Housewarmings
- Baby showers (with baby-sized versions!)
Make a matching pair for every family member!

🧶 Conclusion
Crocheting granny square slippers is an easy, rewarding project that blends old-school charm with modern style. Whether you’re crafting your first pair or making a dozen for holiday gifts, you’ll love how fast they come together and how customizable they are. With just yarn, a hook, and some creative spirit, you’ll have cozy, handmade slippers in no time.
So grab your yarn stash and get started on your next favorite project — your feet will thank you!
Video tutorial:


