Mastering the Art: The Best Techniques for Making a Crochet Basket
A beautifully crafted crochet basket isn’t just a container; it’s a statement piece, an organizational hero, and a testament to the power of fiber and hook. But what makes a “best” crochet basket? It’s the perfect blend of sturdiness, shape retention, and aesthetic appeal, transforming a simple yarn project into a truly useful and decorative item for your home.
This detailed guide will dive into the essential techniques and best practices to help you create truly fabulous and functional crochet baskets that stand tall, hold their shape, and look fantastic doing it.
What Makes a Crochet Basket “The Best”?
- Exceptional Sturdiness: A great basket doesn’t flop over when empty. It holds its shape, even when moderately filled.
- Defined Shape Retention: The base stays flat, the sides remain straight or curve intentionally, and the rim doesn’t sag.
- Pleasing Aesthetics: The stitches are even, the texture is appealing, and the design complements its surroundings.
- Durability: It withstands regular use without stretching out of proportion or showing excessive wear.
- Practicality: It effectively organizes clutter, serves its intended purpose, and is easy to clean.
Key Considerations for Crafting the Best Baskets
Achieving that ideal balance of form and function comes down to thoughtful choices before you even make your first stitch.
- Yarn Choice: The Foundation of Structure
- Rigid Fibers are King: For a truly sturdy basket, opt for fibers with minimal stretch and good body. Cotton (especially chunky cotton cords, rope yarns, or macrame cotton), jute, hemp, and plarn (yarn made from plastic bags) are excellent. These fibers create dense, firm fabric.
- Super Bulky or Multiple Strands: The thicker your “yarn,” the sturdier and faster your basket will work up.
- Super Bulky (Category 6) / Jumbo (Category 7): These are fantastic for quick, robust baskets.
- Holding Multiple Strands: A common and highly effective technique is to hold 2 to 4 strands of worsted weight (Category 4) yarn together. This drastically increases the thickness and stiffness, allowing you to use up stash yarn.
- Avoid: Very soft, stretchy, or fuzzy yarns (like brushed acrylics, mohair, or thin merino wools) will result in a floppy basket unless heavily reinforced.
- Hook Size: The Power of Density
- Go Down, Way Down: For baskets, you’ll almost always use a hook size significantly smaller than what’s recommended on your yarn label for garments. The goal is to create an incredibly dense, tight fabric with minimal gaps.
- Experimentation is Key: With bulky yarns or multiple strands, finding the “right” hook size involves testing. You want the stitches to be tight, but still workable without excessive strain on your hands.
- General Guide:
- Single strand Super Bulky (Cat 6): 8.0mm (L) to 12.0mm (O/P/Q)
- Two strands Worsted (Cat 4): 6.0mm (J) to 8.0mm (L)
- Three strands Worsted (Cat 4): 8.0mm (L) to 10.0mm (N/P)
- Stitch Selection: The Building Blocks of Firmness
- Single Crochet (sc): This is the gold standard for basket making. Its short, dense nature creates the firmest fabric.
- Half Double Crochet (hdc): Can be used for bases or sides if you need a slightly quicker or thicker fabric, but it’s inherently less dense than sc.
- Specialty Stitches for Extra Structure:
- Back Loop Only (BLO) / Third Loop: Working into the BLO or the third loop of an hdc creates a subtle ribbing that adds stiffness and defines transitions (e.g., from base to side).
- Waistcoat Stitch (Center Single Crochet / csc): This stitch involves inserting your hook directly into the center of the ‘V’ of the sc stitch below. It creates an incredibly dense, knit-like fabric that is exceptionally sturdy for baskets. It can be slower and tougher on the hands, but the results are unmatched for firmness.
- Front Post/Back Post Stitches: Can create raised ridges that add structure and visual interest.
- Construction Method: The Path to Shape
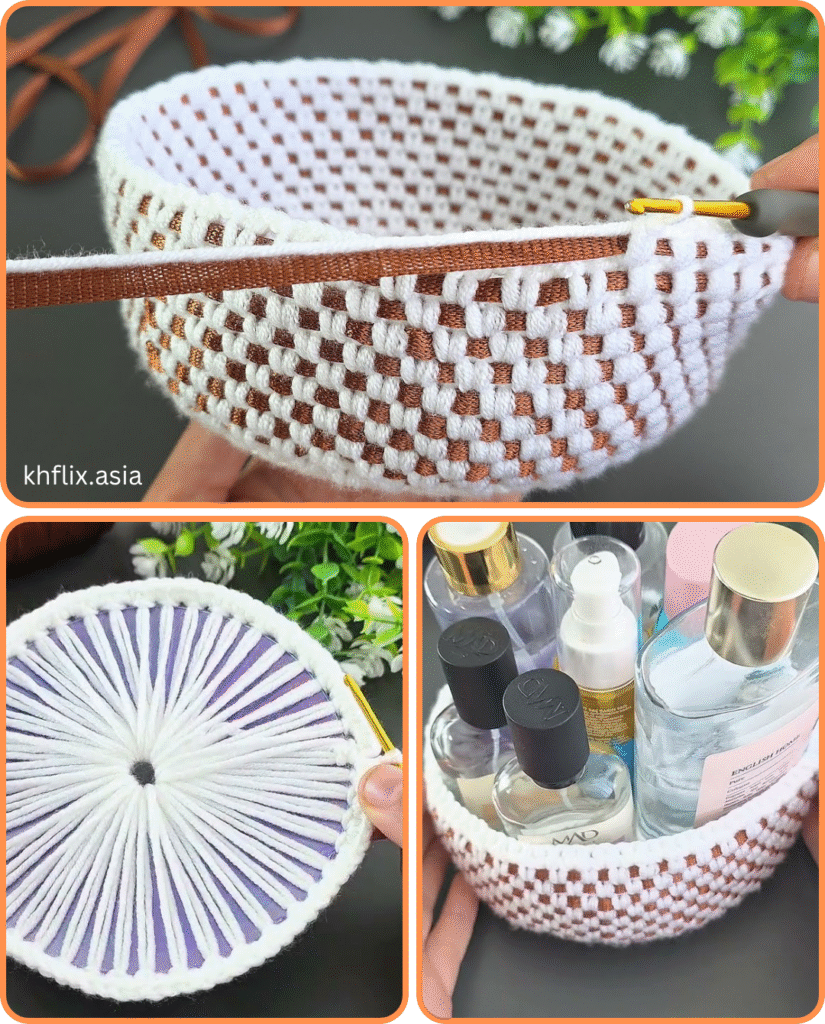
- Flat, Tightly Crocheted Base: A perfectly flat base is non-negotiable. It’s usually created by working in continuous rounds (spirals) of single crochet with evenly distributed increases. Avoid joining rounds in the base if possible, as it creates a visible seam and can lead to a less flat base.
- Defined Transition to Sides: The most common method for a clean, upright wall is to make the first round of the side section by working into the back loop only (BLO) of the last stitch of the base. This creates a neat ridge and forces the fabric to turn upwards.
- Working in Joined Rounds for Sides: Once the BLO round is complete, working the side rounds as joined rounds (sl st to close, ch 1 to start new round) creates a subtle vertical seam but ensures consistent height and a very straight wall. Continuous spirals can work for sides but may result in a slightly less straight “wall” due to the diagonal lean of stitches.
- Tension: The Unsung Hero
- Tight, Tight, Tight: For baskets, tighter tension is almost always better. Your stitches should feel dense and firm, with no visible gaps. This is where a smaller hook size comes into play. Consistent tension is critical for even walls and a flat base.

Step-by-Step Best Practices for Your Crochet Basket
Let’s apply these principles to create a sturdy, beautifully shaped round basket.
Materials (Example for a 10-inch diameter basket):
- Yarn: ~300-500 yards of Super Bulky (Category 6) cotton rope yarn OR ~600-800 yards of Worsted (Category 4) cotton yarn (held triple).
- Hook: 9.0mm (M/N) or 10.0mm (N/P) for Super Bulky, 8.0mm (L) for triple Worsted.
- Yarn Needle, Scissors, Stitch Marker.
Part 1: The Perfectly Flat & Sturdy Base (Continuous SC Rounds)
- Magic Ring (Best Start): Begin with a Magic Ring for a perfectly tight, hole-free center. (Alternatively, Ch 2, then work into the 2nd ch from hook).
- Round 1: 6 sc into Magic Ring. Pull tail tight. (Don’t join). Place stitch marker in last sc. [6 sc]
- Round 2: 2 sc in each st around. Move marker. [12 sc]
- Round 3: *Sc in next st, 2 sc in next st.* Repeat from * around. Move marker. [18 sc]
- Round 4: *Sc in next 2 sts, 2 sc in next st.* Repeat from * around. Move marker. [24 sc]
- Continue Increasing: Keep increasing your sc rounds, adding one more sc between increases each round (e.g., Round 5: sc in 3 sts, 2 sc; Round 6: sc in 4 sts, 2 sc; etc.).
- Crucial: Stop increasing when your base is the desired diameter, and lays perfectly flat. If it cups, you need more increases or a larger hook. If it ripples, you have too many increases or too loose tension.
- For a 10-inch base, you might go up to Round 12 or 13, resulting in 72-78 stitches. Measure your base against your desired final basket diameter.
Part 2: The Defined Wall (First Upright Round)
This is the key to a basket that stands tall.
- Transition Round: Work sc in the Back Loop Only (BLO) of each stitch around. Join with a sl st to the first sc of the round. [Same stitch count as last base round]
- This creates a crisp ridge that makes the sides of your basket turn upwards immediately.
- This is usually the only BLO round.
Part 3: The Straight & Solid Sides (Joined SC Rounds)
Now build the height of your basket.
- Round 1 (Side 1): Ch 1. Sc in each st around. Join with a sl st to the first sc. [Same stitch count as Transition Round]
- Joining rounds (sl st then ch 1) helps keep your side seam straight and your walls perfectly vertical.
- Repeat: Repeat Round 1 until your basket reaches your desired height.
- Aim for about 5-8 inches in height for a useful storage basket.
- For Ultra-Sturdy Sides: If you find the regular sc is still too flexible for your liking, you can experiment with the Waistcoat Stitch for these side rounds. It’s slower, but creates a remarkably stiff fabric. (Insert hook into the center of the ‘V’ of the sc below, rather than under the top loops.)
- Finishing Top Edge (Optional): After your last height round, you can add a final round of sl st around the top edge for a neat, firm finish. [Same stitch count]
- FO, leaving a short tail to weave in.
Part 4: Adding Handles (Practicality & Style)
Handles make your basket truly useful.
- Integrated Crocheted Handles (Recommended):
- Before your very last row, you’ll create chain spaces for the handles.
- Example for a 72-stitch top: Ch 1, sc in first 15 sts, ch 10 (handle), sk 6 sts, sc in next 30 sts, ch 10 (handle), sk 6 sts, sc in remaining 15 sts. Join with sl st.
- Next Round: Ch 1, sc in each sc and each ch of handles around. Join with sl st. FO.
- Reinforce: Go over your handles with a few rounds of sl st or sc to make them extra sturdy.
- Other Options: Sew on pre-made leather handles, or attach rope handles through grommets for a different look.
Part 5: The Crucial Finishing Touches
- Weave in All Ends Meticulously: Loose ends unravel, especially in a functional item. Securely weave in all tails.
- Blocking (Optional but Enhances Shape): While a well-made basket will largely hold its shape, a gentle steam block or wet block can help even out stitches and perfect the form. Stuff the basket tightly with towels or paper and let it dry completely. For cotton, you can lightly spray with starch if you want extra stiffness.
Tips for Creating the Absolute Best Baskets:
- Practice Your Tension: Consistent, tight tension is the number one secret to a sturdy basket.
- Gauge Your Base: Ensure your base lays perfectly flat at each increase round. This prevents wobbles.
- Count Every Stitch: Especially in the base and when placing handles, accurate stitch counts ensure symmetry.
- Use Stitch Markers: Don’t skip them, particularly when working in continuous rounds for the base.
- Don’t Fear Trying Again: If your basket starts to wobble or cup, unravel and adjust your hook size or stitch count. It’s worth it for a flawless finish.
- Experiment with Yarn: Try different types of cotton cord, jute, or plarn to see what kind of stiffness and texture you love most.
- Consider Purpose: Will it hold heavy items? Go for the tightest stitches and thickest yarn. Just decorative? You can be a little more lenient.
By focusing on these key elements—yarn choice, hook size, stitch density, and meticulous construction—you’ll elevate your crochet baskets from simple crafts to truly useful and beautifully designed pieces that will serve your home for years to come.
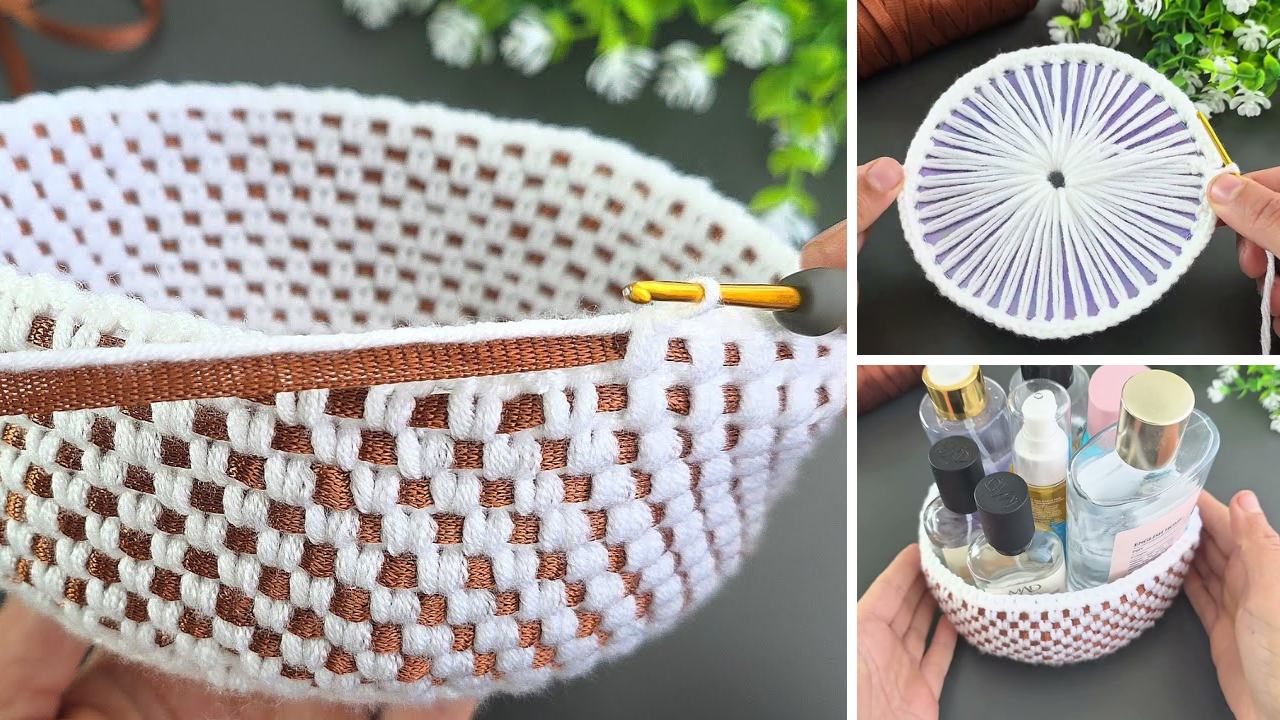
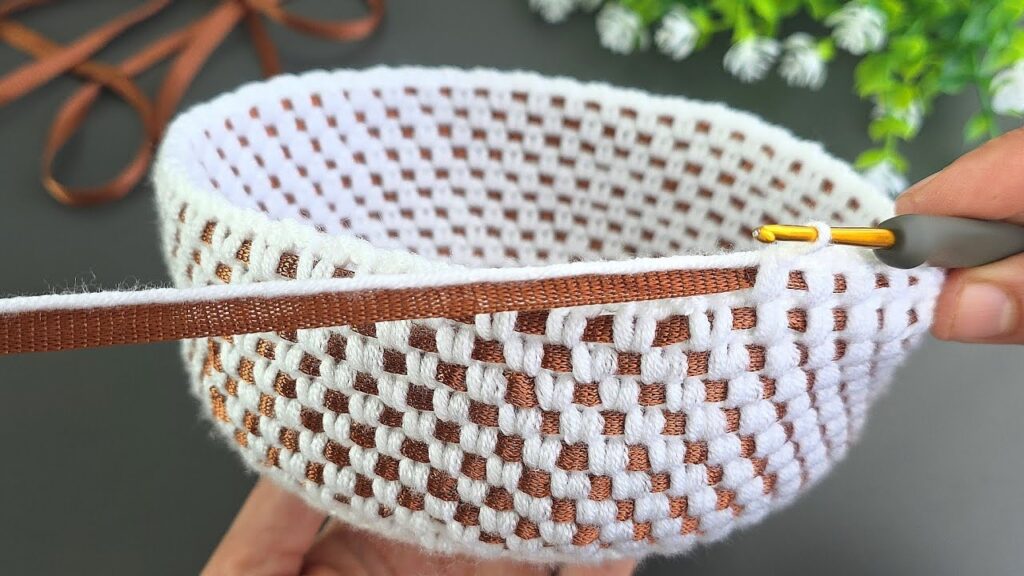
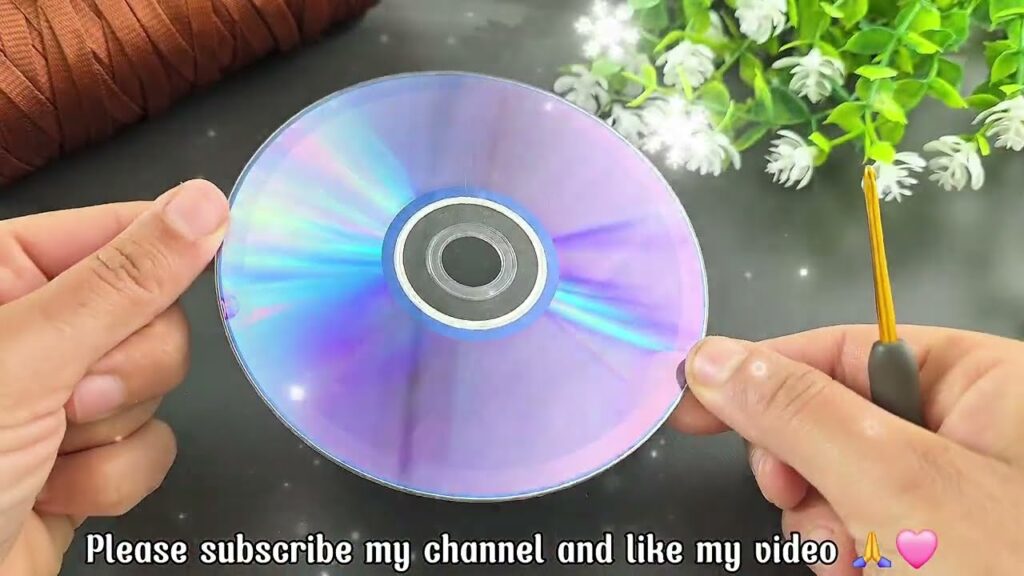
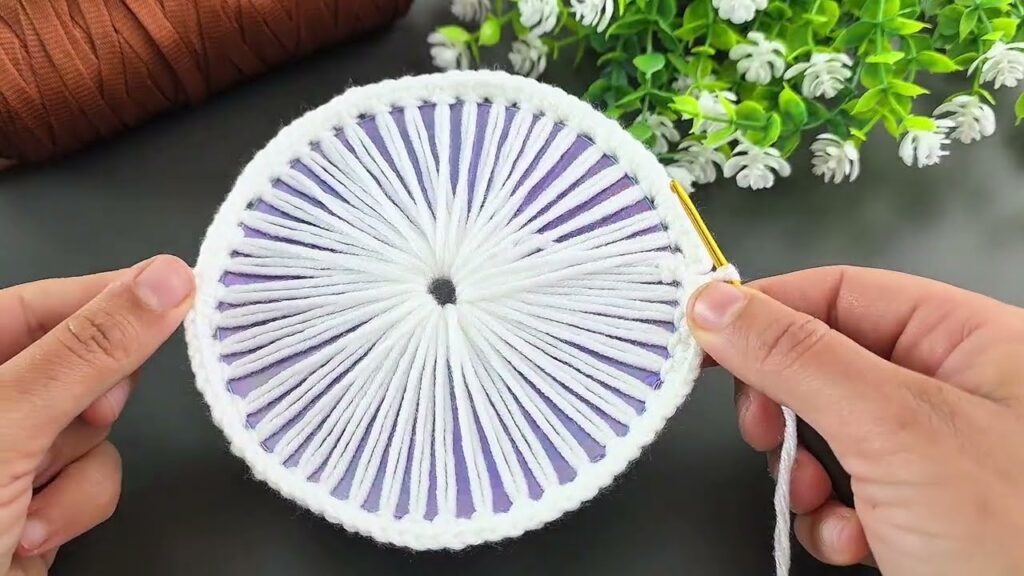
Video tutorial:


