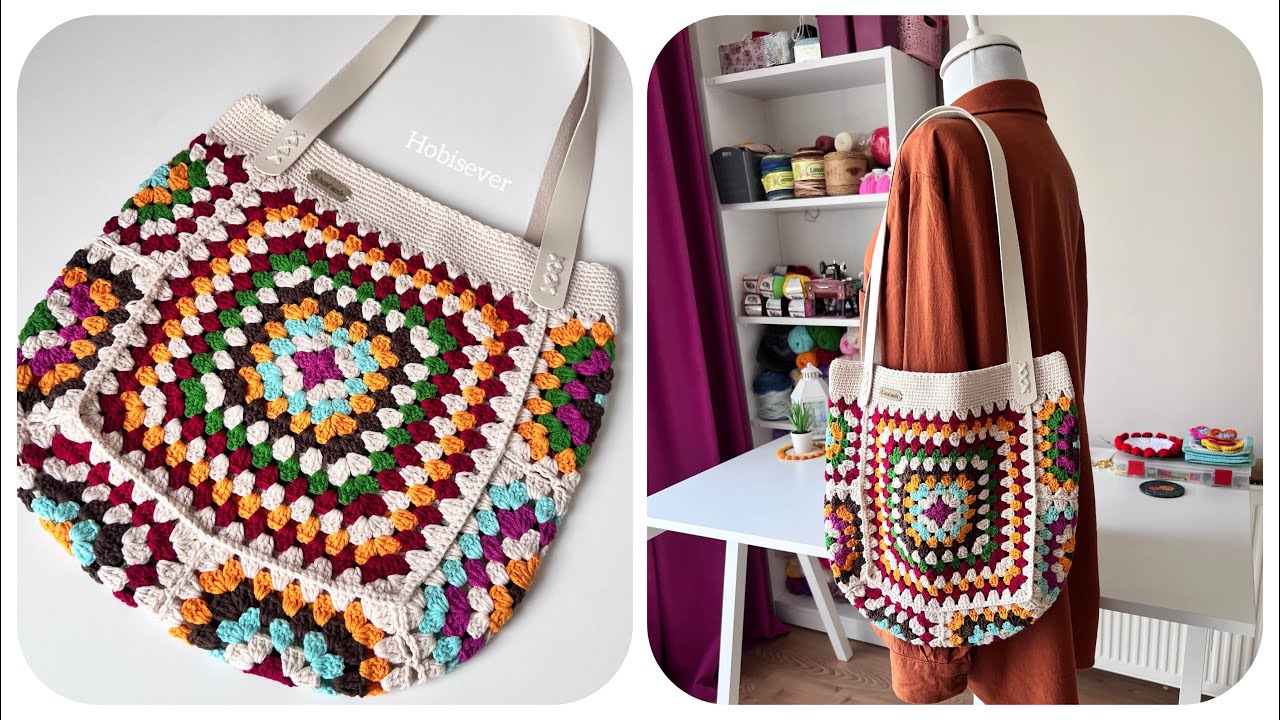
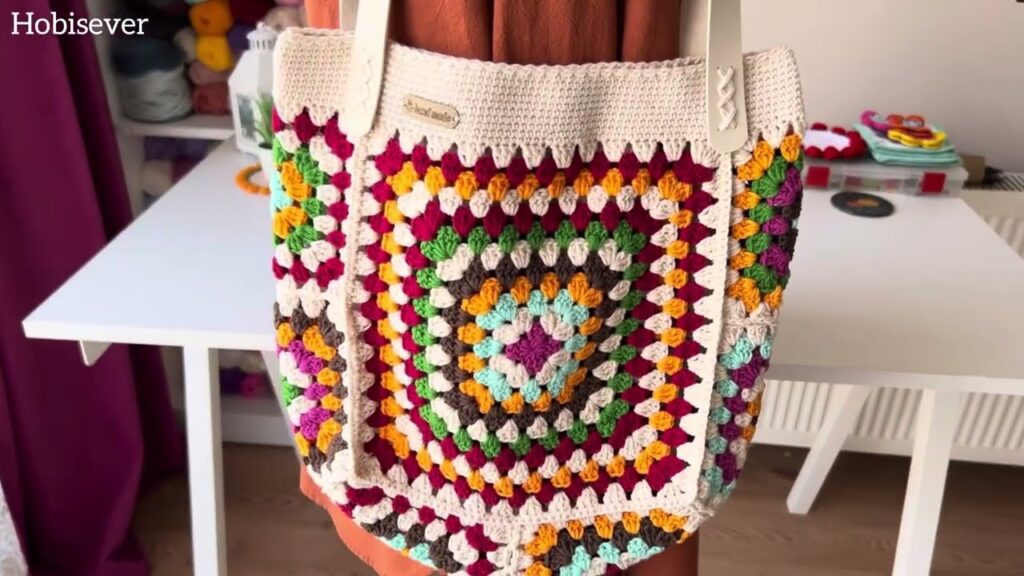
Granny squares are timeless, stylish, and incredibly versatile. If you’re new to crochet or looking for a creative, functional project, a granny square tote bag is the perfect place to start. This tote is fun to make, eco-friendly, and adds handmade charm to your everyday carry.
Whether you’re heading to the market, beach, or library, this bag is both beautiful and practical—and it’s beginner-friendly!

🧵 What You’ll Need
🪡 Materials:
- Yarn: Worsted weight yarn (Medium #4); cotton or acrylic, about 400–600 yards total
- Use one solid color or mix and match for a patchwork look
- Crochet Hook: 5.0 mm (H/8) or size recommended on your yarn label
- Tapestry Needle
- Scissors
- Measuring Tape
- Optional: Fabric for lining, magnetic button, or leather/cord handles
🧩 Basic Skills Required
If you’re new to crochet, the granny square is a perfect starting point. You’ll just need to know a few basic stitches:
- Chain (ch)
- Slip Stitch (sl st)
- Double Crochet (dc)
These form the foundation of traditional granny squares.
🎨 Design Overview
This tote bag will be constructed from granny squares sewn together. You can create:
- A simple 2-panel bag (e.g., 3×3 squares on each side)
- Add a gusset strip (optional) for depth
- Crochet matching or leather straps
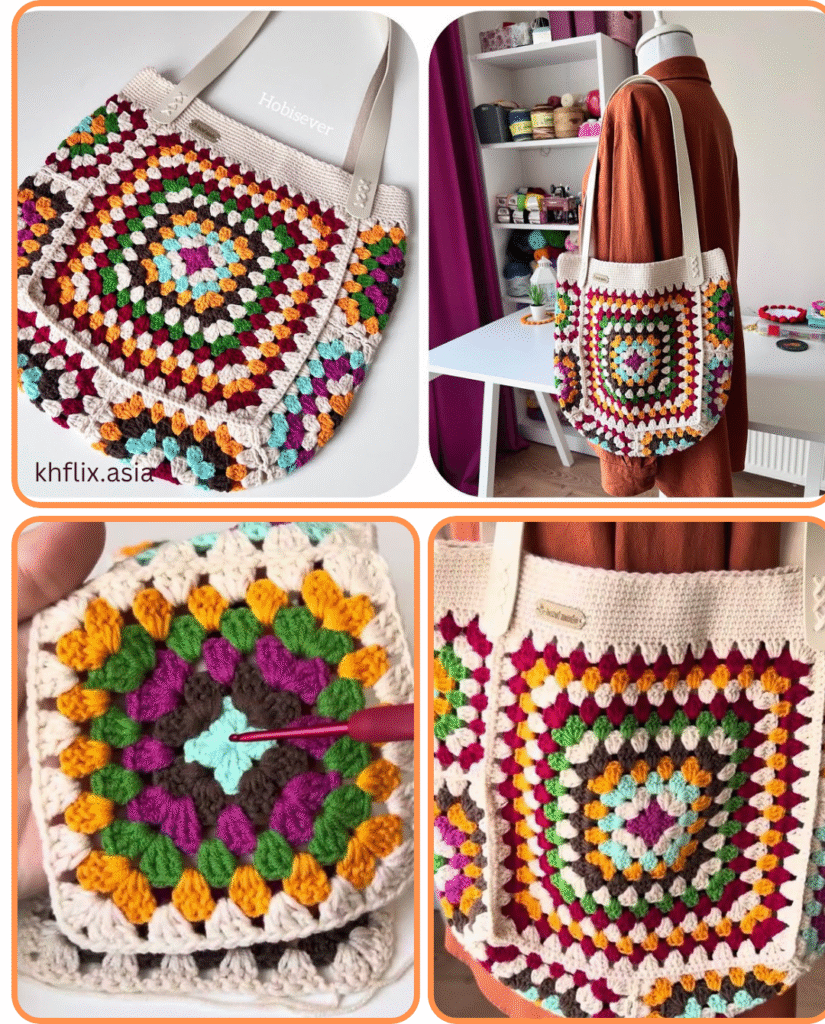
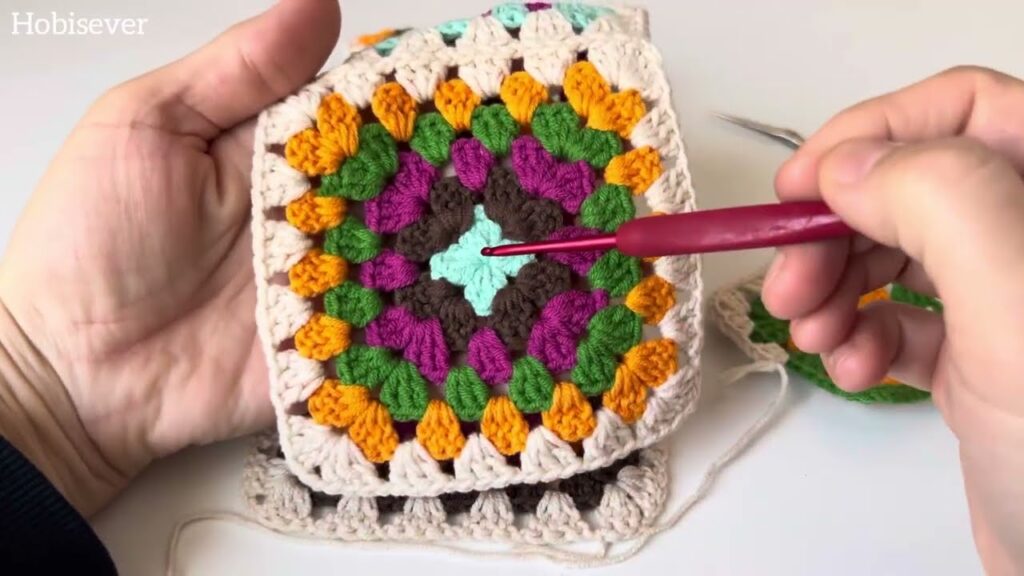
🧶 How to Make a Traditional Granny Square
✅ Basic Granny Square Pattern:
- Start with a Magic Ring, or: textCopyEdit
Ch 4, sl st to first ch to form a ring. - Round 1: textCopyEdit
Ch 3 (counts as dc), 2 dc in ring, ch 2, *3 dc in ring, ch 2* repeat 3 times, sl st to top of beginning ch-3. (4 corners) - Round 2 and beyond: textCopyEdit
Sl st to the next ch-2 space. Ch 3, 2 dc, ch 2, 3 dc in same space (corner made), *ch 1, (3 dc in next ch-1 space), ch 1, (3 dc, ch 2, 3 dc) in corner ch-2 space* repeat around, sl st to join.
👉 Continue adding rounds until the square is about 5–6 inches across. Make 18 squares total (9 per side) for a medium-sized tote.
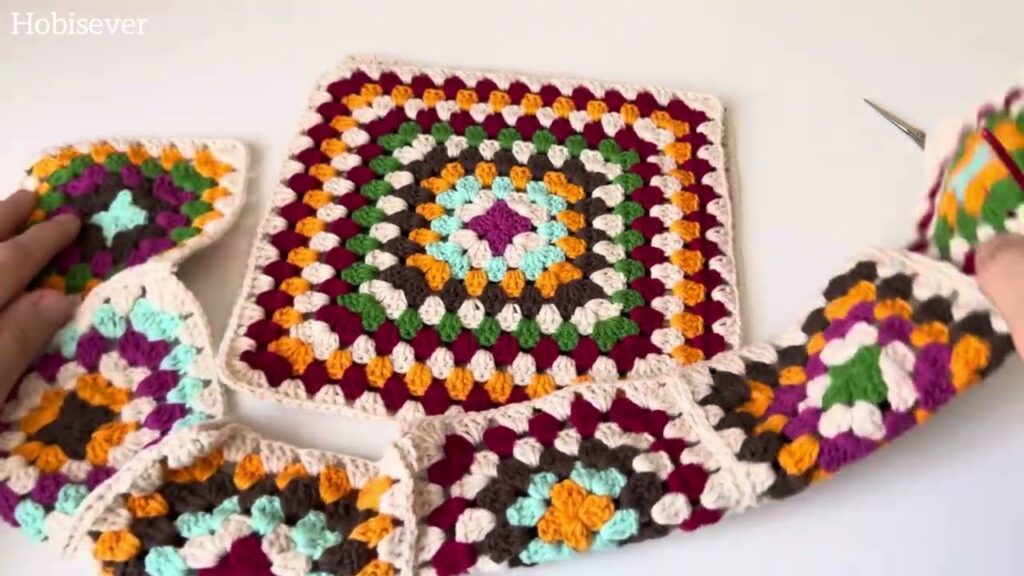
🪡 Assembling the Bag
1. Lay Out Your Squares
- Arrange your squares into two panels (e.g., 3×3 layout).
2. Join Squares
- Use your preferred joining method:
- Whip Stitch (sewn)
- Slip Stitch Join (crocheted)
- Join-As-You-Go (JAYG) for advanced beginners
👉 Join 9 squares into a front panel and 9 into a back panel.
3. Optional Side and Bottom Panel
- Crochet a long strip (single crochet or rows of granny stitch) measuring:
- Length: Width of your tote × 2 + height × 2
- Width: 2–3 inches
- Attach to the front and back panels for more depth.
4. Sew or Crochet Panels Together
- Whip stitch or single crochet the pieces together on the wrong side for a clean seam.
👜 Adding the Handles
Option 1: Crochet Straps
- Ch 70–90 (depending on length), sc in each ch for 3–4 rows for a sturdy strap.
- Attach each end to the inside of the bag.
Option 2: Pre-made Handles
- Sew on leather, bamboo, or rope handles using sturdy thread or yarn.
✨ Optional: Lining Your Tote
For extra durability and a polished look:
- Cut fabric slightly larger than the bag panels.
- Hem the fabric edges.
- Sew fabric to the inside using a sewing needle and thread.
- Optionally insert a magnetic snap or zipper closure.
🧺 Finishing Touches
- Weave in all yarn ends using a tapestry needle.
- Block the bag if squares are curling or uneven.
- Add buttons, tassels, or appliqués for decoration.
📏 Finished Size
A standard tote made from 5.5” squares (3×3 layout) will be about:
- Width: 16–17 inches
- Height: 16 inches
- Depth: Optional 3 inches with gusset
🧵 Tips for Success
- Stick to the same yarn weight for all squares for even tension.
- Choose cotton yarn for durability and structure.
- Use contrasting yarn to join squares for a bold look—or blend it in for a seamless finish.
- Don’t overthink colors! Granny square bags look best with spontaneous color combinations.
❤️ Final Thoughts
The granny square tote bag is a fun and practical way to showcase your crochet skills. It’s a beginner-friendly project that helps you master the granny square while ending up with something beautiful and useful. Whether you go minimalist or vibrant, this bag will turn heads and spark conversations.
Video tutorial:


