
Easy Crochet Zigzag Pattern for Beginners: Add Dynamic Style to Your Projects!
The world of crochet offers an incredible array of stitches and patterns, and while some may seem intimidating, many are surprisingly simple to master. One such pattern is the zigzag stitch, also known as the chevron or ripple stitch. It’s a fantastic pattern for beginners because it uses basic stitches—primarily single crochet or double crochet—to create a visually striking, wavy design.
This detailed guide will break down the easy crochet zigzag pattern, helping you create beautiful, dynamic fabric for a variety of projects.
Why Choose the Zigzag Pattern?
The zigzag pattern is a perennial favorite for good reason:
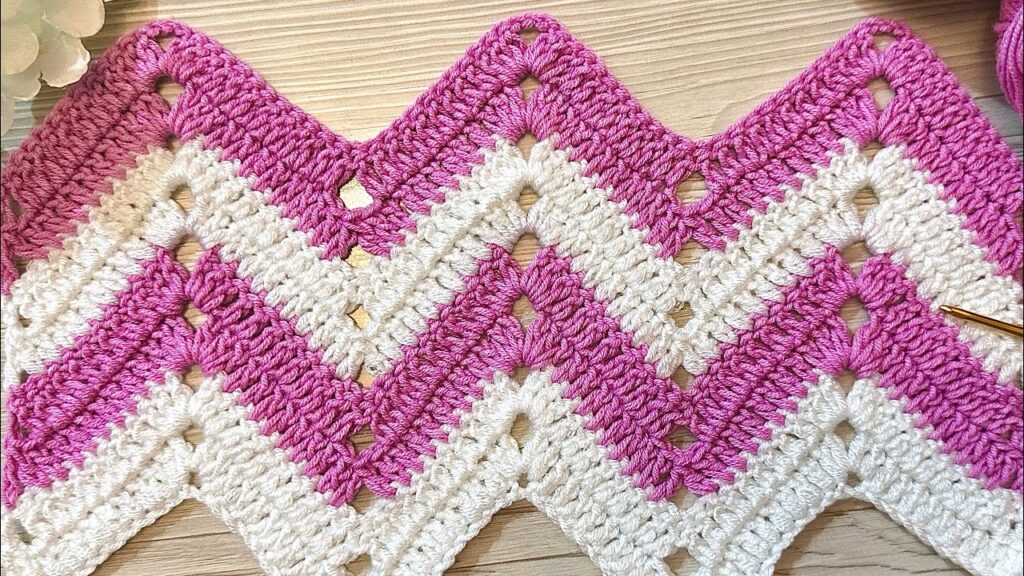
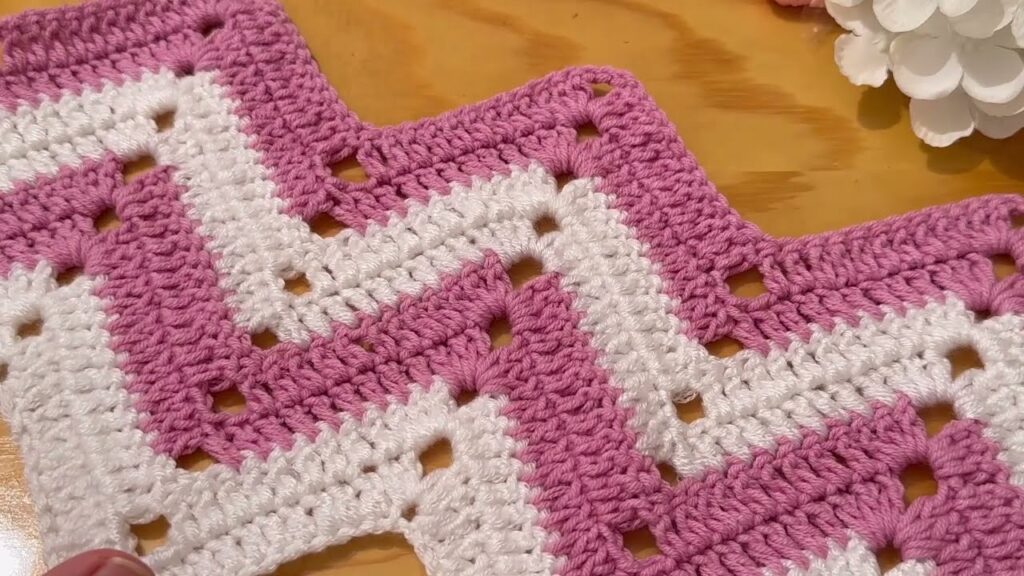
- Visually Dynamic: The undulating waves add instant interest and movement to any project.
- Versatile: It’s perfect for blankets, scarves, dishcloths, bags, and even garments.
- Color Play: The pattern truly shines when you incorporate multiple colors, creating striking stripes that emphasize the zigzag effect.
- Beginner-Friendly: Despite its intricate appearance, it’s built on fundamental crochet stitches, making it accessible even for those new to the craft.
- Texture: It creates a lovely, ridged texture that adds depth to your work.
Understanding the Zigzag “Rhythm”
The core of the zigzag pattern lies in a simple concept: creating peaks and valleys.
- Peaks (Increases): You make extra stitches in one spot to push the fabric upwards, forming the top of the wave.
- Valleys (Decreases): You skip or combine stitches in another spot to pull the fabric downwards, forming the dip of the wave.
These increases and decreases are strategically placed to create the continuous, rhythmic wave.
What You’ll Need: Materials
Before you begin, gather your supplies. For a beginner project like a small blanket sample or a dishcloth, this is what you’ll need:
- Yarn:
- Worsted Weight Yarn (Category 4): This is a great all-around yarn for beginners. Choose cotton for washcloths/dishcloths, or acrylic for blankets and scarves.
- Quantity: A small skein (around 100-200 yards) is enough for practice or a small project. If you’re using multiple colors, get one skein of each.
- Crochet Hook:
- Size H/5.0mm or I/5.5mm: A common size for worsted weight yarn. Check your yarn label for recommended hook sizes.
- Yarn Needle (Tapestry Needle): For weaving in your ends.
- Scissors: For cutting yarn.
Important Note: Chain Multiples
Zigzag patterns always require a specific starting chain multiple. This means your initial chain must be a certain number of stitches, plus an additional few for turning. If your chain isn’t the correct multiple, your pattern won’t form correctly.
For the pattern we’ll explore, the multiple is 14 + 3. This means you’ll chain a number that’s divisible by 14 (e.g., 14, 28, 42, 56…), then add 3 more chains at the end.
Easy Crochet Zigzag Pattern: Step-by-Step (Double Crochet Version)
This version uses the double crochet stitch, which creates a slightly more open and faster-growing fabric than single crochet.
Abbreviations Used:
- ch: chain
- st(s): stitch(es)
- sk: skip
- dc: double crochet
- dc2tog: double crochet 2 together (a decrease)
- sl st: slip stitch
- rep: repeat
Pattern Notes:
- The turning chain (ch 3 at the beginning of rows) counts as your first double crochet.
- The number of stitches between the increases and decreases will vary based on your chosen pattern. This pattern uses 5 double crochets on either side of the peak and valley.
Let’s Begin!
Foundation Chain:
Chain a multiple of 14 + 3. For a small sample or dishcloth, ch 45 (which is 3 x 14 = 42, plus 3).
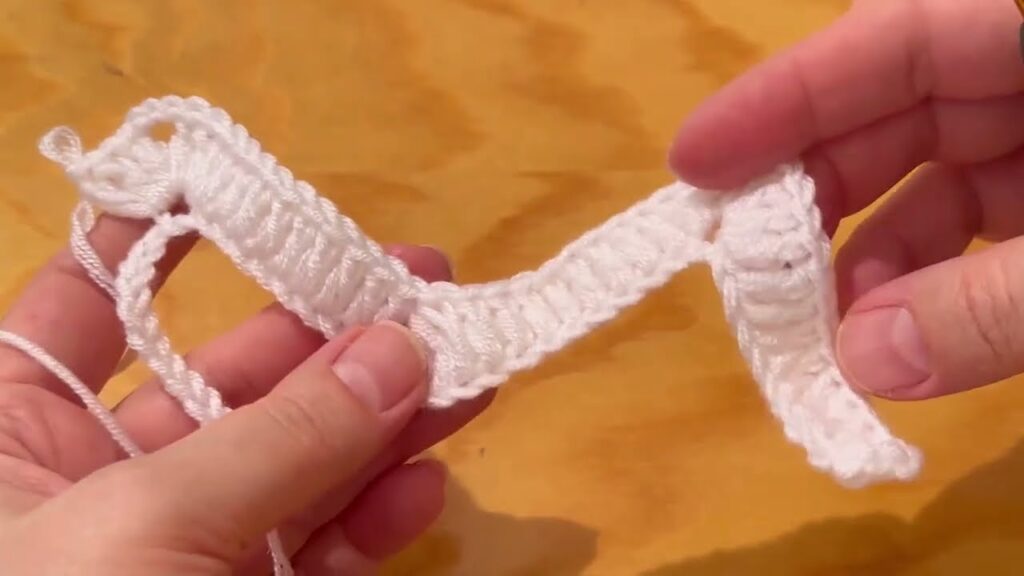
Row 1:
- Dc in the 4th ch from the hook. (This first 3 ch counts as your first dc, so you’ve effectively made 2 dc in the same stitch – this is your first increase).
- Dc in the next 5 ch.
- Sk 2 ch. (This creates the beginning of your valley).
- Dc in the next 5 ch.
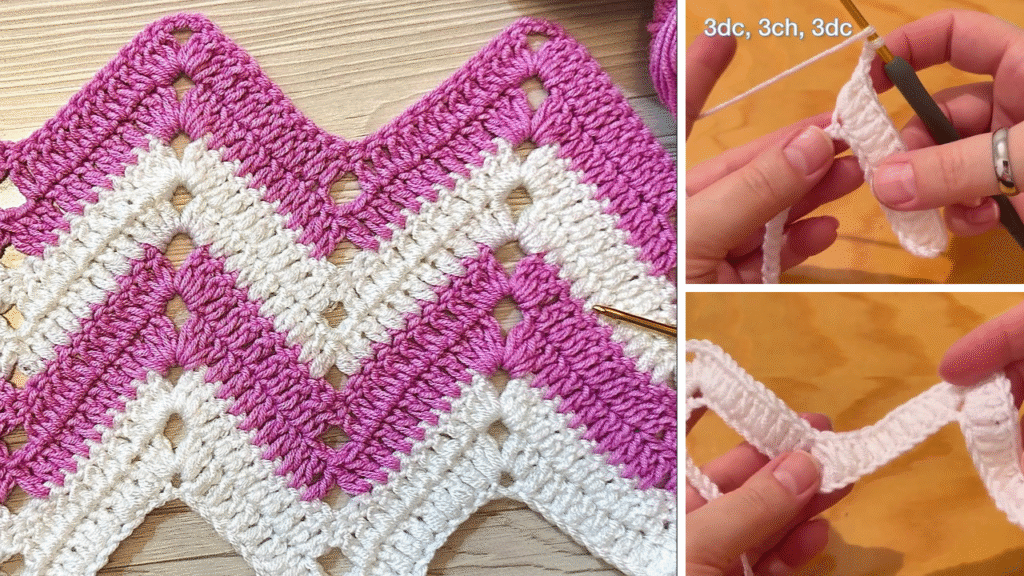
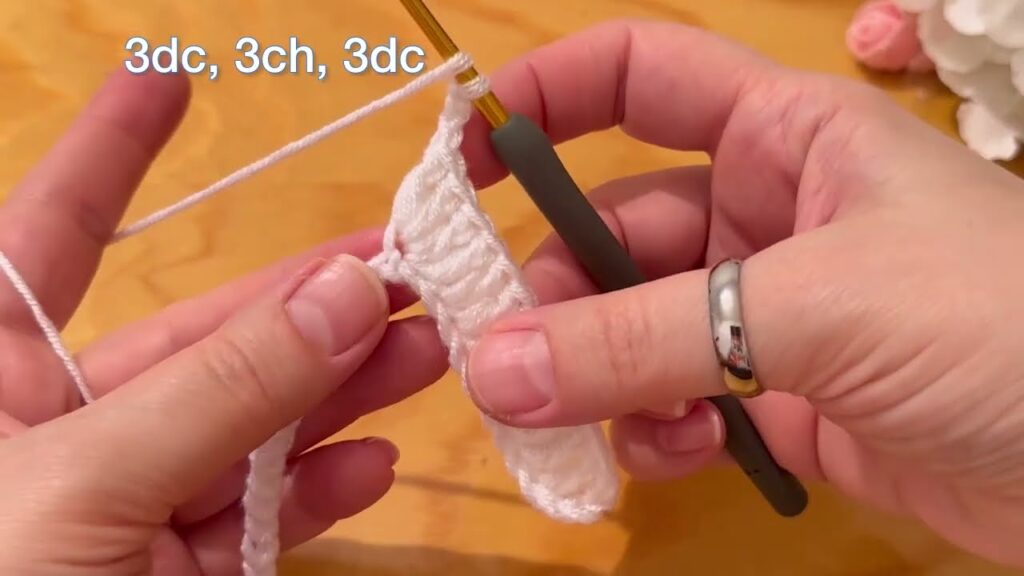
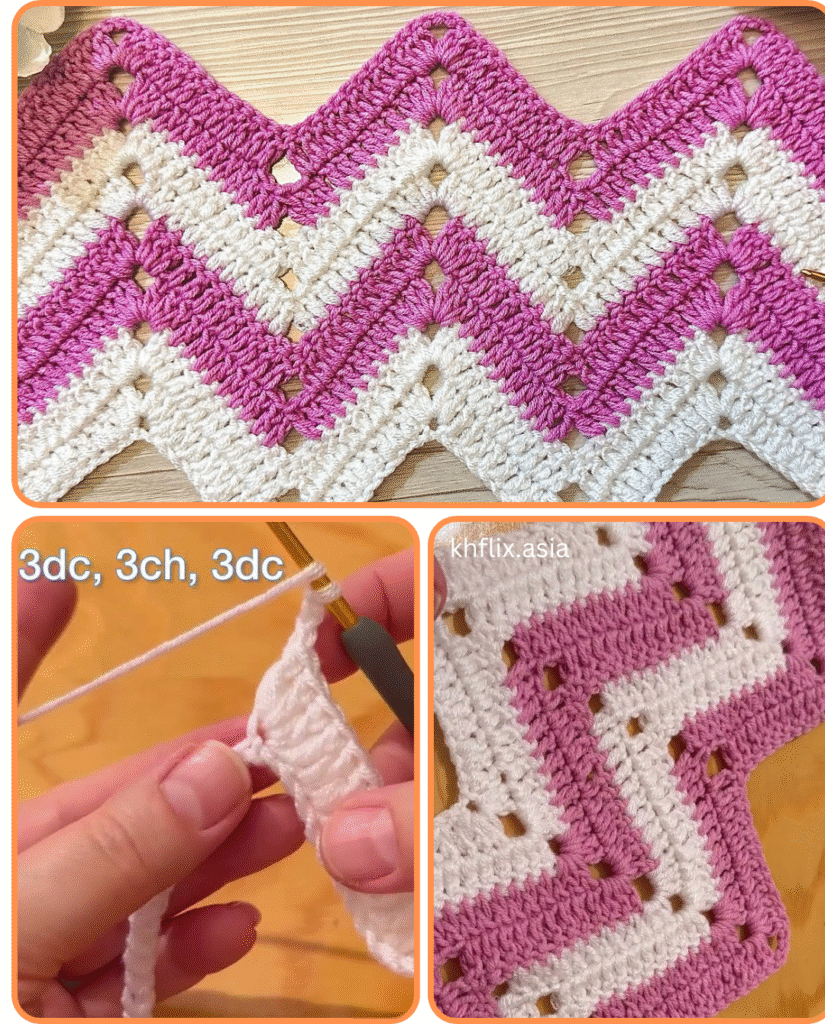
- *3 dc in the next ch. (This creates your peak – 3 dc in one stitch).
- Dc in the next 5 ch.
- Sk 2 ch. (This creates your valley).
- Dc in the next 5 ch.*
- Repeat from * to * across until you reach the last chain.
- 2 dc in the last ch. (This finishes the row with an increase, balancing the start).
- Ch 3 (counts as first dc), turn.
You should be able to see the beginning of your waves forming. The “3 dc in one st” creates a little bump, and the “sk 2 ch” creates a dip.
Row 2 and Subsequent Rows:
- Dc in the same st as the ch 3. (Again, this is your increase at the beginning).
- Dc in the next 5 sts.
- Dc2tog over the next 2 sts. (This is your decrease for the valley. To do this: YO, insert hook into next st, YO, pull up a loop, YO, pull through 2 loops. YO, insert hook into next st, YO, pull up a loop, YO, pull through 2 loops. YO, pull through all 3 loops on hook).
- Dc in the next 5 sts.
- *3 dc in the next st. (This is your peak – you’ll usually be working into the middle dc of the 3-dc group from the previous row).
- Dc in the next 5 sts.
- Dc2tog over the next 2 sts. (Your decrease for the valley – you’ll usually be working over the two skipped stitches from the previous row).
- Dc in the next 5 sts.*
- Repeat from * to * across until you reach the last stitch.
- 2 dc in the top of the turning ch-3 from the previous row. (This finishes your row with an increase).
- Ch 3 (counts as first dc), turn.
Notice how the increases (3 dc in one st) always align with the peaks from the previous row, and the decreases (dc2tog) always align with the valleys.
Continue Repeating Row 2 until your project reaches your desired length.
Finishing Your Project
Once your project is the desired size:
- Fasten off by cutting your yarn, leaving a 6-inch tail. Yarn over and pull the tail completely through the loop on your hook to secure.
- Weave in all your ends neatly using a yarn needle. This is crucial for a professional-looking finish.
Tips for Zigzag Success
- Count Your Stitches: Especially in the first few rows, regularly count your stitches to ensure your pattern stays consistent. If your waves start to flatten or become too pointy, it’s likely a miscount.
- Identify Your Peaks and Valleys: As you work, you’ll naturally start to see where the increases (peaks) and decreases (valleys) are. This will guide your stitches without needing to count every single one.
- Tension is Key: Try to maintain consistent tension throughout your work. Uneven tension can distort the waves.
- Practice Swatch: If you’re new to the zigzag, crochet a small practice swatch first. This helps you get comfortable with the pattern before committing to a larger project.
- Color Changes: To change colors, work the last stitch of the row or section with the old color until you have two loops left on your hook. Drop the old color, pick up the new color, yarn over with the new color, and pull through the last two loops. Continue with the new color.
- Blocking: For blankets or garments, blocking (wetting and shaping your finished piece) can help even out the stitches and enhance the wave definition.
Beyond the Double Crochet Zigzag
Once you’re comfortable with the double crochet zigzag, you can explore variations:
- Single Crochet Zigzag: This uses single crochet stitches instead of double crochet, creating a denser, tighter fabric. The stitch counts and increase/decrease placements will be different, but the principle is the same.
- Textured Zigzag: Incorporate stitches like front post/back post double crochet or half double crochet to add more texture within the waves.
- Shell Stitch Zigzag: Combine the zigzag with shell stitches for a more elaborate, lacy ripple.
The easy crochet zigzag pattern is a fantastic addition to any crocheter’s repertoire. It’s a visually rewarding pattern that allows for endless creativity with color and project type. Grab your hook and yarn, and get ready to make some beautiful waves!

Conclusion
The easy crochet zigzag pattern is a truly rewarding stitch for beginners and experienced crocheters alike. It’s a fantastic way to introduce dynamic visual interest into your projects without needing to master complex techniques. By understanding the simple rhythm of increases and decreases, you can create beautiful, wavy fabrics that are perfect for everything from cozy blankets and stylish scarves to practical dishcloths. Don’t be afraid to experiment with different colors and yarn types to truly make this versatile pattern your own. Embrace the waves, and enjoy the satisfaction of adding this impressive-looking yet accessible stitch to your crochet toolkit!
Video tutorial:


