
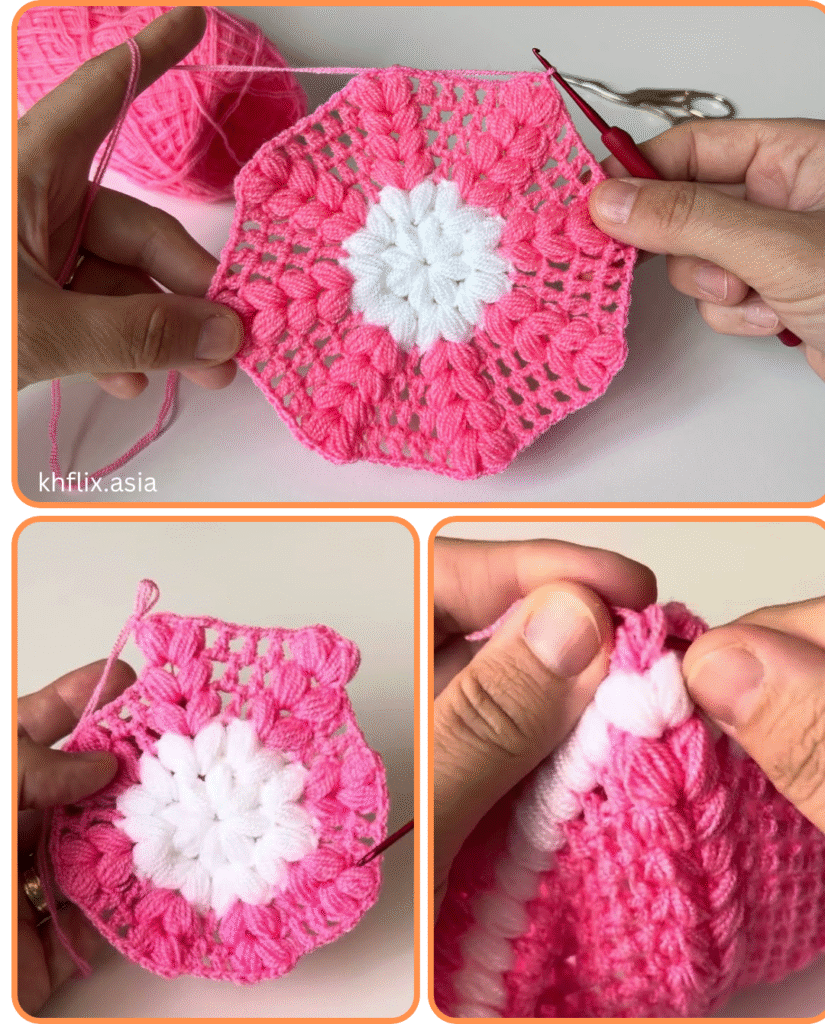
There’s something incredibly satisfying about crafting your own home essentials, and a handmade washcloth is no exception. Not only are they practical and reusable, but they also add a touch of personalized charm to your bathroom or kitchen. For beginners looking to elevate their crochet skills beyond the basic stitches, the puff stitch offers a wonderful opportunity to create a textured, luxurious fabric that’s surprisingly simple to master.
This detailed guide will walk you through everything you need to know to create your own beautiful and functional crochet washcloth using the delightful puff stitch.
Why Choose the Puff Stitch for Your Washcloth?
The puff stitch, as its name suggests, creates a “puffed-out” texture on the surface of your work. This unique quality makes it ideal for washcloths for several reasons:
- Exceptional Softness: The way the yarn is worked in a puff stitch creates a dense, squishy fabric that feels incredibly soft against the skin, perfect for gentle exfoliation or simply a luxurious wash.
- Absorbent and Effective: The raised texture provides more surface area, making the washcloth highly absorbent and effective at scrubbing without being abrasive.
- Visually Appealing: The dimensional quality of the puff stitch adds a beautiful visual interest to your finished piece, making it look more intricate than it actually is.
- Beginner-Friendly: While it might look complex, the puff stitch is essentially a variation of the double crochet and can be easily picked up by those familiar with basic crochet stitches.
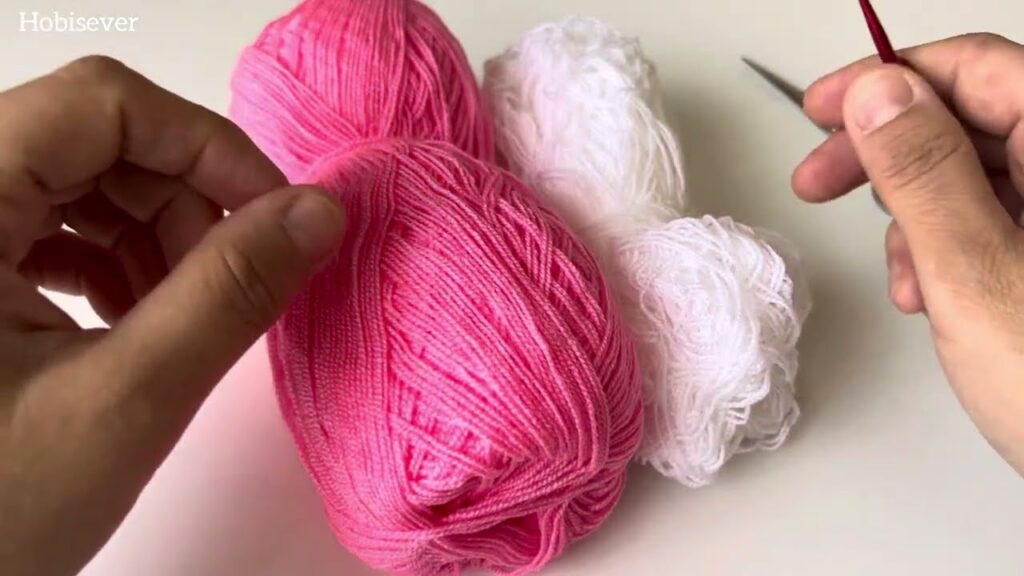
What You’ll Need: Materials for Your Puff Stitch Washcloth
Before you begin, gather your supplies. The right materials will make your crocheting experience much more enjoyable and ensure a high-quality finished product.
- Yarn:
- 100% Cotton Worsted Weight Yarn (Category 4): This is the ideal choice for washcloths. Cotton is highly absorbent, durable, and holds up well to repeated washing and drying. Avoid acrylic or wool yarns for washcloths as they are less absorbent and may not be as suitable for this purpose.
- Quantity: You’ll typically need one skein (approximately 80-100 yards) for a standard-sized washcloth. Choose a color that brings you joy!
- Crochet Hook:
- Size H/5.0mm or I/5.5mm: The hook size can vary slightly depending on your tension and desired fabric density. A 5.0mm or 5.5mm hook is a good starting point for worsted weight cotton. If you crochet tightly, go up a hook size; if you crochet loosely, go down.
- Yarn Needle (Tapestry Needle): For weaving in your ends neatly.
- Scissors: For cutting your yarn.
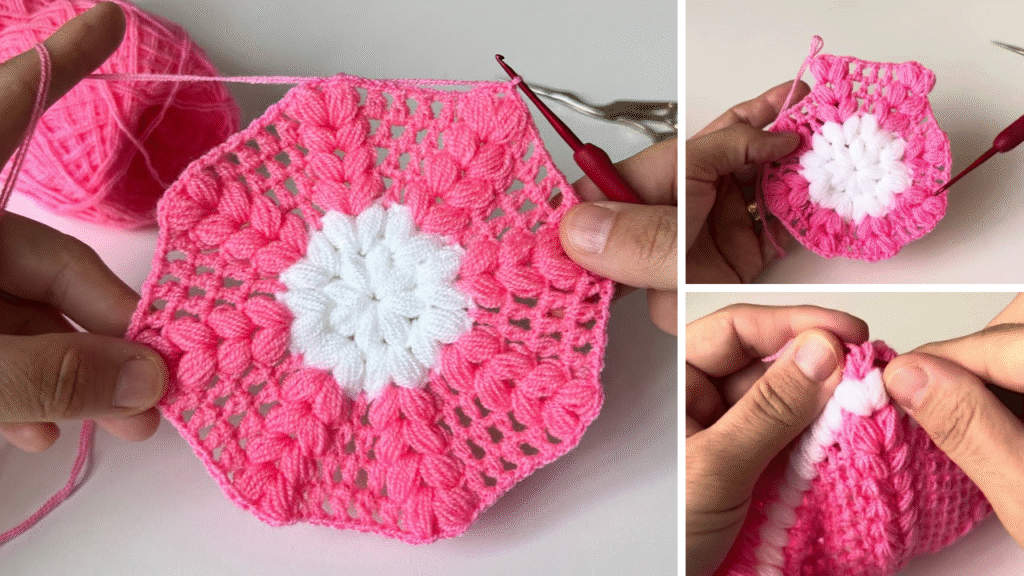
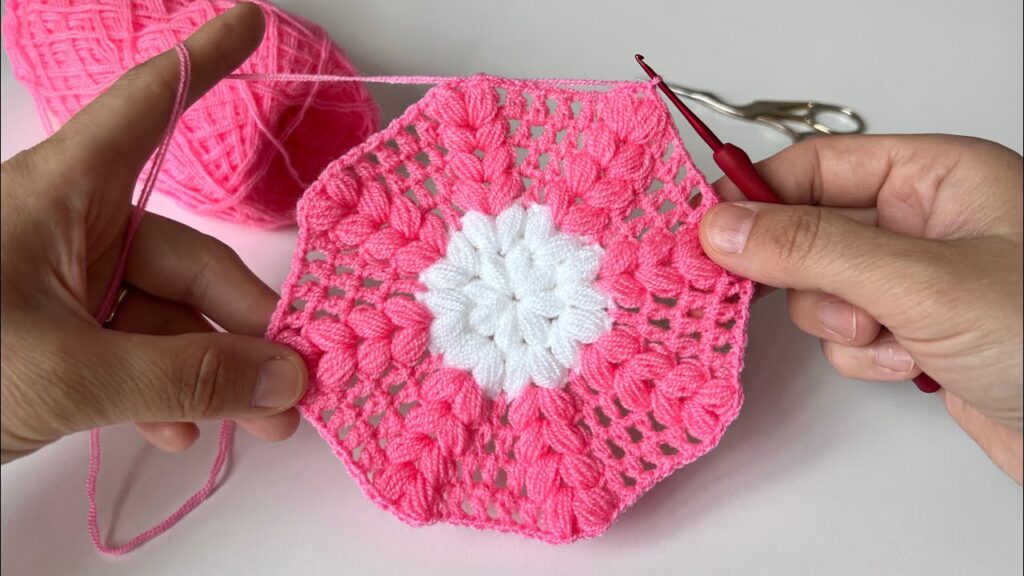
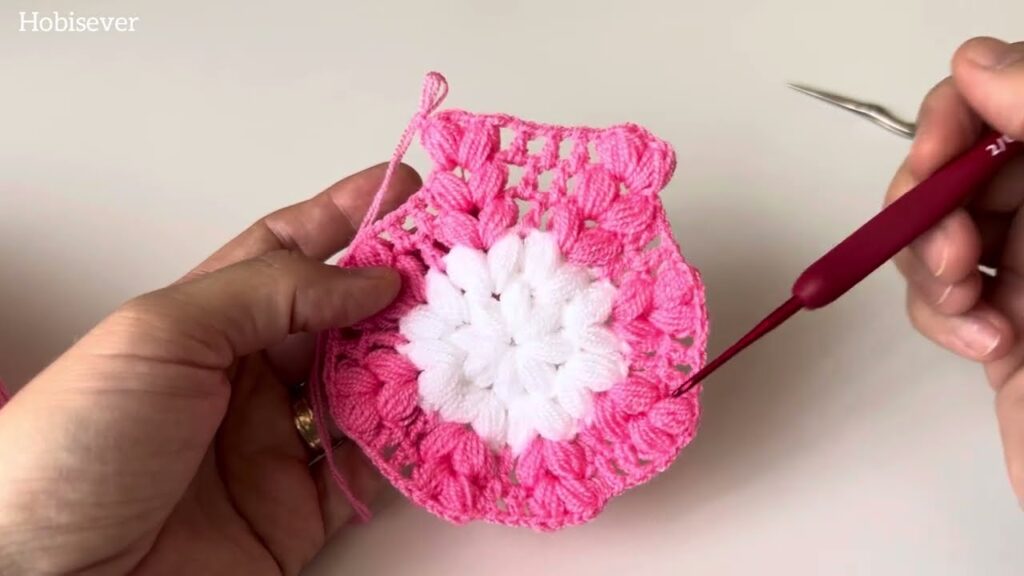
Understanding the Puff Stitch: A Quick Tutorial
Before we dive into the washcloth pattern, let’s break down how to create the puff stitch. Once you master this, the rest of the pattern will be a breeze!
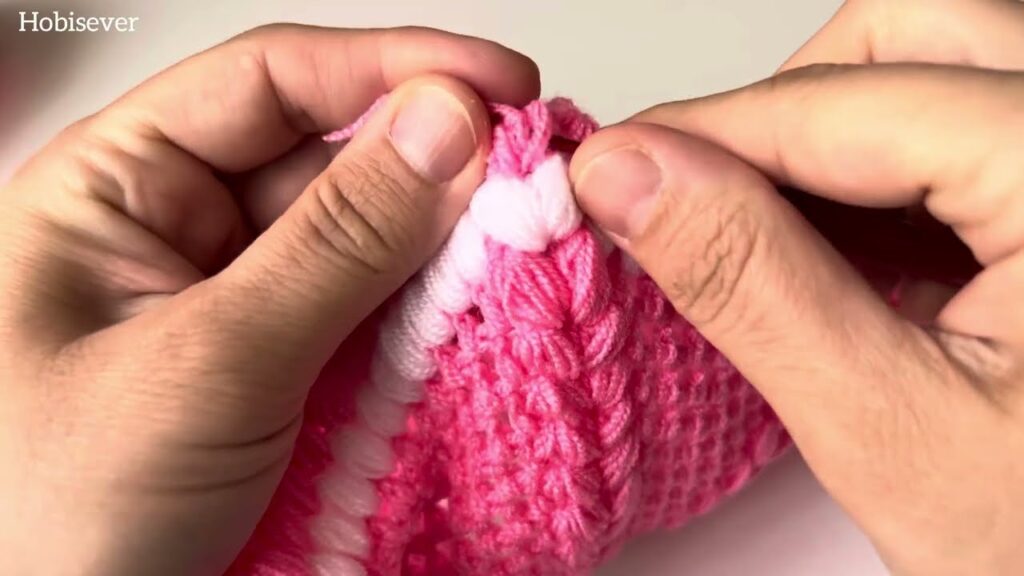
The puff stitch (often abbreviated as “puff st” or “PS”) is worked by “puffing” several half-finished stitches together into one stitch.
How to Make a Puff Stitch:
- Yarn over (YO).
- Insert your hook into the indicated stitch or space.
- YO and pull up a loop. (You should now have 3 loops on your hook).
- YO and insert your hook into the same stitch or space.
- YO and pull up a loop. (You should now have 5 loops on your hook).
- Repeat steps 4 and 5 once more (or as many times as the pattern indicates for your desired puffiness). For a typical puff stitch in a washcloth, 3 or 4 repetitions (meaning you’ll have 7 or 9 loops on your hook before the final step) work well. Let’s aim for 3 repetitions for this tutorial, so you’ll have 7 loops on your hook.
- YO and pull through all 7 loops on your hook.
- Chain 1 (ch 1) to close the puff stitch and secure it. This chain 1 also creates a small space that can be worked into on the next row, or simply helps the puff stitch to stand out.
Important Note: The chain 1 that closes the puff stitch is often not counted as a stitch in the stitch count for the row, unless specified otherwise in the pattern. It simply secures the puff.
Easy Crochet Washcloth Pattern: Step-by-Step
This pattern creates a washcloth approximately 8×8 inches, but you can easily adjust the size by chaining more or fewer stitches in your starting chain.
Abbreviations Used:
- ch: chain
- st(s): stitch(es)
- sk: skip
- sc: single crochet
- puff st: puff stitch
- sl st: slip stitch
- rep: repeat
- dc: double crochet (used in the border)
Let’s Begin!
Foundation Chain:
Ch 30. (This will create a washcloth roughly 8 inches wide. For a wider washcloth, chain an even number of stitches; for a narrower one, chain fewer.)
Row 1: (Set-up Row)
- Sc in the second ch from the hook, and sc in each ch across. (29 sc)
- Ch 1, turn. (The ch 1 does NOT count as a stitch.)
This initial row of single crochet provides a stable base for your puff stitches and helps the washcloth maintain its shape.
Row 2: (Puff Stitch Row)
- Sc in the first sc.
- *Puff st in the next sc, sk 1 sc.* (Remember, our puff stitch involves 3 YO, pull up a loop repetitions before the final pull through all loops, followed by a ch 1 to secure.)
- Rep from * to * across until you have 2 stitches remaining.
- Puff st in the next sc.
- Sc in the last sc. (You should have a total of 14 puff stitches and 2 single crochets in this row.)
- Ch 1, turn.
This row introduces the puff stitch. The “skip 1 sc” helps to create the characteristic staggered look of the puff stitches.
Row 3: (Single Crochet Row)
- Sc in the first sc.
- Sc in the top of each puff st. (This is the “chain 1” that you made to secure the puff stitch.)
- Sc in each skipped sc from the previous row. (Work into the skipped single crochet from Row 1 directly below where the puff stitch was.)
- Sc in the last sc. (You should have 29 sc again.)
- Ch 1, turn.
This row of single crochet creates a flat surface between the puff stitch rows, which helps to define the puff stitches and makes the fabric more stable.
Repeat Rows 2 and 3:
Continue repeating Row 2 (Puff Stitch Row) and Row 3 (Single Crochet Row) until your washcloth reaches your desired length. A good length for an 8-inch wide washcloth is usually around 8 inches, which means you’ll repeat these two rows about 12-14 times (24-28 rows total, including the initial set-up row).
Last Row:
After you complete a Row 3 (a single crochet row), do not chain 1 and turn. Instead, fasten off and weave in your ends.
Optional Border: Adding a Polished Touch
Adding a simple border can give your washcloth a more finished and professional look. A single crochet or double crochet border works beautifully.
Simple SC Border:
- Join your yarn with a slip stitch in any corner.
- Ch 1 (does not count as a stitch).
- Work single crochet stitches evenly around all four sides of your washcloth. For the sides, aim for one single crochet per row end. In each corner, work (sc, ch 1, sc) to create a neat turn.
- Join with a slip stitch to the first sc.
- Fasten off and weave in ends.
Simple DC Border:
- Join your yarn with a slip stitch in any corner.
- Ch 2 (counts as a dc).
- Work double crochet stitches evenly around all four sides. For the sides, aim for two double crochets per row end. In each corner, work (dc, ch 2, dc) to create a neat turn.
- Join with a slip stitch to the top of the beginning ch 2.
- Fasten off and weave in ends.
Finishing Your Washcloth
Once your washcloth is complete and all ends are woven in, it’s ready to be used! For best results, wash your new cotton washcloth before its first use. Cotton tends to become softer and more absorbent after a wash.
Tips for Beginners
- Don’t Be Afraid to Practice: The puff stitch might feel a bit awkward at first, but with a few repetitions, it will become second nature.
- Watch Your Tension: Consistent tension is key to an even fabric. Try to keep your stitches neither too tight nor too loose.
- Count Your Stitches: Especially in the initial rows, counting your stitches at the end of each row ensures your washcloth stays straight and doesn’t get wider or narrower.
- Use Stitch Markers: If you’re having trouble identifying the first or last stitch of a row, place a stitch marker in them.
- Embrace Imperfection: Your first few projects might not be perfect, and that’s perfectly okay! Every stitch you make is a step in your learning journey.
- Experiment with Colors: Try making a set of washcloths in different colors to match your bathroom or kitchen decor.
- Gift Them! Handmade washcloths make thoughtful and practical gifts for housewarmings, birthdays, or just because.
Beyond the Washcloth: Other Uses for the Puff Stitch
Once you’ve mastered the puff stitch with this washcloth pattern, you’ll find countless other applications for this versatile stitch:
- Coasters: Perfect for protecting your furniture and adding a cozy touch.
- Dishcloths: The absorbency and scrubbing power make them ideal for kitchen chores.
- Baby Blankets: The soft, squishy texture is wonderful for baby items.
- Scarves and Cowls: Create warm and textured accessories.
- Bags and Purses: The dense fabric provides good structure.
Crocheting your own puff stitch washcloth is a rewarding project that combines practicality with the joy of handmade creation. It’s an excellent way for beginners to expand their stitch repertoire and create something beautiful and functional for their home. So grab your hook and yarn, and get ready to enjoy the luxurious feel of your very own handmade puff stitch washcloth!
Video tutorial:


