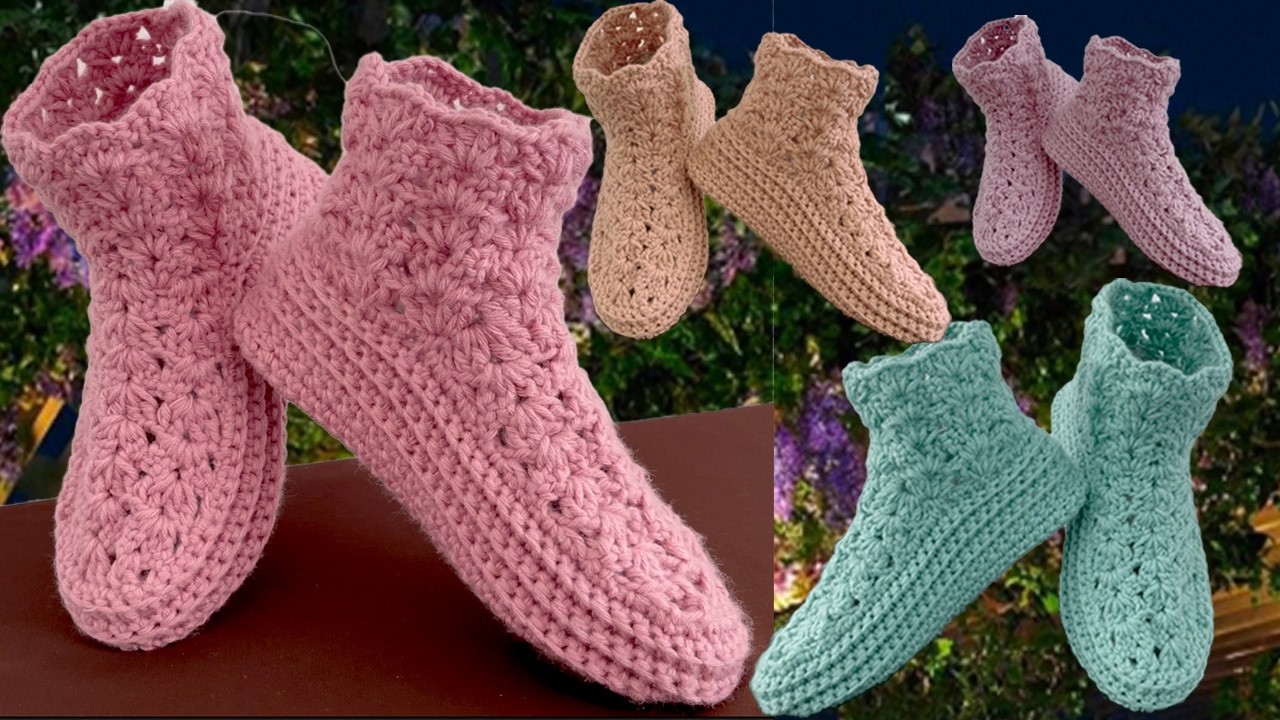
Crocheting your own slippers is a wonderfully rewarding project. Not only do you get a cozy, custom-made pair of footwear, but it’s also a fantastic way to express your creativity. These “cute adult slippers” are designed to be relatively easy, making them perfect for confident beginners or intermediate crocheters looking for a quick and satisfying make.

Before You Start: Essential Information
- Skill Level: Easy to Intermediate
- Finished Size: Customizable (instructions for a women’s size 7-8 US included, with notes on adjusting)
- Gauge: Crucial for sizing! Always check your gauge.
- Estimated Time: 4-6 hours, depending on your speed.
Materials You’ll Need:
- Yarn:
- Worsted Weight (Aran/10-ply) yarn, approximately 200-250 yards.
- Recommended: Soft acrylic or a wool blend for warmth and comfort. Choose a color you love, and perhaps a contrasting color for accents if desired.
- Crochet Hook:
- 5.0 mm (H/8 US) crochet hook (or size needed to obtain gauge).
- Tapestry Needle: For weaving in ends and seaming.
- Scissors: For cutting yarn.
- Stitch Markers (optional but recommended): Especially helpful for marking the beginning of rounds.
- Non-Slip Fabric Paint or Sole Material (optional but highly recommended): For added safety on smooth floors. You can use puff paint, liquid latex, or a pre-made slipper sole material.
Abbreviations (US Crochet Terms):
- ch: chain
- sl st: slip stitch
- sc: single crochet
- hdc: half double crochet
- dc: double crochet
- st(s): stitch(es)
- rnd: round
- fo: fasten off
- BLO: back loop only
- FLO: front loop only
- inc: increase (usually 2 stitches in one stitch)
- dec: decrease (usually sc2tog for single crochet, hdc2tog for half double crochet, etc.)
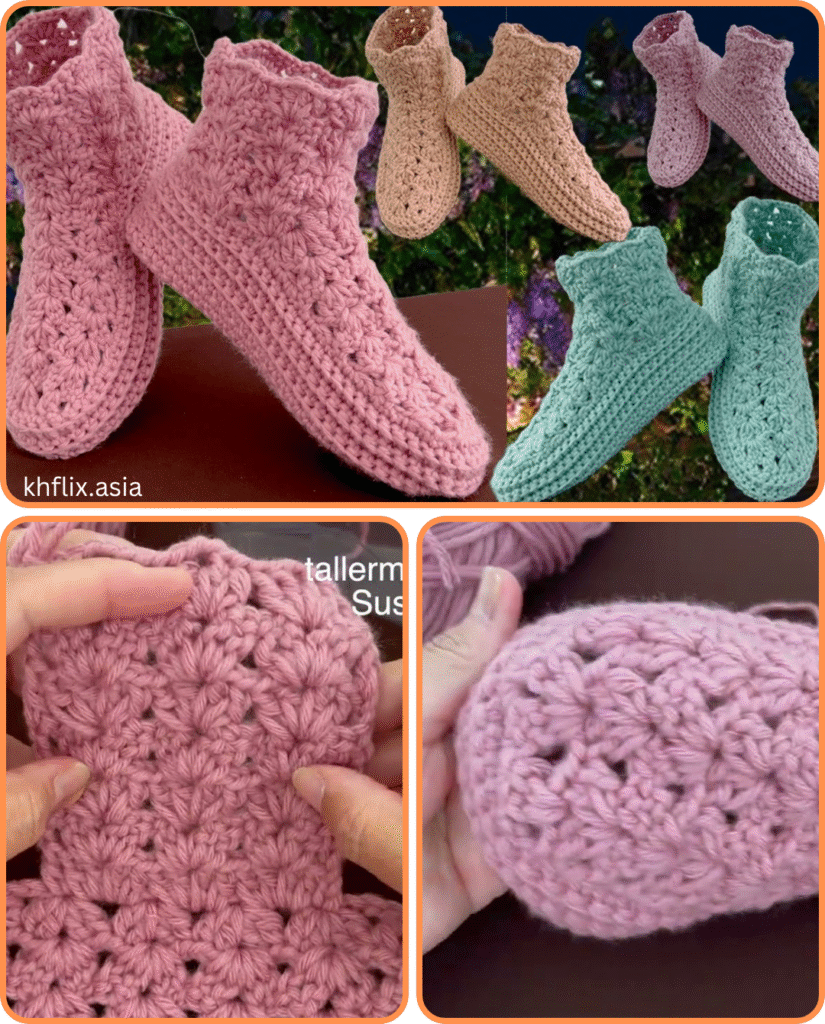
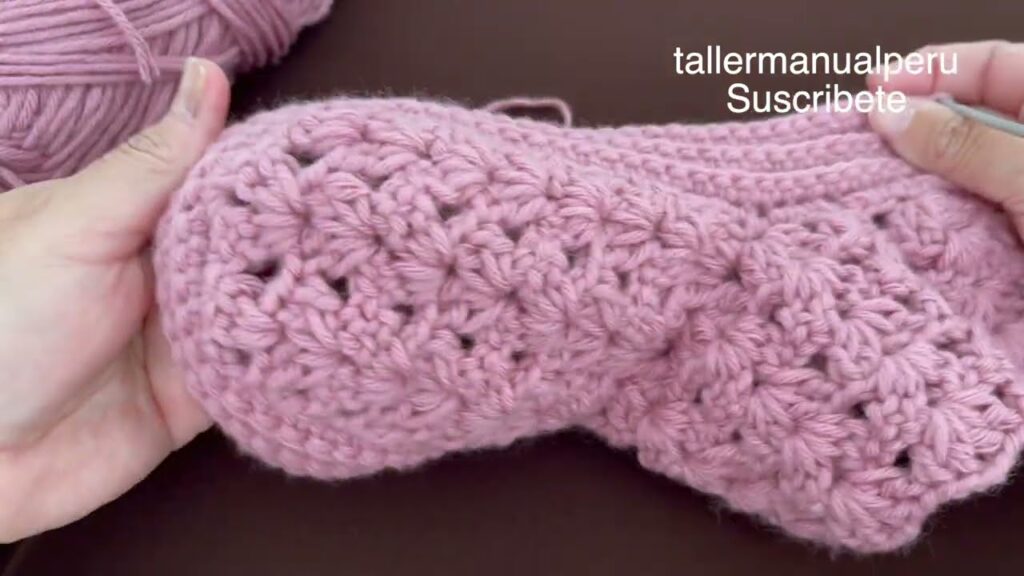
Part 1: The Slipper Base (Sole)
The foundation of your slipper is the sole. We’ll be working in an oval shape.
Gauge Check (VERY IMPORTANT!): Before you begin, make a small swatch to check your gauge. Ch 12. Sc in 2nd ch from hook and across (11 sc). Ch 1, turn. Work 10 rows of sc. Your swatch should measure approximately 3.5 inches wide by 3.5 inches tall. If it’s larger, go down a hook size. If it’s smaller, go up a hook size.
Instructions (Make 2):
- Ch 25 (This chain length will determine the length of your slipper. For a larger size, add more chains; for a smaller size, subtract chains. Each additional/subtracted chain will add/subtract approximately 0.5 inches to the finished slipper length).
- Rnd 1:
- 2 sc in 2nd ch from hook.
- Sc in next 22 chs.
- 5 sc in last ch (this creates the rounded toe).
- Working down the other side of the foundation chain: Sc in next 22 chs.
- 3 sc in the very first ch where you started (this creates the rounded heel).
- Join with a sl st to the first sc. (54 sts)
- Rnd 2:
- Ch 1 (does not count as a stitch).
- 2 sc in first 2 sts (increases for the heel).
- Sc in next 22 sts.
- 2 sc in next 5 sts (increases for the toe).
- Sc in next 22 sts.
- 2 sc in next 3 sts (increases for the heel).
- Join with a sl st to the first sc. (64 sts)
- Rnd 3:
- Ch 1.
- (Sc, 2 sc) in next 2 sts (4 sts total).
- Sc in next 22 sts.
- (Sc, 2 sc) in next 5 sts (10 sts total).
- Sc in next 22 sts.
- (Sc, 2 sc) in next 3 sts (6 sts total).
- Join with a sl st to the first sc. (74 sts)
- Rnd 4: Ch 1. Sc in each st around. Join with a sl st. (74 sts)
- Rnd 5: Ch 1. Sc in each st around. Join with a sl st. (74 sts)
- You now have your slipper sole. It should be firm and relatively flat. If you want a thicker sole, repeat Rnd 4 or 5 once or twice more. This is also where you could insert a pre-made slipper sole for extra cushioning and durability.
Part 2: Building the Slipper Sides
Now we’ll work upwards to form the body of the slipper.
Instructions (Continue from Slipper Base):
- Rnd 6 (Creating the Ridge):
- Ch 1. Work sc in the BLO of each st around. Join with a sl st to the first sc. (74 sts)
- Working in the BLO creates a nice defined ridge around the sole of the slipper, giving it a more polished look.
- Rnd 7-10 (Slipper Body):
- Ch 1. Hdc in each st around. Join with a sl st to the first hdc. (74 sts)
- Repeat these 4 rounds of hdc. Hdc stitches are great for slippers because they create a dense, warm fabric.
- Rnd 11 (Start of Toe Shaping):
- Ch 1. Hdc in next 25 sts.
- Hdc2tog (decrease) over next 2 sts. Repeat 12 more times (13 decreases total).
- Hdc in remaining sts. Join with a sl st. (61 sts)
- You’ll start to see the toe of the slipper forming here.
- Rnd 12:
- Ch 1. Hdc in next 25 sts.
- Hdc2tog over next 2 sts. Repeat 6 more times (7 decreases total).
- Hdc in remaining sts. Join with a sl st. (54 sts)
- Rnd 13:
- Ch 1. Hdc in next 25 sts.
- Hdc2tog over next 2 sts. Repeat 3 more times (4 decreases total).
- Hdc in remaining sts. Join with a sl st. (50 sts)
- Try on the slipper at this point to check the fit. If it’s too loose, you can add another decrease round or tighten your tension. If it’s too tight, you may need to unravel a bit or consider going up a hook size on your next pair!
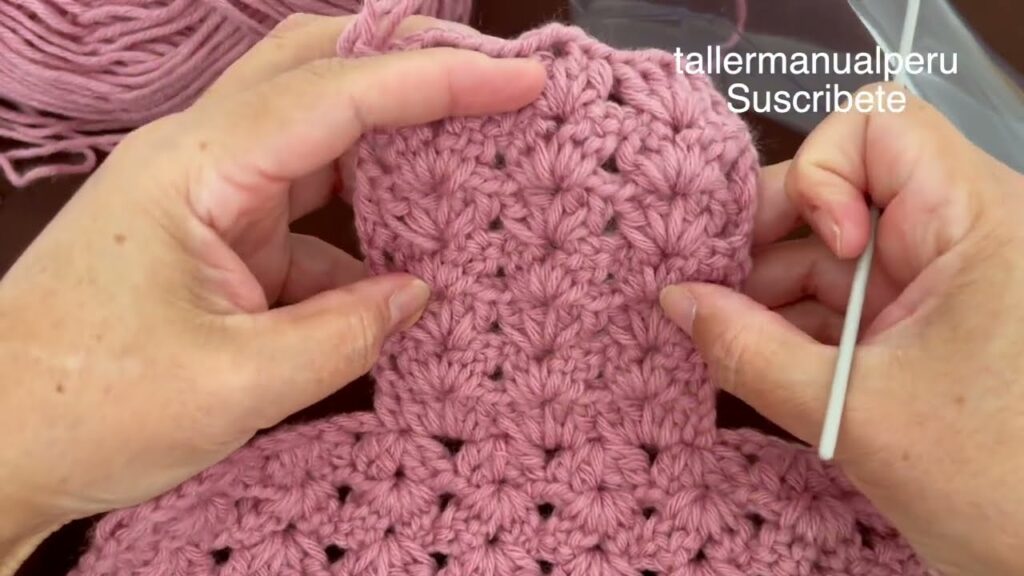
Part 3: The Slipper Cuff/Ankle
This part makes the slipper comfortable around the ankle and adds a touch of style.
Instructions (Continue from Slipper Body):
- Rnd 14 (Optional Trim Color Change):
- Ch 1. Sc in each st around. Join with a sl st to the first sc. (50 sts)
- You can change to a contrasting color here for a pretty accent.
- Rnd 15 (Optional Decorative Edge):
- Ch 1. Sc in first st, ch 2, skip next st around. Join with a sl st to the first sc. (This creates a simple lace-like edge).
- Alternatively, you could do a crab stitch (reverse single crochet) for a textured border, or just a simple round of sc.
- Fo. Weave in all ends securely using your tapestry needle.
Part 4: Finishing Touches & Embellishments
This is where you make your slippers truly “cute”!
- Non-Slip Soles (Highly Recommended):
- Turn your slipper inside out (if using paint) or work on the bottom of the sole.
- Apply non-slip fabric paint in dots, lines, or a fun pattern on the bottom of the sole. Follow the manufacturer’s instructions for drying time. This prevents slipping on smooth floors.
- Alternatively, you can hand-stitch or machine-stitch a piece of non-slip fabric or leather onto the sole.
- Add Embellishments:
- Pom-Poms: Make two matching yarn pom-poms and securely sew them to the top of the slipper.
- Buttons: Attach cute decorative buttons.
- Bow: Crochet a small bow and sew it on.
- Appliqués: Crochet small flowers, hearts, or other shapes and sew them on.
- Embroidery: Embroider a simple design onto the slipper.
Caring for Your Crocheted Slippers:
- Hand Wash: Most yarn is best hand-washed in cool water with a mild detergent.
- Gently Squeeze: Don’t wring them out. Gently squeeze excess water.
- Reshape and Air Dry: Lay flat on a clean towel or drying rack. Avoid direct heat or sunlight which can shrink or damage the yarn.
- Non-Slip Paint Care: If you used fabric paint, check the product’s care instructions.
Tips for Success:
- Read Through: Read the entire pattern before you start to familiarize yourself with the steps.
- Count Your Stitches: Always count your stitches at the end of each round to ensure accuracy and prevent mistakes.
- Use Stitch Markers: Mark the beginning of each round, especially when working in the round.
- Practice Decreases: If you’re new to decreases, practice them a few times before working them into the pattern.
- Adjust as Needed: Don’t be afraid to adjust the pattern slightly to fit your foot perfectly. Everyone’s feet are different!
- Have Fun! Enjoy the process of creating something beautiful and cozy with your own hands.
You’ve now got a fantastic pair of custom-made, cute, and cozy adult slippers ready to keep your feet warm and stylish! Happy crocheting!
Video tutorial:


