
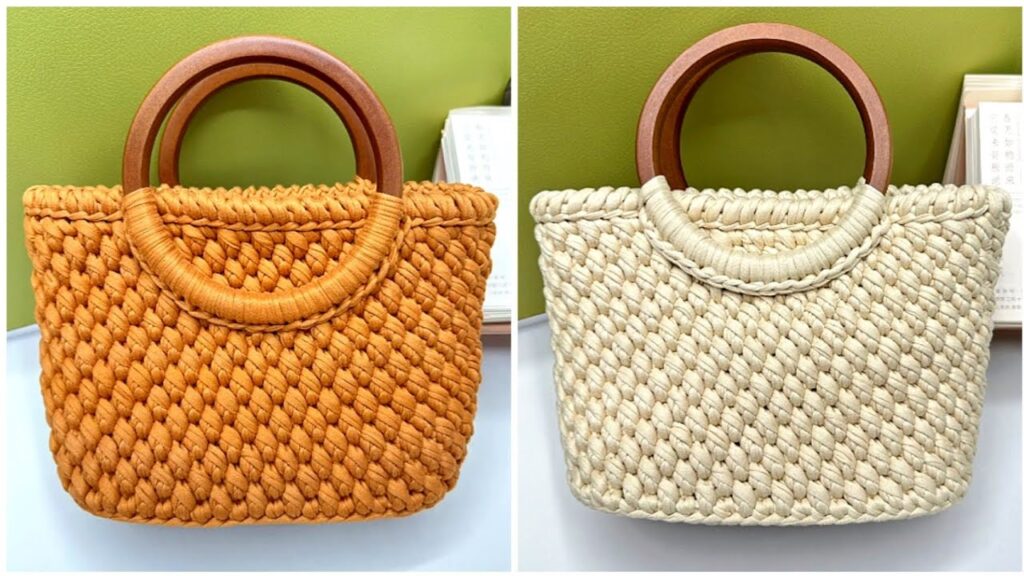
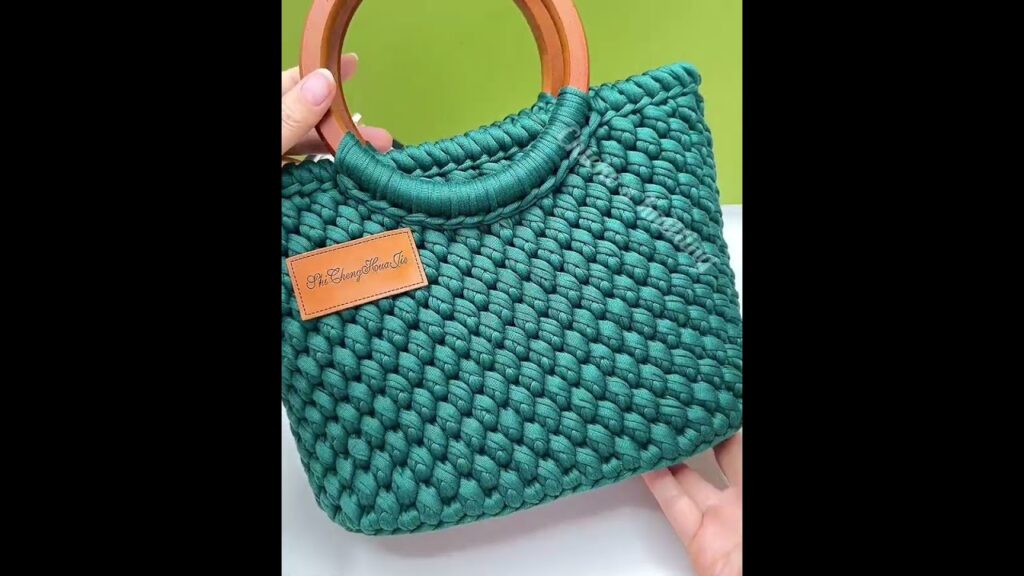
There’s something uniquely satisfying about crafting your own accessories, and a handmade tote bag is as practical as it is stylish. Whether you’re new to the world of crochet or a seasoned pro looking for a quick and rewarding project, a “super easy” tote bag is the perfect choice. Forget complicated stitches or intricate shaping – this design focuses on fundamental techniques to create a sturdy, beautiful bag that you’ll love to use every day.
This article will walk you through everything you need to know to create your own super easy crochet tote bag, from choosing the right materials to mastering the basic stitches and assembling your new favorite carry-all.
Why a Super Easy Crochet Tote Bag?
This project is a winner for many reasons:
- Beginner-Friendly: It primarily uses just one or two basic stitches, making it perfect for those learning to crochet.
- Quick to Make: With simple stitches and minimal shaping, you’ll see your bag take shape rapidly.
- Highly Functional: A tote bag is incredibly versatile – perfect for groceries, market trips, beach days, yarn projects, or just carrying your essentials.
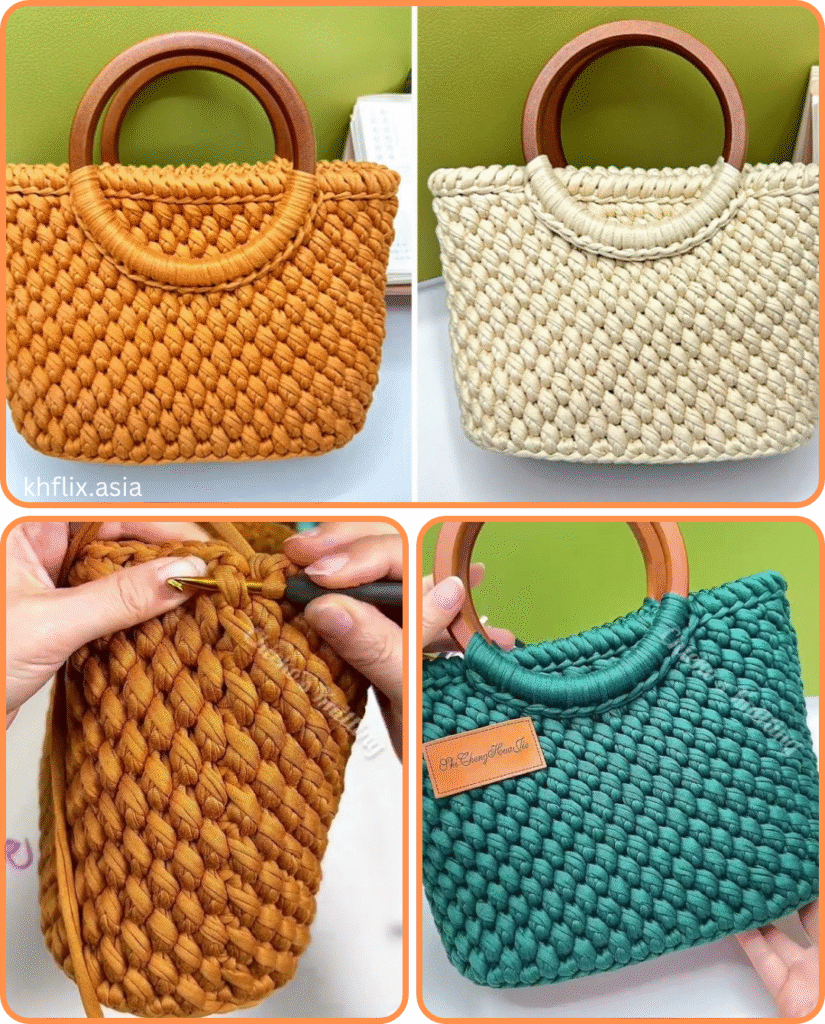
- Customizable: Easily adjust the size, color, and strap length to suit your personal style and needs.
- Eco-Friendly: A reusable handmade bag is a great way to reduce plastic waste.
Materials You’ll Need
The right materials are crucial for a durable and attractive tote bag.
- Yarn:
- Weight: For a sturdy tote, worsted weight (4) or aran weight (4.5) cotton or a cotton blend is highly recommended. These provide good structure and are durable. You could also use a bulky (5) yarn for an even quicker and chunkier bag.
- Fiber Content:
- Cotton/Cotton Blends: Excellent choice! They are strong, durable, hold their shape well, and are easy to wash. They also have a good grip for holding items.
- Acrylic: Affordable and comes in a huge range of colors. Choose a sturdy, less “stretchy” acrylic if possible.
- Recycled Fibers (e.g., T-shirt yarn, recycled cotton): Great for an eco-conscious and unique bag, often providing a chunky, robust texture.
- Yardage: This will vary based on your desired bag size and yarn weight. For a medium-sized tote (approx. 14″ W x 16″ H), plan for 400-600 yards (365-550 meters) of worsted weight yarn. Always buy a bit extra!
- Crochet Hook: Refer to your chosen yarn’s label for the recommended hook size. As a general guide:
- For worsted weight yarn: 5.0 mm (H) or 5.5 mm (I)
- For bulky weight yarn: 6.0 mm (J) or larger
- You might go down a hook size from the label’s recommendation if you want a denser fabric for a sturdier bag.
- Yarn Needle (or Tapestry Needle): For weaving in ends and seaming.
- Scissors: For cutting yarn.
- Stitch Marker (Optional but Recommended): Helpful for marking the beginning of rounds or specific stitches.
- Measuring Tape: For checking your gauge and bag dimensions.

Understanding Gauge (Don’t Skip This!)
Gauge refers to the number of stitches and rows per inch (or centimeter). While it might seem like an extra step, checking your gauge ensures your finished bag will be the correct size and have the desired firmness.
To check your gauge (using Single Crochet for example):
- Chain about 15-20 stitches.
- Row 1: Sc in the 2nd ch from hook, sc in each ch across.
- Row 2: Ch 1 (does not count as a stitch), turn, sc in each sc across.
- Repeat Row 2 until your swatch measures at least 4×4 inches (10×10 cm).
- Measure a 4×4 inch square within your swatch. Count how many single crochet stitches you have across 4 inches and how many rows you have in 4 inches.
- Adjust if needed:
- If you have more stitches/rows than the pattern suggests (or your desired firmness), your tension is too tight. Go up a hook size.
- If you have fewer stitches/rows than the pattern suggests, your tension is too loose. Go down a hook size.
- Repeat until your gauge is close to what you desire.
The Super Easy Stitch Patterns
For this tote, we’ll focus on just a couple of fundamental stitches:
- Chain (ch): The foundation of almost all crochet.
- Single Crochet (sc): Creates a dense, sturdy fabric perfect for bags.
- Slip Stitch (sl st): Used to join stitches, finish rounds, and create neat edges.
Abbreviations:
- ch: chain
- sc: single crochet
- sl st: slip stitch
- st(s): stitch(es)
- rnd: round
Pattern Instructions: The Super Easy Crochet Tote Bag
This pattern creates a rectangular base and then builds up the sides in continuous rounds.
Finished Size (Approximate): 14 inches wide x 16 inches tall (excluding straps). You can easily adjust by changing your starting chain and number of rounds.
Part 1: The Base of the Bag
The base is worked in an oval shape, crocheting around a starting chain.
- Starting Chain: Ch 31 (or any odd number for your desired base length. An odd number helps center stitches later. Remember, 31 chs will result in a base length of approximately 14 inches after the first round).
- Rnd 1: 2 sc in the 2nd ch from hook, sc in each of the next 28 chs (or chs minus 3), 4 sc in the last ch. Now, working along the opposite side of the starting chain: sc in each of the next 28 chs, 2 sc in the last ch. Join with a sl st to the first sc. (64 sc total, or (Starting Ch – 1) x 2 + 6 sc)
- This forms an oval base, with increases at each end to turn the corners.
- Rnd 2: Ch 1 (does not count as a stitch), sc in the same st as join. 2 sc in the next st, sc in each of the next 30 sc. 2 sc in the next st, sc in the next st, 2 sc in the next st, sc in each of the next 30 sc. 2 sc in the last st. Join with a sl st to the first sc. (70 sc total)
- You are continuing to increase at the corners to keep the base flat. The exact number of increases per round will depend on your starting chain and desired base flatness. For a simple base, just ensuring increases at the ends of the oval will suffice.
- Rnd 3: Ch 1, sc in the same st. Sc in each st around. Join with a sl st to the first sc. (70 sc total)
- This round sets the foundation for the sides. No increases here.
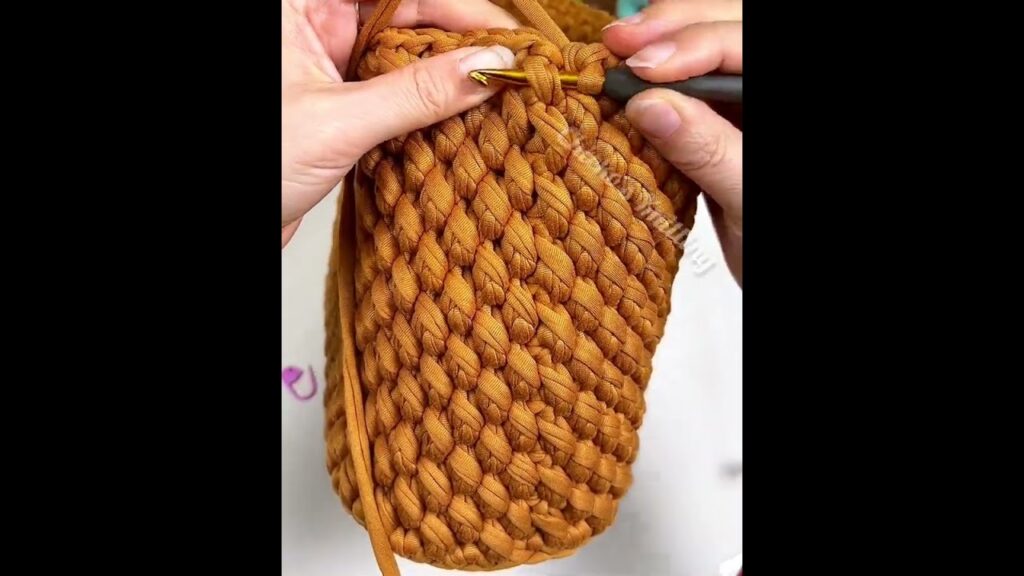
Part 2: The Body of the Bag
Now we’ll work straight up to form the sides of the tote.
- Rnd 4: Ch 1, sc in the same st as join. Sc in the back loop only (BLO) of each st around. Join with a sl st to the first sc. (70 sc total)
- Working in the BLO creates a slight ridge that helps define the bottom of the bag and makes the sides stand up nicely.
- Rnd 5 onwards: Ch 1, sc in the same st as join. Sc in each st around (through both loops this time). Join with a sl st to the first sc.
- Repeat Rnd 5: Continue repeating Rnd 5 until your bag reaches your desired height (e.g., 16 inches from the base).
- Count your rounds periodically to keep track of your progress.
- Last Round of Body: Finish your last body round with a sl st to the first sc. Fasten off, leaving a tail about 12-18 inches long for attaching straps if you plan to sew them on.

Part 3: The Straps
You have a few options for straps:
Option A: Crocheted Straps (Recommended for Super Easy)
You’ll make two identical strips.
- Strap 1: Ch 5 (or desired width).
- Row 1: Sc in the 2nd ch from hook, sc in each ch across. (4 sc)
- Row 2: Ch 1 (does not count as a st), turn, sc in each sc across. (4 sc)
- Repeat Row 2: Continue repeating Row 2 until your strap reaches your desired length (e.g., 24-26 inches for a shoulder bag). Fasten off, leaving a long tail for sewing.
- Make Strap 2: Repeat steps 1-4 for the second strap.
Attaching Crocheted Straps:
- Lay your bag flat. Flatten it so the side seams (or natural creases) are aligned.
- Position Straps: Measure in from each side seam approximately 3-4 inches (or find the desired placement) and mark these points on the front and back of the bag with stitch markers or pins. These are where your straps will be attached.
- Sew: Using your yarn needle and the long tail, securely sew one end of a strap to the marked points on the front of the bag. Use a strong whip stitch or mattress stitch. Reinforce by sewing back and forth a few times.
- Repeat: Attach the other end of the same strap to the corresponding marked points on the back of the bag.
- Second Strap: Attach the second strap in the same manner on the opposite side of the bag.
- Weave in Ends: Securely weave in all remaining loose ends.
Option B: Fabric or Leather Straps (Requires some basic sewing skills or pre-made straps)
If you want a different look or extra durability, you can purchase pre-made fabric or leather straps, or make your own from sturdy fabric.
- Prepare Straps: If making your own, cut two fabric strips (e.g., 3″ wide x 26″ long). Fold long edges to the center, press, then fold in half again, press, and topstitch along both long edges.
- Attach: Position fabric/leather straps on the inside or outside of the bag top edge, as desired. Use a strong hand-sewing needle and heavy-duty thread (for leather) or your sewing machine (for fabric) to securely attach them with a box stitch or an “X” stitch for reinforcement.
Finishing Your Tote Bag
- Weave in All Ends: This is crucial for a tidy and durable bag. Use your yarn needle to weave in all loose ends securely. Don’t just trim them close, as they can unravel.
- Optional: Add a Lining: For extra durability and to prevent items from poking through the crochet fabric, you can sew a simple fabric lining for your bag. This is an excellent next-step project!
- Optional: Embellishments: Add a tassel, pom-poms, a button closure, or an applique for a personalized touch.

Caring for Your Crocheted Tote Bag
Always refer to your yarn label for specific care instructions.
- Cotton/Acrylic: Most can be machine washed on a gentle cycle with cold water. Lay flat to dry or tumble dry on low. Avoid high heat, which can damage acrylic or cause cotton to shrink excessively.
- Specialty Yarns: Hand wash in cool water with a mild detergent, gently squeeze out excess water (do not wring!), and lay flat on a towel to air dry, reshaping as needed.
Congratulations! You’ve just created a super easy, functional, and beautiful crochet tote bag. This project is a fantastic confidence booster and a wonderful stepping stone to more complex crochet creations. Enjoy using your new handmade accessory!
Video tutorial:


