
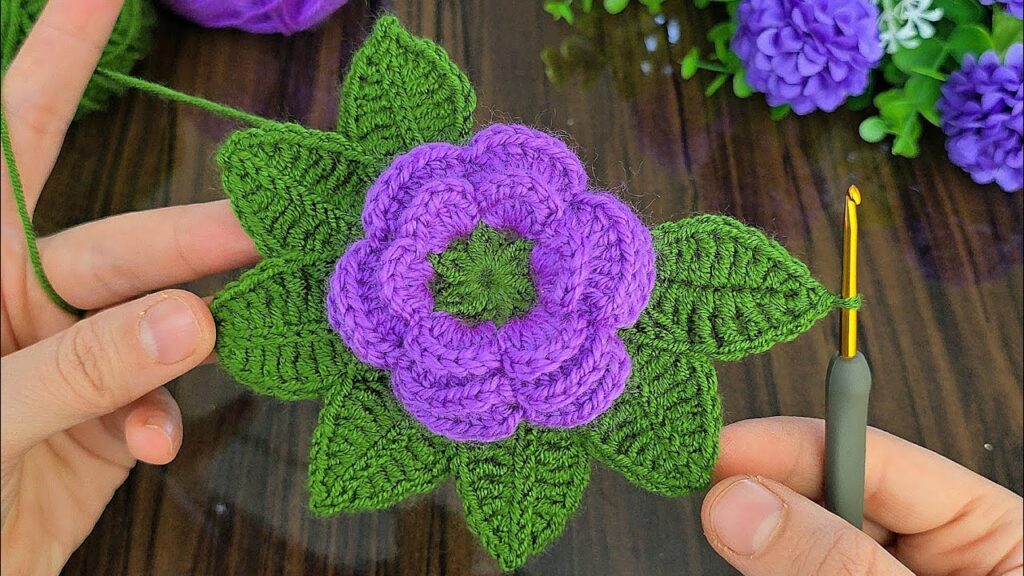
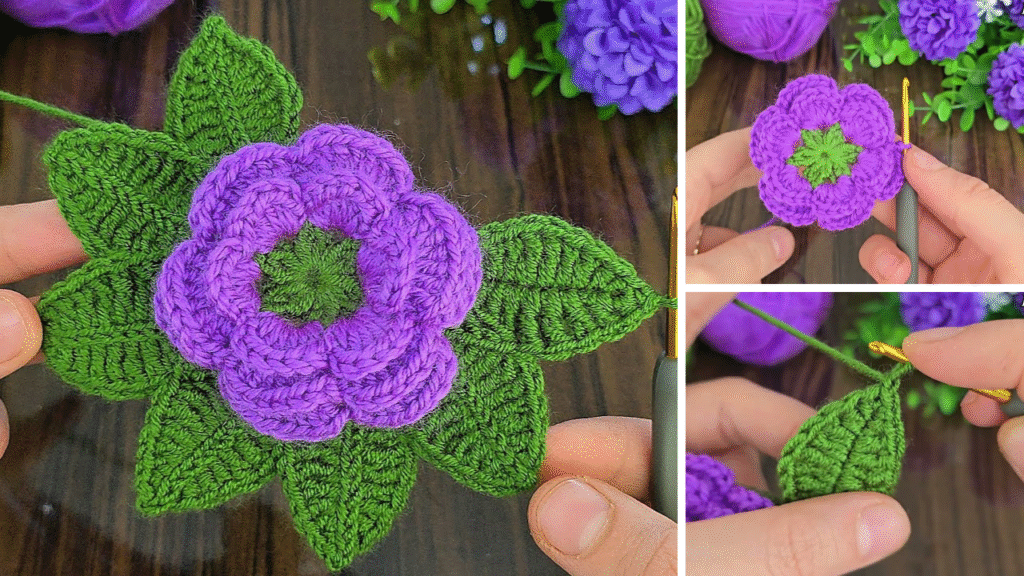
There’s something uniquely satisfying about creating something beautiful with your own hands, especially when it’s surprisingly simple. For beginners eager to dive into the world of crochet, the “easy crochet rose flower motif” is an absolute gem. It’s a quick, rewarding project that teaches fundamental stitches while yielding a charming, versatile embellishment.
Forget complex patterns and endless counting; this rose practically forms itself! You’ll be amazed at how a simple strip of crochet magically transforms into a delicate bloom.
Why Start with the Easy Crochet Rose?
- Instant Gratification: These roses work up incredibly fast, giving you a tangible result in minutes.
- Skill Building: It introduces essential stitches like chain, single crochet, and double crochet in a relaxed, repetitive way.
- Versatility: Once mastered, you can use these little roses for countless projects:
- Adorn headbands, hats, or scarves.
- Embellish bags, blankets, or clothing.
- Create beautiful brooches or hair clips.
- String them together for garlands or jewelry.
- Decorate gift wrapping or handmade cards.
- Budget-Friendly: You only need a small amount of yarn, making it perfect for using up scraps.
Materials You’ll Need
Keep it simple!
- Yarn: Any smooth yarn will work, but for a beginner, a light worsted (DK) or worsted weight (Aran) yarn is easiest to handle. Choose a color that makes you think of roses (red, pink, white, yellow, or even a soft pastel green for leaves!).
- Crochet Hook: Match your hook size to your yarn. The yarn label usually recommends a size (e.g., 4.0mm [G-6] or 5.0mm [H-8]).
- Tapestry Needle: Essential for weaving in ends and sewing your rose into shape.
- Scissors: For cutting your yarn.
Essential Crochet Stitches & Terms (US Terms)
Don’t worry if these sound intimidating; they are simple to learn and will be explained step-by-step.
- Chain (ch): The foundation of almost every crochet project.
- How to: Yarn over (yo), pull yarn through loop on hook.
- Slip Stitch (sl st): Used for joining, moving across stitches, or finishing.
- How to: Insert hook into stitch, yo, pull yarn through stitch and through loop on hook.
- Single Crochet (sc): A short, dense stitch.
- How to: Insert hook into stitch, yo, pull up a loop (2 loops on hook), yo, pull through both loops.
- Half Double Crochet (hdc): A stitch taller than sc but shorter than dc.
- How to: Yo, insert hook into stitch, yo, pull up a loop (3 loops on hook), yo, pull through all 3 loops.
- Double Crochet (dc): A taller, looser stitch.
- How to: Yo, insert hook into stitch, yo, pull up a loop (3 loops on hook), yo, pull through 2 loops (2 loops on hook), yo, pull through remaining 2 loops.
Let’s Make a Rose! The Step-by-Step Guide
This rose is made by crocheting a flat strip that naturally curls into a spiral when you use varying stitch heights.
Step 1: The Foundation Chain
- Pick up your yarn and hook. Make a slip knot on your hook.
- Chain (ch) 25: This will be the length of your rose strip. If you want a smaller rose, chain 20-22. For a slightly larger one, chain 30-35.
- Tip for beginners: Don’t chain too tightly, or the next row will be difficult to work into.
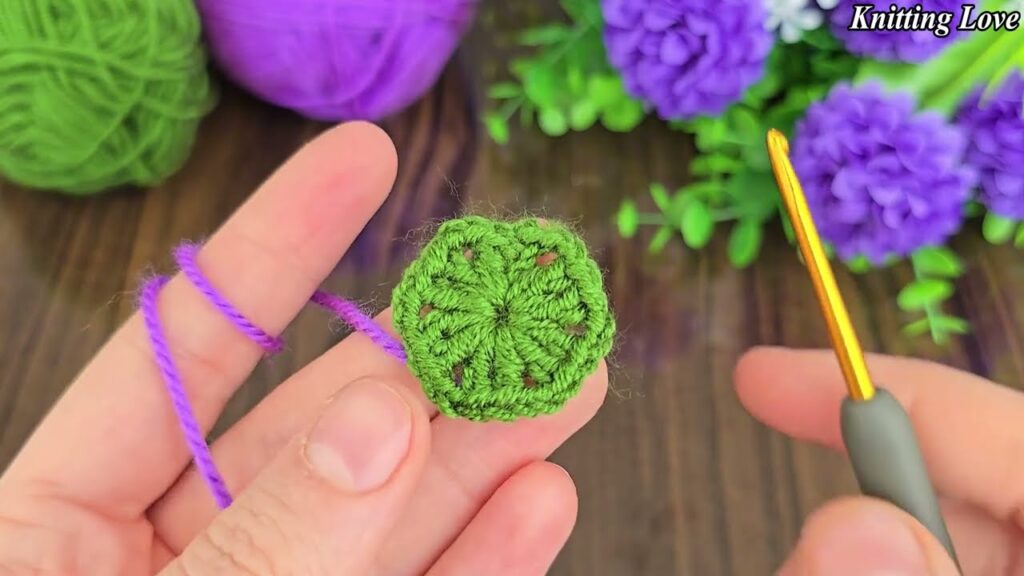
Step 2: The Base Row (Row 1)
This row creates the foundation stitches for your “petals.”
- Half Double Crochet (hdc) in the 3rd chain from your hook. (The 2 skipped chains count as a hdc).
- How to: Yo, insert your hook into the 3rd chain from your hook. Yo again, pull up a loop (you should have 3 loops on your hook). Yo, pull through all 3 loops.
- Hdc in each remaining chain across.
- You should end up with one less hdc than your starting chain (e.g., if you chained 25, you’ll have 24 hdc stitches).
- Chain 2 (ch 2) and turn your work. (This ch 2 counts as the first hdc of the next row).
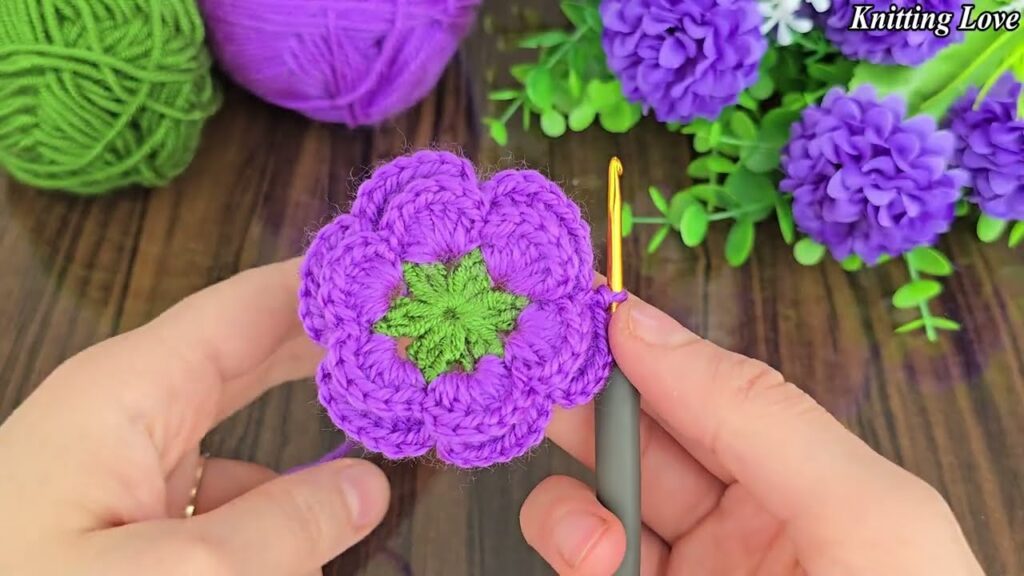
Step 3: The Petal Row (Row 2 – The Magic Row!)
This is where the ruffles for your petals are created. You’ll be working multiple stitches into each stitch from the previous row.
- In the very first stitch (the one your ch 2 is coming out of), make 4 Half Double Crochet (hdc) stitches.
- How to: Yo, insert hook into that first stitch, yo, pull up a loop, yo, pull through all 3 loops. Repeat this 3 more times into the very same stitch.
- Now, in the next stitch, make 5 Half Double Crochet (hdc) stitches.
- Repeat this: 5 hdc in each of the remaining stitches across your row.
- As you work, you’ll notice your crocheted strip starting to naturally curl or ruffle. This is exactly what you want!
- When you reach the very last stitch, make 5 hdc in it.
- Fasten off (cut your yarn, leaving a long tail about 10-12 inches/25-30 cm – this is crucial for sewing!), then pull the tail through the loop on your hook to secure.
Your crocheted piece should now look like a long, wavy, ruffled strip.
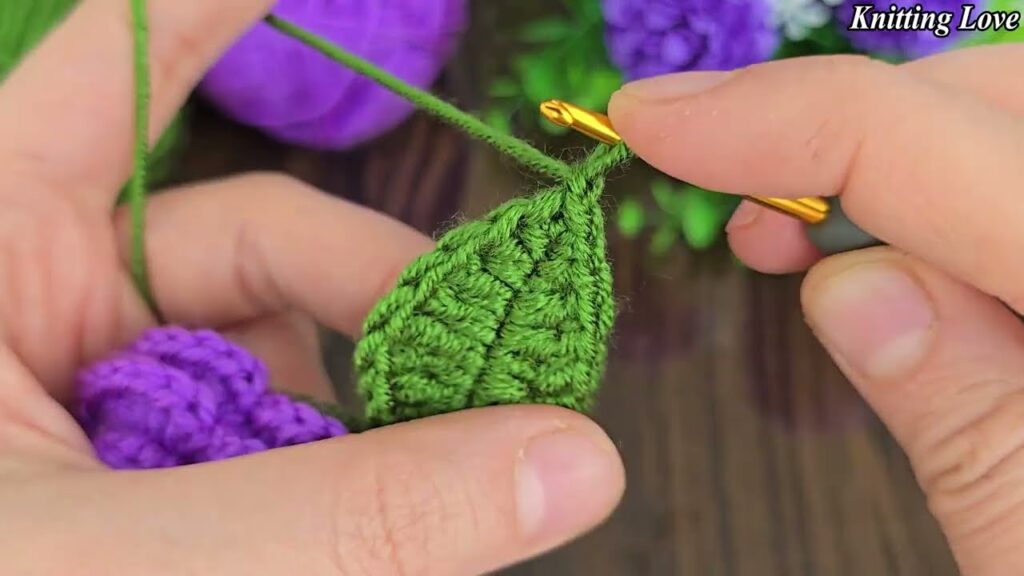
Step 4: Shaping Your Rose
This is the fun part where the magic happens!
- Start from one end of your ruffled strip. The end with the shorter chain/hdc base (the one you just finished working from) usually works best as the center.
- Begin to gently roll the strip. Roll it tightly at the very beginning to form the rose’s center bud.
- Continue rolling the strip around the center. As you roll, let the ruffles naturally fan out and create the petal layers. Don’t roll it too tightly; let the strip guide you. You’ll see the rose shape emerge!
- Keep rolling until you reach the end of the strip.
Step 5: Securing Your Rose
Now you need to sew the base to hold your beautiful rose shape.
- Thread your long yarn tail onto your tapestry needle.
- Hold the rose firmly in one hand, keeping its shape.
- Working from the back (bottom) of the rose, begin to stitch through all the layers of the coiled strip.
- Make simple stitches that go through the bottom of the rose, catching multiple layers as you go.
- Work in a few different directions to make sure all parts of the base are securely joined.
- Aim to make your stitches invisible from the front.
- Make sure the center is secure, then sew around the outer edges of the base to keep the petals from unraveling.
- When you’re satisfied the rose is secure, weave in any remaining yarn tail on the back.
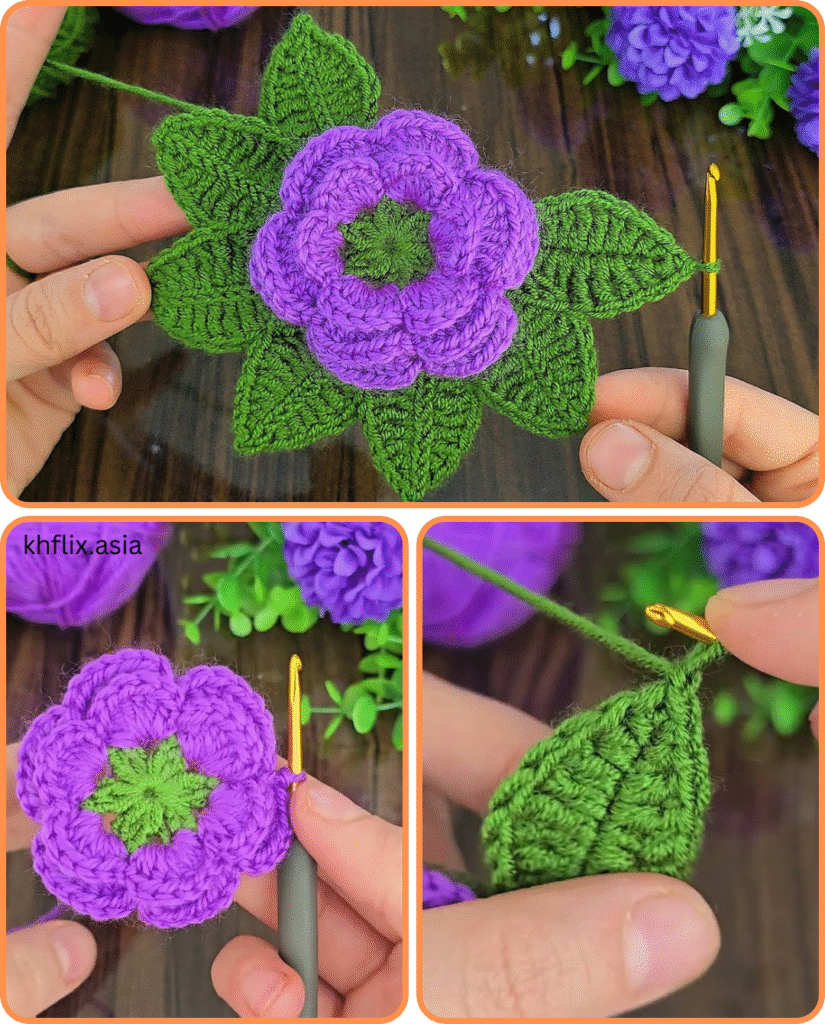
Voila! You now have a beautiful, handmade crochet rose motif!
Tips for Beginner Success
- Don’t Stress About Perfection: Your first rose might not be perfectly symmetrical, and that’s okay! Each handmade item has its own unique charm.
- Practice Your Tension: Try to keep your stitches consistent. Too tight, and your rose will be stiff; too loose, and it might be flimsy.
- Count Your Stitches (Loosely): For this pattern, exact counts aren’t as critical as for garments, but try to keep track of your “5 hdc in each stitch” for consistent ruffles.
- Watch Videos: If you’re a visual learner, search YouTube for “easy crochet rose for beginners” or “crochet curly rose tutorial.” Seeing the rolling process can be very helpful.
- Experiment with Yarn: Different yarn weights and fibers will give you different results. A thicker yarn makes a larger, chunkier rose; a thinner yarn makes a more delicate one.

Ideas for Using Your Beautiful Rose Motifs
- Hair Accessories: Glue a clip or bobby pin to the back.
- Brooches: Attach a brooch pin to the back.
- Fashion Embellishments: Sew onto sweaters, bags, hats, or headbands.
- Home Decor: Use them as appliques on throw pillows, curtains, or small blankets.
- Gift Embellishments: Tie one onto a gift tag or ribbon for a special touch.
- Jewelry: Make tiny ones for earrings or larger ones for a statement necklace.
You’ve just completed a fantastic beginner project that opens up a world of creative possibilities. The easy crochet rose flower motif is a testament to how simple stitches can combine to create something truly lovely. Keep practicing, keep creating, and enjoy the beautiful blooms you bring to life with your hook and yarn!
Video tutorial:


