
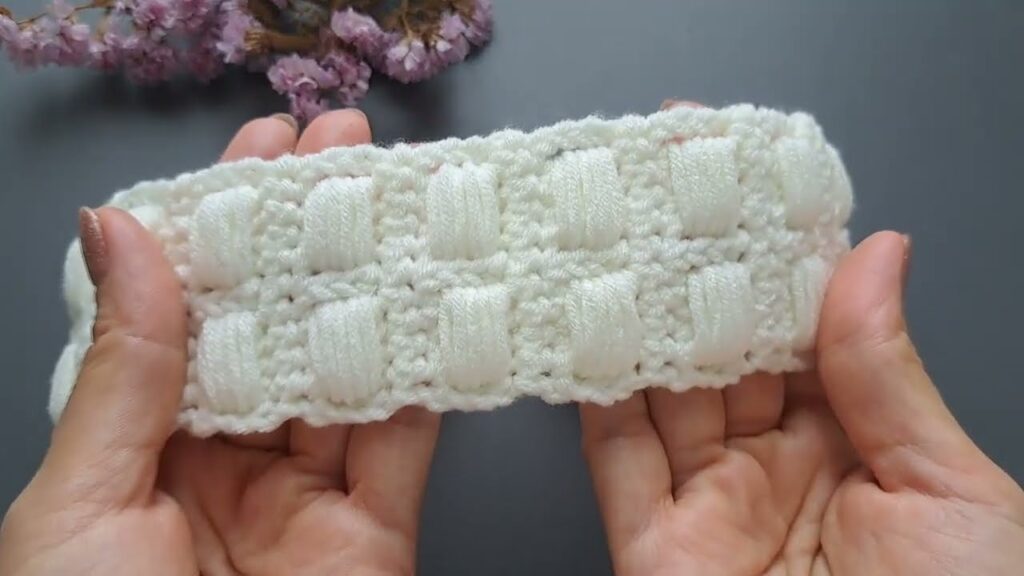
Looking for a fun and stylish crochet project that’s quick to make and eye-catching? A DIY crochet headband using the bead stitch is the perfect choice! This textured, modern-looking headband works up quickly and is ideal for all skill levels—especially if you’re ready to try something a little more decorative than basic stitches.
In this guide, you’ll learn how to make a beautiful crochet headband using the bead stitch, complete with materials, stitch instructions, sizing tips, and a step-by-step pattern.

🧶 Why You’ll Love This Headband
- Beginner-friendly with just one decorative stitch to learn
- Great stash-buster — uses minimal yarn
- Fast to make — finished in under an hour
- Stylish and trendy for all seasons
- Makes a perfect handmade gift
✂️ Materials You’ll Need
- Yarn: Worsted weight (#4) cotton or acrylic yarn
- Crochet hook: 5.0 mm (H) hook
- Yarn needle
- Scissors
- Measuring tape
- Stitch marker (optional, helpful for keeping track)
✅ Tip: Cotton yarn offers better grip and structure for headbands, while acrylic adds stretch and softness.

🧵 Stitches Used (US Terms)
- Chain (ch)
- Single Crochet (sc)
- Double Crochet (dc)
- Bead Stitch (explained below)
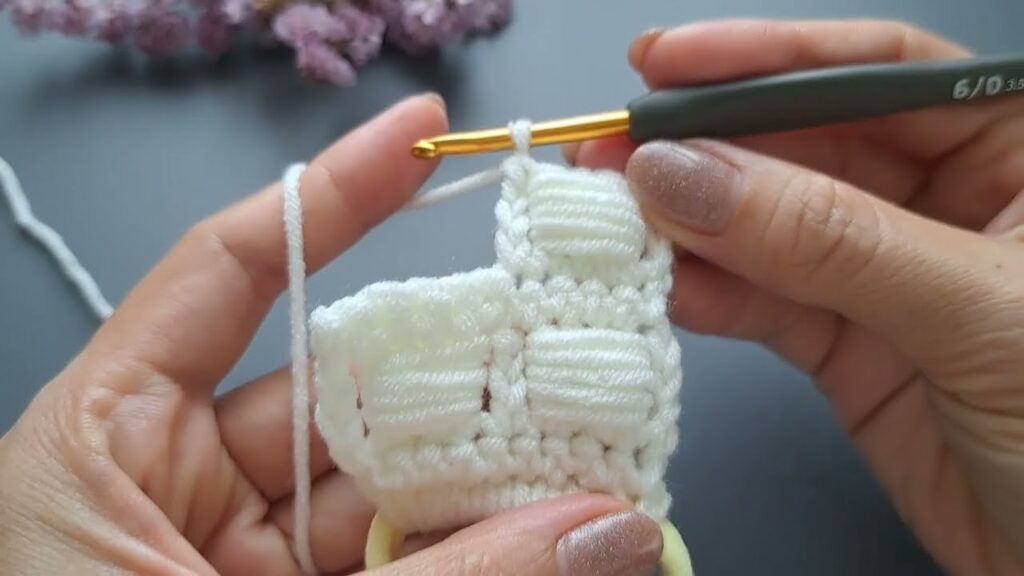
💡 How to Crochet the Bead Stitch
The bead stitch is a textured stitch that looks like small raised beads stacked together. It adds decorative flair and makes your headband stand out.
Bead Stitch Breakdown:
- Start with 1 double crochet (dc)
- Yarn over, insert your hook around the post of the dc you just made (from front to back), yarn over and pull through — repeat this step 3 times (you’ll have 7 loops on your hook)
- Yarn over and pull through all 7 loops
- Skip the next stitch, and dc into the next
- Repeat!
📏 Headband Size Guide
To fit most teens and adults, aim for a finished length of:
- 18–20 inches (46–51 cm) un-stretched
- 2.5–4 inches (6–10 cm) wide
The bead stitch is thick and slightly stiff, so don’t make the headband too tight—allow a bit of stretch for comfort.
🧶 Easy DIY Bead Stitch Headband Pattern
Step 1: Foundation Chain
- Ch 15 (or adjust for desired width)
Step 2: Row 1 – Single Crochet Base
- Sc in 2nd ch from hook and across. (14 sc)
- Ch 1, turn.
Step 3: Row 2 – Start Bead Stitch
- Dc in first st
- Work bead stitch (as explained above) across, skipping every other stitch between beads
- End with dc in last st
- Ch 1, turn
Step 4: Row 3 – Single Crochet
- Sc across row to stabilize
- Ch 1, turn
Repeat Rows 2 & 3
Continue alternating 1 bead stitch row and 1 single crochet row until the headband reaches 18–20 inches in length.
🪡 Step 5: Seam the Ends
- Fold the headband ends together (right sides facing in)
- Use a yarn needle or slip stitch to seam the short edges together
- Turn the headband right-side out
Optional:
- Wrap a small yarn strip around the seam to create a turban-style twist or cover the join for a neat look

🎨 Customization Ideas
- 🌈 Color stripes: Change colors every few rows
- 💎 Add beads: Thread small beads onto yarn and space them between bead stitches
- 🧶 Use velvet yarn: For a luxe look and cozy texture
- 🎀 Bow or flower embellishment: Sew on a simple crocheted bow or rose for a feminine touch
🧡 Tips for Success
- Practice the bead stitch separately before starting the headband
- Don’t crochet too tightly—the bead stitch uses extra yarn and tension
- Use a soft, non-itchy yarn if the headband will touch the skin
- Block the finished piece lightly to shape and smooth it
🎁 Great for Gifting or Selling
This headband is a beautiful, functional gift idea and a great product to make for craft fairs or online shops. It’s unique, trendy, and personal—something you can customize in endless ways.
✅ Conclusion
The crochet bead stitch headband is an easy DIY project with stunning results. It blends simplicity and style, offering texture and function in one cozy accessory. Whether you’re a beginner looking to level up or a seasoned crocheter seeking a quick, creative win, this project is for you.
So grab your favorite yarn, try out the bead stitch, and create a headband that’s both fashionable and functional—you’ll love how it turns out!
Video tutorial:


