Crochet bags are not only stylish and unique, but they’re also incredibly rewarding to make. A crossbody bag or sling bag is perfect for everyday use, offering hands-free convenience while keeping your essentials secure. Whether you’re a seasoned crocheter or just starting out, this detailed tutorial will guide you through creating your very own custom bag.
Why Crochet Your Own Crossbody Bag?
- Customization: Choose your own yarn, colors, and embellishments to create a bag that perfectly matches your style.
- Durability: Handmade bags can be incredibly sturdy and long-lasting when made with quality materials and proper techniques.
- Unique Gift: A handmade bag makes a thoughtful and personal gift for friends and family.
- Skill Development: This project allows you to practice various crochet stitches and construction techniques.
What You’ll Need: Materials
Before you begin, gather all your supplies. The type of yarn and hook size will influence the final look and feel of your bag.
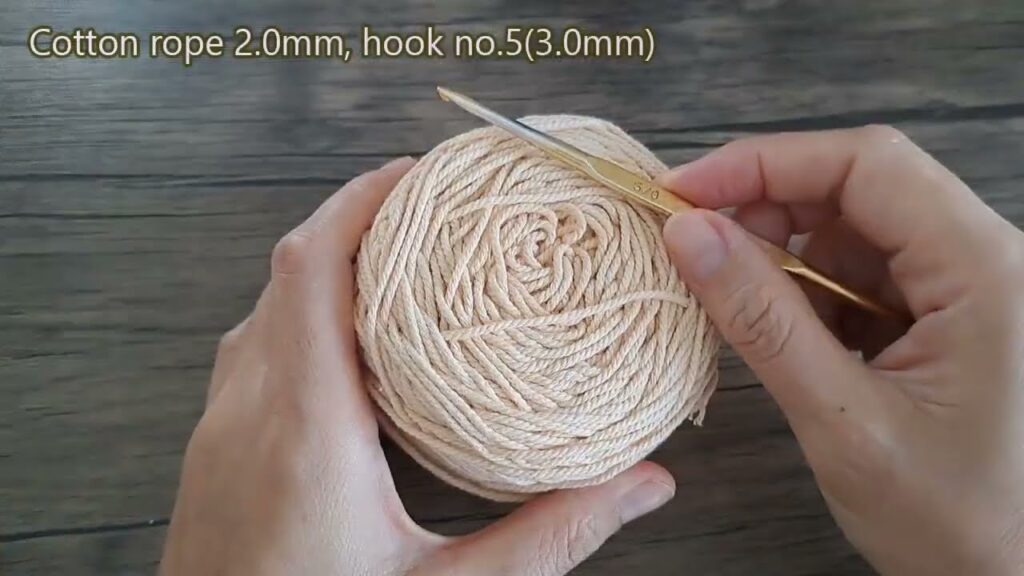
- Yarn:
- Recommended: A durable yarn like cotton, cotton blend, or a sturdy acrylic is ideal. These yarns hold their shape well and are less likely to stretch out over time.
- Weight: Medium (worsted weight / ARAN) is a great starting point for a sturdy bag. You can also use bulkier yarn for a quicker project or finer yarn for a more delicate look.
- Quantity: Approximately 200-400 yards, depending on your desired bag size and yarn weight. It’s always better to have a little extra!
- Crochet Hook: Choose a hook size appropriate for your yarn weight.
- For worsted weight yarn, a 4.0mm (G/6) to 5.5mm (I/9) hook is generally suitable.
- Always check your yarn label for recommended hook sizes. Using a slightly smaller hook than recommended can create a tighter fabric, which is good for bags.
- Stitch Markers: Essential for marking the beginning of rounds or important stitches.
- Tapestry Needle (Yarn Needle): For weaving in ends.
- Scissors: For cutting yarn.
- Optional Hardware:
- D-rings or O-rings: (2) For attaching the strap to the bag.
- Swivel Hooks/Clasps: (2) For a detachable strap.
- Bag Strap: You can crochet your own strap, use a store-bought fabric strap, or a faux leather strap.
- Magnetic Snap, Button, or Zipper: For a closure.
- Fabric for Lining: (Optional, but highly recommended for durability and to prevent stretching).
- Sewing Machine or Needle and Thread: If adding a fabric lining or attaching hardware.

Crochet Stitches You’ll Use
This tutorial will primarily use basic crochet stitches. Familiarity with these will be helpful:
- Chain (ch): The foundation of your crochet project.
- Slip Stitch (sl st): Used to join stitches and rounds.
- Single Crochet (sc): A dense and sturdy stitch, great for bags.
- Half Double Crochet (hdc): Slightly taller than sc, but still creates a firm fabric.
- Double Crochet (dc): Taller than hdc, creates a more open fabric. (Less common for main bag body, but good for decorative elements or a quicker project if you don’t mind a looser fabric).
Getting Started: Understanding Bag Construction
Most crossbody or sling bags are constructed in a few main parts:
- The Base: The bottom of the bag, often worked in oval rounds.
- The Body: Worked in rounds or rows from the base upwards.
- The Flap/Opening: How the bag closes.
- The Strap: Attached to the body.
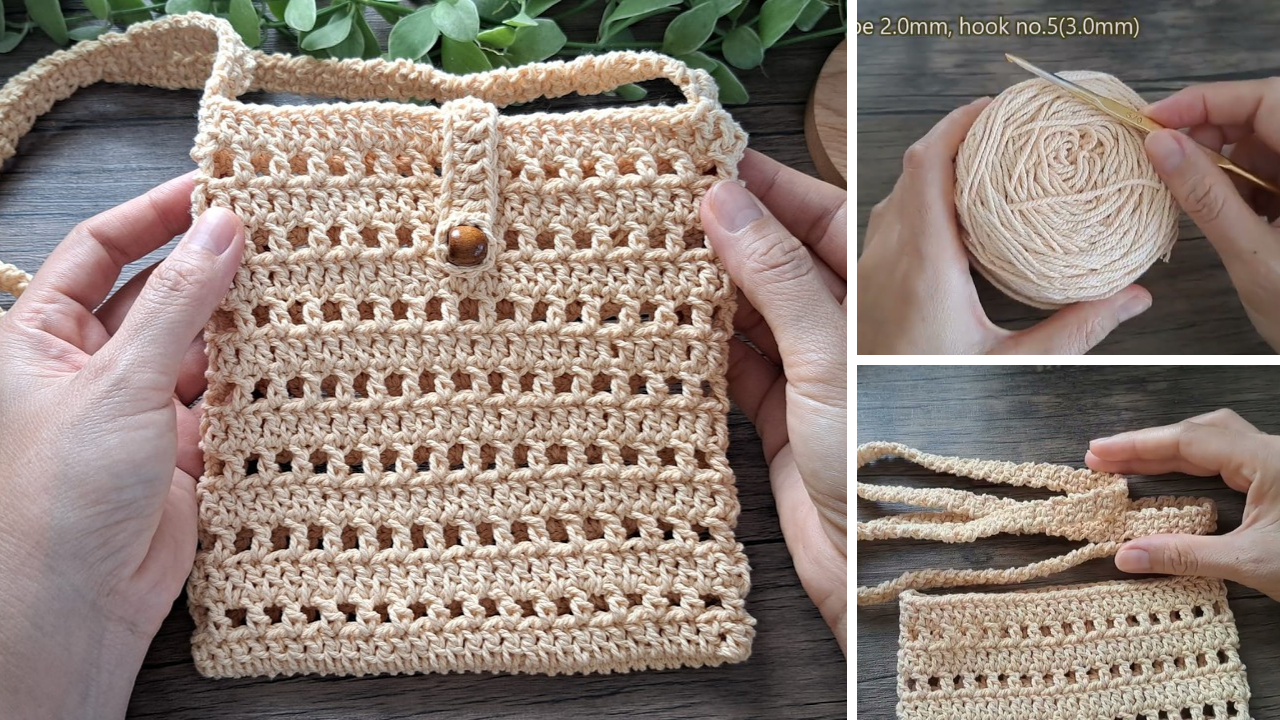
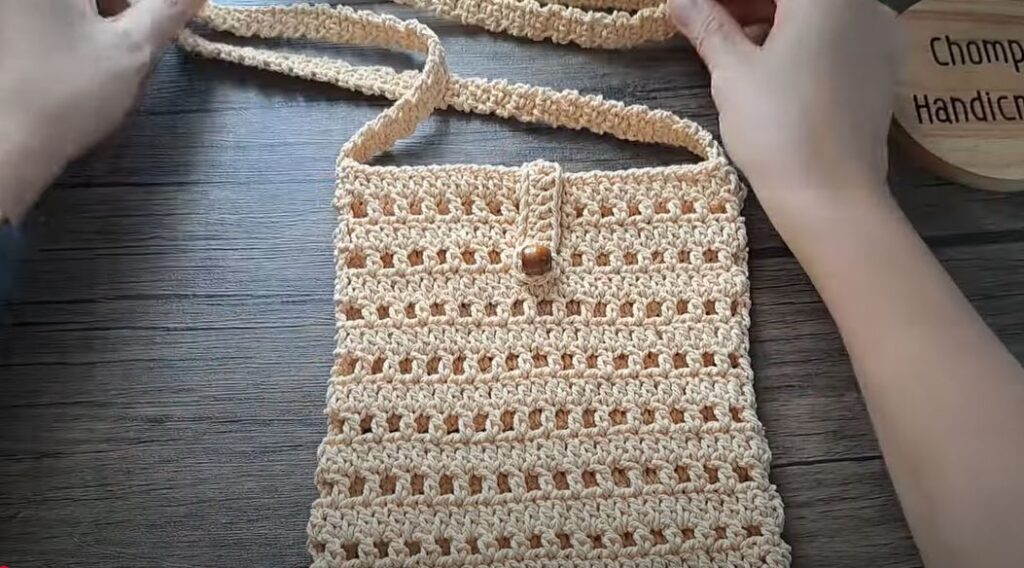
For this tutorial, we’ll create a simple rectangular bag with a flap, worked in continuous rounds for the body.
Pattern: Simple Crossbody/Sling Bag
This pattern will create a bag approximately 8-10 inches wide and 7-9 inches tall (excluding the strap), but you can easily adjust the size.
Part 1: The Base of the Bag
We’ll start by creating an oval base.
Row 1: Chain (ch) 26. (This will be the width of your bag. For a wider bag, chain more; for a narrower bag, chain less). Row 2: Sc in the 2nd ch from hook. Sc in the next 23 chains. (3 sc in the last chain – this creates the curve). Continue on the other side of the chain: Sc in the next 23 chains. 2 sc in the last chain. Join with a sl st to the first sc. (52 sc)
- Tip: Place a stitch marker in the first and last stitch of the round to help you keep track.
Round 3: Ch 1. 2 sc in the first stitch. Sc in the next 23 stitches. 2 sc in each of the next 3 stitches. Sc in the next 23 stitches. 2 sc in each of the next 2 stitches. Join with a sl st to the first sc. (60 sc)
Round 4: Ch 1. Sc in each stitch around. Join with a sl st to the first sc. (60 sc)
- You now have a flat oval base. If you want a deeper base, repeat Round 4 a few more times before moving to the body.
Part 2: The Body of the Bag
Now we’ll work upwards to create the walls of the bag. For a neat seam, we’ll turn our work.
Round 5: Ch 1. Working in the back loop only (BLO) of each stitch, sc in each stitch around. Join with a sl st to the first sc. (60 sc)
- Working in the BLO creates a defined edge where the base transitions to the body of the bag.
Round 6 – 25 (or until desired height): Ch 1. Sc in each stitch around. Join with a sl st to the first sc. (60 sc)
- Continue crocheting in single crochet rounds until your bag reaches your desired height. Aim for 7-9 inches for a standard crossbody.
- Do not fasten off if you are adding a flap directly to the bag.
Part 3: The Flap (Option 1: Integrated Flap)
This method creates a flap that extends directly from the back of the bag.
Continuing from the Body (Round 25 or desired height):
- Flatten your bag. The last stitch of your body rounds should be at one of the sides. This ensures your flap will be centered. Adjust with a few slip stitches if needed.
- Row 1 (Flap): Ch 1. Sc in the next 30 stitches. Turn your work. (This will be the width of your flap. Adjust if you want a narrower or wider flap).
- Row 2 – 15 (or until desired flap length): Ch 1. Sc in each stitch across. Turn your work. (30 sc)
- Continue until your flap is long enough to cover the opening of your bag when folded over.
- Fasten off and weave in ends.
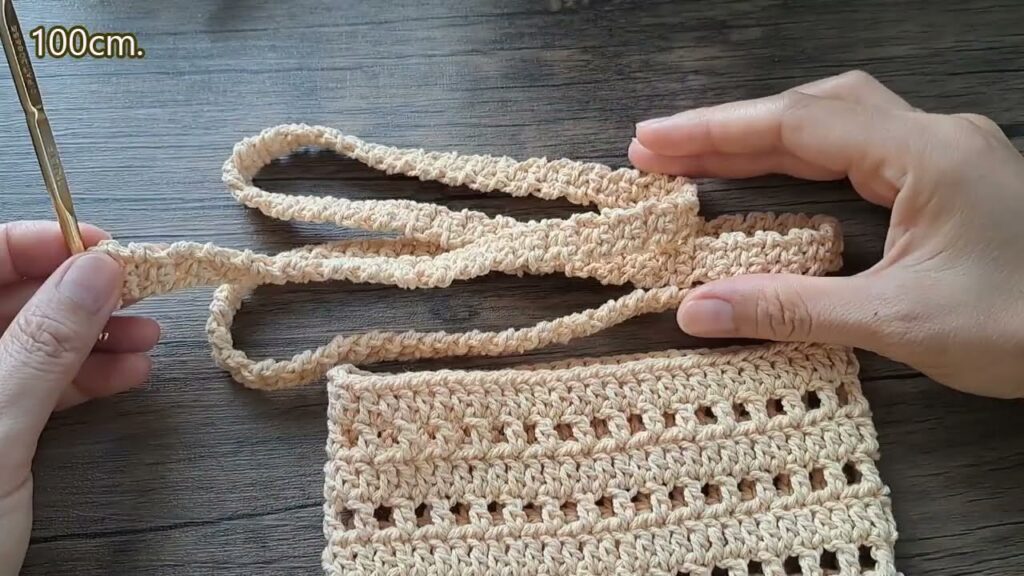
Part 4: The Strap
You have several options for the strap:
Option A: Crocheted Strap (Single Crochet)
This is a simple and sturdy strap.
Method:
- Ch 8 (or desired width of strap).
- Row 1: Sc in the 2nd ch from hook and in each ch across. Turn. (7 sc)
- Row 2: Ch 1. Sc in each sc across. Turn. (7 sc)
- Repeat Row 2 until your strap reaches the desired length. For a crossbody, this is typically 45-55 inches, but measure yourself to find the perfect fit.
- Fasten off, leaving a long tail for sewing.
Option B: Crocheted Strap (Modified Half Double Crochet for Stretch)
This creates a slightly stretchier and softer strap.
Method:
- Ch 8 (or desired width).
- Row 1: Hdc in the 3rd ch from hook and in each ch across. Turn. (6 hdc)
- Row 2: Ch 2 (does not count as a stitch). Hdc in the third loop of each hdc across. Turn. (6 hdc)
- The “third loop” is located behind the top loops of the hdc stitch.
- Repeat Row 2 until desired length.
- Fasten off, leaving a long tail.
Option C: Store-Bought Strap
Purchase a ready-made fabric or faux leather strap. These often come with hardware already attached.

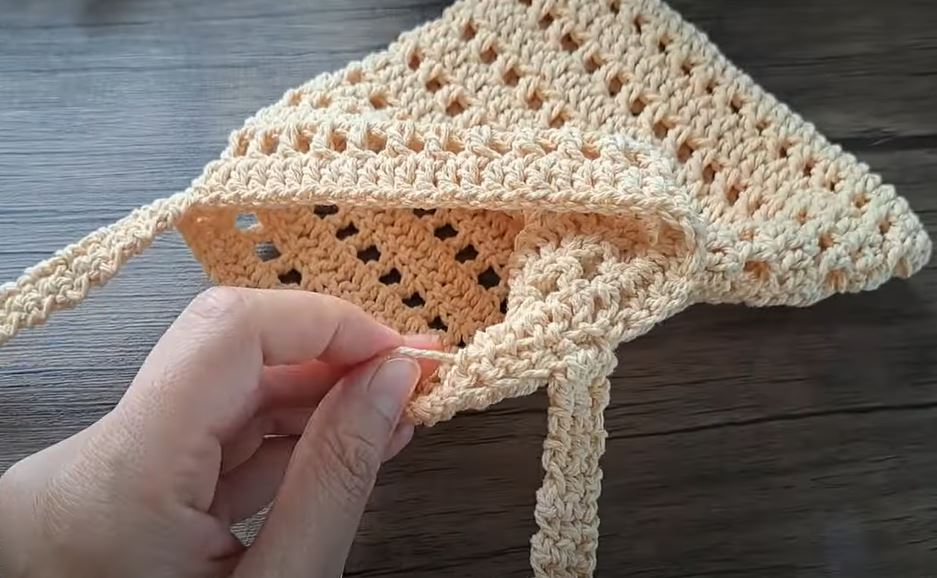
Part 5: Assembly and Finishing
Now it’s time to bring your bag together!
- Weave in all loose ends using your tapestry needle. Take your time to do this neatly for a professional finish.
- Attach the Strap:
- If using D-rings/O-rings: Sew a D-ring or O-ring securely to each side of the bag, near the top opening. Then, sew the ends of your crocheted strap to the D-rings/O-rings.
- If using Swivel Hooks/Clasps: Attach your swivel hooks to the ends of your crocheted strap. Then, attach D-rings/O-rings to the sides of your bag, and clip the swivel hooks onto them. This allows for a detachable strap.
- If directly sewing crocheted strap: Simply sew each end of your crocheted strap to the top corners of the bag’s body, ensuring even placement and strong seams.
- Add a Closure (Optional but Recommended):
- Magnetic Snap: Sew one half to the underside of the flap and the other half to the front of the bag body, ensuring they align when the flap is closed.
- Button and Loop: Crochet a small chain loop on the underside of your flap. Sew a decorative button onto the front of your bag body that the loop can go around.
- Zipper: This is more advanced and usually requires a fabric lining for a clean finish.
- Add a Fabric Lining (Highly Recommended):
- A fabric lining will give your bag a professional finish, prevent stretching, and keep small items from falling through stitches.
- Measure: Measure the dimensions of your finished crochet bag (width, height, and depth of the base).
- Cut Fabric: Cut fabric pieces to match these dimensions, adding a seam allowance (e.g., 1/2 inch) on all sides. You’ll need a piece for the main body and possibly a separate piece for the flap if your flap is lined.
- Sew: Stitch the fabric pieces together to create a bag shape. Hem the top edge.
- Insert: Place the fabric lining inside your crochet bag.
- Hand-stitch or Machine-stitch: Carefully hand-stitch or machine-stitch the top edge of the lining to the inside top edge of your crochet bag.
Care Instructions for Your Crochet Bag
- Spot Clean: For small marks, use a damp cloth with mild soap.
- Hand Wash: If a full wash is needed, hand wash in cool water with a gentle detergent.
- Reshape and Air Dry: Gently squeeze out excess water (do not wring!). Reshape the bag and lay it flat on a towel to air dry. Avoid hanging it, as this can cause stretching.
- Avoid Harsh Chemicals: Do not use bleach or harsh cleaning agents.
Tips for Success
- Gauge Swatch: While not strictly necessary for a bag, a gauge swatch helps ensure your bag will be the size you intend.
- Stitch Tension: Try to maintain consistent stitch tension throughout your project for an even and attractive fabric.
- Stitch Markers are Your Best Friend: Use them liberally, especially when working in rounds, to avoid miscounting and ensure even sides.
- Don’t Be Afraid to Experiment: Once you’ve mastered the basic pattern, try different stitch patterns for the body, add pockets, or embellish your bag with appliques or tassels.
- Blocking (Optional): Lightly steam or wet block your finished bag to help it achieve its final shape and drape.
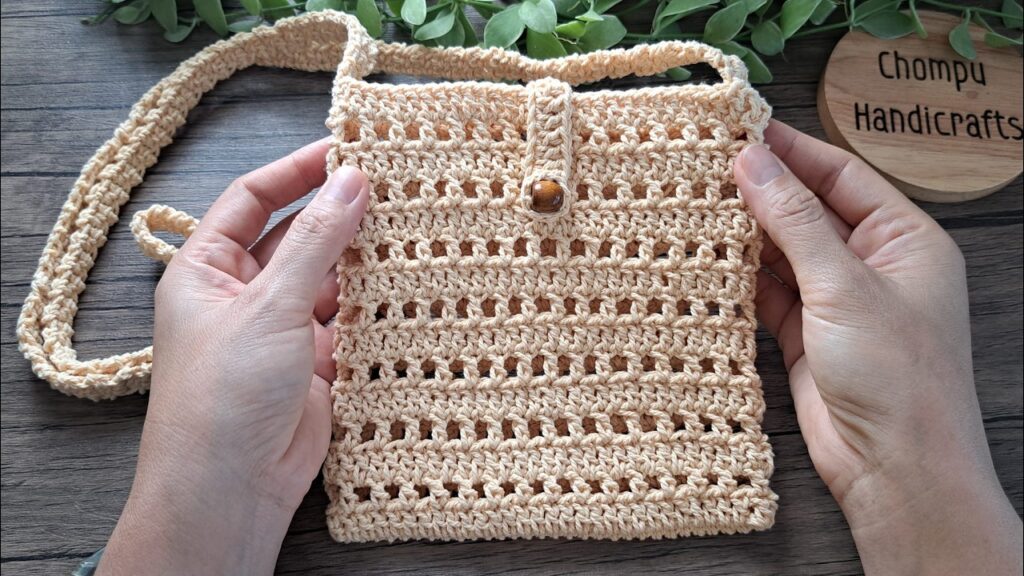
You’ve now got a fantastic, handmade crochet crossbody or sling bag! Enjoy showing off your creation, and don’t hesitate to make more in different colors and styles!
Got it! Here’s a conclusion for the Crochet Crossbody Bag Tutorial:
Conclusion
Congratulations! You’ve just embarked on or completed a wonderful journey into creating your very own crochet crossbody or sling bag. From selecting the perfect yarn to meticulously weaving in those final ends, each stitch tells a story of your dedication and creativity.
This project is more than just a handmade accessory; it’s a testament to your growing crochet skills and your unique style. You now possess a versatile and personal bag that’s perfect for everyday adventures, a thoughtful gift for a loved one, or simply a proud display of your crafting prowess.
Remember, the beauty of crochet lies in its endless possibilities. Don’t hesitate to experiment with different stitch patterns, add personalized embellishments, or play with color combinations to make each bag truly one-of-a-kind.
So, grab your hook, explore new yarn colors, and keep those creative stitches flowing. Happy crocheting!
Video tutorial:


