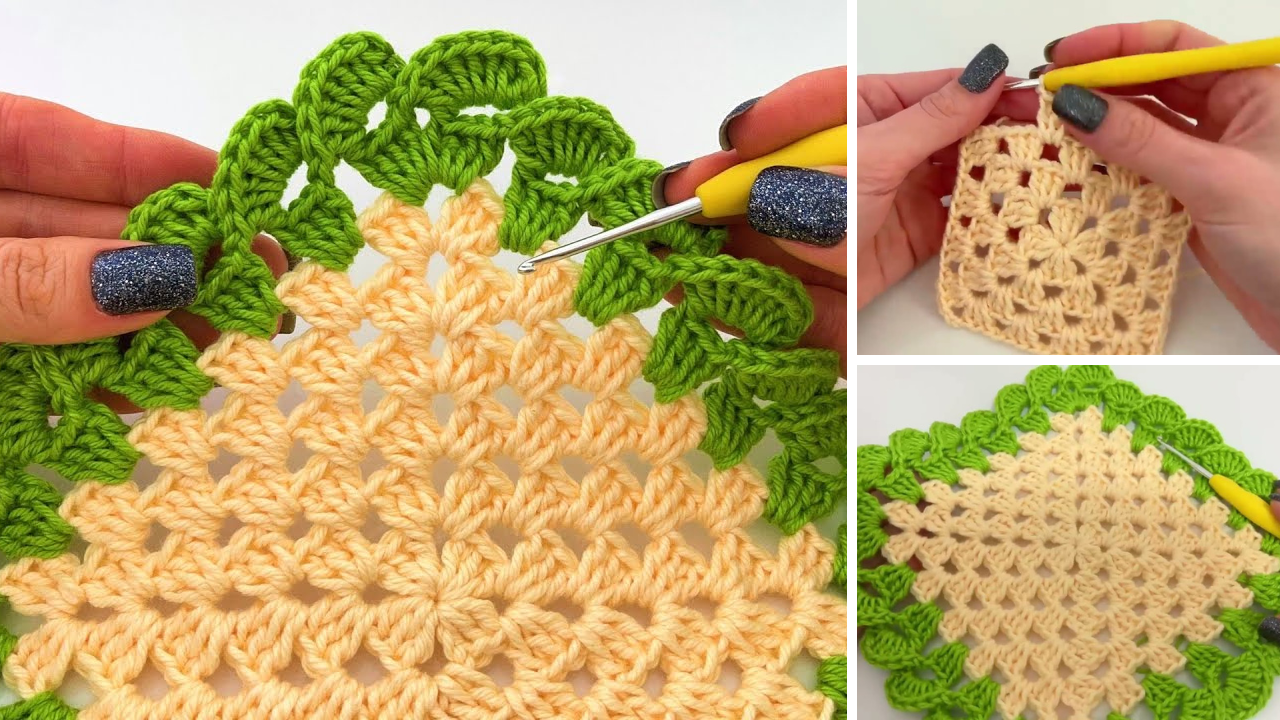
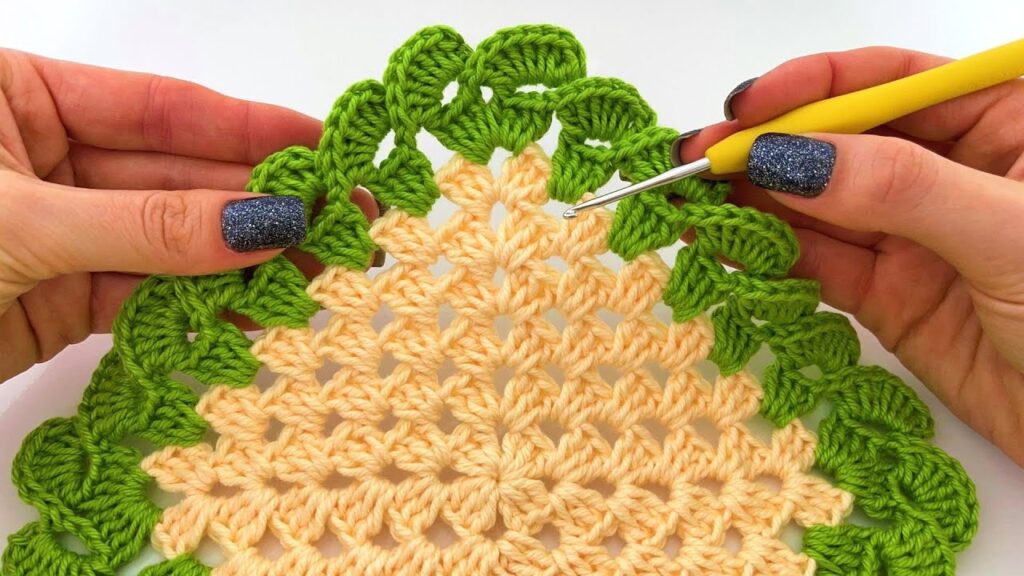
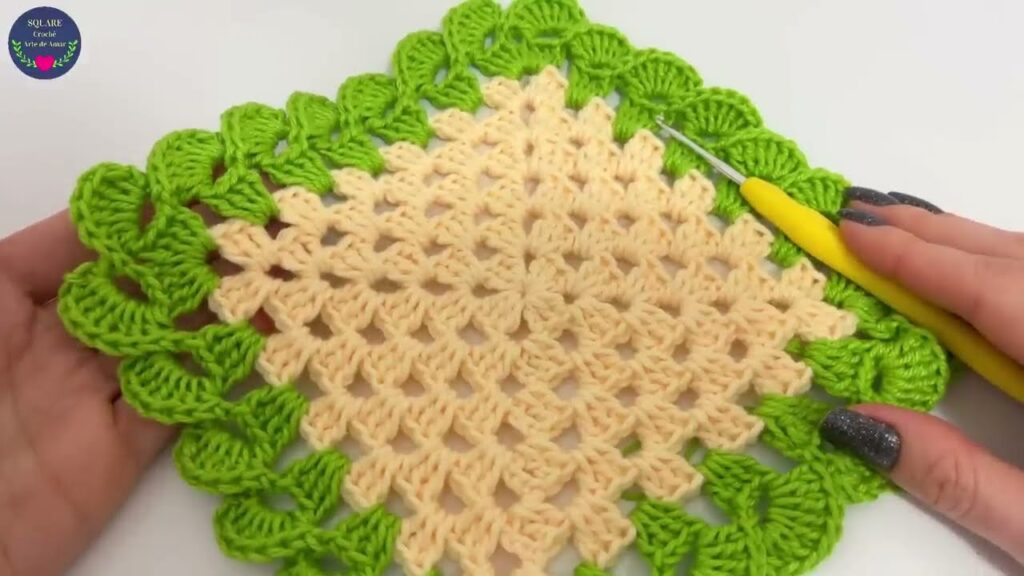
If you’re looking to crochet a square that’s super easy but has a little twist—something that adds personality without being complicated—this tutorial is for you! We’ll be creating a classic square but giving it a unique decorative “beak” or peek at one corner. It’s perfect for blankets, shawls, decorative pillows, or even wall art.
🧵 Materials You’ll Need:
- Yarn: Worsted weight or any yarn of your choice (cotton or acrylic is great for beginners)
- Hook: 5.0 mm (H) or size recommended on your yarn label
- Scissors
- Yarn Needle (for weaving in ends)
- Measuring Tape (optional)
🧶 Stitches Used (US Terms):
- ch – Chain
- dc – Double Crochet
- sl st – Slip Stitch
- sc – Single Crochet
📐 Finished Size:
This square is easily customizable. With worsted yarn and a 5mm hook, your square will be approximately 5×5 inches with 4 rounds. You can add more rounds to increase the size.

👣 Step-by-Step Instructions
We’ll make a basic square (like a granny square) and modify one corner to have a decorative “peek” or pointed beak using extra chains and stitches.
✅ Step 1: Start the Foundation
Option A: Magic Ring
- Make a magic ring
Option B: Chain Ring
- Ch 4, join with a sl st to form a ring
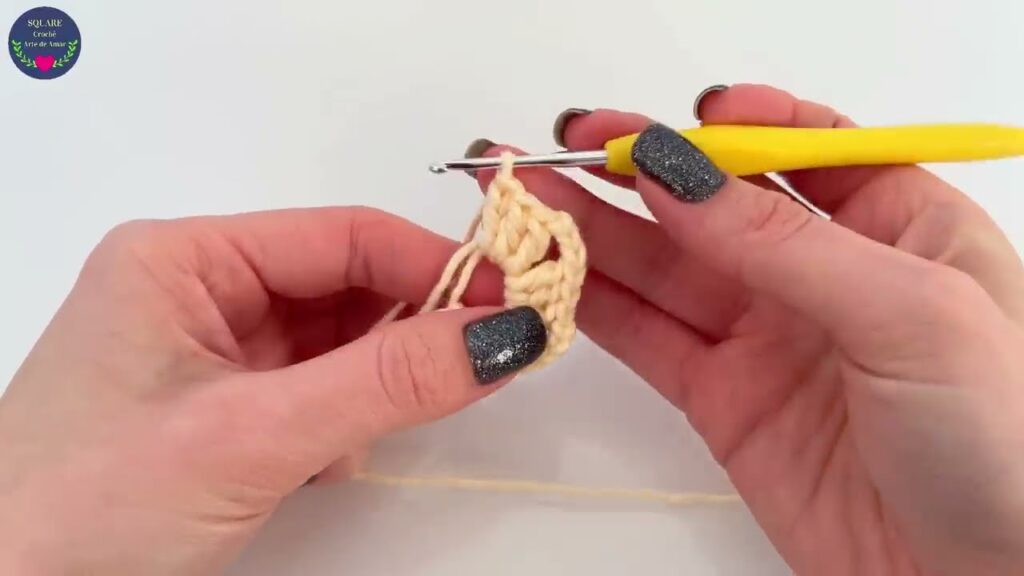
✅ Step 2: Round 1 – Start the Square
- Ch 3 (counts as dc), 2 dc into ring, ch 2
- (3 dc, ch 2) × 3 more times into ring
- Join with a sl st to the top of ch-3
👉 You should have 4 groups of 3 dc clusters, separated by ch-2 spaces (these are your corners)
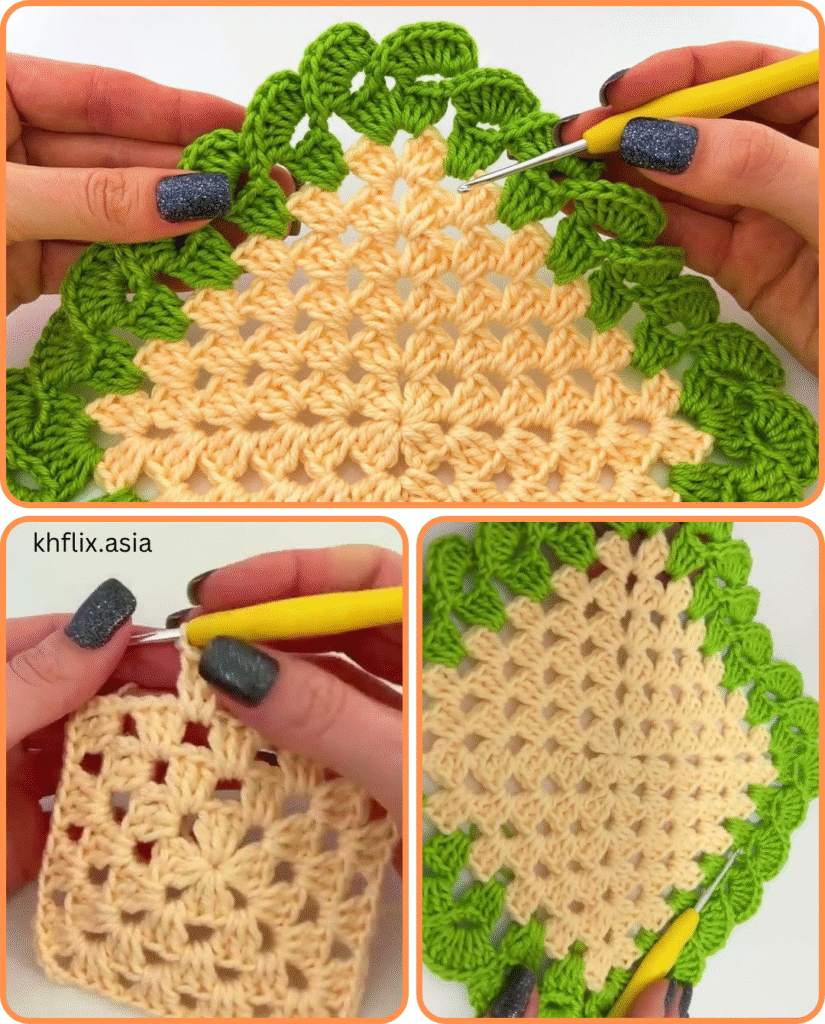
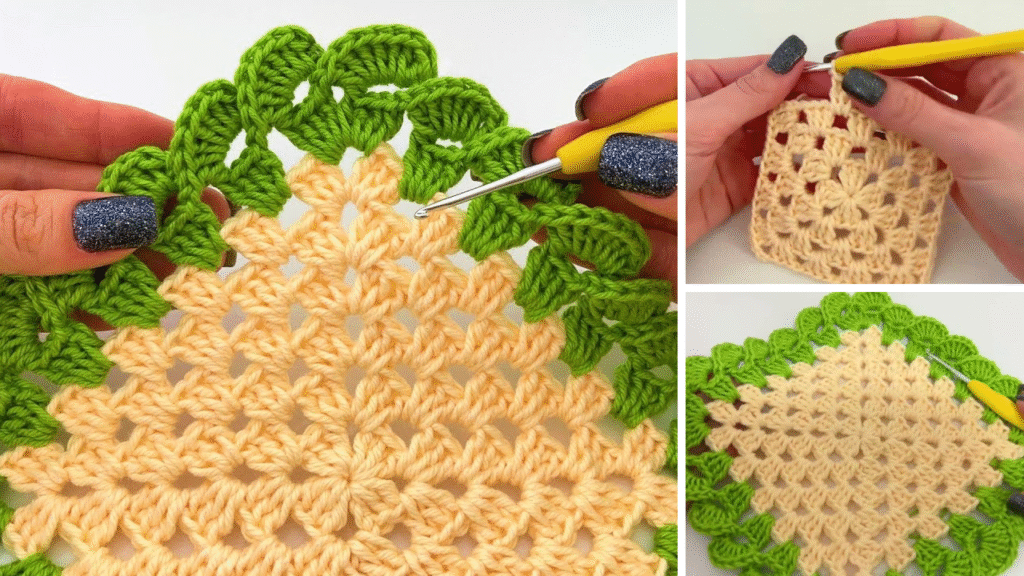
✅ Step 3: Round 2 – Basic Round with Modified Corner
- Sl st over to the next corner space
- Ch 3 (counts as dc), 2 dc, ch 2, 3 dc in same space (first corner)
- (In next space between clusters: 3 dc. In next corner: 3 dc, ch 2, 3 dc)
– Repeat around, BUT…
✅ At the final corner, do the following special “peek”:
Peek Corner (Beek Effect):
- 3 dc, ch 3, dc, ch 2, 3 dc
💡 This ch-3 + dc adds a little pointed peek or “beak” that protrudes slightly, giving your square a distinctive corner!
- Join with sl st
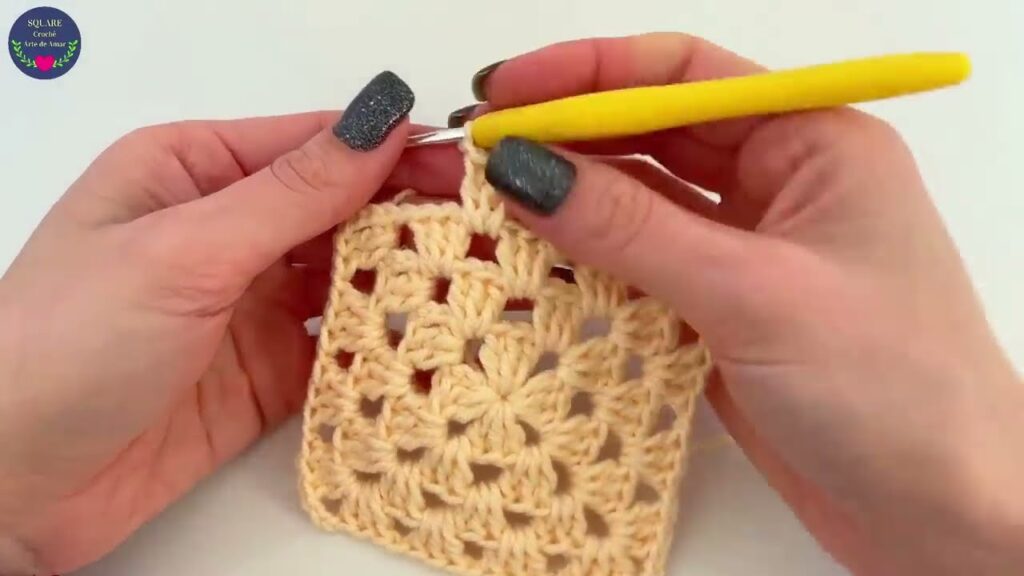
✅ Step 4: Round 3 – Continue the Pattern
- Sl st to the next corner (including the peek corner)
- In each regular corner: (3 dc, ch 2, 3 dc)
- In the peek corner:
- 3 dc, ch 3, dc, ch 2, 3 dc
- Place 3 dc in each space between clusters
- Join with sl st
Now you’ll see one corner has a small pointed extension—this gives the square a playful, asymmetric look while still keeping the overall structure!

✅ Step 5: Add More Rounds (Optional)
Continue in the same fashion:
- For each regular corner: (3 dc, ch 2, 3 dc)
- For the peek corner: (3 dc, ch 3, dc, ch 2, 3 dc)
- On each side: 3 dc in each space between clusters
You can stop after 3–5 rounds or keep going for a larger square.
✅ Step 6: Finish and Fasten Off
- After your final round, sl st to join
- Cut yarn, pull through, and weave in ends using a yarn needle
🎉 You now have a unique square with a beautiful beaked or pointed corner!
🌟 How to Use This Square:
- As a motif: Use these squares in larger projects like throws or scarves
- Turn the “beak” corner upward for a diamond-shaped block
- Make multiple with different beak corners for a fun patchwork effect
- Use contrasting yarn for the beak row for visual emphasis
🧼 Care Instructions:
- Wash on gentle if using acrylic or cotton yarn
- Lay flat to dry to preserve the square’s shape, especially the pointed corner
💡 Tips for Success:
- Mark the special peek corner with a stitch marker so you don’t miss it in each round
- Keep your tension even—especially in the peek corner, as extra chains can cause looseness
- Blocking the final square will help keep the peek sharp and the square flat
🧵 Final Thoughts
Crochet doesn’t have to be complicated to be creative. This very easy square with a peek or “beak” corner is proof that just a small twist in your pattern can make your work stand out. It’s perfect for beginners looking to spice up their projects with minimal effort.
So grab your yarn, relax, and enjoy this simple yet stylish twist on the classic crochet square!
Video tutorial:


