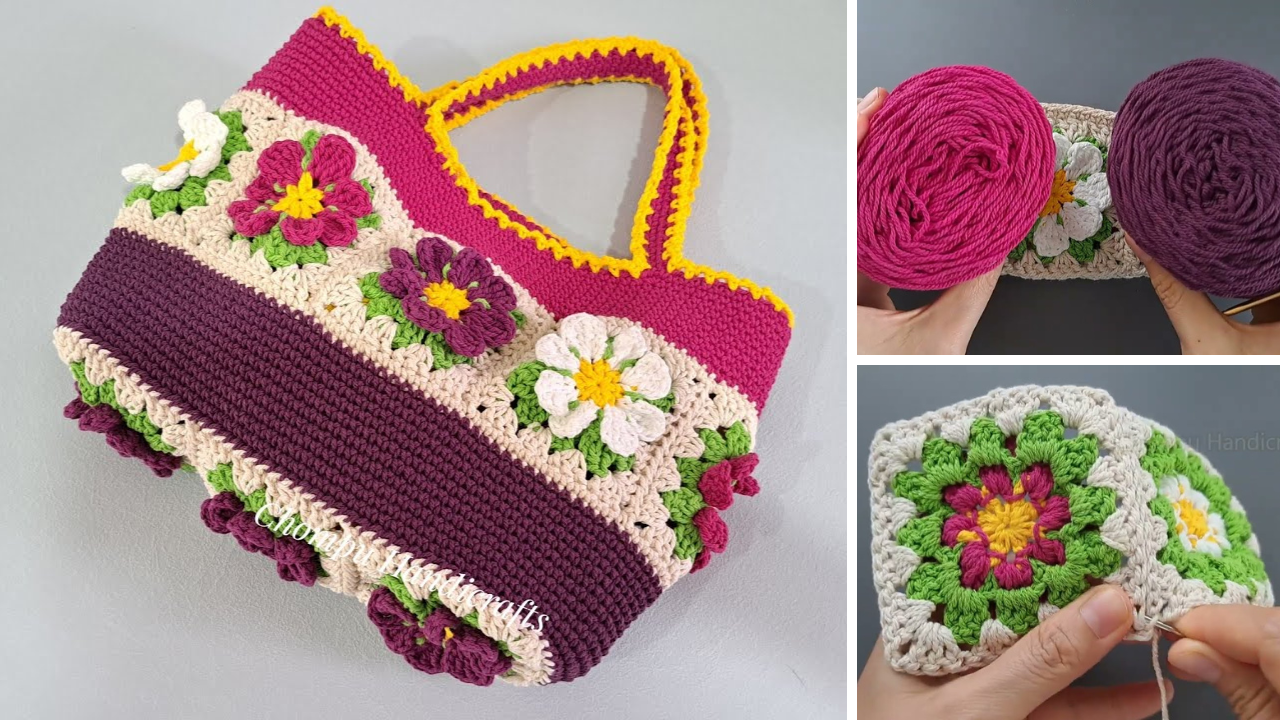
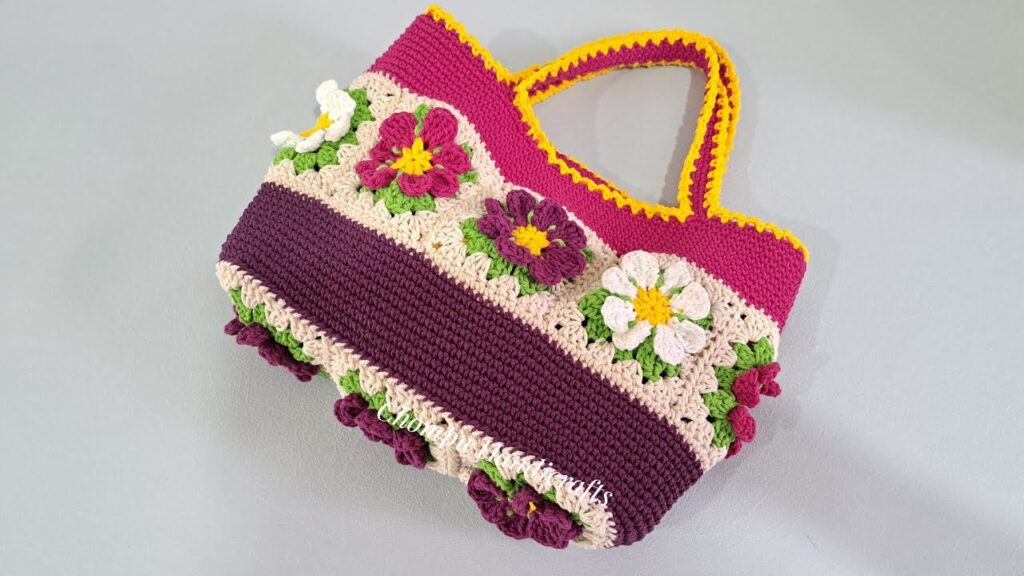
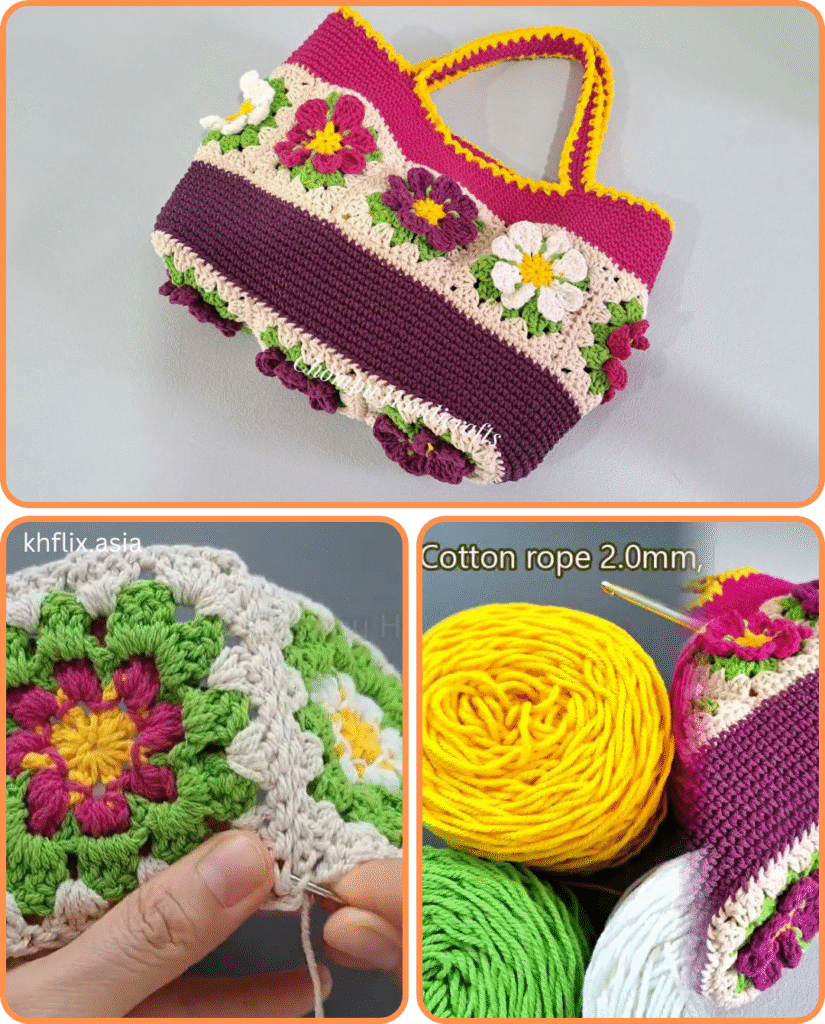
Crocheted bags are not just practical accessories; they’re wearable art, and a flower granny square bag is a delightful way to add a touch of handmade charm to your wardrobe. Combining the timeless appeal of granny squares with the whimsical beauty of floral motifs, this project is perfect for crocheters of all skill levels. Whether you’re a seasoned pro or just picking up your hook, this detailed guide will walk you through every step to create your own unique and stylish bag.
Why a Flower Granny Square Bag?
- Versatile: Perfect for groceries, beach trips, market hauls, or simply as a statement piece.
- Customizable: Endless possibilities for color combinations and square arrangements.
- Scrap-Friendly: A fantastic way to use up leftover yarn from other projects.
- Skill-Building: Reinforces basic crochet stitches and introduces colorwork.
- Gift-Worthy: A thoughtful and personal handmade present for friends and family.
Materials You’ll Need:
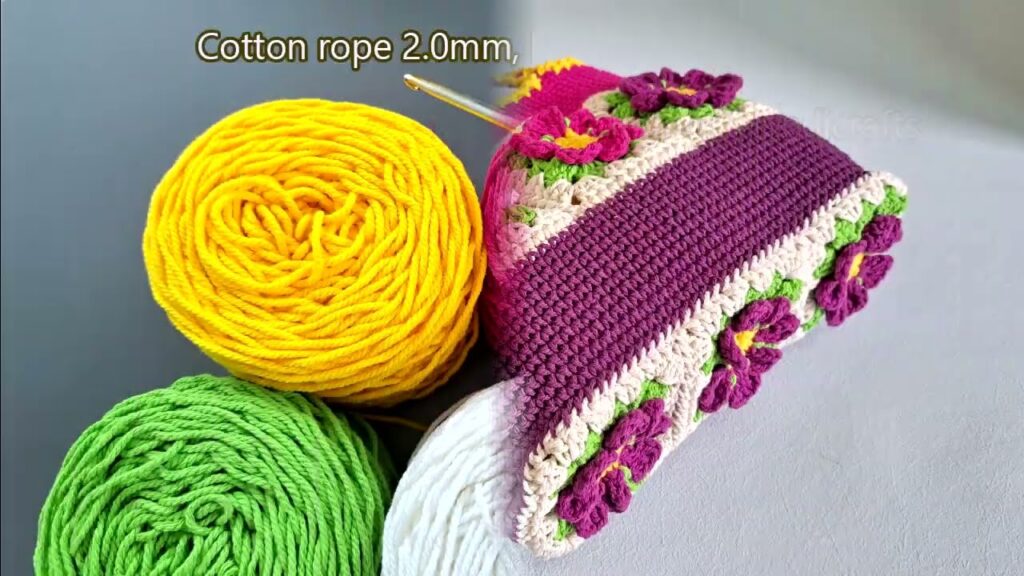
Before you begin, gather your supplies. The yarn weight and hook size can be adjusted based on your desired bag size and drape.
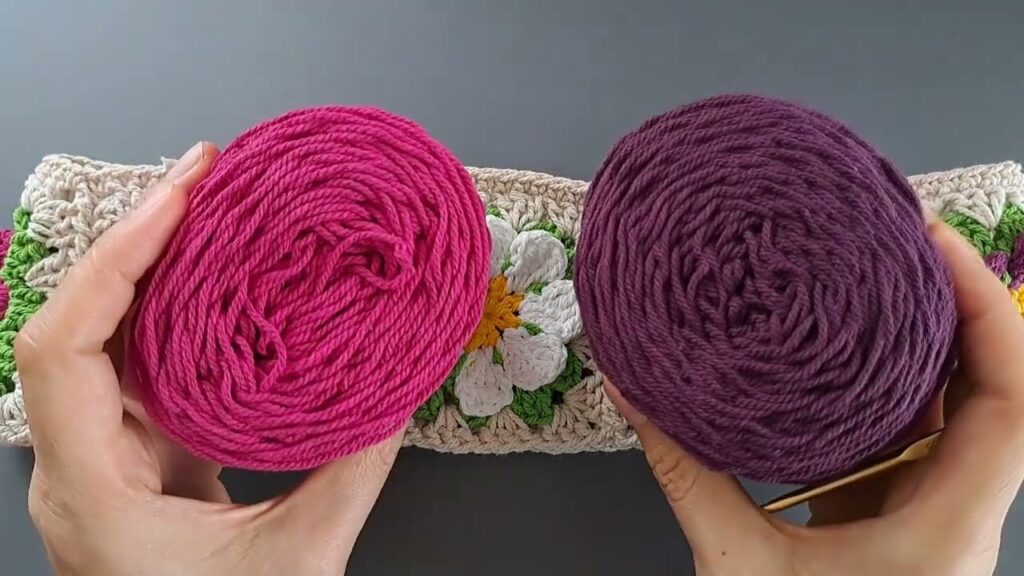
- Yarn:
- Main Color(s) for Flowers: Worsted weight (Aran) cotton or acrylic yarn in various colors for the petals and centers. This is where you can have fun with vibrant hues!
- Border/Joining Color: Worsted weight (Aran) cotton or acrylic yarn in a contrasting or complementary color for the granny square borders and joining.
- Lining Yarn (Optional but Recommended): A strong, durable yarn for the lining (e.g., mercerized cotton) if you plan to line your bag.
- Crochet Hook: A hook size appropriate for your chosen yarn (e.g., 5.0 mm (H/8) or 5.5 mm (I/9) for worsted weight yarn). Check your yarn label for recommendations.
- Yarn Needle (Tapestry Needle): For weaving in ends.
- Scissors: For cutting yarn.
- Stitch Markers (Optional): Helpful for marking stitches, especially for beginners.
- Fabric for Lining (Optional): Cotton or canvas fabric if you plan to sew a fabric lining.
- Sewing Machine and Thread (Optional): If sewing a fabric lining.
Crochet Abbreviations (US Terminology):
- ch: chain
- sl st: slip stitch
- sc: single crochet
- hdc: half double crochet
- dc: double crochet
- tr: treble crochet (or triple crochet)
- sk: skip
- sp: space
- st(s): stitch(es)
- FO: fasten off

Part 1: Crocheting Your Flower Granny Squares
The heart of your bag will be the individual flower granny squares. There are many variations of flower granny squares; here, we’ll outline a popular and relatively simple version. You’ll need to make a sufficient number of squares to achieve your desired bag size (e.g., 13 squares for a basic tote: 9 for the main body, 4 for the sides/gusset, or more for a larger bag).
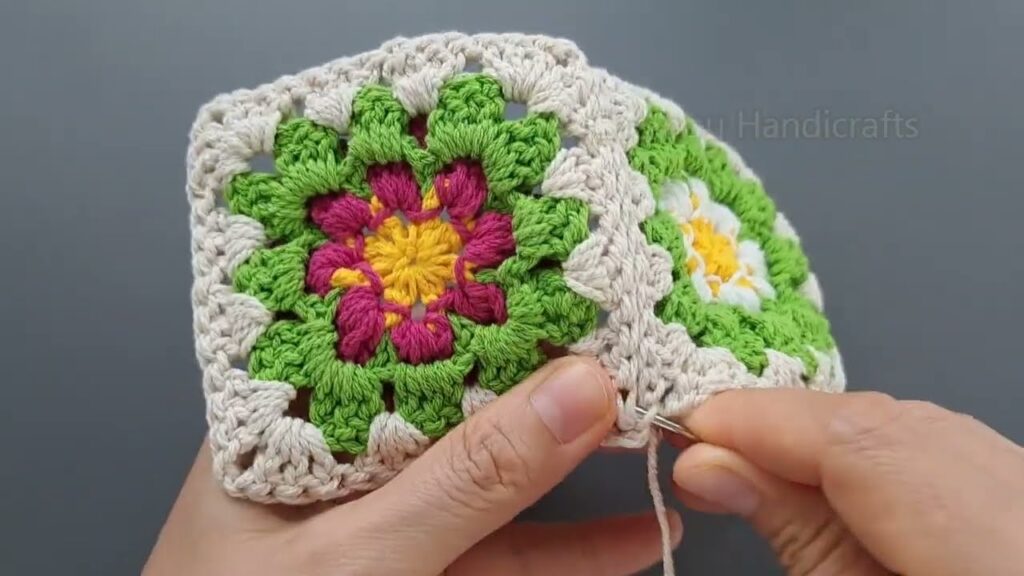
Basic 3-Round Flower Granny Square:
Round 1: Flower Center (Color A – e.g., Yellow)
- Create a magic ring (or ch 4, sl st to first ch to form a ring).
- Ch 3 (counts as first dc).
- Work 11 dc into the ring. (12 dc total)
- Sl st to the top of the initial ch 3 to join.
- Fasten off Color A.
Round 2: Petals (Color B – e.g., White or a contrasting color)
- Join Color B in any dc from Round 1 with a sl st.
- Ch 2 (does not count as a stitch).
- Work (hdc, dc, hdc) into the same stitch.
- Sl st into the next dc.
- Repeat from * for a total of 12 petals around.
- Sl st to the first hdc to join.
- Fasten off Color B.
Round 3: Granny Square Corner/Frame (Color C – e.g., Green or your joining color)
- Join Color C in any sl st between two petals from Round 2 with a sl st.
- Ch 3 (counts as first dc).
- Work 2 dc in the same sl st (first side group).
- Ch 1.
- Work (3 dc, ch 2, 3 dc) in the next sl st (this creates your first corner).
- Ch 1.
- Work 3 dc in the next sl st (second side group).
- Ch 1.
- Work (3 dc, ch 2, 3 dc) in the next sl st (second corner).
- Ch 1.
- Work 3 dc in the next sl st (third side group).
- Ch 1.
- Work (3 dc, ch 2, 3 dc) in the next sl st (third corner).
- Ch 1.
- Work 3 dc in the next sl st (fourth side group).
- Ch 1.
- Work (3 dc, ch 2, 3 dc) in the same sl st as the beginning of the round (fourth corner).
- Sl st to the top of the initial ch 3 to join.
- Fasten off Color C.
Important Notes for Squares:
- Weave in ends as you go! This will save you a lot of time and effort at the end.
- Consistency is key: Try to maintain a consistent tension for all your squares to ensure they are roughly the same size.
- Block your squares (optional but recommended): If your squares are curling or uneven, gently wet them and pin them to a flat surface to dry. This creates a more professional finish.
Part 2: Assembling Your Bag
Once you have all your beautiful flower granny squares, it’s time to bring them together! The layout of your squares will determine the shape and size of your bag. A common and easy layout for a basic tote is a 3×3 grid for the front and back, and then additional squares for the sides/gusset.
Recommended Layout for a Simple Tote (Example using 13 squares):
- Front Panel: 3 squares across, 3 squares down (9 squares total)
- Back Panel: 3 squares across, 3 squares down (9 squares total)
- Side Gusset/Bottom: 1 square wide, 4 squares long (4 squares total, folded in half for the bottom and sides)
Joining Methods:
There are several ways to join granny squares. Choose the one you find most appealing:
- Slip Stitch Join (Invisible/Flat Join):
- Place two squares together with wrong sides facing.
- Insert your hook through the back loops only of both squares.
- Sl st across, working into each corresponding stitch or chain space. This creates a neat, flat seam.
- Single Crochet Join (Raised Seam):
- Place two squares together with wrong sides facing.
- Insert your hook through both loops of both squares.
- Sc across, working into each corresponding stitch or chain space. This creates a slightly raised, defined seam.
- Whip Stitch Join (Sewn Join):
- Using your yarn needle and your joining yarn, whip stitch the squares together. This is a very secure method.
Step-by-Step Assembly:
- Join Front Panel: Arrange your 9 squares for the front panel. Join them horizontally first, then join the rows vertically.
- Join Back Panel: Repeat for the back panel.
- Prepare Side/Bottom Gusset: Join your 4 squares in a straight line.
- Attach Gusset to Front Panel: Take your joined side/bottom strip. Starting at one corner, join one long side of the strip to one side of your front panel, continuing along the bottom and up the other side.
- Attach Gusset to Back Panel: Repeat step 4, joining the other long side of the strip to your back panel. This will form the 3D shape of your bag.
- Secure Remaining Seams: Ensure all open edges where squares meet are securely joined.
Part 3: Adding the Top Border and Handles
Now that your bag’s body is assembled, you’ll want to create a sturdy top edge and attach handles.
Top Border (Optional but Recommended):
To give your bag a clean finish and added stability, work a few rounds of single crochet or half double crochet around the top opening.
- Join your main joining color to any stitch at the top opening of your bag.
- Ch 1 (does not count as a stitch).
- Work 1 sc in each stitch around the top opening, working into the tops of the dc stitches and chain spaces as evenly as possible. Join with a sl st to the first sc.
- Repeat for 2-4 more rounds, or until your desired border width is achieved.
Handles:
There are many ways to add handles to your bag.
- Crocheted Handles:
- Simple Straps: Chain a long length (e.g., 60-80 chains, or your desired handle length). Work sc or hdc back down the chain. Repeat for the second handle. Attach to the inside top corners of your bag with sc stitches or by sewing.
- Folded Straps: Work a long rectangle of sc or hdc stitches (e.g., 6-8 stitches wide by your desired length). Fold it in half lengthwise and sl st or sc the edges together to create a sturdy strap.
- Purchased Handles: You can find beautiful wooden, bamboo, or leather handles at craft stores. Simply sew them onto the top edge of your bag using a strong needle and thread, or by crocheting directly onto them if they have holes.
Part 4: Lining Your Bag (Optional but Highly Recommended)
A fabric lining will give your bag a professional finish, prevent stretching, and keep small items from falling through any gaps in your crochet work.
- Measure Your Bag: Measure the width and height of your finished crocheted bag.
- Cut Fabric: Cut two pieces of fabric for the main body of the bag, adding seam allowances (e.g., 1/2 inch) to all sides. If your bag has a separate gusset, you’ll need to cut fabric for that as well.
- Sew Lining: Sew the fabric pieces together in the same shape as your crocheted bag. Create a clean top edge by folding down and pressing the top raw edge of the fabric lining.
- Insert and Secure: Place the finished fabric lining inside your crocheted bag. Hand-stitch the top edge of the lining to the inside top edge of your crocheted bag using a needle and matching thread. Alternatively, you can use a sewing machine if you’re confident.
Care for Your Crocheted Bag:
- Spot clean minor spills.
- Hand wash in cool water with a mild detergent for a deeper clean.
- Reshape and lay flat to dry to prevent stretching and maintain shape.
- If your yarn allows, you might be able to machine wash on a gentle cycle and air dry, but always check your yarn label for specific care instructions.
Get Creative!
The beauty of crocheting your own bag lies in the endless possibilities for customization.
- Color Play: Experiment with different color palettes for your flowers and backgrounds.
- Yarn Choices: Try different yarn weights for larger or smaller squares and bags.
- Embellishments: Add tassels, pom-poms, or even embroidered details to your finished bag.
- Granny Square Variations: Explore other flower granny square patterns for a different look.
Crocheting a flower granny square bag is a rewarding project that results in a beautiful, functional, and deeply personal accessory. So grab your hooks, choose your favorite colors, and let your creativity bloom! Happy crocheting!
Video tutorial:


