
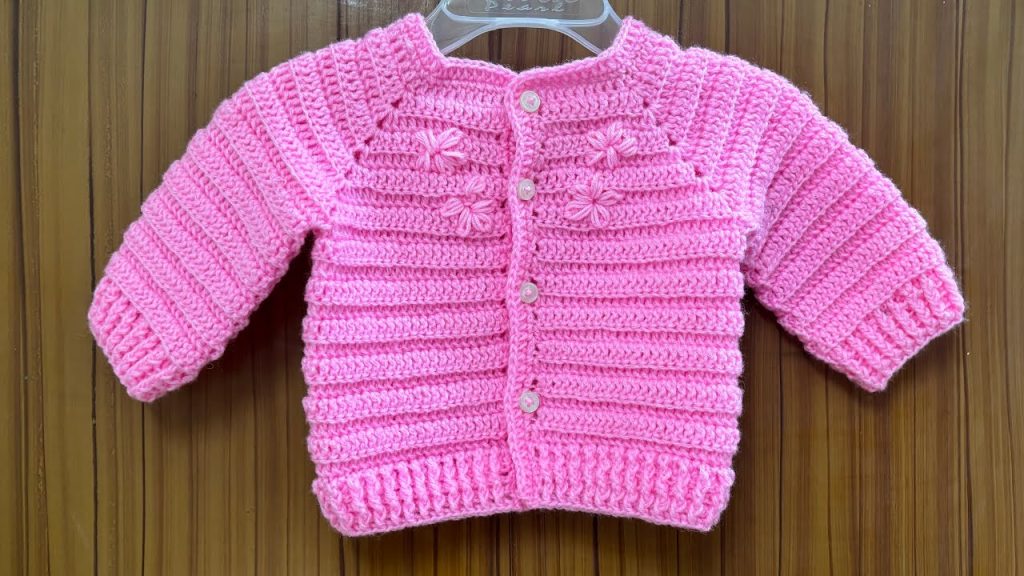
Crocheting a cardigan for a baby aged 6 to 12 months is not only a rewarding project but also a great way to create something beautiful, functional, and personal. Whether you are a seasoned crocheter or a beginner looking to try your first garment, this step-by-step guide will walk you through the entire process of making a crochet baby cardigan.
This tutorial will focus on a basic raglan-style cardigan, which is one of the easiest and most versatile types to make, with plenty of opportunities for customization.
🧵 What You’ll Learn in This Guide
- Understanding baby cardigan sizing (6–12 months)
- Choosing the right yarn and hook
- Step-by-step construction (from neckline to sleeves)
- How to add finishing touches (edging, buttons, etc.)
- Tips for customization and care
👶 Understanding the Size (6–12 Months)
Before you start crocheting, it’s important to understand the size you’re aiming for. Babies grow quickly, so cardigans should ideally have a little room to grow.
| Measurement | 6–12 Months Baby |
|---|---|
| Chest Circumference | 18–19.5 inches (46–50 cm) |
| Cardigan Length | 10–12 inches (25–30 cm) |
| Sleeve Length | 6–7 inches (15–18 cm) |
| Neck Width | 4–5 inches (10–12.5 cm) |
🧶 Materials Needed
Yarn:
- Yarn Weight: DK (Double Knit / Light Worsted / Category 3)
- Yarn Quantity: Approximately 300–400 yards
- Fiber Type: Baby-friendly yarn like soft acrylic, cotton, or bamboo blend
Tools:
- Crochet Hook: 4.0 mm (G-6) or as recommended for your yarn
- Scissors
- Yarn needle (for weaving in ends)
- Stitch markers (to mark raglan points)
- 3–5 small buttons (optional)
🔁 Basic Stitches Used
This pattern uses simple stitches, making it ideal for beginners.
- ch = chain
- sl st = slip stitch
- sc = single crochet
- hdc = half double crochet
- dc = double crochet
- fpdc/bpdc = front and back post double crochet (used for ribbing)
📐 Gauge (Important!)
Gauge: 16 dc x 10 rows = 4” x 4” (10 x 10 cm)
To check gauge:
- Crochet a swatch with your selected yarn and hook.
- Measure it after a few rows.
- Adjust hook size if needed.
✨ How to Crochet a Baby Cardigan (Top-Down Raglan Style)
This style starts at the neckline and works downward. It’s seamless and easy to try on as you go.
🧶 Step 1: Create the Foundation Chain
Foundation Chain:
- Chain 52 (or adjust for your tension).
This will be the starting point for the yoke (neckline to underarms).
🧵 Step 2: Mark Raglan Points
We’re dividing the stitches like this:
- 1st front panel: 9 stitches
- 1st sleeve: 8 stitches
- Back panel: 18 stitches
- 2nd sleeve: 8 stitches
- 2nd front panel: 9 stitches
Place stitch markers between the sections (after 9, 17, 35, 43).
🧶 Step 3: Work the Yoke
Row 1:
- Ch 2 (counts as dc), dc in each stitch, making 2 dc in the marked stitches (these are your raglan increases).
- Move the markers up each row.
Repeat rows, increasing at raglan points every row, until the yoke is approx. 4.5–5” tall from the neckline and wide enough to fit baby’s upper chest (~19”).
🧵 Step 4: Divide for Sleeves
Now we’ll separate the sleeves from the body.
Row X (Next Row):
- Dc across the first front panel.
- Skip sleeve stitches (put them on a holder or piece of scrap yarn).
- Dc across the back panel.
- Skip second sleeve stitches.
- Dc across the second front panel.
You should now have the main body of the cardigan.
🧶 Step 5: Crochet the Body
Continue working dc in rows across the entire body section until the piece is approx. 10–12 inches long from neckline to hem (or desired length).
Optional: Add ribbing at the bottom using front post and back post double crochet for 3–4 rows.
🧵 Step 6: Crochet the Sleeves
Go back to the sleeve stitches you set aside.
- Rejoin yarn at the armhole.
- Work dc rounds or rows around the sleeve. Join each round with sl st.
- Continue until the sleeve is approx. 6–7 inches long.
Optional: Add a cuff using fpdc/bpdc ribbing for a snug finish.
Repeat for the second sleeve.
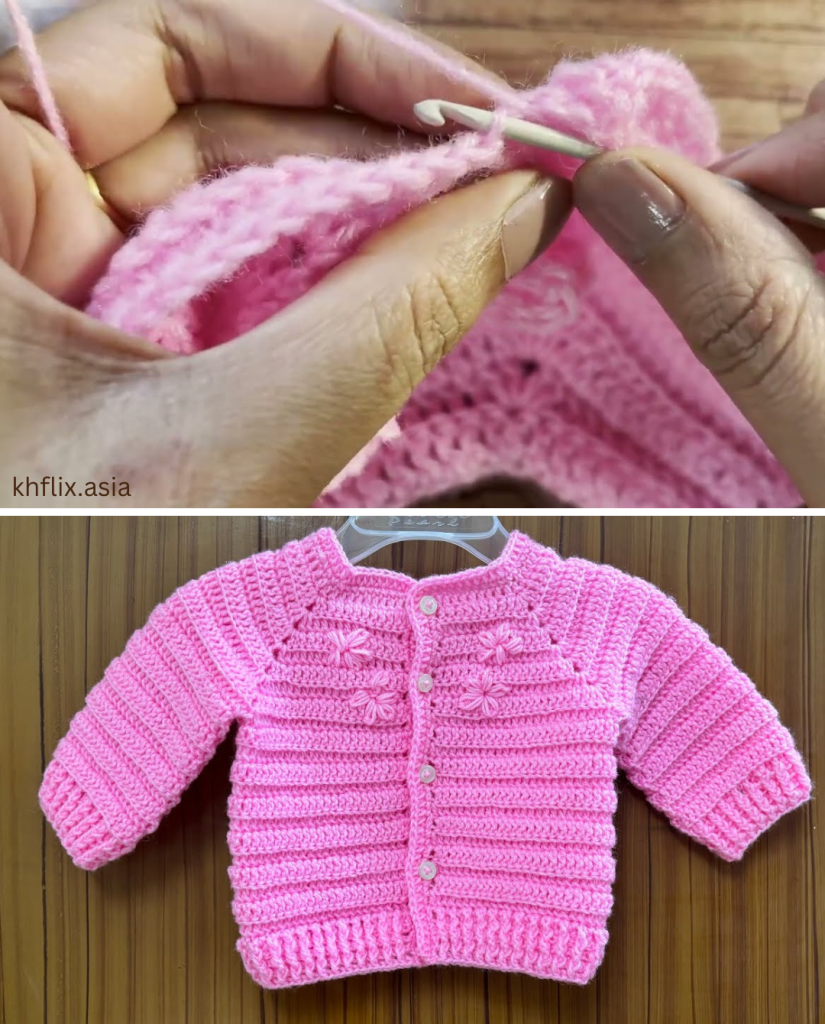
🧶 Step 7: Add Edging and Button Bands
Add a simple edging around the neckline and front edges using single crochet or half double crochet.
Button Band Tips:
- Work 2–3 rows of sc or hdc along the front panels.
- On one side, leave spaces (ch-1 or ch-2) for buttonholes every 1–2 inches.
- Sew on buttons to the opposite panel.
🪡 Step 8: Weave in Ends and Block
- Use a yarn needle to weave in all loose ends securely.
- Lightly block the cardigan if needed to smooth out stitches.

🎨 Customization Ideas
- Use striped or variegated yarn for colorful effects.
- Add crochet appliqués like hearts, stars, or animals.
- Make a hood by working in rows from the neckline.
- Add a pocket or a small embroidered design.
💧 Washing and Care Instructions
Always use yarn that’s easy to wash, especially for baby garments.
- Machine wash on gentle cycle (cold or warm water)
- Use baby-safe, hypoallergenic detergent
- Lay flat to dry or tumble dry low (check yarn label)
Include washing instructions if gifting the cardigan.
❓ FAQs
Can I use different yarn weights?
Yes, but you’ll need to adjust the stitch count and possibly the hook size. Stick with DK weight for simplicity.
What if I want to make a larger or smaller size?
Adjust your foundation chain and raglan stitch counts proportionally. Alternatively, follow a graded pattern that includes multiple sizes.
Is this pattern beginner-friendly?
Yes! This cardigan uses basic stitches and construction. As long as you know how to work in rows, increase, and shape a sleeve, you’re good to go.
🎁 Perfect Occasions to Gift a Handmade Baby Cardigan
- Baby showers
- First birthdays
- Holidays (Christmas, Easter)
- Family photo shoots
- Coming-home outfit
Pair it with matching booties, a hat, or a blanket for a complete handmade gift set!

❤️ Final Thoughts
Crocheting a cardigan for a 6 to 12-month-old baby is more than just a craft—it’s a heartfelt gesture that results in a warm, soft, and beautiful piece of clothing. Whether you keep it, gift it, or sell it, your handmade cardigan is sure to be treasured.
With basic stitches, easy construction, and endless opportunities for customization, this project is perfect for beginners and experienced crafters alike. So grab your yarn, hook, and a cup of tea—and enjoy the cozy journey of crocheting for little ones.
Video tutorial:


