A well-fitting hat is a joy to wear, and with a few simple measurements and a basic understanding of crochet hat construction, you can create hats for anyone! This guide focuses on a classic top-down beanie construction using half double crochet (HDC) stitches, which is a great choice for beginners due to its speed and comfortable fabric.

Understanding Hat Construction
Most crochet hats are worked in the round, starting from the top (the crown) and working downwards towards the brim. This allows for easy customization of both the crown diameter and the height of the hat.
Key Components of a Top-Down Hat:
- Crown: This is the flat circular part at the very top of the hat. You increase stitches in each round until the circle reaches the correct diameter for the head.
- Sides (Body): Once the crown reaches the desired diameter, you stop increasing and crochet even (one stitch in each stitch) until the hat reaches the desired height.
- Brim (Optional): The last few rounds of the hat can be worked differently to create a brim, such as ribbing for a snug fit or more increases for a wider brim.
Essential Measurements for a Perfect Fit
To ensure your hat fits perfectly, you’ll need two main measurements:
- Head Circumference: This is the measurement around the widest part of the head, typically just above the eyebrows and ears.
- How to Measure: Use a soft tape measure and wrap it snugly (but not tightly) around the head where the hat would sit.
- Hat Height: This is the measurement from the top center of the head down to where you want the hat to end (e.g., top of the ear, bottom of the ear, or further for a slouchy fit).
- How to Measure: Measure from the very top of the head straight down to the desired stopping point.
General Adult Hat Size Chart (Approximate):
| Size | Head Circumference (inches) | Head Circumference (cm) | Crown Diameter (inches) | Hat Height (inches) | Hat Height (cm) |
|---|---|---|---|---|---|
| Small Adult | 20-21 | 51-53.5 | 6.4-6.7 | 8-8.5 | 20.5-21.5 |
| Medium Adult | 21-22 | 53.5-56 | 6.7-7.0 | 8.5-9 | 21.5-23 |
| Large Adult | 22-23 | 56-58.5 | 7.0-7.3 | 9-9.5 | 23-24 |
| Extra Large Adult | 23-24 | 58.5-61 | 7.3-7.6 | 9.5-10 | 24-25.5 |
| Slouchy Hat | Same as above | Same as above | Same as above | 10-12+ | 25.5-30.5+ |
Crown Diameter Calculation: A common formula for the crown diameter of a flat circle that will then form a hat is: Crown Diameter=(Head Circumference−Negative Ease)/π Negative ease is typically 1-2 inches (2.5-5 cm) for hats, meaning the finished hat will be slightly smaller than the head circumference to ensure a snug fit that stays on. For example, if a head circumference is 22 inches, aim for a hat circumference of 20 inches. 20/3.14≈6.37 inches.
Materials You’ll Need
- Yarn: Medium weight (Worsted/Aran, #4) yarn is a great choice for most adult hats. The amount needed will vary by size and stitch, but typically 150-250 yards (137-229 meters) for a beanie.
- Crochet Hook: A hook size appropriate for your yarn. For worsted weight yarn, a 5.0 mm (H) or 5.5 mm (I) hook is common. (Always check your yarn label for recommendations).
- Stitch Marker: Essential for working in the round to mark the beginning of each round.
- Tapestry Needle: For weaving in ends.
- Scissors: For cutting yarn.
- Measuring Tape: For checking your gauge and hat dimensions.
Basic Crochet Stitches Used
- Ch (Chain): Yarn over, pull through loop on hook.
- Sl St (Slip Stitch): Insert hook into stitch, yarn over, pull through stitch and loop on hook.
- HDC (Half Double Crochet): Yarn over, insert hook into stitch, yarn over, pull up a loop (3 loops on hook), yarn over, pull through all 3 loops on hook.
- HDC Inc (Half Double Crochet Increase): Work 2 HDC stitches into the same stitch.
Gauge: Your Most Important Tool!
Gauge is the number of stitches and rows per inch (or cm) for a given yarn and hook. It’s crucial for achieving the correct size.
- To create a gauge swatch: Chain about 15-20 stitches. Work 10-15 rows in HDC. Measure a 4×4 inch (10×10 cm) square within your swatch.
- Adjusting Gauge: If you have too many stitches per inch, your hat will be too small – try a larger hook. If you have too few stitches per inch, your hat will be too large – try a smaller hook.
Step-by-Step Hat Pattern (Top-Down Beanie)
This pattern uses HDC and is designed to be easily adaptable for different adult sizes. We’ll start with a “Magic Ring” for a neat crown, but you can also use a “Chain 2” method.
Abbreviations:
- Ch: Chain
- Sl St: Slip Stitch
- HDC: Half Double Crochet
- HDC Inc: Half Double Crochet Increase (2 HDC in the same stitch)
- St(s): Stitch(es)
- MR: Magic Ring
- Rnd: Round
General Notes:
- The Ch 1 at the beginning of each round does not count as a stitch.
- Join each round with a Sl St to the first HDC of the round.
- Use a stitch marker to mark the first stitch of each round to help you keep track.
Step 1: The Crown (Increasing Rounds)
The crown is a flat circle. You will increase stitches evenly in each round until the diameter reaches the measurement calculated earlier.
Starting Options:
- Magic Ring (MR): Creates a tight center hole.
- Create a magic ring.
- Rnd 1: Ch 1, work 8-10 HDC into the magic ring. Pull tail tight to close the ring. Join with Sl St to the first HDC. (8-10 HDC)
- Chain 2 Method:
- Ch 2.
- Rnd 1: Work 8-10 HDC into the 2nd chain from the hook. Join with Sl St to the first HDC. (8-10 HDC)
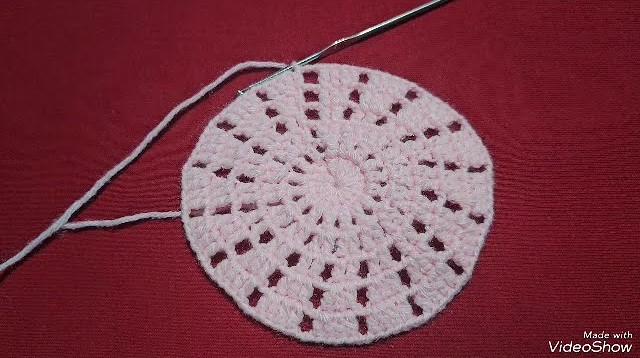
Increasing Rounds: The key to a flat circle is to increase the same number of stitches in each round as you started with in Rnd 1. If you started with 8 HDC, you’ll increase by 8 HDC in each subsequent round. If you started with 10 HDC, you’ll increase by 10 HDC in each round. Let’s assume you started with 8 HDC for this example.
- Rnd 2: Ch 1, HDC Inc in each st around. Join with Sl St. (16 HDC)
- Rnd 3: Ch 1, HDC in next st, HDC Inc in next st. Repeat from * around. Join with Sl St. (24 HDC)
- Rnd 4: Ch 1, HDC in next 2 sts, HDC Inc in next st. Repeat from * around. Join with Sl St. (32 HDC)
- Rnd 5: Ch 1, HDC in next 3 sts, HDC Inc in next st. Repeat from * around. Join with Sl St. (40 HDC)
Continue this pattern of increasing the number of HDC between each increase until your crown reaches the desired diameter.
- General Increase Formula for HDC Circles:
- Rnd 1: Initial stitches (e.g., 8-10 HDC)
- Rnd 2: HDC Inc in every stitch.
- Rnd 3: (HDC in 1 st, HDC Inc) repeat.
- Rnd 4: (HDC in 2 sts, HDC Inc) repeat.
- Rnd X: (HDC in (X-2) sts, HDC Inc) repeat.
How to know when to stop increasing the crown:
- Measure the diameter of your flat circle. Place the circle flat and measure across its widest point. Compare this to the “Crown Diameter” from your size chart.
- Try it on (if possible): For adult sizes, you can often fit the crown over your head. When the crown is roughly the right diameter and sits somewhat flat on the top of your head, you’re ready to move to the body. It might be slightly smaller than your final head circumference due to negative ease and how the stitches will relax.
Step 2: The Body (Straight Rounds)
Once your crown is the correct diameter, you will stop increasing and work even rounds to create the body of the hat.
- Rnd [Next]: Ch 1, HDC in each st around. Join with Sl St. (Same stitch count as your last increase round)
Continue repeating this round until your hat reaches the desired height.
- Measuring Hat Height: Periodically try on the hat or measure from the top center of the crown down to the edge. Stop when the hat is about 1 inch (2.5 cm) shorter than your desired final hat height, as the brim will add a bit more length.
Step 3: The Brim (Optional but Recommended)
A simple ribbed brim adds elasticity and a finished look. This is often done using HDC in the back loop only (HDC BLO).
- Rnd [Brim 1]: Ch 1, HDC BLO in each st around. Join with Sl St.
- Rnd [Brim 2]: Ch 1, HDC BLO in each st around. Join with Sl St.
- Rnd [Brim 3]: Ch 1, HDC BLO in each st around. Join with Sl St.
For a more structured or decorative brim, you could:
- Use front post/back post stitches (FPDC/BPDC or FPHDC/BPHDC) for a more pronounced ribbing.
- Work more rounds in HDC BLO for a wider brim.
- Work single crochet (SC) stitches for a firmer brim.
Step 4: Finishing
- Fasten Off: After completing your final brim round, cut your yarn, leaving a 6-8 inch tail. Yarn over and pull the tail completely through the last loop on your hook to secure.
- Weave in Ends: Use your tapestry needle to weave in both the starting tail from the magic ring (or chain 2) and the ending tail. Weave them securely into the stitches for a neat finish that won’t unravel.
Customizing for Different Looks
- Slouchy Hat: To create a slouchy hat, simply continue working “Body” rounds (HDC in each stitch) for an extra 2-4 inches (5-10 cm) beyond the standard hat height for your size before adding the brim.
- Different Stitches: You can use other stitches like single crochet (SC) for a denser, stiffer hat, or double crochet (DC) for a lacier, more drapey hat. Remember to adjust your hook size and increase/height rounds accordingly, as stitch height and width vary.
- SC Hat: Start with more stitches in Rnd 1 (e.g., 6-8 SC). Your increase rounds will increase by 6-8 SC each time. The hat will also be shorter per round, so you’ll need more body rounds.
- DC Hat: Start with fewer stitches in Rnd 1 (e.g., 10-12 DC). Your increase rounds will increase by 10-12 DC each time. The hat will be taller per round, so you’ll need fewer body rounds.
- Yarn Weight: This pattern is easily adaptable for different yarn weights.
- Thicker Yarn (e.g., Chunky/Bulky #5 or #6): Use a larger hook (e.g., 6.0mm-9.0mm). You’ll need fewer stitches in Rnd 1 and fewer increase rounds for the crown. The hat will work up much faster.
- Thinner Yarn (e.g., DK/Light Worsted #3): Use a smaller hook (e.g., 3.5mm-4.5mm). You’ll need more stitches in Rnd 1 and more increase rounds for the crown. The hat will take longer to make.
- Always check your gauge when changing yarn weight or hook size!
Troubleshooting Common Issues
- Hat is too pointy: You might be increasing too quickly or not enough stitches in your starting round. Ensure your increases are consistent and follow the formula for a flat circle.
- Hat is ruffled/wavy: You are increasing too many stitches in your crown rounds. Try skipping an increase round or reducing the number of stitches you increase by in a round.
- Hat is too tight/loose: Your gauge is off. Adjust your hook size accordingly.
- Hat is too short/long: Adjust the number of “Body” rounds you crochet.
With this detailed guide and a little practice, you’ll be able to crochet perfectly fitting adult hats for yourself and everyone you know! Happy crocheting!
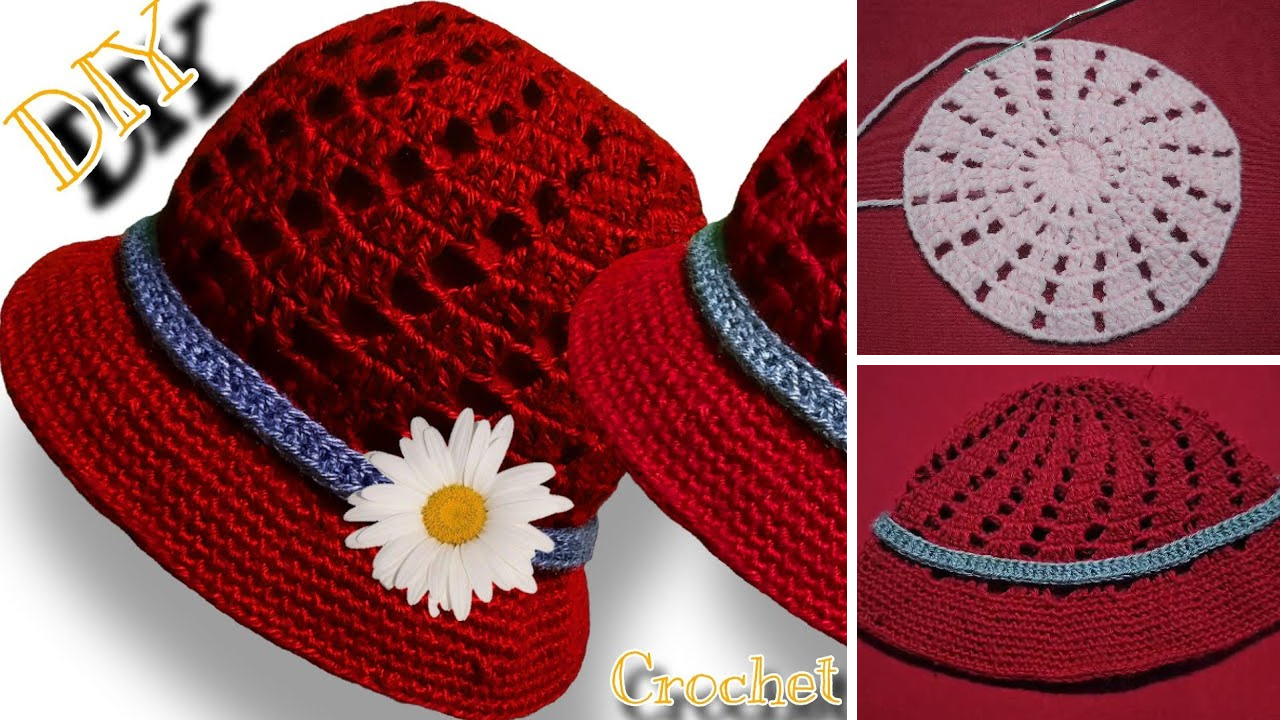
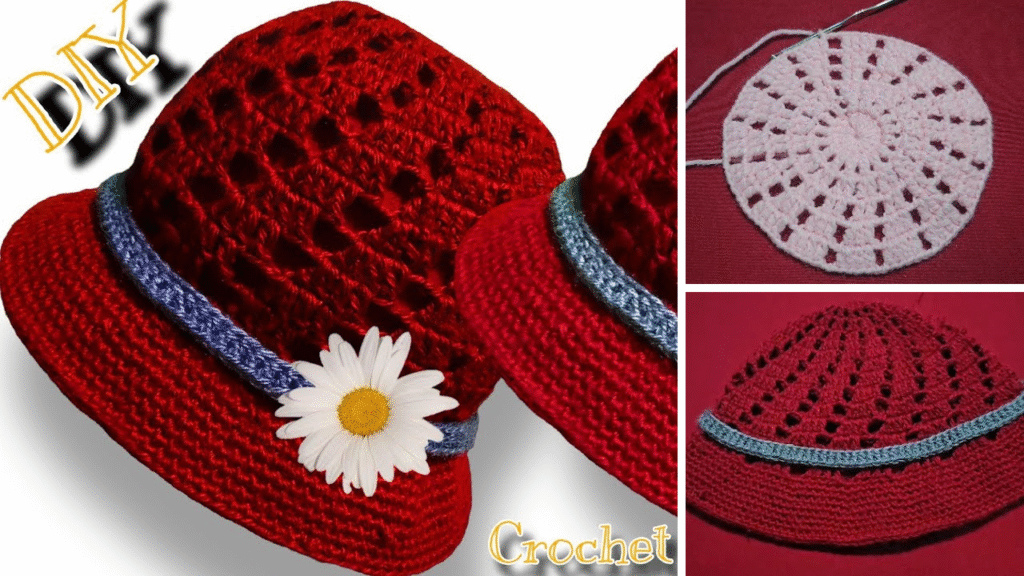
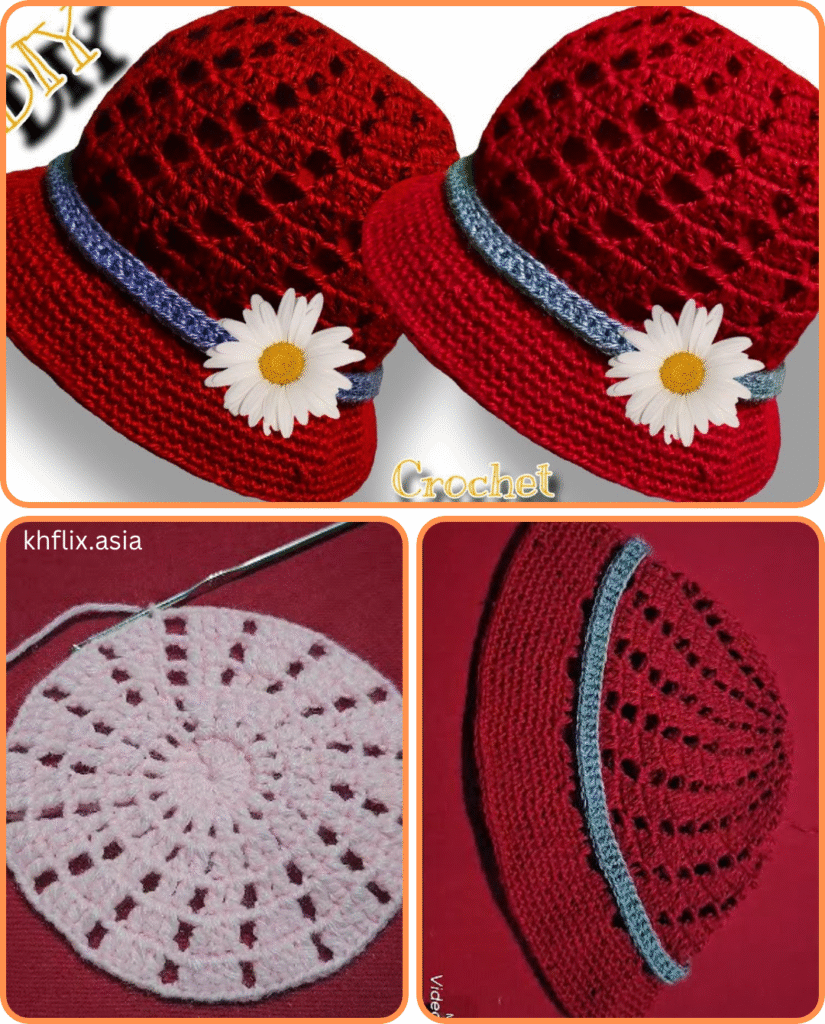
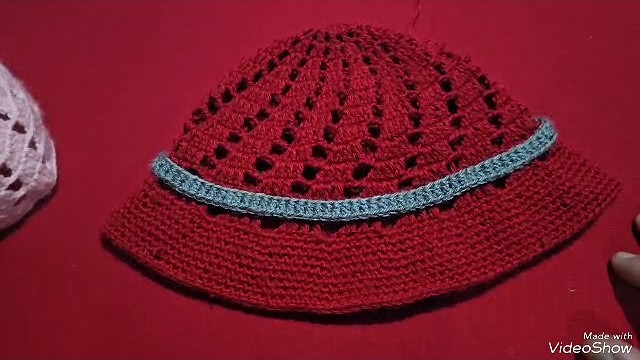
Video tutorial:


