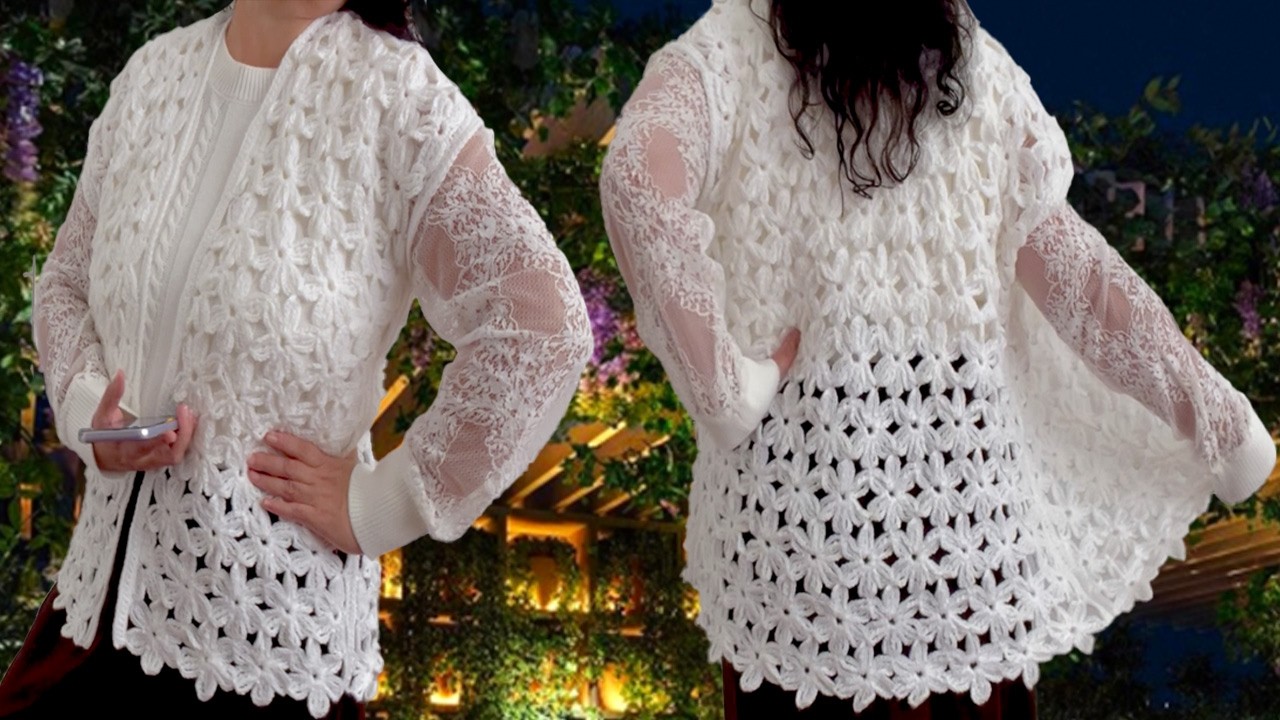
Imagine a garment that’s both effortlessly stylish and incredibly comfortable, a piece that you can wear dressed up or down, and best of all, one you can create with just a few basic crochet skills. Enter the crochet blouse made from simple rectangles! This incredibly beginner-friendly method allows you to craft a beautiful, custom-fit top without the complexities of shaping sleeves or intricate stitch patterns.
This article will guide you through the process, from selecting your materials to seaming your finished rectangles into a wearable masterpiece. Get ready to fall in love with the magic of minimalist crochet!
Why a Rectangle Blouse?
The beauty of this design lies in its simplicity:
- Beginner-Friendly: If you can crochet a rectangle, you can make this blouse! No complicated increases, decreases, or fancy shaping required.
- Quick to Make: Working in straight rows means your project will grow quickly, providing satisfying progress.
- Customizable Fit: Easily adjust the width and length of your rectangles to create a blouse that perfectly suits your body and style.
- Versatile Style: Depending on your yarn choice and finishing touches, your rectangle blouse can be light and airy for summer, or cozy and substantial for cooler weather.
- Minimal Seaming: Only a few strategic seams are needed to transform your flat pieces into a wearable garment.
Materials You’ll Need
The right materials are key to a successful and enjoyable project.
- Yarn:
- Weight: For a light and drapey blouse, a DK (3) or sport (2) weight yarn is ideal. If you want something a bit more substantial, a light worsted (4) can also work. Avoid very bulky yarns as they might make the blouse too stiff.
- Fiber Content:
- Cotton/Cotton Blends: Excellent for breathability, drape, and stitch definition, making them perfect for warmer weather.
- Bamboo/Linen Blends: Offer beautiful drape, a slight sheen, and are very comfortable against the skin.
- Acrylic/Acrylic Blends: A budget-friendly option, easy to care for, and available in a vast array of colors. Look for softer acrylics for better drape.
- Yardage: This will vary significantly based on your size and chosen yarn weight. As a general estimate, for an adult S/M, plan for 800-1200 yards (730-1100 meters). Always buy a little extra just in case!
- Crochet Hook: Refer to your chosen yarn’s label for the recommended hook size. As a starting point:
- For DK weight yarn: 4.0 mm (G) or 4.5 mm (7)
- For Sport weight yarn: 3.5 mm (E) or 4.0 mm (G)
- You might go up a hook size from the label’s recommendation if you want a lacier, more open fabric.
- Yarn Needle: For weaving in ends and seaming.
- Scissors: For cutting yarn.
- Measuring Tape: Crucial for getting your dimensions right.
- Stitch Markers (Optional but Recommended): Helpful for marking your stitches and keeping track of rows.
Understanding Gauge (The Secret to a Good Fit!)
Gauge is the number of stitches and rows per inch (or centimeter) created by your yarn and hook combination. While it’s easy to skip, checking your gauge is VITAL for this project to ensure your blouse fits as intended.
How to Check Your Gauge:
- Chain about 20-25 stitches (or enough for a swatch about 6 inches wide).
- Work a few rows in the stitch pattern you plan to use for your blouse (e.g., double crochet). Aim for a swatch that’s at least 4×4 inches.
- Measure a 4×4 inch section of your swatch. Count how many stitches you have across 4 inches and how many rows you have in 4 inches.
- Adjust if needed:
- If you have more stitches/rows than the pattern suggests (or your desired measurement), your tension is too tight. Go up a hook size.
- If you have fewer stitches/rows than the pattern suggests (or your desired measurement), your tension is too loose. Go down a hook size.
- Repeat until your gauge matches your desired measurements.
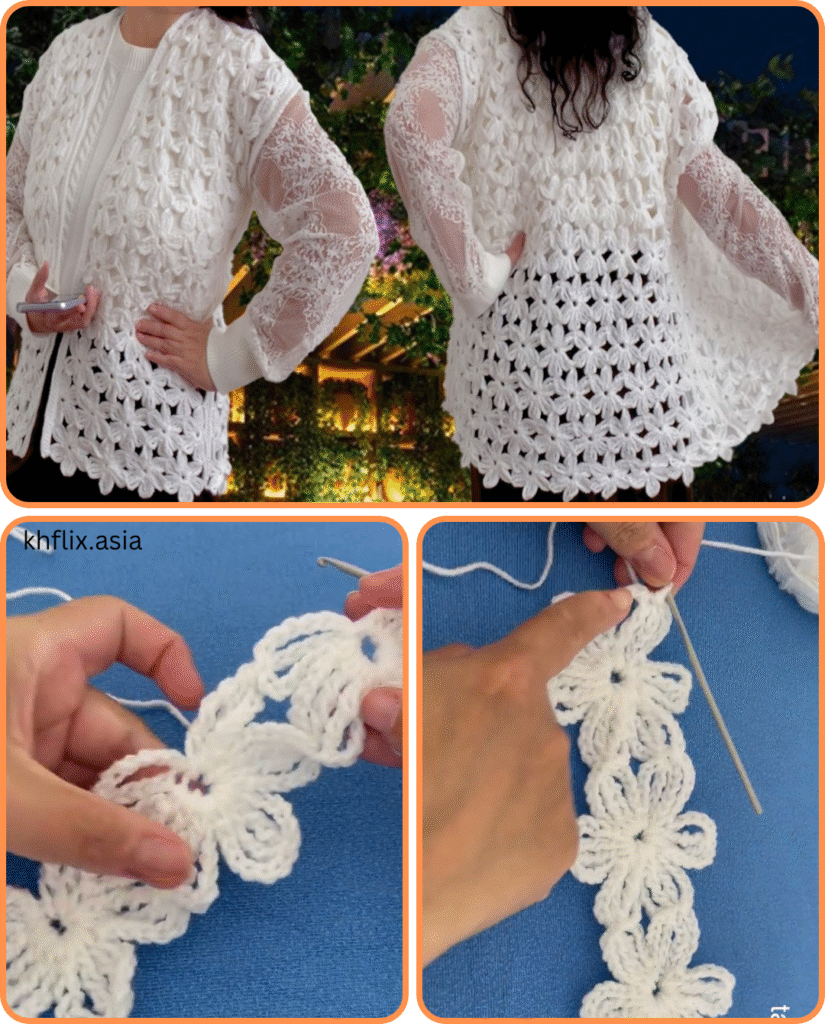
The Simple Stitch Pattern
For an “easy and beautiful” blouse, we’ll stick to basic, widely used stitches that create lovely drape and texture.
- Double Crochet (dc): This is a fantastic go-to stitch. It works up relatively quickly, creates a nice open fabric, and drapes well.
- Half Double Crochet (hdc): A slightly denser stitch than dc, good if you want a bit more coverage.
- Granny Stripe (Clusters): Creates a lovely textured, open fabric with a vintage feel. This involves working 3 dc into a space, skipping stitches, and repeating.
For this tutorial, let’s use a simple Double Crochet (dc) pattern. It’s timeless and universally flattering.
Abbreviations:
- ch: chain
- sc: single crochet
- dc: double crochet
- sl st: slip stitch
- st(s): stitch(es)
- rep: repeat
Designing Your Rectangle Blouse: Measurements Are Key!
This blouse is made from two identical rectangles: a front panel and a back panel.
- Measure Your Bust: Measure around the fullest part of your bust.
- Determine Rectangle Width:
- Formula: (Bust Measurement / 2) + desired ease.
- “Ease” refers to how much extra room you want in the garment.
- For a fitted look: 0-2 inches of positive ease.
- For a comfortable, standard fit: 3-6 inches of positive ease.
- For an oversized, relaxed fit: 7+ inches of positive ease.
- Example: If your bust is 36 inches and you want 4 inches of positive ease, your desired total circumference is 40 inches. Each rectangle should be 20 inches wide.
- Determine Rectangle Length:
- Body Length: Measure from the top of your shoulder (near your neck) down to where you want the hem of the blouse to fall.
- Sleeve Length (Optional, for wider rectangles): If you want your rectangles to form part of the sleeve, measure from your desired shoulder point (e.g., halfway between neck and shoulder joint) down to where you want the sleeve to end on your arm (e.g., elbow, 3/4 length, wrist). Add this to your body length.
- Total Length: For a short-sleeved blouse where the rectangle also forms the sleeve, measure from the point where you want the shoulder seam to be (e.g., 2-3 inches out from the neck) down to your desired hem, and then from that shoulder point down to where you want your sleeve to end.
- Simpler Method: Lay a well-fitting top flat. Measure its width (underarm to underarm) and its length (from shoulder to hem, and from the outer shoulder point to the sleeve hem if you want the rectangle to include the sleeve).
Example Dimensions (for a general S/M size, adjust to your measurements):
- Rectangle Width: Approximately 18-22 inches (45-56 cm)
- Rectangle Length: Approximately 22-26 inches (56-66 cm)
Pattern Instructions (Using Double Crochet)
You will be making TWO identical rectangles.
Step 1: Create Your Foundation Chain
- Calculate Stitches: Using your hook and chosen yarn, make a chain that measures your desired Rectangle Width. Make sure your chain is an even number for symmetry later, or just approximate and adjust in Row 1.
- Tip: Don’t chain too tightly! This can make your first row difficult to work into.
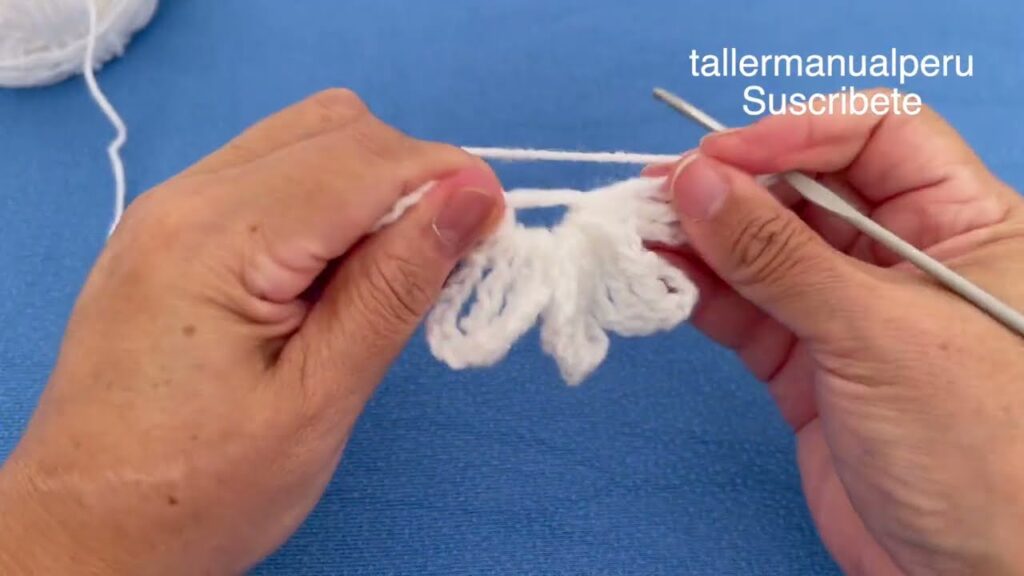
Step 2: Work the First Row
- Row 1: Dc in the 4th ch from hook (the skipped 3 chs count as your first dc). Dc in each ch across.
- Count your stitches. This is your stitch count for all subsequent rows.
Step 3: Work Subsequent Rows
- Row 2: Ch 3 (counts as first dc), turn your work. Dc in the next stitch and in each dc across, working your last dc into the top of the turning ch-3 from the previous row.
- Repeat Row 2: Continue repeating Row 2 until your rectangle measures your desired Rectangle Length.
- Fasten Off: When you reach your desired length, cut your yarn, leaving a tail about 12-18 inches long (for seaming). Pull the tail through the last loop on your hook to secure.
Repeat these steps to create your second identical rectangle.
Assembling Your Blouse
Now, the exciting part – transforming your flat rectangles into a wearable blouse!
- Lay Flat: Lay one rectangle flat on a clean surface. This will be your back panel.
- Align: Place the second rectangle directly on top of the first, aligning all edges perfectly. This is your front panel.
- Shoulder Seams:
- From the top left corner, measure in approximately 4-6 inches (10-15 cm) and place a stitch marker. This will be the start of your shoulder seam.
- Repeat on the top right corner. The unseamed space in the middle will be your neck opening. The exact measurement for the shoulder seam depends on your preference for neck width – wider opening = shorter seam.
- Using your yarn needle and the long tails you left (or a new piece of yarn), seam the top edges together from the outer corners inwards to your stitch markers. You can use a whip stitch, mattress stitch, or slip stitch through both layers.
- Securely weave in any loose ends.
- Side Seams:
- Starting from the bottom hem of the blouse, measure up approximately 6-8 inches (15-20 cm) along the side edge and place a stitch marker. This will be the bottom of your armhole opening. Adjust this measurement based on your desired armhole depth – a larger arm = longer opening.
- Repeat on the other side.
- Using your yarn needle, seam the side edges together from the bottom hem up to your stitch markers.
- Securely weave in any loose ends.
Finishing Touches (Optional, but Recommended)
- Neckline Edging: For a polished look, work a round of single crochet (sc) or slip stitches (sl st) evenly around the neckline. You can also do a round of reverse single crochet for a “crab stitch” border.
- Sleeve Edging: Similarly, work a round of sc or sl st around the armhole openings.
- Bottom Hem Edging: A simple round of sc can give the hem a neater finish.
- Blocking: If your yarn allows (especially natural fibers), blocking can significantly improve the drape and shape of your blouse. Gently wash your finished piece, carefully squeeze out excess water, and lay it flat to dry, gently shaping it to your desired dimensions.
Caring for Your Crocheted Blouse
Always refer to your yarn label for specific care instructions.
- Cotton/Acrylic: Often machine washable on a gentle cycle with cold water. Lay flat to dry or tumble dry on low.
- Wool/Delicate Blends: Hand wash in cool water with a mild detergent. Gently squeeze out water (do not wring!), and lay flat on a towel to air dry, reshaping as needed.
Variations and Design Ideas
- Different Stitches: Experiment with other easy stitch patterns like half double crochet, single crochet, or even a simple shell stitch for different textures.
- Stripe It Up: Change colors every few rows for a striped effect.
- Lace Accents: Incorporate a row of open lace (like a V-stitch row) into your pattern for a delicate touch.
- Longer Sleeves: Make your initial rectangles significantly wider. When seaming the sides, leave a larger opening for the armhole, and seam the remaining portion of the rectangle to form the sleeve seam.
- Off-the-Shoulder: Create a much wider neckline opening and add an elastic casing or drawstring to wear it off the shoulders.
This “very easy, beautiful crochet blouse from rectangles” is a fantastic project for anyone looking to make their own garments. It’s a testament to how simple shapes and basic stitches can combine to create something truly elegant and perfectly tailored to you. Happy crocheting!
Video tutorial:


