
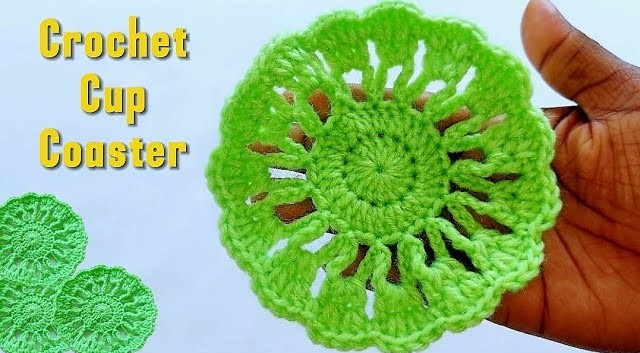
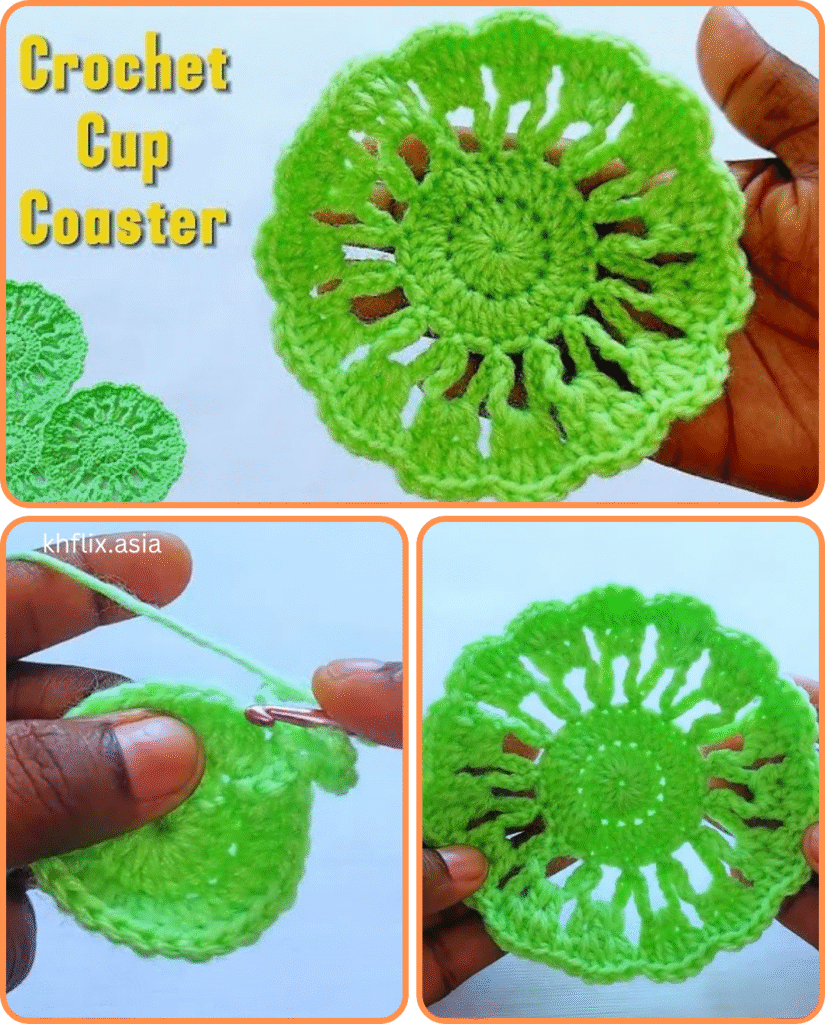
Crocheted cup coasters are not only practical for protecting your furniture but also add a personal and decorative touch to your home. They’re perfect for beginners because they work up quickly, use minimal yarn, and allow you to practice basic crochet stitches. Whether you want to make a set for yourself or create handmade gifts, this guide will walk you through how to crochet a simple and stylish cup coaster from start to finish.
☕ Why Crochet a Cup Coaster?
- Beginner-friendly: Great project to learn stitches and shaping
- Quick & easy: Most coasters take under 30 minutes
- Minimal materials: Use scrap yarn or leftover bits
- Great gifts: Perfect for housewarmings, holidays, or personal sets
- Customizable: Make them round, square, floral, or textured
🧶 Materials You’ll Need
- Yarn:
- 100% cotton yarn is best (absorbs moisture and is heat-resistant)
- Worsted weight (#4) is ideal for coasters
- Crochet hook: 4.0 mm (G) or 4.5 mm (US 7) hook
- Scissors
- Yarn needle (for weaving in ends)
- Stitch marker (optional)
🪡 Stitches Used (US Terms)
- Chain (ch)
- Slip Stitch (sl st)
- Single Crochet (sc)
- Half Double Crochet (hdc)
- Double Crochet (dc)
📏 Standard Coaster Size
A typical coaster measures about 4 to 5 inches (10–12.5 cm) in diameter. You can easily adjust the size by adding or subtracting rounds.
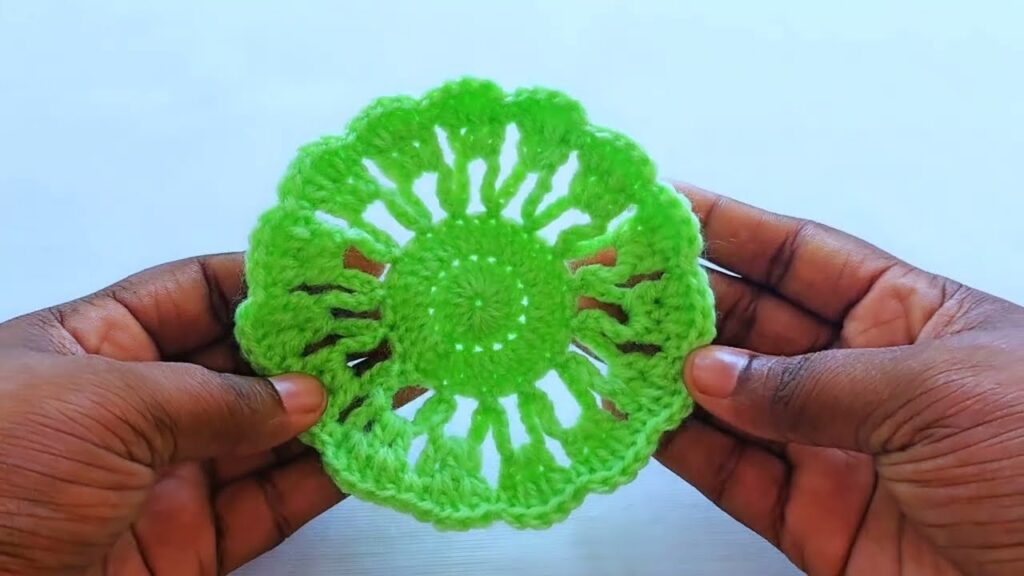
🧵 Simple Round Crochet Cup Coaster Pattern
This basic round coaster uses double crochet stitches and works up in just a few rounds.
✨ Step 1: Start with a Magic Ring (or chain 4 and join)
- Create a magic ring, or:
- Chain 4, then join with a slip stitch to form a ring.
✨ Step 2: Round 1
- Ch 3 (counts as first dc), work 11 dc into the ring.
- Join with a sl st to the top of the ch-3.
(12 dc total)
✨ Step 3: Round 2
- Ch 3, 1 dc in same stitch, then 2 dc in each stitch around.
- Join with sl st to top of beginning ch-3.
(24 dc total)
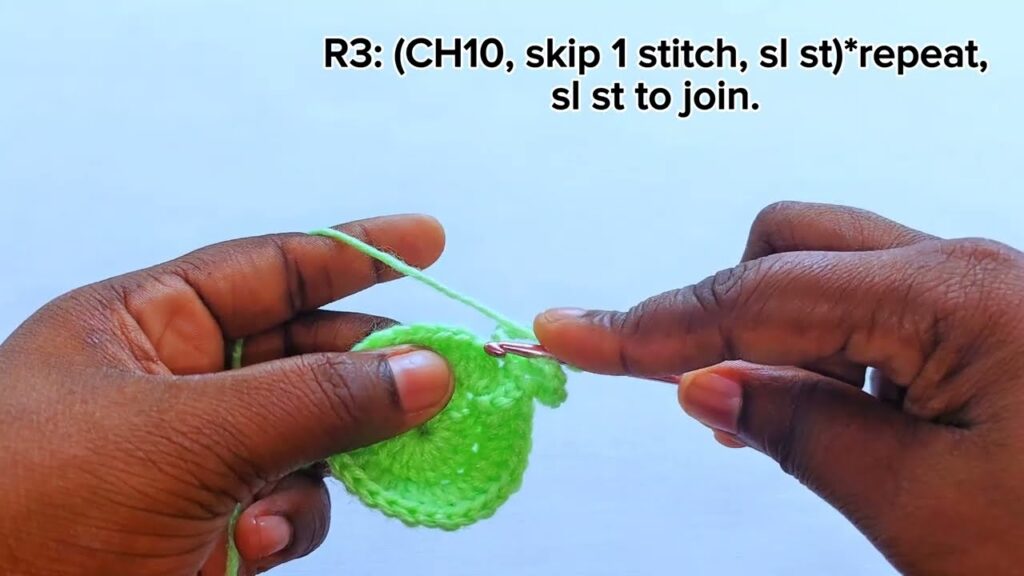
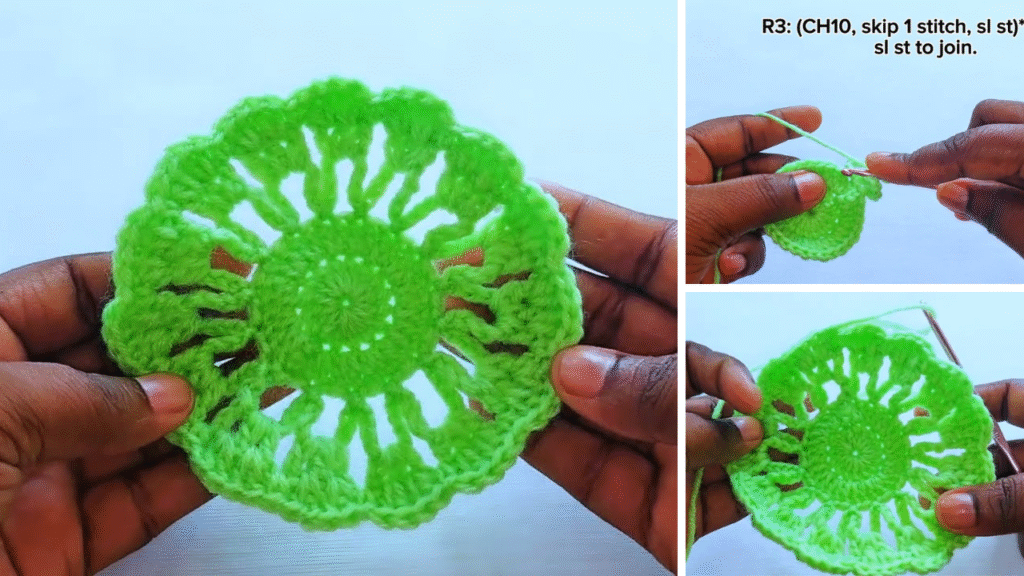
✨ Step 4: Round 3
- Ch 3, 1 dc in next stitch, 2 dc in next stitch, repeat around.
- Join with sl st.
(36 dc total)
✨ Step 5: Optional Round 4 (for a larger coaster)
- Ch 3, 1 dc in next 2 stitches, 2 dc in next stitch, repeat around.
- Join with sl st.
(48 dc total)
✅ Tip: If your coaster starts to curl or ripple, block it or adjust your hook size.
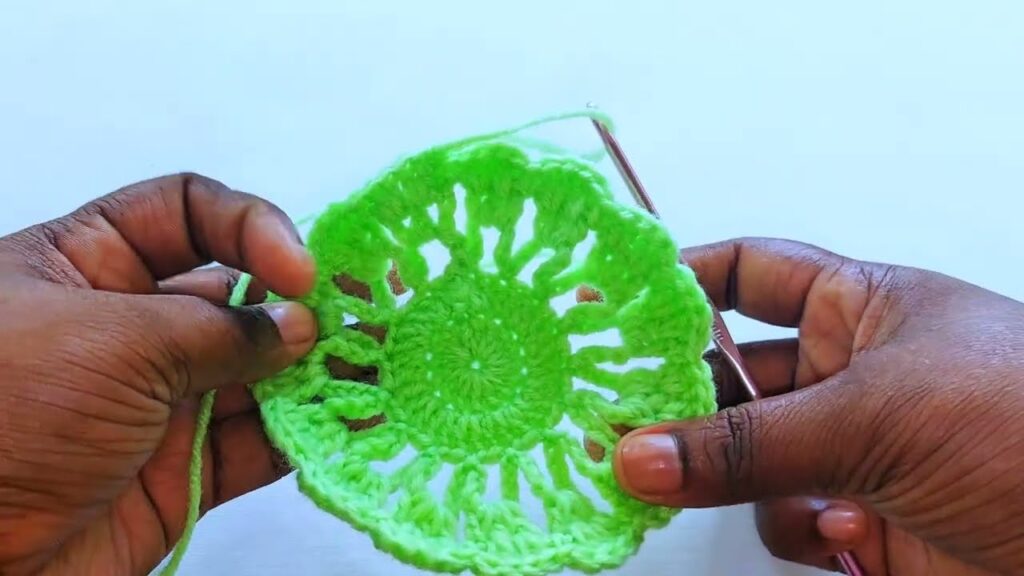
✨ Step 6: Finishing Edge (Optional)
For a nice decorative edge:
- Round 5: Ch 1, work 1 sc in each stitch around, join with sl st.
OR - Try a crab stitch (reverse sc) or a picot edge for added texture.
✨ Step 7: Fasten Off & Weave In Ends
- Cut yarn, leaving a tail of about 6 inches.
- Use a yarn needle to weave in the tail neatly on the back of the coaster.
🎨 Creative Variations
- Color Changes: Alternate colors each round for a striped look.
- Granny Style: Use granny stitch clusters for a vintage feel.
- Floral Design: Use petal-shaped stitches for a flower-style coaster.
- Square Coasters: Instead of working in the round, use rows of sc or dc stitches.
- Textured Stitch: Try puff stitches, bobbles, or front post stitches.
🧡 Tips for Success
- Use cotton yarn—it’s absorbent, washable, and durable.
- Block your coasters if they curl or don’t lie flat.
- Make a set of 4 or 6 for a full table set or gift set.
- Store them flat or stack them in a small basket.
🎁 Great Gift Idea
A stack of handmade coasters tied with a ribbon makes a thoughtful and practical gift for:
- Housewarmings
- Weddings
- Birthdays
- Holidays
- Teachers or coworkers
Pair them with a mug and a bag of tea or coffee for a cozy gift bundle!
Video tutorial:
🧶 Conclusion
Crocheting cup coasters is a perfect way to practice your crochet skills while creating something useful and beautiful. Whether you prefer simple and minimal or colorful and decorative, you can design a set that fits any aesthetic or occasion.
With just a hook, some yarn, and a bit of time, you can crochet stylish, functional coasters that protect your surfaces and add a handmade touch to your home.


