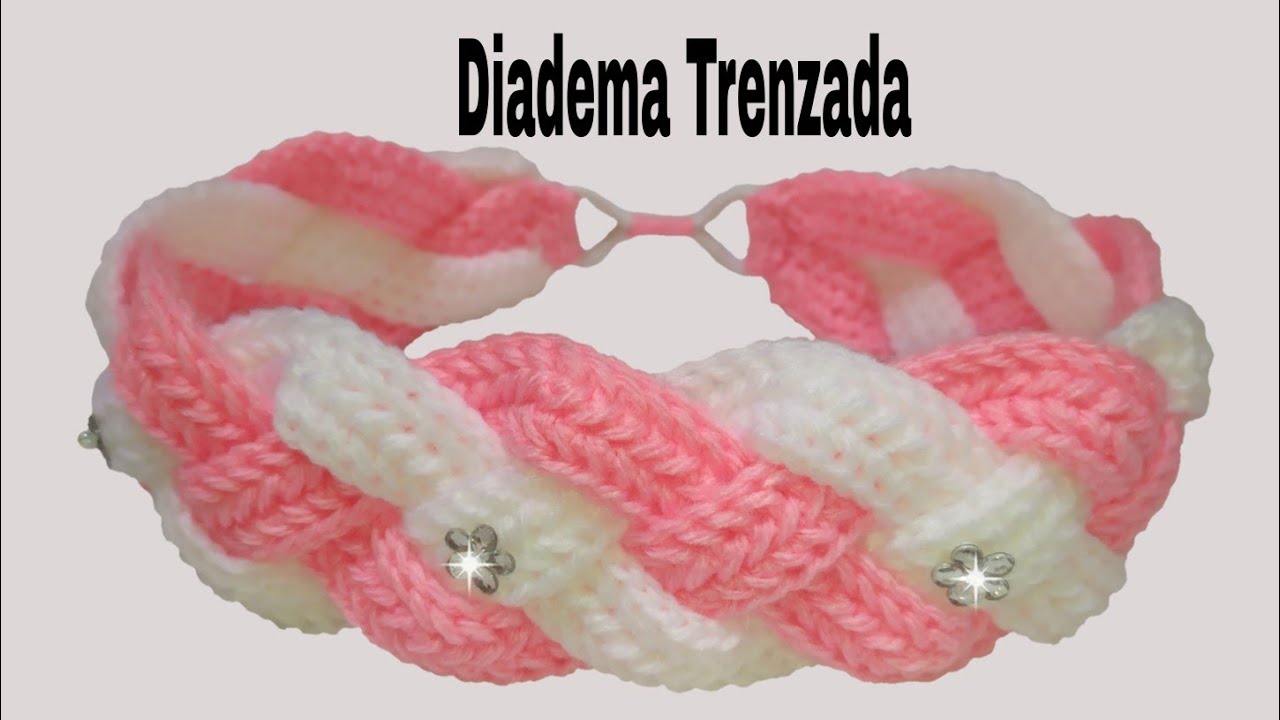
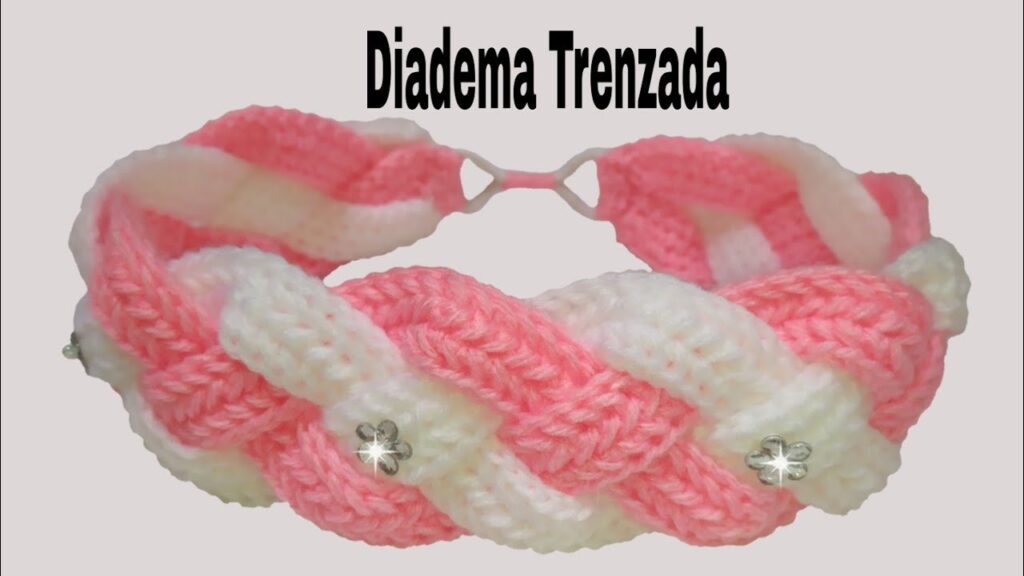
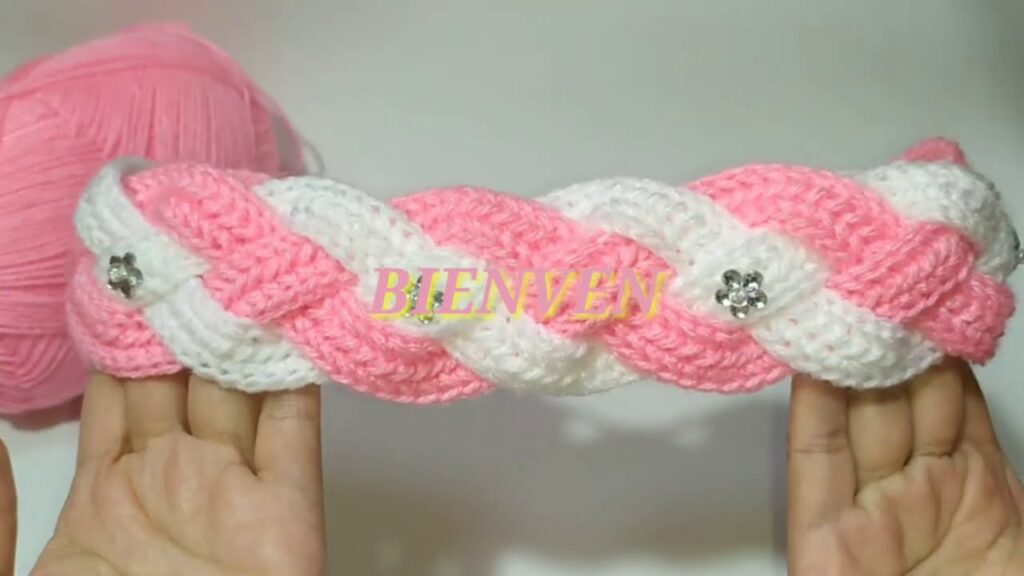
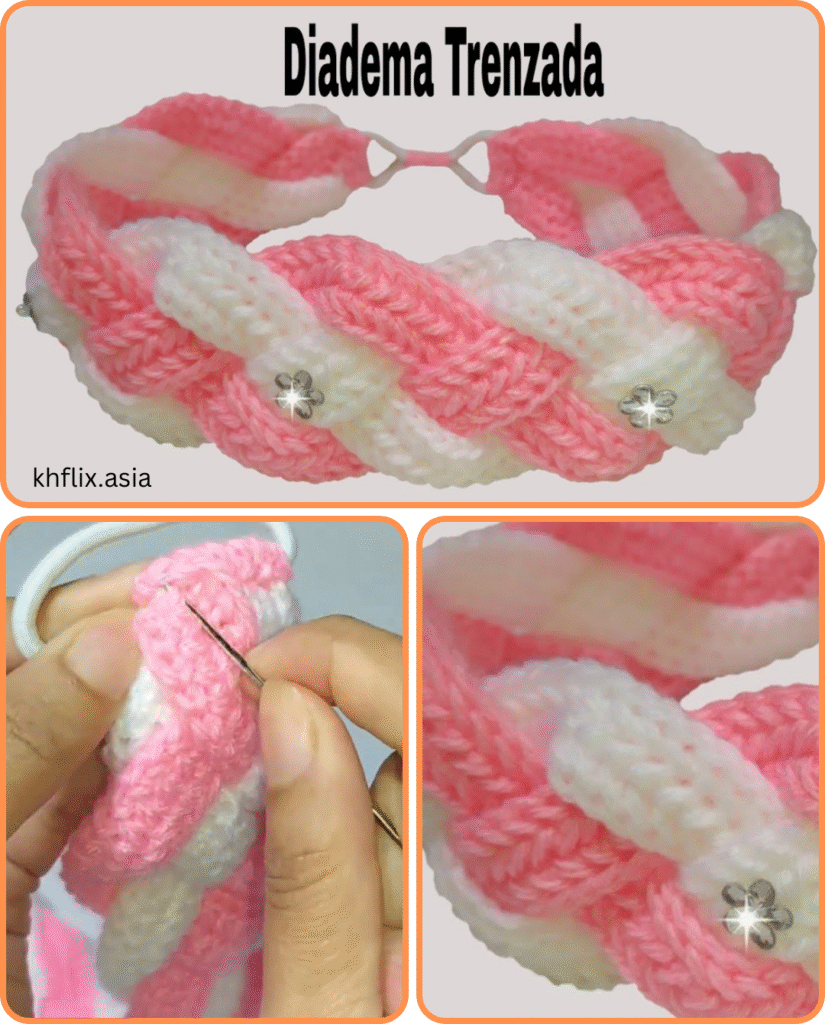
Crochet headbands are not just cozy winter accessories—they’re fashionable, functional, and a fun way to practice new stitch patterns. One standout design is the Crochet Embossed Braid Headband, which features elegant, raised braid textures created using front post stitches. This design mimics the look of classic cable-knit patterns but is entirely crocheted, making it a satisfying project for intermediate crocheters looking to expand their stitch library.
✨ What Are Embossed Braids in Crochet?
Embossed braids are 3D, raised textures created using a combination of front post double crochets (FPdc) and back post double crochets (BPdc). These techniques allow stitches to sit on top of the fabric, creating the illusion of woven cables or braids. Unlike knit cables, crochet braids are worked in layers and sections using strategic post-stitch placement.
🧶 Materials Needed
- Yarn: Worsted weight (category 4) yarn works best for structure and warmth. Choose a soft but durable fiber like acrylic, wool blend, or cotton.
- Hook: 5.0 mm (H-8) crochet hook (check your yarn label for recommendations).
- Tapestry Needle: For weaving in ends.
- Scissors
- Measuring Tape (for sizing)
Optional: Buttons or decorative elements for added flair.

📏 Sizing and Fit
Measure the circumference of your head or the recipient’s head. Subtract 1–2 inches to allow for stretch (most yarns have some give). A typical adult headband ranges from 20″ to 22″ in circumference and 3″ to 4″ in width.
🧵 Stitches and Abbreviations Used
- Ch – Chain
- Sl st – Slip Stitch
- Sc – Single Crochet
- Dc – Double Crochet
- FPdc – Front Post Double Crochet
- BPdc – Back Post Double Crochet
- Sk – Skip
- Rep – Repeat
Note: This pattern assumes a basic understanding of front and back post stitches. These are essential for creating the embossed braid look.
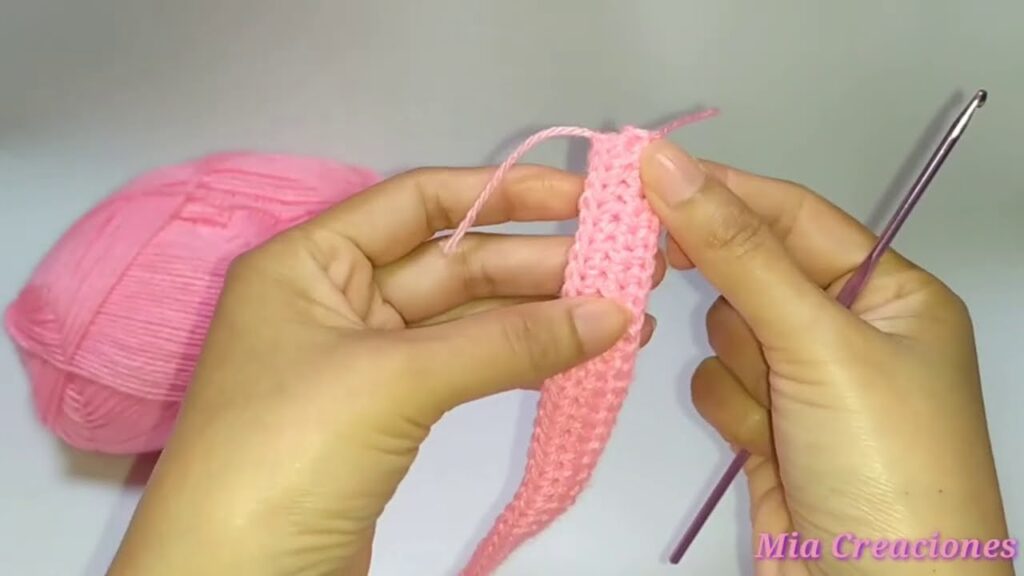
🧣 Pattern: Crochet Embossed Braid Headband
Foundation Row:
Ch 66 (or any multiple of 12 + 6 for sizing). Join with a sl st to the first ch to form a ring, being careful not to twist.
Round 1:
Ch 2 (does not count as a stitch), dc in each ch around, join with a sl st to the first dc.
[66 dc]
Round 2 (Set Up Row):
Ch 2, FPdc in next 3 sts, dc in next 3 sts – repeat from * to * around.
Join with sl st.
[11 braids = 66 sts]
Round 3-9 (Braid Definition):
Ch 2, FPdc in first FPdc, sk next 2 FPdc, FPdc in next 2 FPdc, go back and FPdc in skipped 2 FPdc (this creates the braid cross), dc in next 3 sts – repeat from * to * around.
Join with sl st.
Tip: You’re crossing the middle two FPdc stitches every second or third row to form a braid twist.
Round 10 (Finishing Round):
Ch 1, sc in each stitch around for a polished edge. Join with sl st and fasten off.
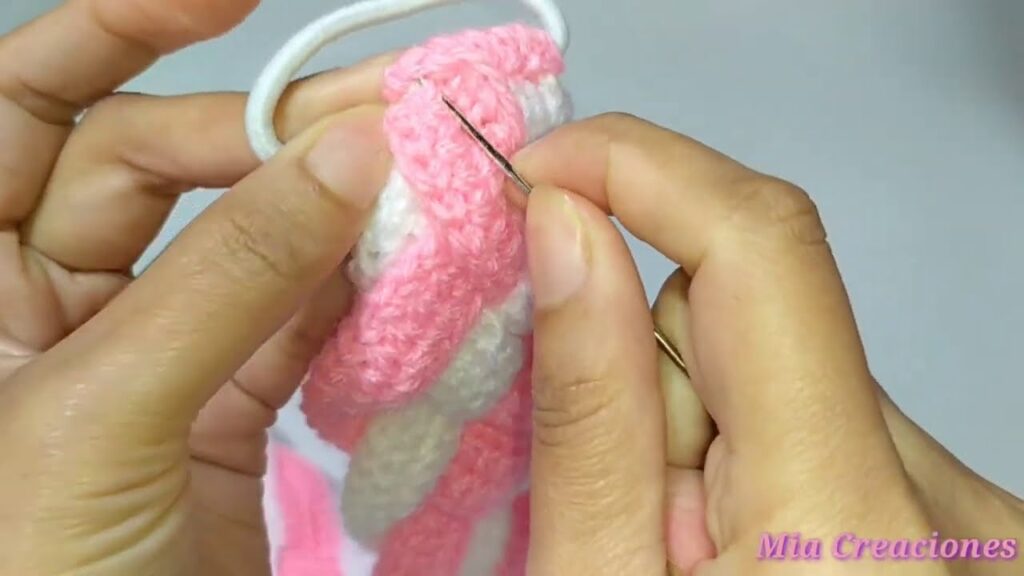
🧼 Finishing and Assembly
- Use a tapestry needle to weave in all loose ends.
- Optional: Add a button detail or twist the band before joining to mimic a turban-style look.
- Lightly block the headband if needed to define the braid texture.
💡 Customization Ideas
- Color Play: Try a gradient yarn or use two contrasting colors for alternating braid and background rows.
- Width: Add more rows to increase the width for colder climates.
- Matching Set: Make matching fingerless gloves or a scarf using the same embossed braid pattern.
🧵 Skill Level
Intermediate – This project is ideal for those who are already comfortable with double crochet and want to explore post stitches for textural effects.
🧑🎨 Why You’ll Love It
The embossed braid stitch creates a beautifully textured, knit-like appearance with the convenience of crochet. It’s modern, stylish, and works up relatively quickly. Whether you’re making it for yourself, as a gift, or to sell at craft fairs, this headband offers elegance and practicality.
Video tutorial:


