
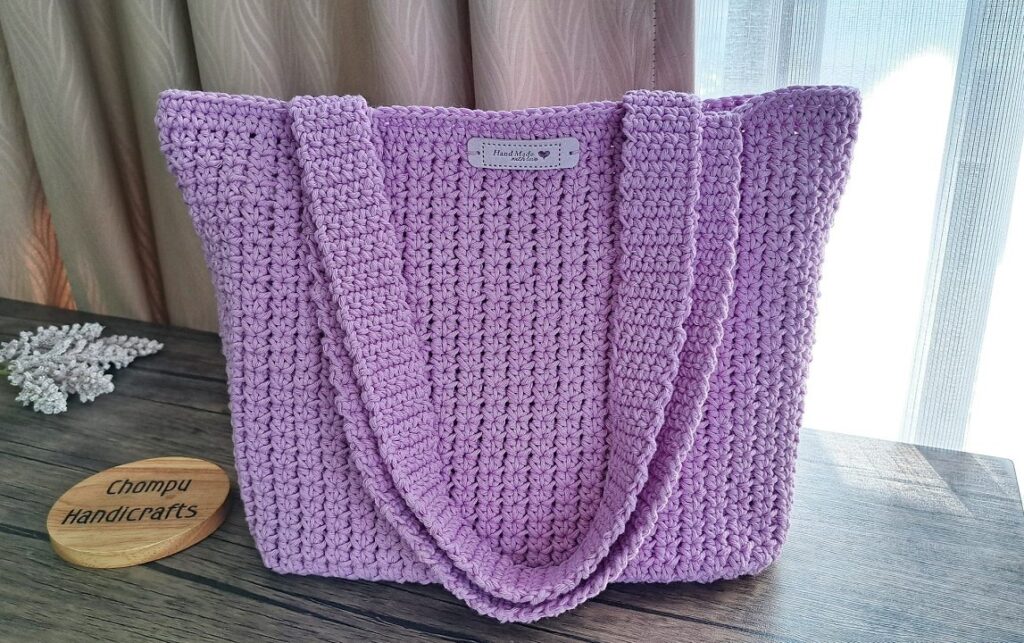
If you’re looking for a simple and stylish crochet project, a super easy crochet tote bag is a great place to start. It’s perfect for beginners, practical for everyday use, and completely customizable in color, size, and texture. Whether you’re heading to the market, beach, or library, this tote bag will carry your essentials—and your personality—with ease.
This tutorial will guide you through everything from materials to step-by-step construction using basic crochet stitches.
👜 What You’ll Need
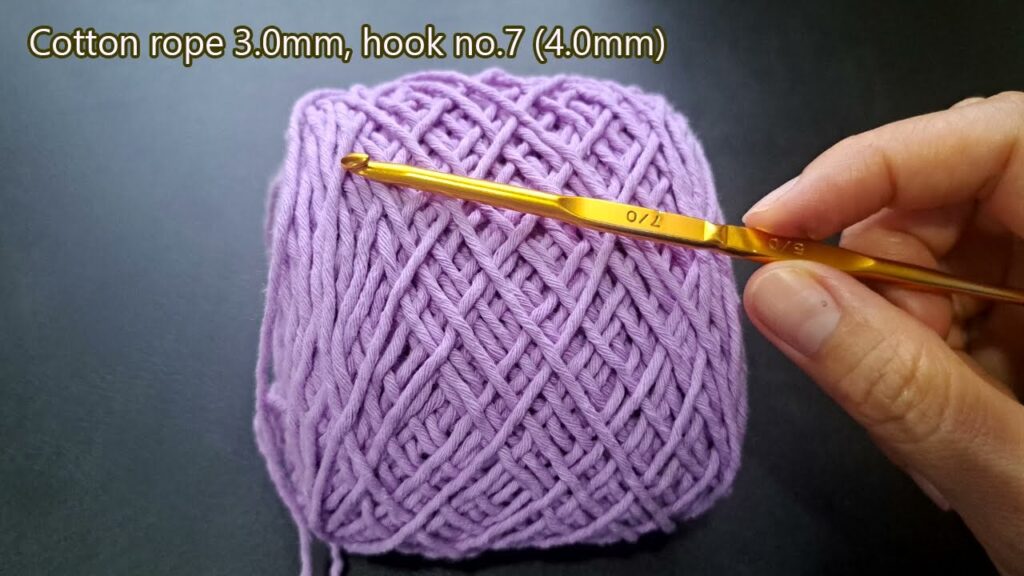
Yarn
- Worsted weight cotton yarn (around 300–400g, depending on bag size)
- Cotton yarn is durable, washable, and ideal for bags.
Tools
- Crochet hook: Size 5.0 mm (H) or 5.5 mm (I), depending on your yarn
- Scissors
- Tapestry needle (for weaving in ends)
- Stitch markers (optional but helpful)
🧵 Stitches Used
This pattern uses basic stitches—perfect for beginners.
- ch – chain
- sc – single crochet
- hdc – half double crochet
- sl st – slip stitch
- inc – increase (2 stitches in one)

🧺 Finished Size
- Approx. 14″ wide x 14″ tall (not including handles)
- You can easily adjust the size by changing the number of starting chains or rounds
🪡 Pattern Overview
This super easy tote bag is made in three main parts:
- The flat oval base
- The body (worked in rounds)
- The handles
Let’s get started!
👣 Step-by-Step Instructions
🔹 Step 1: Crochet the Base
We’ll start with a flat oval base using single crochet.
Round 1:
- Ch 25 (or desired width of base)
- Sc in 2nd ch from hook and across to last stitch (23 sc)
- 3 sc in the last chain (turn the work and begin working along the other side of the chain)
- Sc in next 22 sts, 2 sc in the last stitch (total: 50 sts)
- Join with sl st
Round 2:
- Ch 1, sc in next 23 sts, 2 sc in next 3 sts (around curve), sc in next 23 sts, 2 sc in last 2 sts
- Join (56 sts)
Round 3:
- Repeat the increase pattern evenly around to expand the base. You can add more rounds until the base is the size you want (each round increases by 6–8 sts)
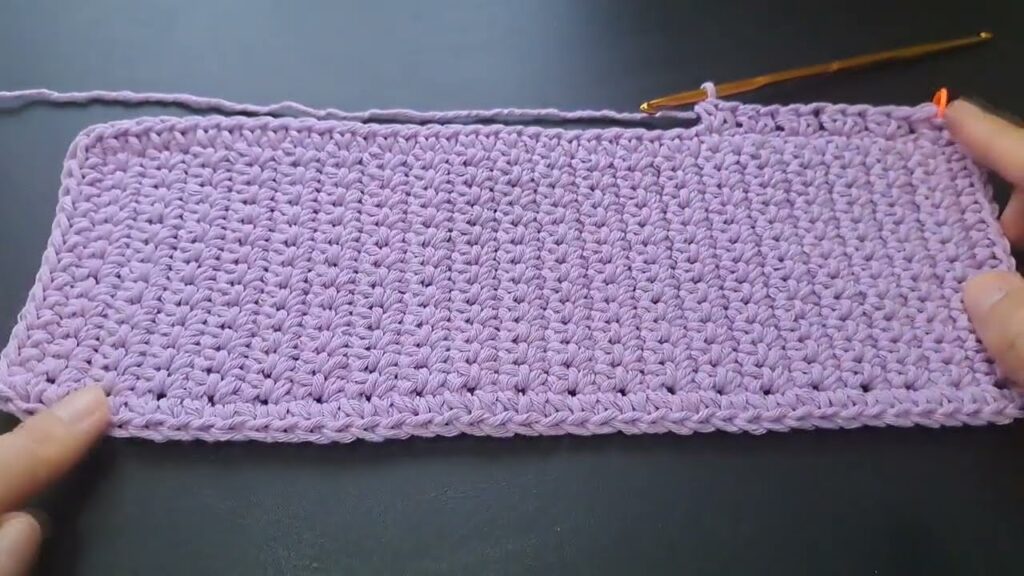
🔹 Step 2: Build the Body
Now that you’ve built the base:
Round 1 (Body start):
- Ch 1, sc in the back loop only (BLO) in each stitch around to form a clean edge
- Join with sl st
Rounds 2–25 (or desired height):
- Ch 1, hdc in each stitch around
- Join with sl st after each round
💡 Pro tip: To create a tighter and sturdier bag, alternate rows of sc and hdc.
Continue until the bag reaches your desired height.
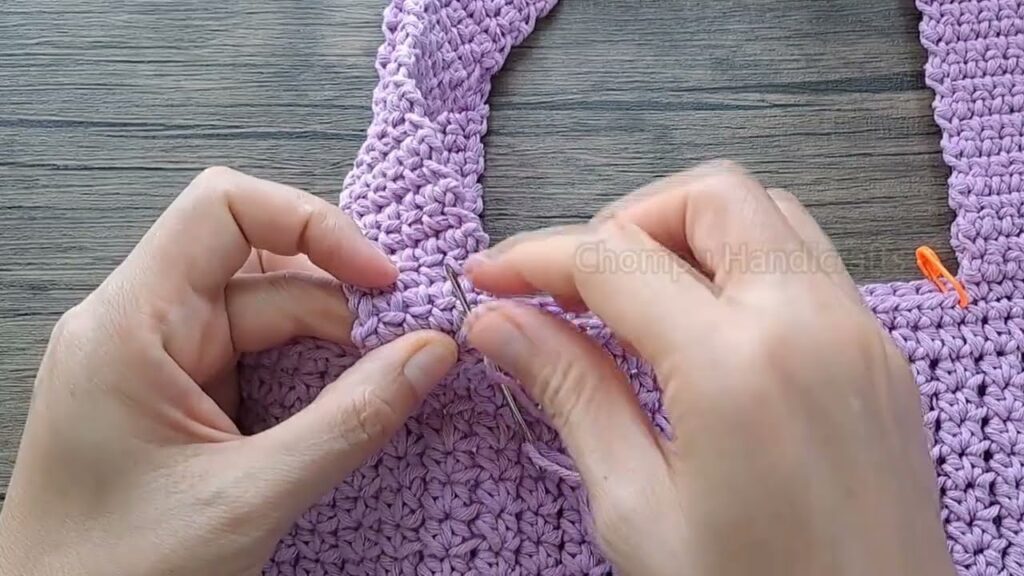
🔹 Step 3: Add Handles
Basic Handle Instructions (for two short handles):
Round 26:
- Ch 1, sc in next 10 sts
- Ch 30 (creates handle), skip next 10 sts
- Sc in next 20 sts
- Ch 30, skip next 10 sts
- Sc in next 10 sts
- Join
Round 27:
- Ch 1, sc around including into each chain (handle) from previous round
- Join and fasten off
Optional: Work another round or two of sc around the handles to strengthen them.
🎨 Customization Ideas
- Change colors every few rounds for stripes.
- Use variegated yarn for a multicolor look without weaving in ends.
- Add a button or flap closure.
- Sew in a fabric lining for a more polished look (great for small items).
- Attach a snap hook or keyring tab inside.
⏱️ Time Estimate
- Beginner crocheters: 4–6 hours
- Intermediate: 2–4 hours

🧼 Care Instructions
- Machine wash in cold water (if using cotton yarn)
- Lay flat to dry
- If the bag stretches over time, you can reshape it with steam blocking
📌 Tips for Success
- Use cotton yarn for durability—acrylic stretches too much.
- Keep your tension even for a consistent, professional look.
- Use a tighter hook if you want a more solid (less stretchy) bag.
- Add a plastic or cork base insert for extra support if carrying heavier items.
Video tutorial:
🧶 Final Thoughts
A crochet tote bag is one of the easiest and most rewarding projects to make. You’ll end up with a functional piece that’s eco-friendly, reusable, and stylish. Once you’ve mastered the basics, try experimenting with textures, patterns, or even granny squares for the body. The possibilities are endless!


