Looking for a fun and functional crochet project? A mini coin purse with a zipper is the perfect choice! It’s small, stylish, and ideal for holding coins, lip balm, keys, or other tiny treasures. Best of all, it makes a fantastic gift or a cute addition to your handmade accessories collection.
This tutorial will guide you through the full process—from crocheting the body of the purse to sewing in a zipper—for a polished, professional-looking finish.

👜 What You’ll Need
Yarn & Tools
- Cotton yarn (worsted weight or DK recommended for structure)
- Crochet hook (typically 3.5 mm – 4 mm, check your yarn label)
- Stitch marker (helpful for working in the round)
- Scissors
- Tapestry needle
- Sewing needle (sharp tip for zipper installation)
- Sewing thread (matching your yarn or zipper)
Notions
- Zipper (4–6 inch zipper, depending on purse size)
- Optional: Fabric lining, keyring, snap hook, or charm
✨ Finished Size
Approximately 4″ x 3″ (10 cm x 7.5 cm) depending on your yarn and stitch tension.

🧶 Crochet Stitches Used
- Ch – Chain
- Sc – Single Crochet
- Sl st – Slip Stitch
- Inc – Increase (2 sc in one stitch)
- Dec – Decrease (single crochet 2 together)
🪡 Step-by-Step Instructions
🔹 Step 1: Crochet the Base (Oval)
Round 1:
Ch 11. Sc in 2nd ch from hook and in next 8 sts. 3 sc in last ch.
Now work on the other side of the chain: sc in next 8 sts, 2 sc in last st. Join with sl st. (22 sts)
Round 2:
Ch 1. Sc in next 9 sts, 2 sc in next 3 sts (around the curve), sc in next 9 sts, 2 sc in next 2 sts. Join. (28 sts)
Round 3:
Ch 1. Sc in next 10 sts, (sc, inc) x 3, sc in next 10, (sc, inc) x 2. Join. (34 sts)
This creates a sturdy oval base. Adjust number of chains to make it wider/narrower.

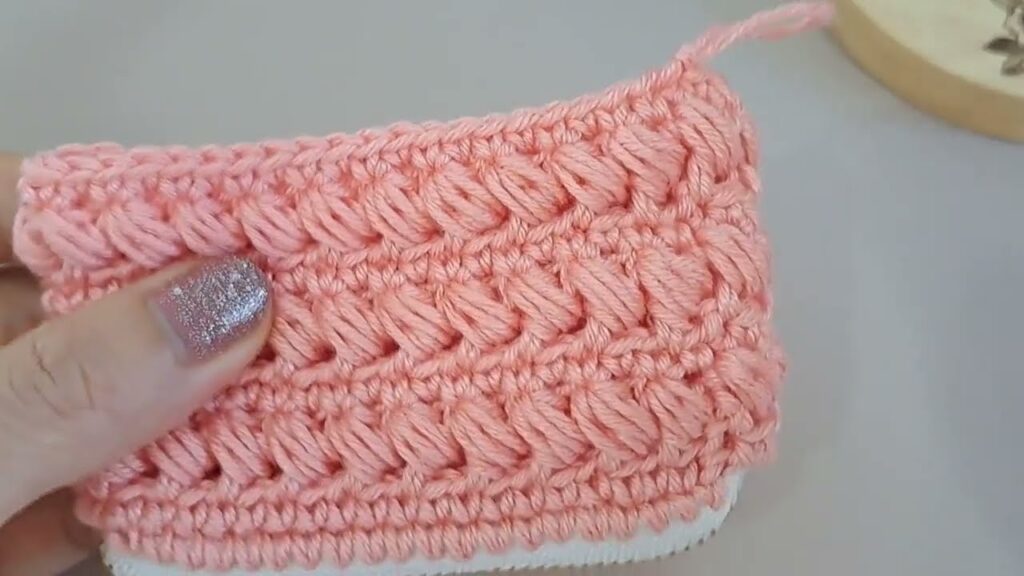
🔹 Step 2: Build the Sides
From here, stop increasing and start working one stitch per stitch in continuous rounds.
Rounds 4–10 (or desired height):
Sc in each st around. Use a stitch marker to keep track of rounds.
Optional: Add some texture with hdc or sc in back loops only for one or two rounds.
At the end, sl st to join and fasten off, leaving a long tail for sewing.
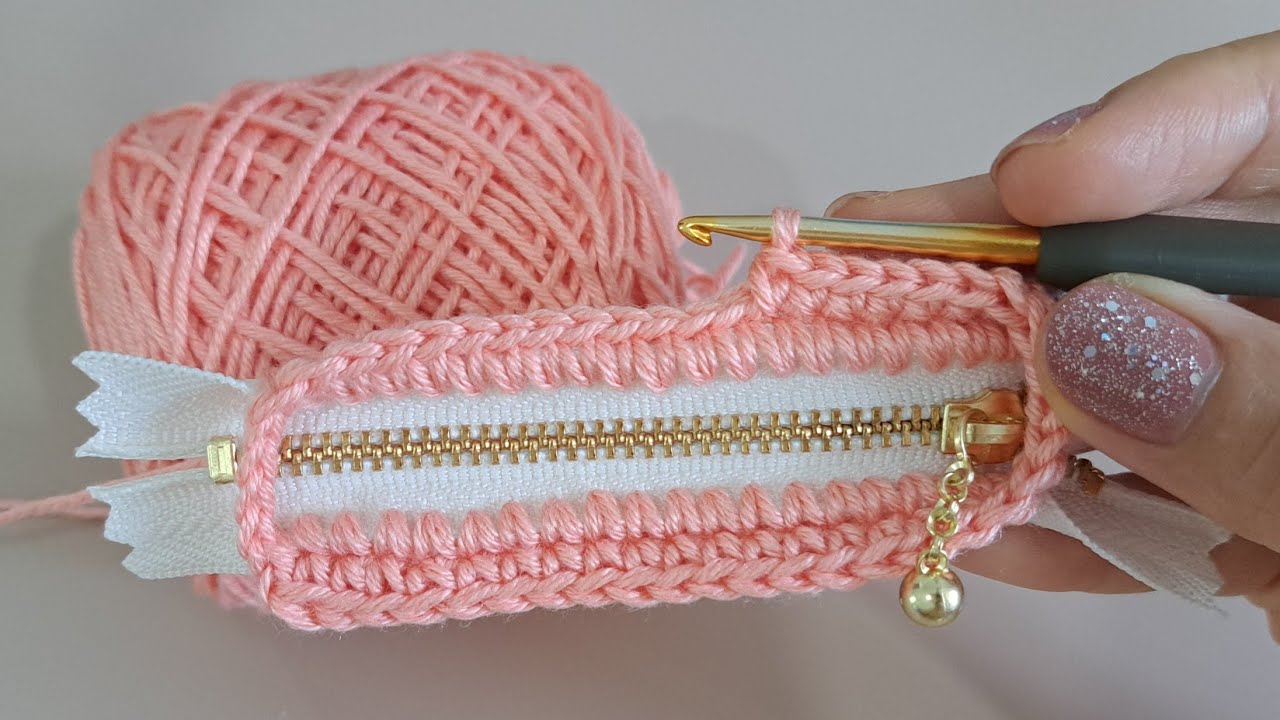
🔹 Step 3: Prepare and Attach the Zipper
🧵 Option A: Hand-Sew Zipper Directly to Crochet
- Pin the zipper to the top edge of your purse (open the zipper halfway).
- Using a sharp sewing needle and matching thread, sew the zipper through the top edge of the crochet. You may go through the top row or work through a round of chain stitches if needed.
- Use small, tight stitches to ensure it’s secure and neat.
🧵 Option B: Add Fabric Lining (Optional but neat)
- Cut fabric slightly larger than your purse.
- Fold and sew the edges of the fabric to make a pouch.
- Insert lining inside purse and sew lining and zipper together to the crochet edges.
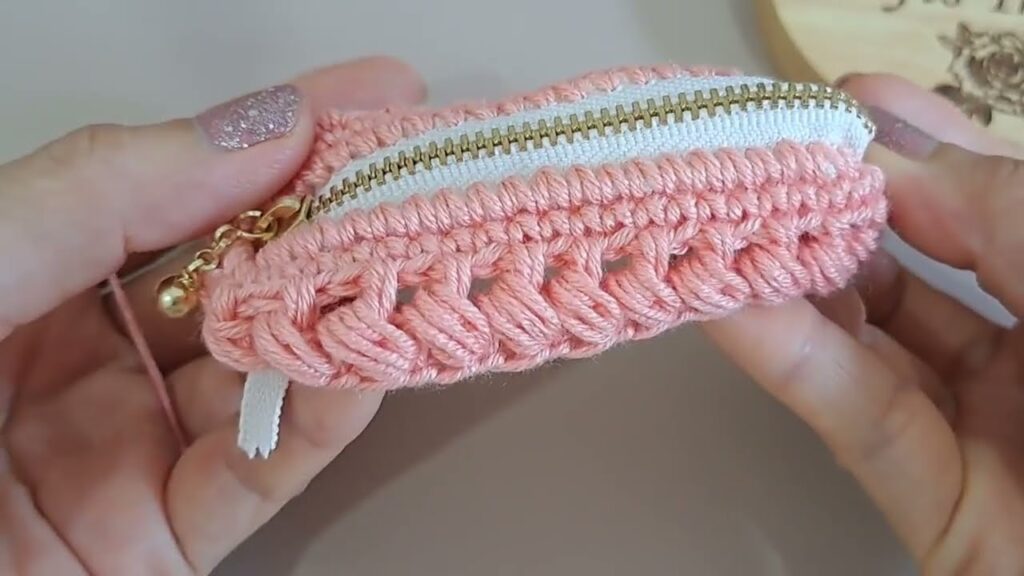
🔹 Step 4: Finish and Embellish
- Weave in all loose yarn ends with your tapestry needle.
- Test the zipper to make sure it opens and closes smoothly.
- Add a charm, tassel, or label to the zipper pull.
- Optional: Attach a keyring or small strap for convenience.
🎨 Customization Ideas
- Change colors for a striped or color-block design.
- Use tapestry crochet to add hearts, stars, or initials.
- Add a puff stitch row for extra texture.
- Try granny square motifs on each side for a vintage look.
🧵 Tips for Success
- Use cotton yarn: It holds shape better than acrylic and is easier to sew through.
- If sewing the zipper is hard, try whipstitching with yarn and then going over with thread.
- Avoid very tight stitches—looser gauge makes inserting the zipper easier.

⏱️ Time Estimate
- Crocheting: 1–2 hours
- Sewing zipper: 20–30 minutes
- Optional lining: 20 minutes
Total: About 2–3 hours
🧺 Care Instructions
- Spot clean with mild soap and water
- Avoid putting in washing machine (especially with zipper or lining)
- Lay flat to dry
Video tutorial:
🌟 Conclusion
Crocheting a mini coin purse with a zipper is a fun and practical project you can finish in an afternoon. It’s a great way to use up scrap yarn and learn new skills like shaping and hand-sewing. Once you’ve mastered one, you’ll want to make more in different colors and styles—for yourself, gifts, or even to sell!


