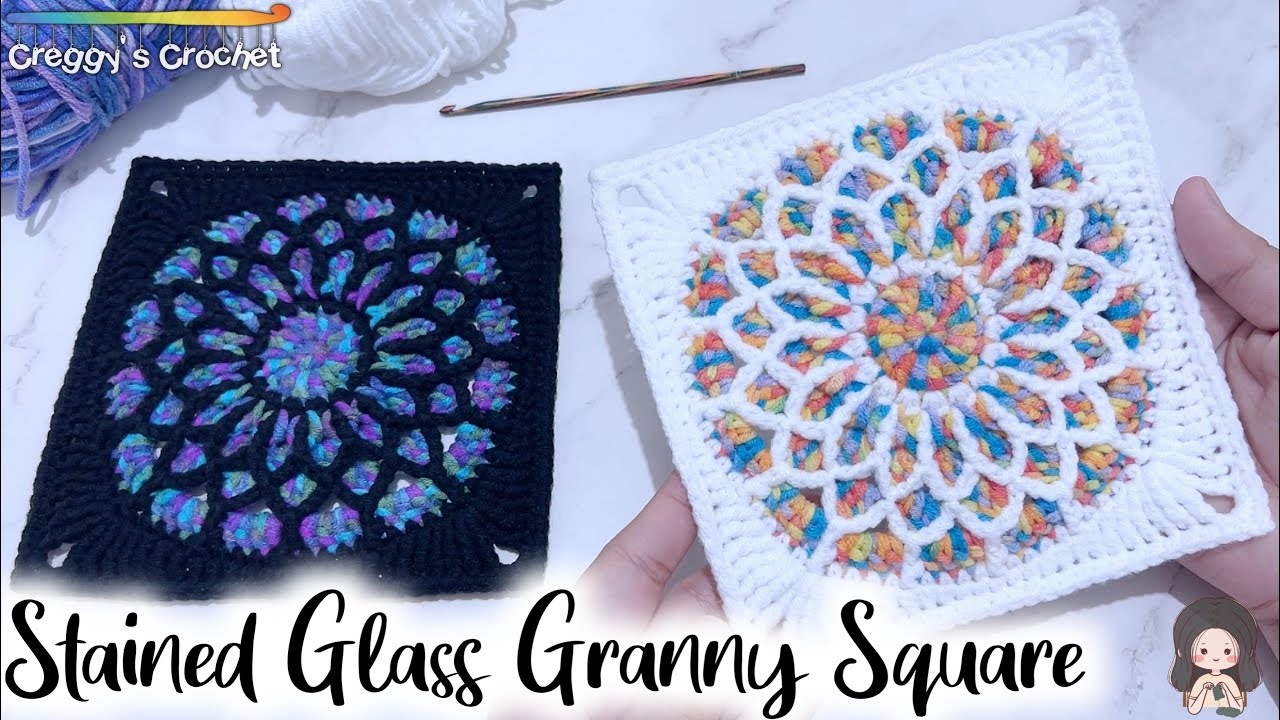
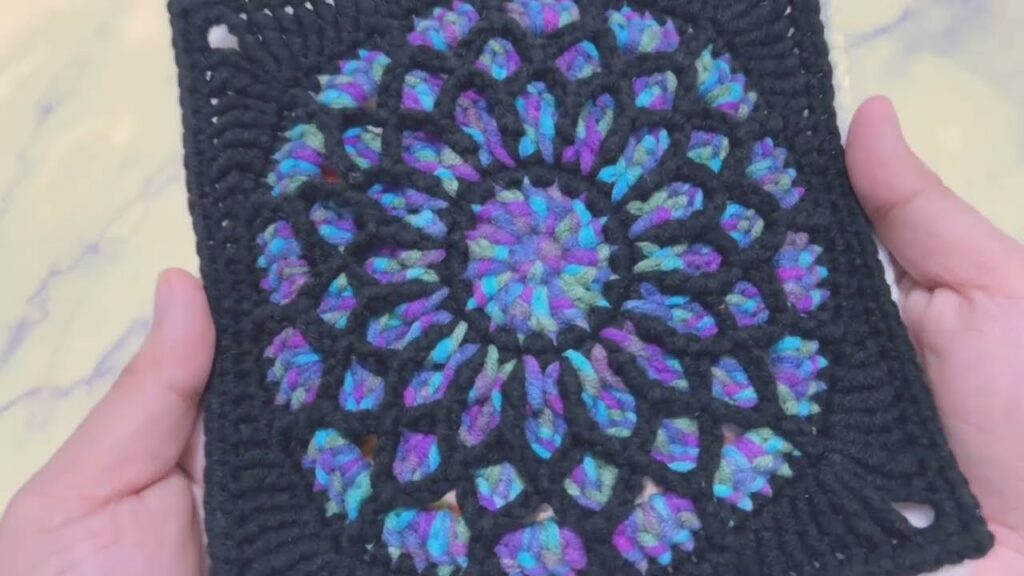
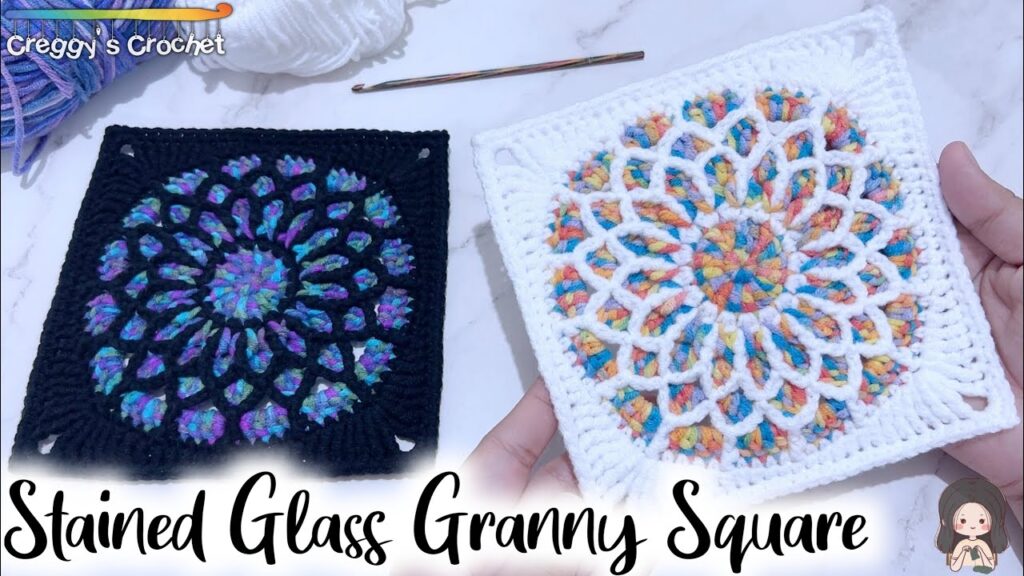
The Stained Glass Granny Square combines traditional granny square techniques with bold color contrasts to replicate the look of stained glass windows. By using bright center colors and a dark outline (usually black), you can create a dazzling, mosaic-like square that’s perfect for blankets, wall art, bags, and more.
Whether you’re aiming for a vintage cathedral vibe or a modern color-pop design, this square is a unique and eye-catching project.

🧶 Materials Needed
- Worsted weight yarn (#4)
- Color A: Bright/variegated yarn for the “glass” effect
- Color B: Black or dark contrast color for the “lead” outlines
- Crochet Hook: 5.0 mm (H/8) or size needed to meet gauge
- Tapestry needle
- Scissors
📐 Finished Size
- Approx. 5–6 inches, depending on yarn and hook size
📌 Stitches & Abbreviations
- ch – chain
- sl st – slip stitch
- sc – single crochet
- dc – double crochet
- sp – space
- st – stitch
- beg – beginning
🌟 Design Overview
The square is built in two main parts:
- Inner Color Section – Done in bright or multicolor yarn.
- Bold Outline – Done in black to mimic stained glass lead work.
The inner portion can be a standard granny or a variation with shaped sections, then outlined with black post stitches or overlay work for the stained glass effect.
🧵 Step-by-Step Instructions
✅ Round 1 – Center Color
Using Color A (glass color):
- Ch 4, sl st to first ch to form a ring.
- Ch 3 (counts as dc), work 2 dc in the ring.
- Ch 2, 3 dc in the ring — repeat 3 times.
- Join with a sl st to top of ch-3.
🔄 Result: A basic 4-corner center. You should have 4 clusters of 3 dc separated by ch-2 spaces (the corners).
✅ Round 2 – Continue Inner Color
- Sl st into next 2 dc and into the ch-2 corner space.
- Ch 3 (counts as dc), 2 dc, ch 2, 3 dc in the same corner.
- (3 dc in next sp between clusters, 3 dc, ch 2, 3 dc in corner) — repeat around.
- Join with sl st to top of ch-3.
Repeat this style for another 1–2 rounds, depending on how large you want the colored center.
✅ Round 3 (or 4) – Complete Color Section
Continue building like a traditional granny square:
- In corners: 3 dc, ch 2, 3 dc
- In side spaces: 3 dc
Once your inner section is 3–4 rounds wide, fasten off and prepare for the stained glass outline.
🖤 Adding the “Stained Glass” Effect
Now switch to Color B (black or contrast color).
There are two main approaches you can use for the outline.
✨ Option 1: Overlay Outline (Simple & Bold)
- Join black yarn in any corner ch-2 space.
- Ch 3, 2 dc, ch 2, 3 dc in corner space.
- Work 3 dc in each space between clusters around.
- In each corner, do 3 dc, ch 2, 3 dc.
- Sl st to join.
💡 This creates a bold black border directly over the color section. It outlines each shape like leading between stained glass panels.
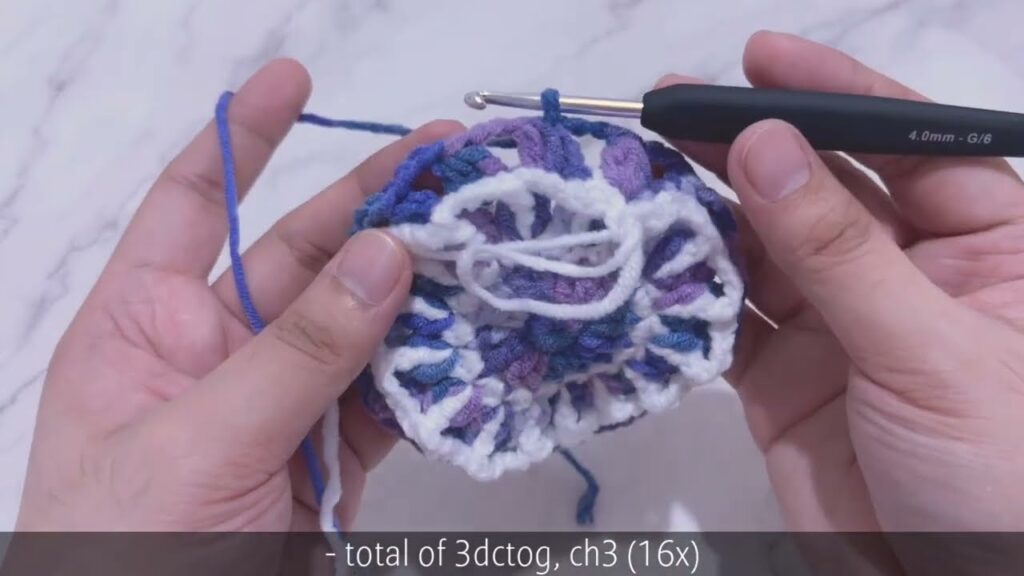
✨ Option 2: Surface Slip Stitch Embroidery
For a more true stained glass effect, where the black “lead lines” sit on top:
- Using a smaller hook (e.g., 4.0 mm), surface slip stitch around each cluster or between rows.
- Insert your hook in the fabric and work slip stitches across in lines or around shapes.
- This method gives you precise control and maximum contrast but takes a bit more time.
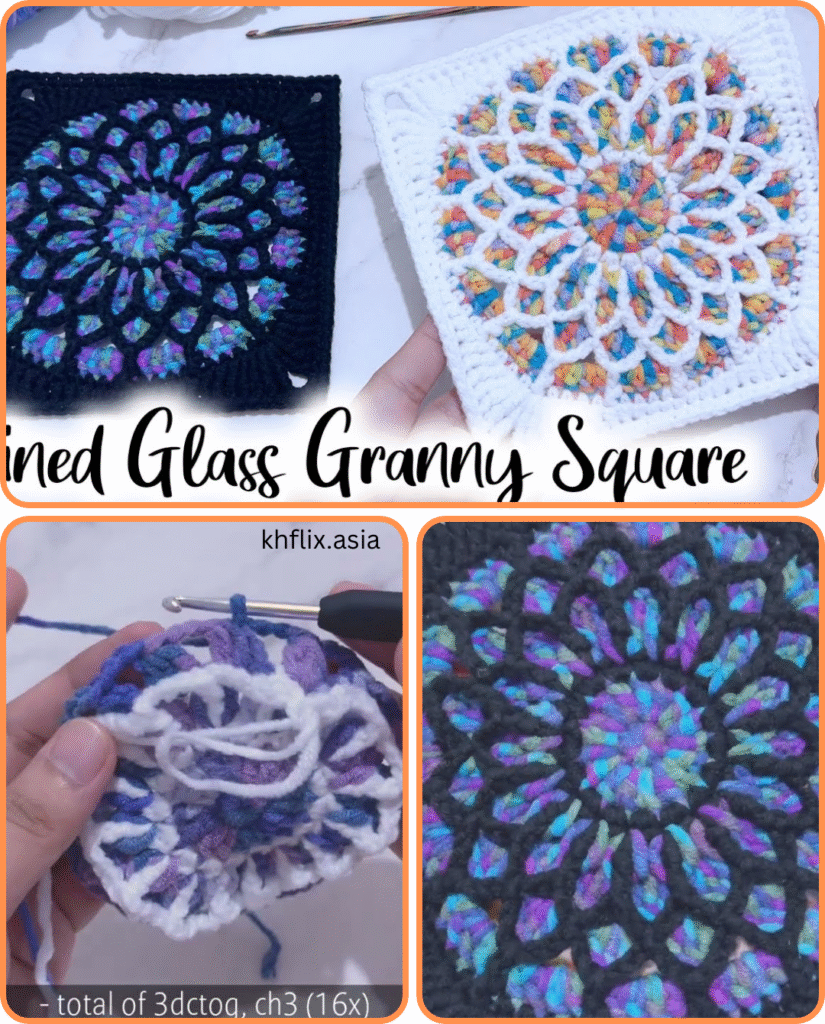
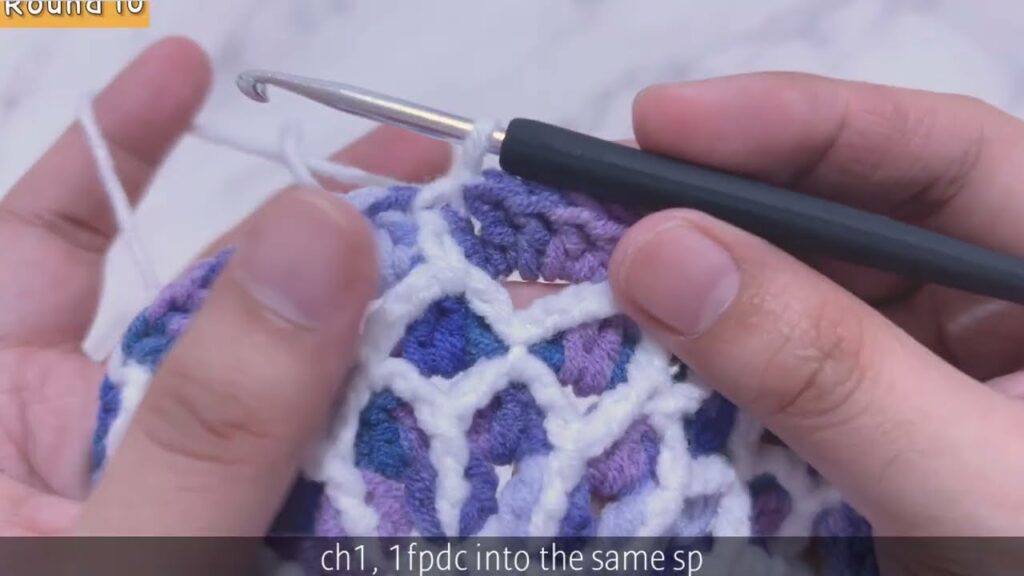
🟦 Final Round – Square It Up
Work one more round of black or dark yarn in the traditional granny pattern to stabilize the shape.
- In corners: 3 dc, ch 2, 3 dc
- Along edges: 3 dc in each space
Sl st to close, fasten off, and weave in all ends.
✂️ Finishing Touches
- Use a tapestry needle to neatly weave in all yarn ends.
- Lightly block your square to even out the shape and stitches.
🎨 Customization Ideas
- Use metallic thread for the outline to mimic lead or solder lines.
- Make each square a different stained glass “window” – mix round centers, floral motifs, etc.
- Connect squares with black joining yarn for a unified, window-pane look.
🧺 Care Instructions
- Gentle hand wash or cold machine cycle
- Lay flat to dry
- Avoid wringing to preserve shape
Video tutorial:
🧡 Final Thoughts
The Crochet Stained Glass Granny Square is a brilliant way to combine classic crochet with artistic design. Each square looks like a little window of color framed in elegant black lines. Whether used for a cozy afghan, a decorative pillow, or a hanging wall panel, this motif is sure to draw attention and admiration.


