
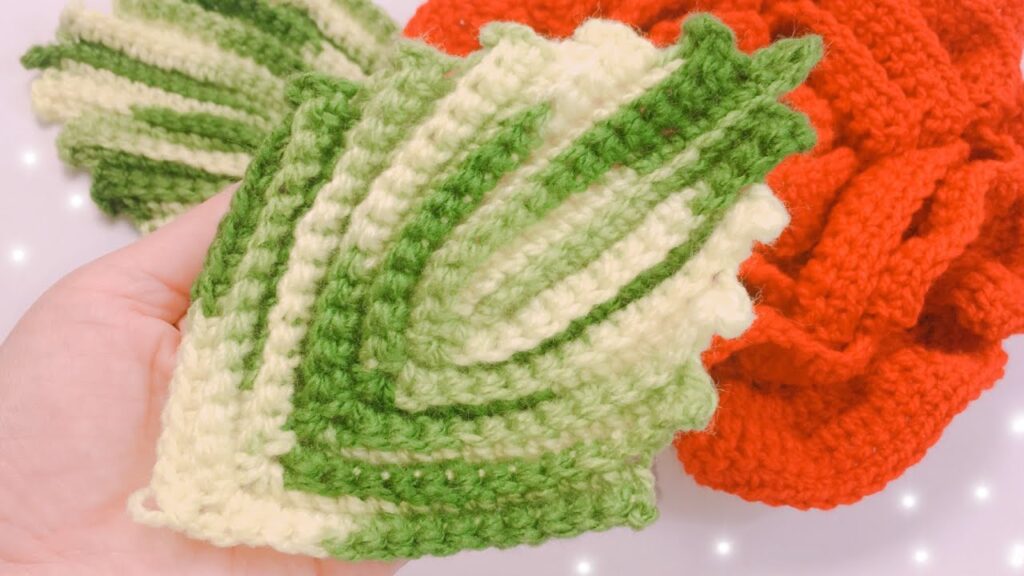
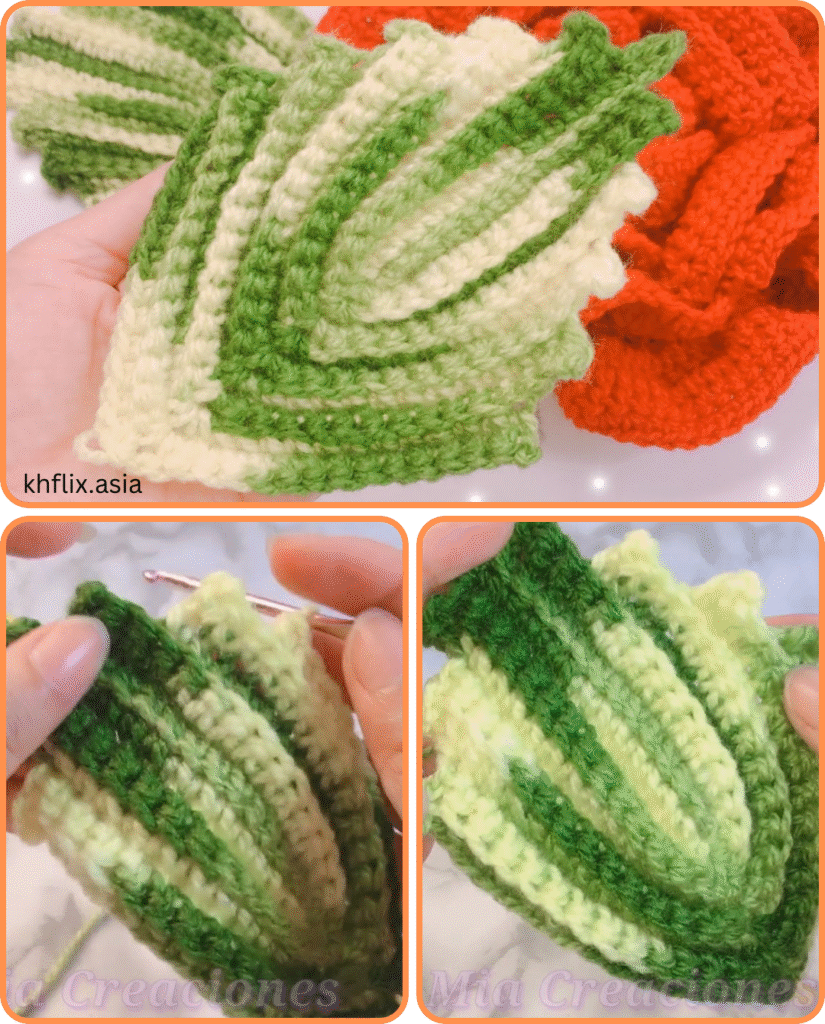
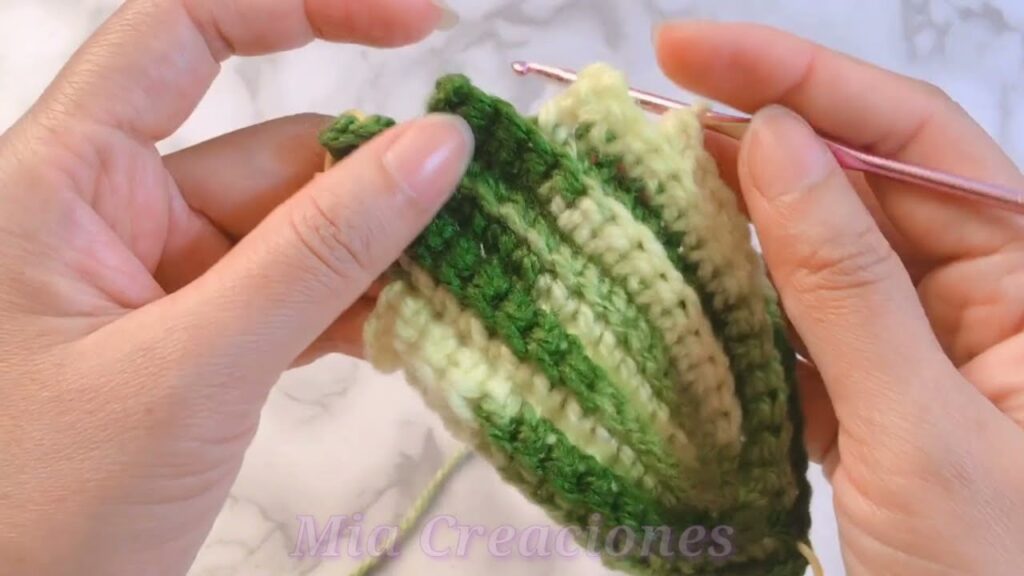
Crochet flowers look even more stunning with leafy accents. In this guide, you’ll learn how to make large, detailed crochet leaves that can be used for floral arrangements, wall hangings, hair clips, hats, or as part of a botanical motif. These leaves have a natural curve and optional vein detailing to mimic real leaves.
🧶 Project Overview
| Feature | Details |
|---|---|
| Skill Level | Beginner to Intermediate |
| Time to Complete | ~15–25 minutes per leaf |
| Size | Approx. 4–6 inches long (adjustable) |
| Ideal For | Crochet flowers, bouquets, accessories |
📦 Materials Needed
| Item | Recommended |
|---|---|
| Yarn | DK (Category 3) or Worsted (Category 4) Cotton or Acrylic |
| Hook Size | 3.5 mm – 4.5 mm (E–G) depending on yarn weight |
| Yarn Needle | For weaving in ends and embroidery (optional) |
| Scissors | For cutting yarn |
| Optional | Wire (for shaping leaf) or hot glue for stiffening |
🧵 Stitches & Abbreviations (U.S. Terms)
- ch – chain
- sl st – slip stitch
- sc – single crochet
- hdc – half double crochet
- dc – double crochet
- tr – treble crochet
- st(s) – stitch(es)
🌿 PART 1: Basic Large Leaf Pattern
This pattern creates a symmetrical, pointed leaf with a center vein, worked in a single round around the foundation chain.
✅ Step 1: Foundation Chain
Ch 13 (or adjust based on desired length of leaf).
You can use more chains for a longer leaf — just make sure to mirror the pattern on both sides.
✅ Step 2: First Side of the Leaf
Starting in the 2nd chain from hook, work the following down the chain:
Sc, hdc, dc, dc, tr, tr, dc, dc, hdc, sc, sl st in last ch.
This forms one curved side of the leaf.
✅ Step 3: Second Side (Working Along Opposite Side of Chain)
Now turn your work slightly to crochet along the unused loops of the chain:
Sl st in same ch, sc, hdc, dc, dc, tr, tr, dc, dc, hdc, sc.
Join with sl st to first sc. Fasten off and weave in ends.

✅ Optional: Leaf Vein Embroidery
- Use a contrasting yarn color or the same yarn with a yarn needle.
- Stitch a central “vein” by making a line down the center.
- Add smaller angled stitches coming off the center for realism.
🌱 PART 2: Ruffled or Wide Leaf Variation
To make a wider or ruffled leaf, increase stitch heights more dramatically.
Foundation Chain:
Ch 15
Work down first side:
Sc, hdc, dc, dc, tr, tr, tr, tr, dc, dc, hdc, sc, sl st.
Repeat symmetrically on the opposite side.
🌾 PART 3: Optional Wire Insert (for Shape)
To make your leaf bendable or poseable, insert floral wire.
Steps:
- Complete the leaf and leave a long tail.
- Thread floral wire through the stitches along the outer edge or central vein.
- Use yarn or embroidery to hide the wire.
- Twist the ends of the wire at the base to secure.
Great for floral arrangements, corsages, or wall art!

💡 Customization Ideas
- Use variegated green yarn for a natural look.
- Make a set of three in different sizes for layered effects.
- Add picot edging for a decorative, serrated leaf border.
- Crochet multiple leaves together for a garland or vine.
🧼 Care Instructions
- Use cotton yarn for a crisp, realistic look and easy blocking.
- Gently hand wash if necessary and reshape while damp.
- You can stiffen with spray starch or glue for long-term use.
📸 Great Uses for Crochet Leaves
- Attach to crochet flowers like roses or daisies.
- Sew onto scarves, hats, or cardigans as embellishments.
- Create home décor like framed botanical art.
- Use in hair accessories, like headbands or barrettes.
- Add to baby photo props or seasonal wreaths.
Video tutorial:
🎉 Final Thoughts
Crocheting large leaves for flowers adds life and detail to your handmade creations. They’re quick to make, easily customizable, and perfect for beginners exploring 3D shapes. With a little yarn and creativity, you can turn a simple flower into a stunning centerpiece with natural flair.


