Inspired by the joy of soft, yellow yarns and the meditative rhythm of the crochet hook, this pattern is designed for both Tunisian crochet beginners and seasoned crafters looking for a quick, satisfying project. The “Woven Sunrise” texture is created using a simple two-row repeat that gives the fabric a beautiful, basket-weave-like feel—all while keeping it super easy!

Project Details
- Skill Level: Easy (Beginner-friendly for Tunisian Crochet)
- Finished Size: Approximately 30 inches x 36 inches (76 cm x 91 cm)
- Gauge: 16 stitches and 14 rows = 4 inches (10 cm) in Pattern Stitch, blocked. Getting gauge is important for sizing, especially with blankets!
Materials
- Yarn: Approximately 1,200 yards (1100 m) of Worsted Weight (Category 4) yarn.
- Main Color (MC): 1,100 yds of soft yellow yarn (e.g., a baby-friendly acrylic or cotton blend).
- Contrast Color (CC): 100 yds of a cream or white yarn for the border.
- Hook: 6.0 mm (US J/10) Tunisian Crochet Hook with a cable long enough to hold at least 120 stitches.
- Notions: Scissors, tapestry needle for weaving in ends, and stitch markers (optional, for marking the ends of rows).
Abbreviations & Special Stitches
| Abbreviation | Meaning |
| ch | Chain |
| st(s) | Stitch(es) |
| sl st | Slip Stitch |
| yo | Yarn Over |
| FP | Forward Pass |
| RP | Return Pass |
| LTS | Last Tunisian Stitch: Insert hook under both vertical bars of the last stitch and pull up a loop. |
| TSS | Tunisian Simple Stitch: Insert hook from right to left under the next vertical bar and pull up a loop. |
| TP | Tunisian Purl Stitch: Bring yarn to the front of the work, insert hook under the next vertical bar, bring yarn back, and pull up a loop. |
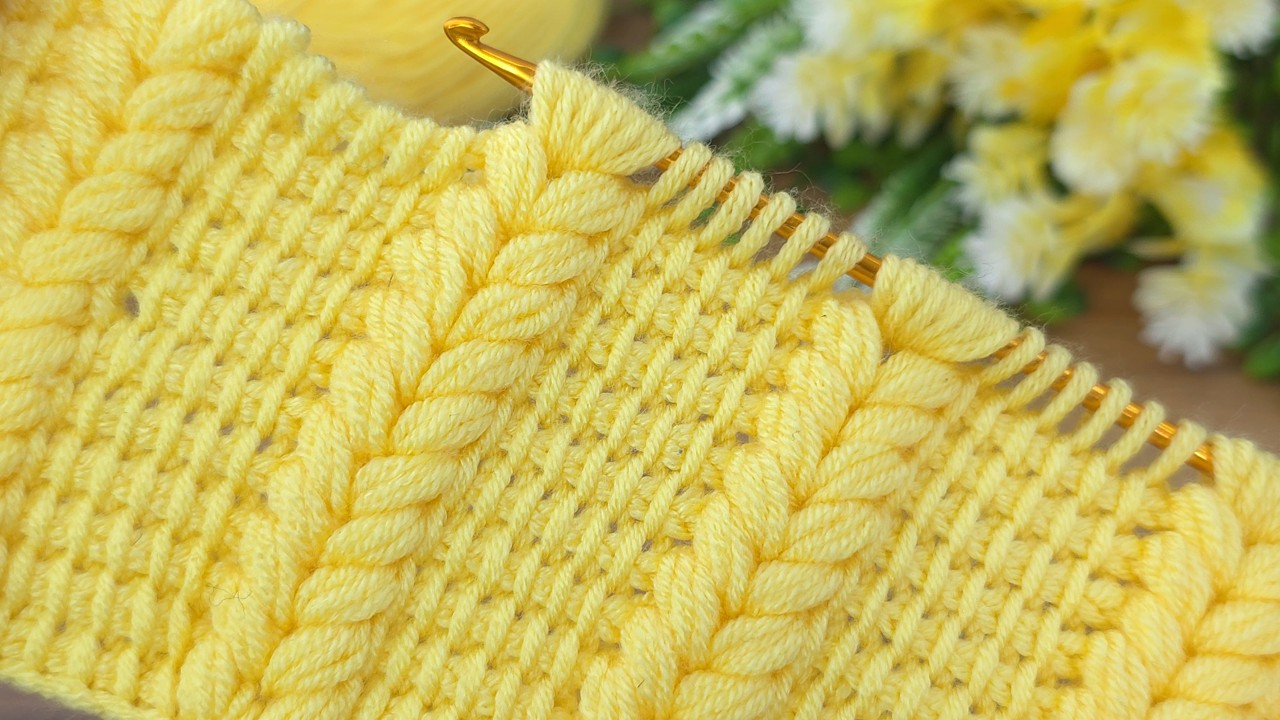
The Woven Sunrise Pattern
This pattern is worked in multiples of 2 stitches, plus 1 for the foundation chain.
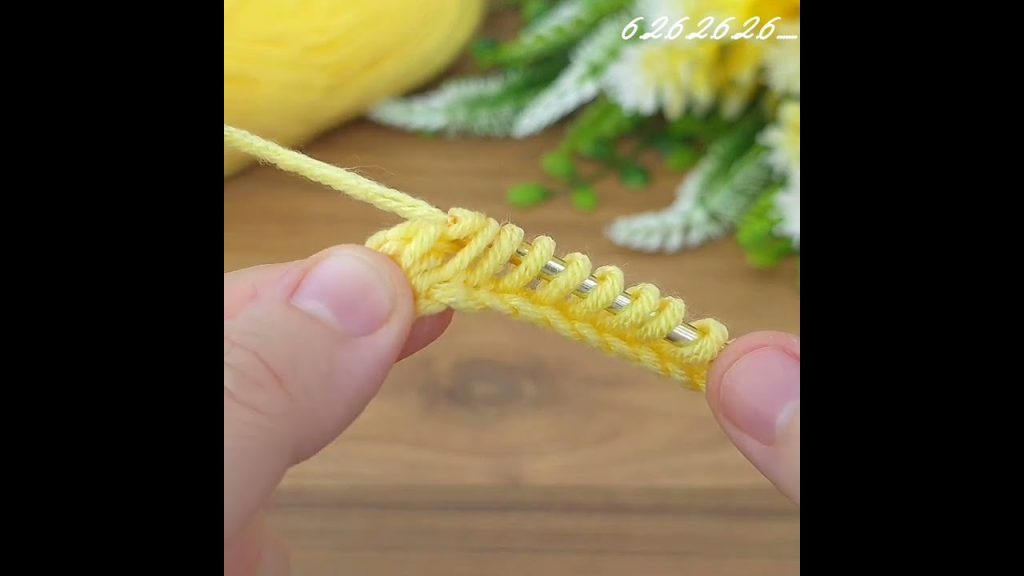
Step 1: Foundation Chain
- With MC, ch 121.
- Foundation FP: Skip the first chain from the hook, insert the hook into the back bump of the second chain, yo and pull up a loop. Keep the loop on the hook. Repeat across all 120 chains. (121 loops on hook, including the loop from the chain).
- Foundation RP: Ch 1, (*yo, pull through 2 loops on hook*). Repeat from * to * until only 1 loop remains on the hook. This completes your first row.
Step 2: The Woven Sunrise Repeat
This pattern is a simple two-row repeat. The Return Pass (RP) is the same for every row.
Row 1 (Forward Pass – FP):
- Skip the first vertical bar.
- *Work TP in the next st, work TSS in the next st*.
- Repeat from * to * until 1 st remains.
- Work LTS in the very last st. (121 loops on hook).
Row 2 (Forward Pass – FP):
- Skip the first vertical bar.
- *Work TSS in the next st, work TP in the next st*.
- Repeat from * to * until 1 st remains.
- Work LTS in the very last st. (121 loops on hook).
The Return Pass (RP) for ALL Rows:
- Ch 1, (*yo, pull through 2 loops on hook*). Repeat from * to * until only 1 loop remains on the hook.
Step 3: Main Blanket Body
Continue working Row 1 (FP) and Row 2 (FP) in alternation, always following up with the RP, until the blanket measures approximately 35 inches (89 cm) from the beginning, or until you are satisfied with the length. Ensure you end after a Row 2 (FP).
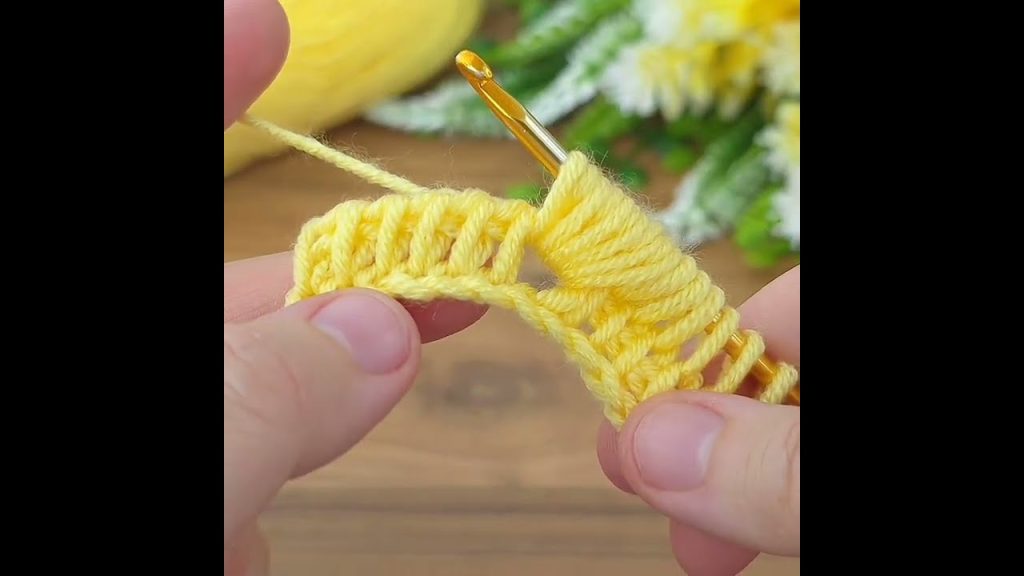
Step 4: Bind Off
The Bind Off row is worked just like a Row 1 (FP), but you will sl st after pulling up a loop for each stitch. This creates a neat, non-curling edge.
- Work TP in the next st, then sl st (pull through the loop on the hook).
- Work TSS in the next st, then sl st.
- Repeat this sequence (**TP, sl st**, **TSS, sl st**) across the row until the final stitch.
- For the LTS, insert the hook under both vertical bars, pull up a loop, and sl st.
- Fasten off MC, leaving a long tail to weave in.
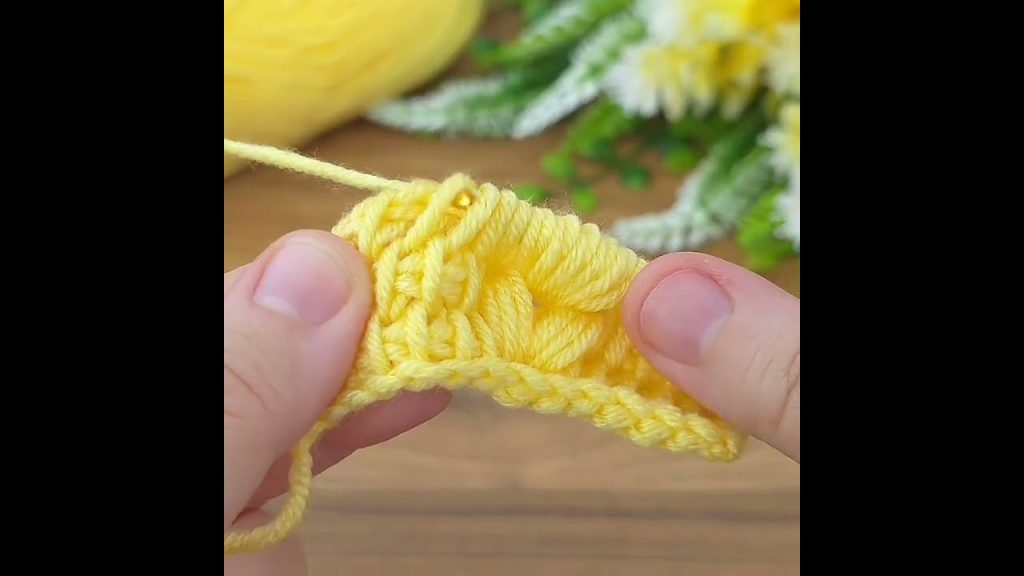
Step 5: The Single Crochet Border
Adding a simple single crochet border will give your blanket a polished look and help the edges lie perfectly flat.
- Attach CC in any corner with a sl st.
- Round 1:Ch 1 (does not count as a stitch).
- Work sc evenly around the entire perimeter of the blanket.
- Sides: Aim for approximately 3 sc for every 2 rows to keep the edge flat.
- Corners: Work (sc, ch 2, sc) in each corner stitch to help it turn smoothly.
- Join with a sl st to the first sc.
- Round 2: Ch 1. Work 1 sc in every stitch around, working (sc, ch 2, sc) into the ch-2 space of each corner.
- Repeat Round 2 until the border is the desired thickness (2-4 rounds is usually sufficient).
- Fasten off CC, leaving a long tail to weave in.
Finishing
- Weave in all ends securely using your tapestry needle.
- Blocking: While optional for acrylic yarn, blocking the blanket is highly recommended as it opens up the stitch pattern, evens out any tension issues, and ensures the blanket is perfectly square. Pin the blanket to a flat, waterproof surface, mist generously with water, and let it dry completely.
And just like that, you have a beautiful, textured, and truly unique baby blanket! Don’t forget to share your finished Woven Sunrise Baby Blanket!
Video tutorial:


