
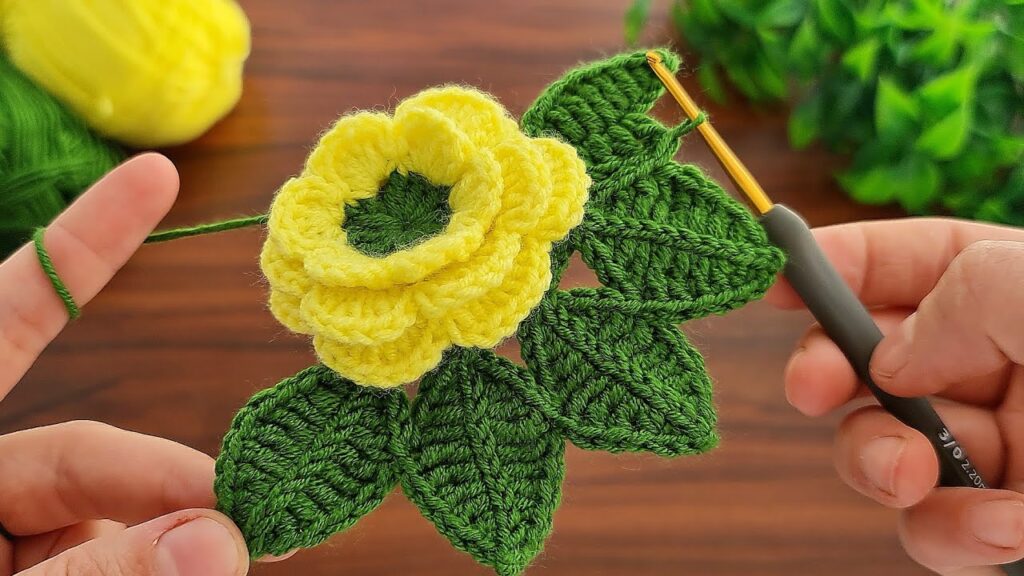
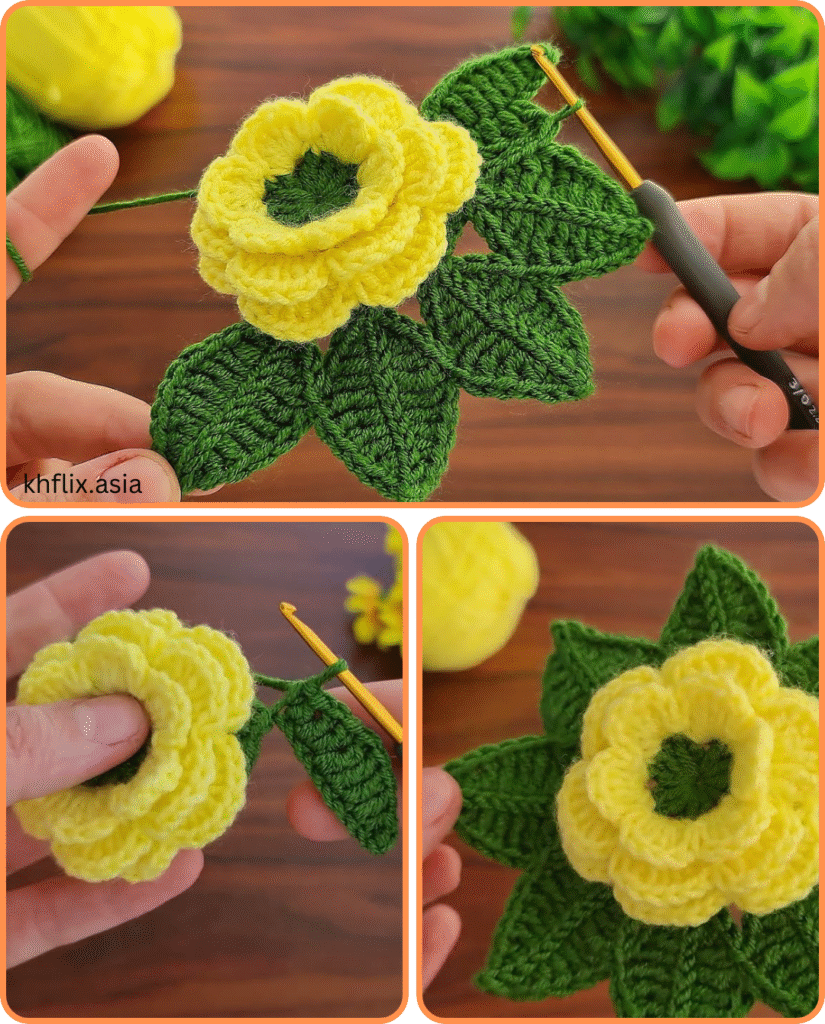
A crochet tea rose is a fuller, more layered flower than a simple rose, with delicately shaped petals that resemble a blooming garden rose. In this tutorial, you’ll create a 3D tea rose along with two graceful leaves, all with simple stitches and no sewing machine required.
🧶 Project Overview
| Feature | Details |
|---|---|
| Skill Level | Beginner to Intermediate |
| Time Required | ~30–45 minutes |
| Uses | Hats, shawls, hair accessories, home decor |
| Construction | Flower and leaves worked separately and joined manually |
📦 Materials Needed
| Item | Recommended Details |
|---|---|
| Yarn | DK or worsted weight yarn (Category 3 or 4) |
| Hook | 3.5 mm to 4.5 mm (E to G) |
| Yarn Needle | For weaving in ends and attaching parts |
| Scissors | Sharp scissors for trimming |
| Optional | Hot glue or felt circle (for securing finished piece) |
🧵 Stitches & Abbreviations (U.S. Terms)
- ch – chain
- sc – single crochet
- hdc – half double crochet
- dc – double crochet
- tr – treble crochet
- sl st – slip stitch
- st(s) – stitch(es)
🌹 Part 1: Crochet the Tea Rose
The rose starts as a ruffled strip that is rolled and sewn into shape.
✅ Step 1: Foundation Chain
Ch 51 (or 60 for a larger rose).
Adjust the chain in multiples of 5 for fuller roses.
✅ Step 2: Base Row
Row 1: Sc in 2nd ch from hook and in each ch across. (50 sc)
Turn your work.
✅ Step 3: Create the Petal Bases
Row 2: *Ch 2, skip 1 st, sl st in next* — repeat across.
You will have loops (ch-2 spaces) along the row — one for each petal.
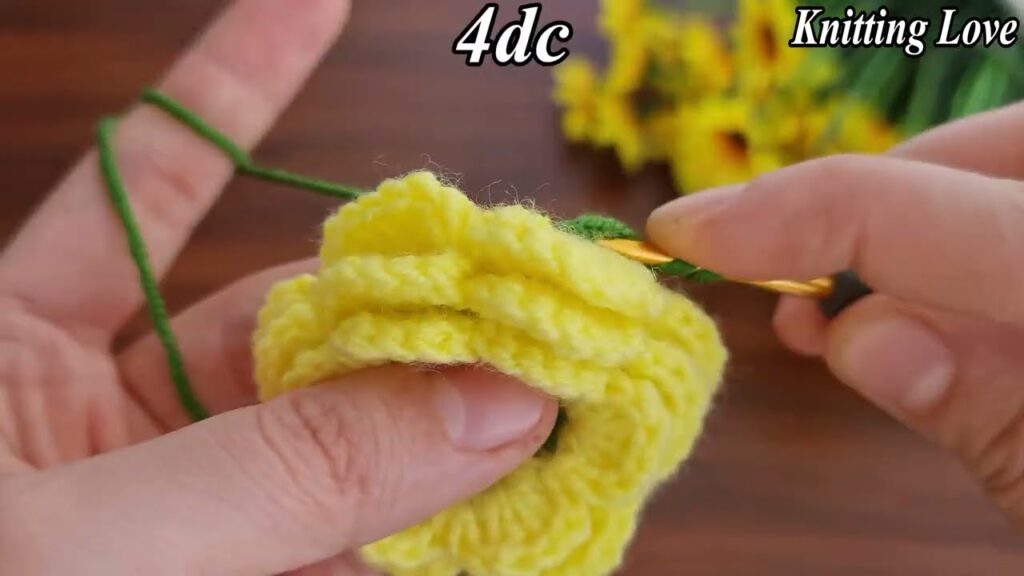
✅ Step 4: Form the Petals
Now you’ll work into each loop to form petals of increasing size.
Row 3 (Petal Formation):
Work the following into each ch-2 loop:
- In first 5 loops: (1 sc, 1 hdc, 1 dc, 1 hdc, 1 sc) – small petals
- Next 5 loops: (1 sc, 1 hdc, 2 dc, 1 hdc, 1 sc) – medium petals
- Remaining loops: (1 sc, 1 hdc, 2 dc, 1 tr, 2 dc, 1 hdc, 1 sc) – large outer petals
This creates a gradual blooming effect.
✅ Step 5: Roll and Sew the Rose
- Begin tightly coiling from the first (smallest) petal.
- Shape the flower as you go, forming a spiral.
- Use a yarn needle and the long tail to sew through the base layer of the petals, securing the roll from underneath.
Tie off securely and weave in any ends.
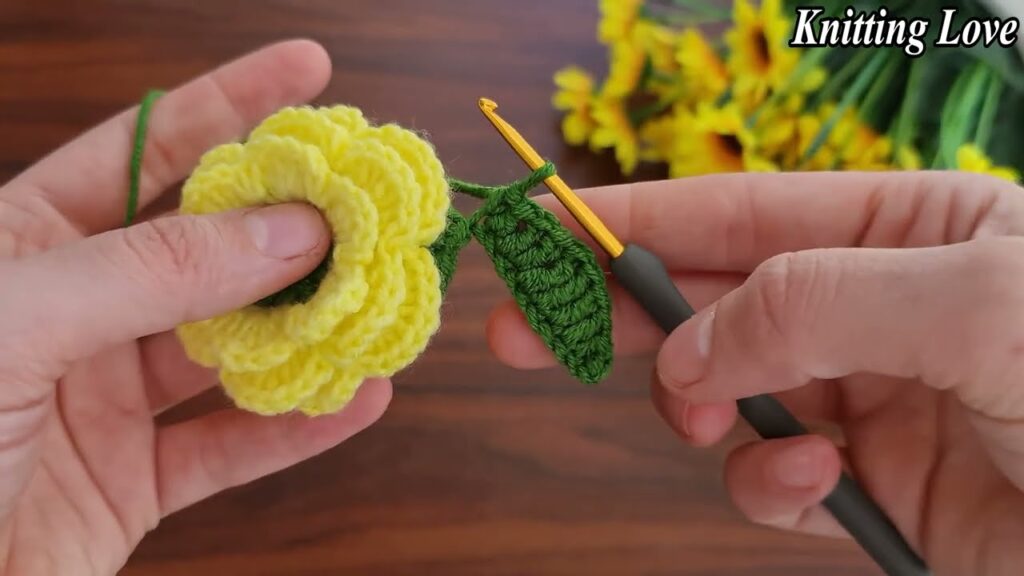
🍃 Part 2: Crochet the Leaves
Make 2–3 leaves depending on how full you want your motif.
✅ Leaf Pattern:
Ch 10.

Row 1:
Sc in 2nd ch from hook, hdc in next, dc in next 3 ch, hdc in next, sc in next, sl st in last ch.

Ch 1, rotate to work on the other side of the chain.

Sc in first, hdc in next, dc in next 3 ch, hdc in next, sc in next. Sl st to starting point.
Fasten off and weave in the tail.
Optional: Add vein detail by sewing a line of yarn down the center with a yarn needle.
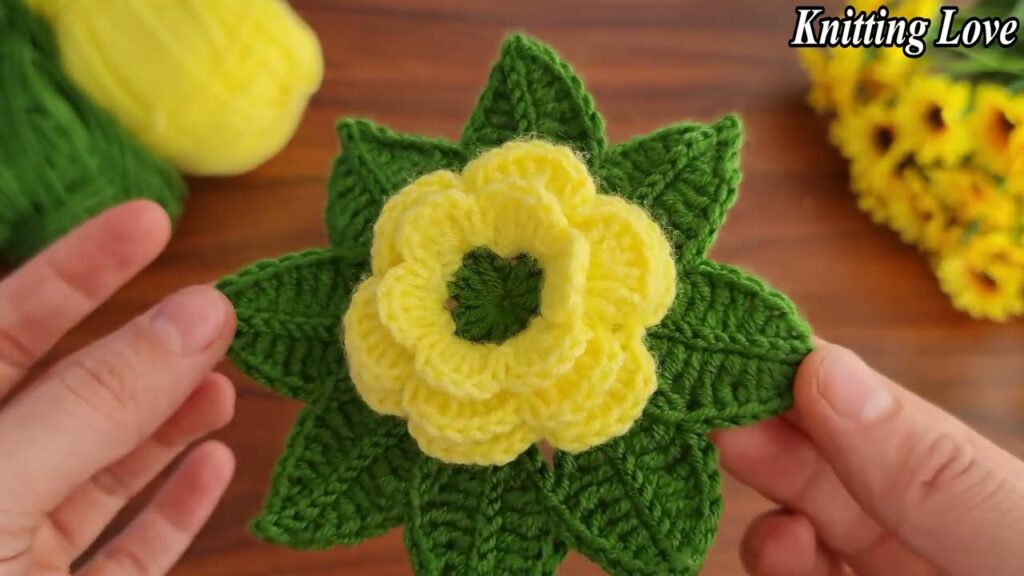
🧷 Assembly: Attach Leaves to Rose
- Position leaves under the base of your rose.
- Use yarn and a needle or glue to secure them in place.
- For accessories (headband, pin), glue or sew the entire motif onto a felt circle or fabric base.
🎨 Customization Ideas
- 🌈 Color blending: Use variegated yarn or change colors mid-row for multi-tone petals.
- 💎 Add beads: Sew a pearl or bead in the center.
- 🧵 Make a bouquet: Attach to floral wire for a handmade crochet rose bouquet.
- 🎁 Gift topper: Use it to decorate gift boxes or greeting cards.
🧼 Care Instructions
- If made with acrylic or cotton, hand wash gently in cold water.
- Lay flat to dry and reshape petals if needed.
Video tutorial:
🎉 Final Thoughts
This crochet tea rose with leaves makes a stunning and timeless handmade embellishment. Whether you’re adding it to a wearable piece or crafting a floral arrangement, the result is elegant and endlessly customizable. And with just basic stitches, even beginners can bring this flower to life.


