
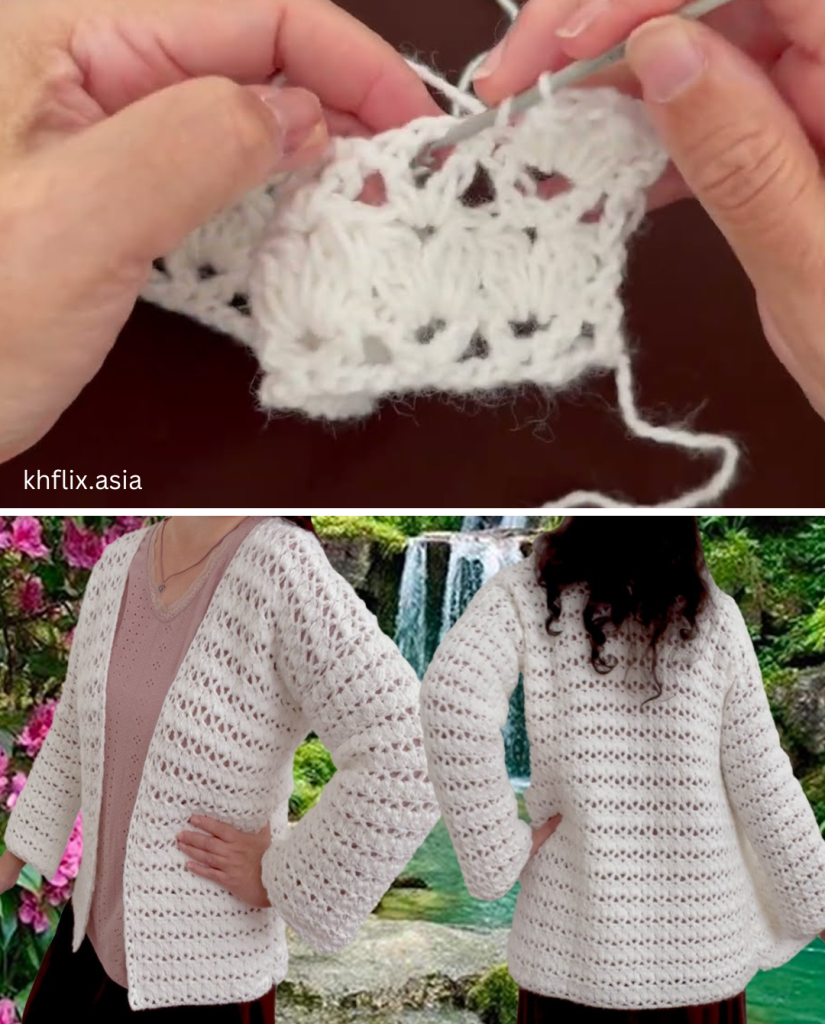
Hello, creative friends! If you’ve ever wanted to crochet a garment but felt intimidated by complicated shaping, this project is your perfect entry point. I’m thrilled to share the pattern for the Reversible Bloom Cardigan—a beautiful, flowing jacket that is constructed simply from straight rectangles.
Inspired by a gorgeous design that emphasizes ease and versatility, this cardigan uses the exquisite Reversible Tulip Stitch. This stitch creates a delicate, lacy texture that looks identical on both sides, meaning no “wrong side” of the fabric! Whether you wear it open as a light layer or cinched with a belt, this project is perfect for every season and skill level.

Grab your hook, measure up, and let’s start blooming!
Why You’ll Love Crocheting This Cardigan:
- Seamless Fit: Built from simple, easy-to-manage rectangles.
- Reversible Stitch: No need to worry about the “right” or “wrong” side of your fabric.
- Versatile Design: Easily customizable into a full cardigan, a summer blouse, or a chic vest.
- Fast-Paced Stitch: The two-row repeat keeps the work moving quickly and memorably.
What You’ll Need:
- Yarn: DK Weight (#3) or Light Worsted Weight (#4) yarn. Choose a cotton or cotton blend for summer, or an acrylic/wool blend for a warmer cardigan.
- Total Yarn: Approximately 800–1200 yards, depending on size and desired length.
- Crochet Hook: 3.0 mm or 3.5 mm hook (or the size recommended for your yarn to achieve a soft, flowing fabric).
- Tapestry Needle: For weaving in ends and seaming the panels.
- Scissors:
- Stitch Markers (Optional): To mark the armholes during assembly.
Essential Crochet Abbreviations:
- ch: chain
- st(s): stitch(es)
- sl st: slip stitch
- dc: double crochet
- Cl: Cluster (see special stitches below)
- inc: increase
- rep: repeat
Special Stitch: The Cluster (Cl)
The Cluster is worked by gathering three incomplete double crochet stitches into one stitch:
- Yarn over, insert hook into the specified space/stitch, yarn over and pull up a loop, yarn over and pull through 2 loops (2 loops on hook).
- Repeat the first step twice more in the same space/stitch (4 loops on hook).
- Yarn over and pull through all 4 loops on the hook. One Cluster (Cl) made.
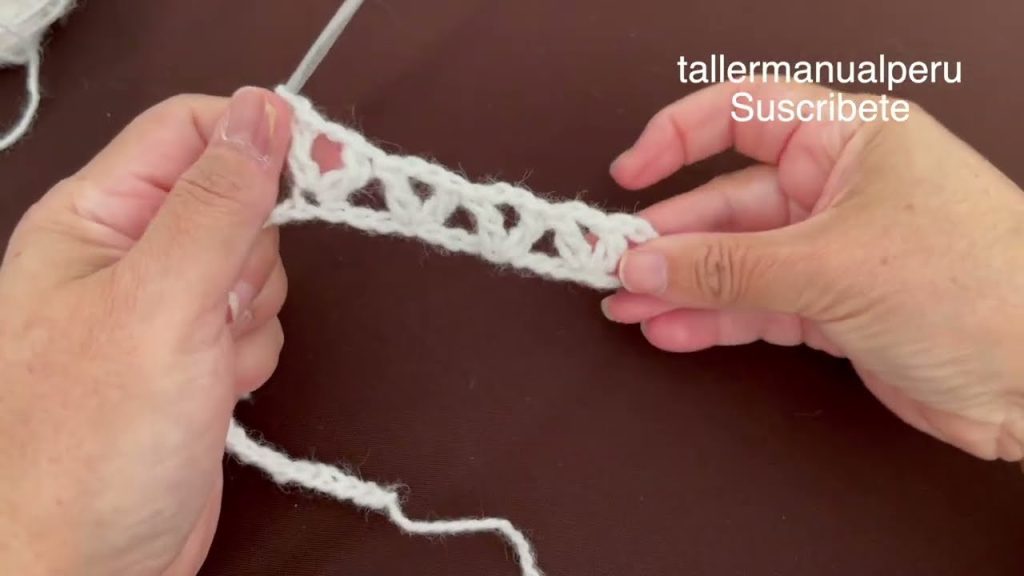
The Reversible Tulip Stitch Pattern
This pattern is a Multiple of 4 chains + 2 chains for the foundation.
Row 1 (V-Stitch Foundation):
Ch 3(counts as firstdcthroughout).- Skip the next 3 chains.
- In the 4th chain, work a V-Stitch:
(dc, ch 2, dc). - *Skip the next 3 chains. In the 4th chain, work a V-Stitch:
(dc, ch 2, dc). - Repeat from * across the row until 4 chains remain.
- Skip the next 3 chains. Work 1 dc into the last chain.
- Turn.
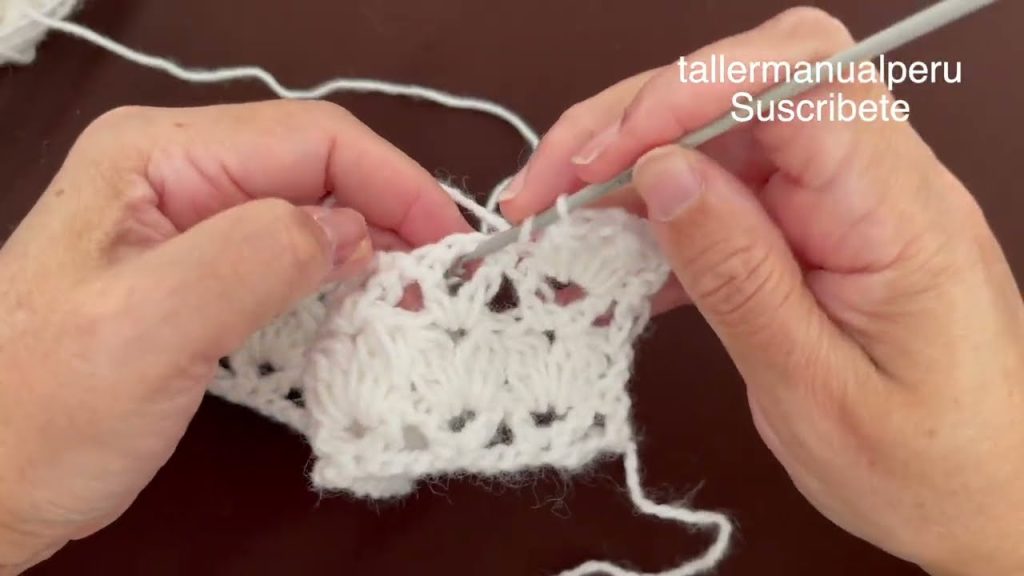
Row 2 (Cluster Row):
Ch 3(counts as firstdc).- Work a Cluster (Cl) into the center
ch 2 spaceof the first V-Stitch. Ch 2.- Work a Cluster (Cl) into the center
ch 2 spaceof the next V-Stitch. - *Work a Cluster (Cl) into the center
ch 2 spaceof the next V-Stitch. Ch 2.- Repeat from * across the row, working the last Cluster into the final V-Stitch space.
- Work 1 dc into the top of the starting
ch 3of the previous row. - Turn.
Row 3 (V-Stitch Repeat):
Ch 3(counts as firstdc).- Work a V-Stitch
(dc, ch 2, dc)into thech 2 spacebetween the Clusters of the previous row. - *Work a V-Stitch
(dc, ch 2, dc)into thech 2 spacebetween the next pair of Clusters. - Repeat from * across the row.
- Work 1 dc into the top of the starting
ch 3of the previous row. - Turn.
Repeat Rows 2 and 3 for the entire garment.
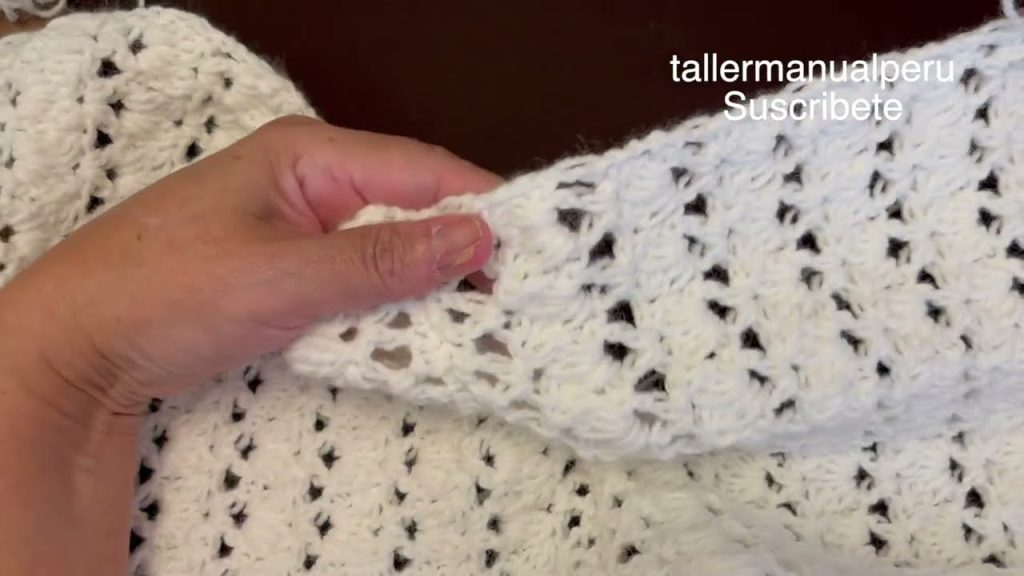
Construction: Rectangular Panels
The jacket is constructed using three rectangular panels (two Fronts, one Back) and then adding the sleeves.
1. The Back Panel (Spalda)
- Sizing: To determine your starting chain, measure the widest part of the back, from armhole to armhole, across the shoulders, or across the hips (whichever you want as the width).
- Starting Chain: Chain a length that matches your desired width, ensuring the stitch count is a multiple of 4 + 2.
- Example Size (Medium): Approx. 98 chains (24 repeats + 2).
- Body: Work in the Reversible Tulip Stitch pattern (repeating Rows 2 & 3) until the panel reaches the height from the bottom hem to the top of your shoulder.
- Finish:
FOand weave in ends.
2. The Front Panels (Delanteros – Make 2)
- Sizing: To ensure a proper neck opening when assembled, the combined width of the two front panels should be less than the back panel. A good rule of thumb is: (Back Panel Repeats) – (8 Repeats) = (Front Panel Repeats x 2).
- This leaves 4 repeats of the stitch pattern on either side of the center back for the neck opening (8 repeats total).
- Starting Chain: Chain a length that is about half the width of the back panel, minus the neck allowance. Ensure the stitch count is a multiple of 4 + 2.
- Example Size (Medium): Approx. 42 chains (10 repeats + 2).
- Body: Work in the Reversible Tulip Stitch pattern (repeating Rows 2 & 3) for the exact same number of rows as the Back Panel.
- Finish:
FOand weave in ends.
Assembly: Joining & Sleeves
1. Seaming the Shoulders
- Lay the Back Panel flat.
- Place one Front Panel on top of the Back Panel, aligning the top edge and the outer corner (the future shoulder/sleeve edge).
- Using the Tapestry Needle and matching yarn, or a
sl stseam:- Starting from the shoulder edge, sew or slip stitch the top edges of the Front Panel to the Back Panel.
- Stop seaming when you reach the neck gap. Leave the central portion of the back panel unseamed for the neck.
- Repeat with the second Front Panel on the opposite side. You should now have an opening for the neck.
2. Picking up the Sleeves (Working in the Round/Rows)
The sleeves are worked directly from the armhole for a seamless finish.
- Mark the Armhole: Lay the joined piece flat. Decide on the depth of your armhole (e.g., 8–10 inches / 20–25 cm). Place a stitch marker on the front and back panel, measuring down from the shoulder seam, to mark the bottom of the armhole.
- Join the Sides: Sew or
sl stthe side seams, starting from the marked armhole down to the bottom hem. - Picking Up Stitches: Attach your yarn at the bottom of one armhole.
- Work
dcstitches evenly around the entire armhole opening. Aim for a stitch count that is a multiple of 4. Sl stto the firstdcto join the round.
- Work
- Sleeve Body:
- Round 1 (Cluster Row):
Ch 3. Work the Cluster Row (Row 2 of the pattern), adapting to the round (do not turn). You will work aClinto a stitch,ch 2, then skip stitches and work the nextClto maintain the pattern. - Round 2 (V-Stitch Row):
Ch 3. Work the V-Stitch Row (Row 3 of the pattern) into thech 2 spacesof the previous round. - Repeat these two rounds until the sleeve reaches your desired length.
- Round 1 (Cluster Row):
- Cuff Shaping (Optional): Decrease the stitch count slightly every few rows to taper the sleeve towards the wrist.
- Finish:
FOand weave in ends. Repeat for the second sleeve.
3. Final Edging (Optional)
To match the look of the hem and sleeve cuffs, you can add the V-Stitch foundation along the front and neck opening.
- Attach yarn at the bottom front corner.
- Work Row 1 (V-Stitch Foundation) evenly all the way up the front opening, around the back neck, and down the other front opening. This will frame the garment beautifully.
FOand weave in all remaining ends.
Congratulations! You have created the stunning Reversible Bloom Cardigan. Enjoy wearing your beautiful, handmade layer!
Video tutorial:


