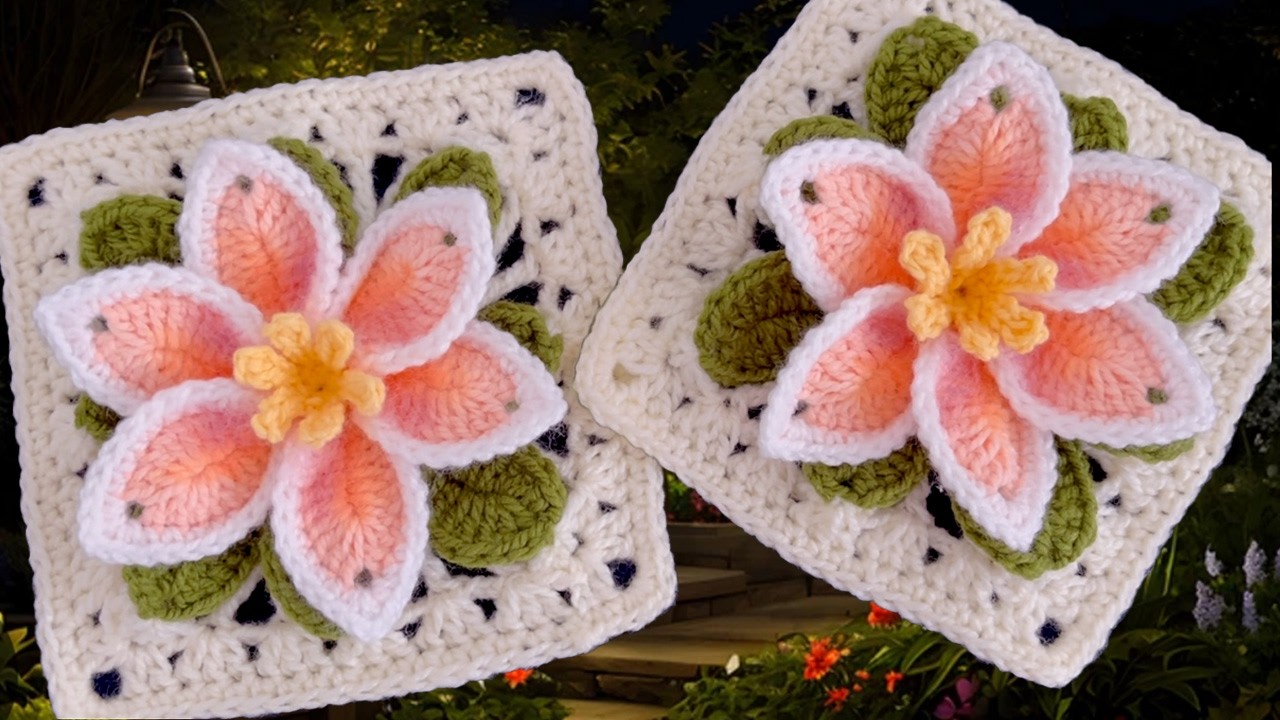
Hello, crochet enthusiasts! If you’re looking for a project that combines classic crochet techniques with a stunning, three-dimensional design, you’re in for a treat. This pattern, inspired by a video from Taller Manual Perú, will guide you through creating a beautiful crochet square with a lily flower in relief. These squares are perfect for adding a touch of elegance to blankets, cushions, bedspreads, or curtains.

Before we begin, a special thanks to Liliana from Taller Manual Perú for her wonderful tutorial!
Materials Needed:
- Crochet Hook: 3 mm
- Yarn:
- Light salmon (for the lily petals)
- Green (for the leaves and square base)
- Cream and white (for the flower border and final square)
- Yellow scraps (for the flower’s center)
- Optional: Fabric paint for adding shading and dimension.
Part 1: Crocheting the 3D Lily Flower
The flower is the heart of this project. It’s worked in several stages to achieve the beautiful raised effect.
Step 1: The Flower Center Begin with a slip knot and chain three to form a small circle. Into this circle, crochet six single crochets to form the core of your flower.
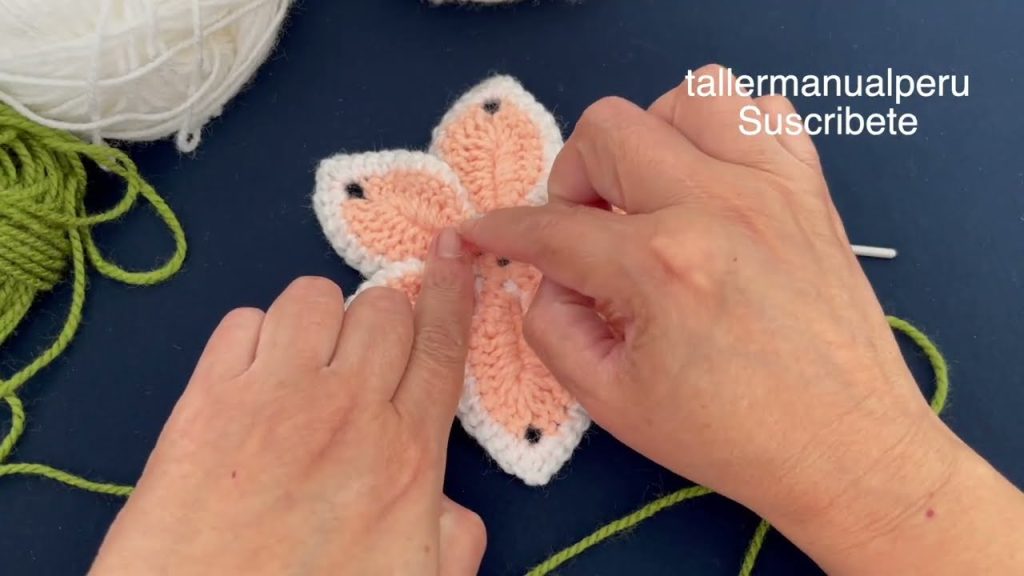
Step 2: Creating the Petals Using the light salmon yarn, you will now form the lily’s petals. The tutorial shows a combination of chain stitches, single crochets, half-double crochets, and double crochets to build up the shape of each petal. The key is to create the relief effect by working the stitches in a specific sequence.
Step 3: Adding the White Border Once the petals are formed, attach the white yarn. You’ll use a single crochet stitch to create a neat border around each petal, which helps define their shape and makes the lily stand out.
Part 2: The Square and Leaves
With your flower complete, it’s time to build the square base and add the lovely leaves.
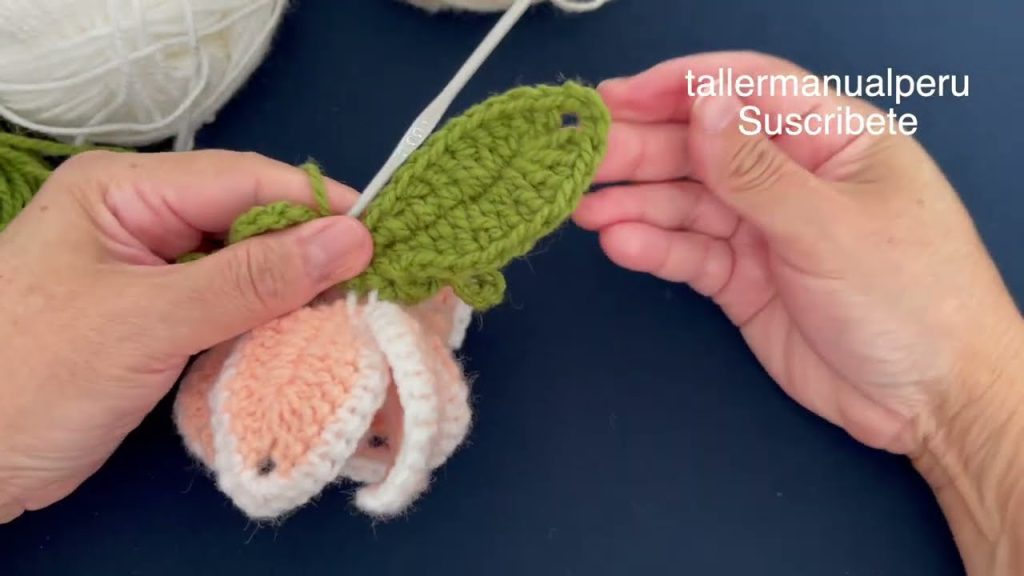
Step 1: Forming the Square Base Attach the green yarn to the back of your crocheted flower. This will be the foundation for the square.
Step 2: Crocheting the Leaves The pattern features two sizes of leaves: a larger one for the corners and a smaller one for the sides of the square. They are made using a similar technique to the petals, with a combination of different stitch types to give them shape and a realistic feel.
Part 3: Finishing the Square
Now, we’ll finish the square and make it ready for joining.
Step 1: The Final White Border Using your white yarn, create the final border of the square. Work corner stitches to ensure a crisp, defined square shape. This border pulls everything together and gives the square its final form.
Step 2: The Joining Row The last row is worked in single crochet. This creates a clean edge that is ideal for easily joining multiple squares together to create a larger project like a blanket or a pillow cover.
Adding the Final Touches
For an extra layer of detail, you can follow Liliana’s lead in the video and use fabric paint to add shading to the lily petals. This technique adds incredible dimension and makes the flowers look even more realistic. You can also add the yellow center of the lily by chaining and using slip stitches.
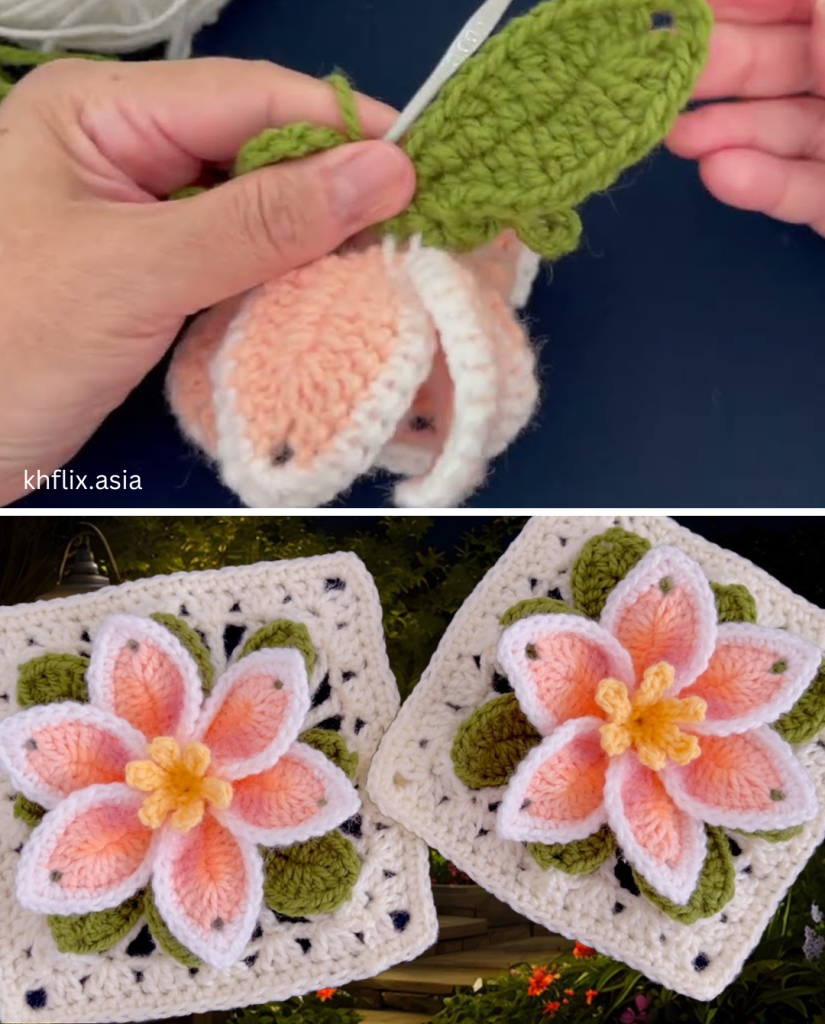
This pattern is a fantastic way to create a unique and beautiful decorative item. The finished squares are incredibly versatile, and the 3D effect makes them a conversation piece.
Video tutorial:


