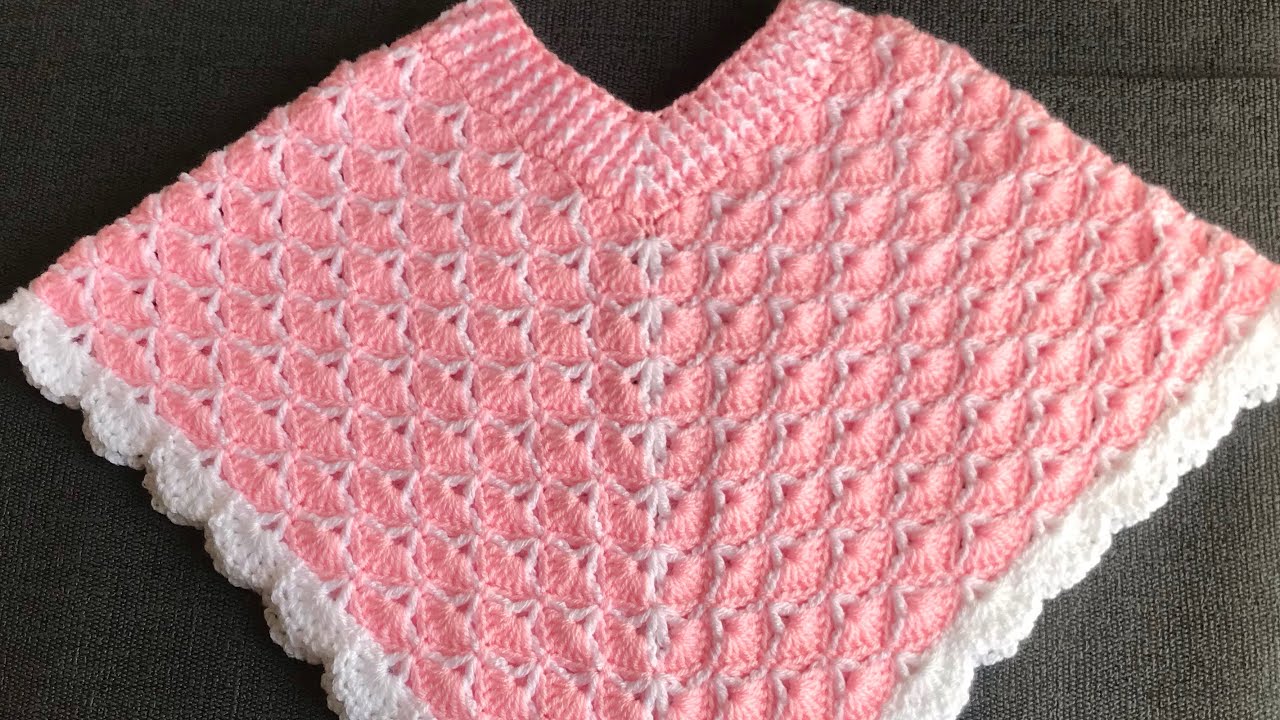
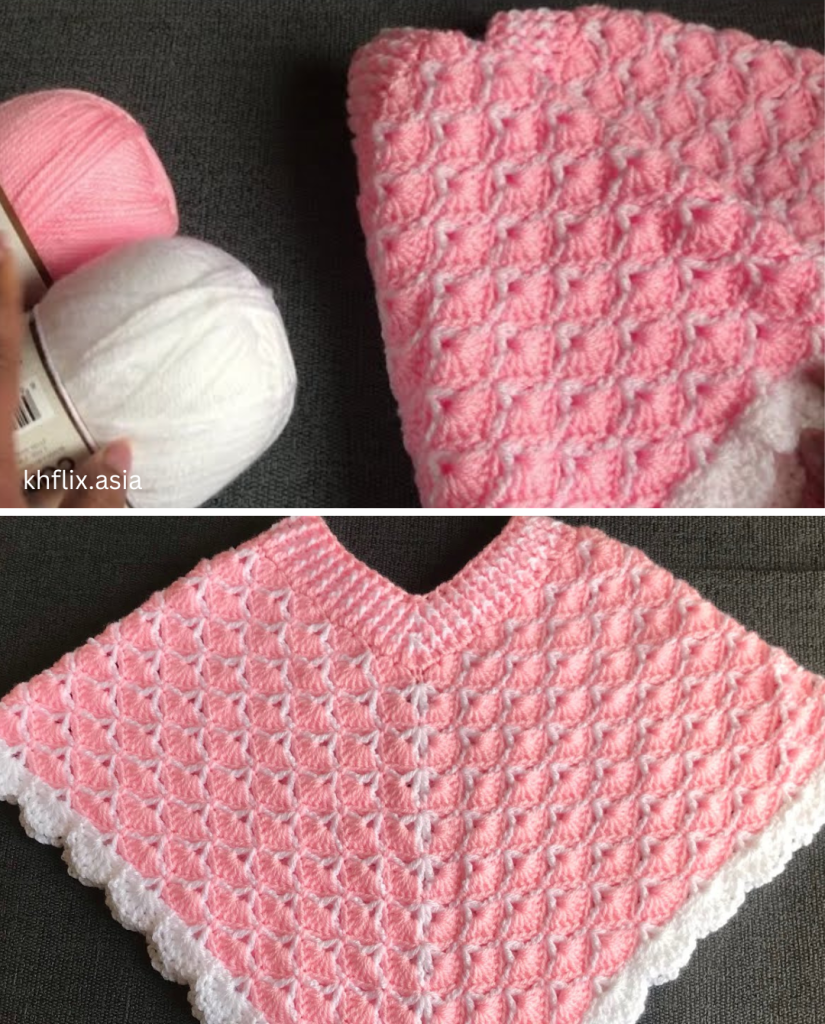
Are you looking for a quick and stunning project for the little ones in your life? This easy crochet baby poncho is the perfect answer! Based on the beautiful and clear tutorial by Craft & Crochet, this pattern features a simple two-round repeat that creates a gorgeous textured fabric and classic shaping.
Even if you are a beginner, this pattern is designed to be straightforward and rewarding. It’s worked from the top down in rounds, making it seamless and simple to customize to any size!

Pattern Details at a Glance
- Skill Level: Easy / Beginner-Friendly
- Gauge: Not critical, but aim for a relaxed fabric.
- Stitch Repeat: The main body is a simple two-round repeat (Shell Round and Framework Round).
Materials & Tools
| Item | Details |
| Yarn | Double Knitting (DK) weight yarn (approximately 100g/330m per skein). |
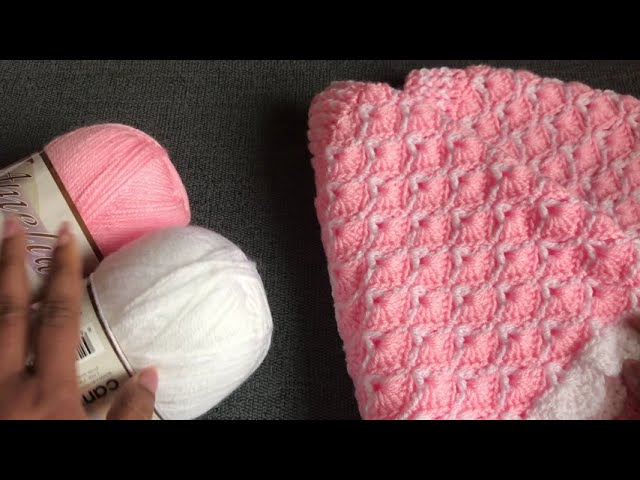
| Colors | Main Color (MC): Pink (or color of choice). You’ll need approx. 120g for the poncho and a matching hat. Secondary Color (SC): White (for the trim and framework rounds). |
| Hook | 4.0 mm Crochet Hook (recommended by the pattern creator) |
| Notions | Stitch markers/Stitch counter (highly recommended for corner placement!), Scissors, Yarn Needle for weaving in ends. |
Sizing Guide & Foundation Chain
This pattern provides instructions for four different sizes, from baby to young child. The poncho is sized by adjusting the initial chain count and the total number of shell rounds.
The foundation chain must be a multiple of 6, plus 4 for the setup round to work.
| Size | Foundation Chains (Total) | Initial Shells (Rnd 1) | Total Rounds (Main Body) |
| 6-12 Months | 86 chains | 14 shells | 19 rounds |
| 1-2 Years | 98 chains | 16 shells | 21 rounds |
| 3-4 Years (Video Size) | 110 chains | 18 shells | 23 rounds |
| 4-6 Years | 122 chains | 20 shells | 25-27 rounds |
Stitch Abbreviations (US Terms)
| Abbreviation | Stitch |
| ch | Chain |
| sl st | Slip Stitch |
| sc | Single Crochet |
| dc | Double Crochet |
| sk | Skip |
| Shell | 7 double crochet stitches in the same stitch/space |
| V-st | V-Stitch (dc, ch 1, dc in the same stitch/space) |
| FPDC | Front Post Double Crochet |
| BPDC | Back Post Double Crochet |
| ( ) | Work stitches inside parentheses into the same stitch/space |
| * | Repeat instructions following the asterisk |
The Easy Crochet Poncho Pattern
The pattern is worked in two main sections: The Main Body (with increases) and The Neckline (ribbing).
SECTION 1: MAIN BODY (The Two-Round Repeat)
Step 1: Foundation Chain & Round 1 (Setup Shells)
- Using Main Color (MC), create a slip knot.
- Chain the number of stitches for your chosen size (e.g., 110 for 3-4 years).
- Round 1 (Shell Setup): Working into the back bumps of the chain .
- Sc in the 2nd ch from the hook.
- *Sk next 2 ch, make Shell (7 dc) in the next ch. Sk next 2 ch, sc in the next ch.*
- Repeat from * all the way to the end. You should have 3 chains left.
- Sk next 2 ch, sc in the very last ch.
- Join: Ensure the chain is not twisted. Sl st into the first sc to join into a round. You can use your yarn tail and a needle later to close the small gap at the chain join.
- Mark Corners: Count your total number of shells (e.g., 18 for 3-4 years). Divide the shells in half (e.g., 9 shells per side). Use a stitch marker to mark the single crochet (sc) stitch that falls between the last shell of the first half and the first shell of the second half. Mark the sc stitch at the halfway point. This will be your two corner points for the increases.
Step 2: Round 2 (Framework – SC Color)
- Switch to Secondary Color (SC). Pull the new color through the loop on your hook (do not cut MC, carry it up the seam).
- Round 2 (Framework):
- Ch 4 (counts as dc, ch 1). Dc in the same sc (first V-st made) [14:03].
- Ch 5.
- *Make V-st (dc, ch 1, dc) in the next sc. Ch 5.*
- Repeat from * until you reach the corner marker.
- Corner Increase: In the marked sc stitch, work: V-st, ch 1, V-st [14:48].
- Ch 5.
- Repeat the side pattern: *V-st in the next sc. Ch 5.* Repeat to the next corner, and then repeat the corner increase in the second marked sc.
- Continue to the end of the round. Sl st into the 3rd chain of the beginning ch-4 to join [18:00].
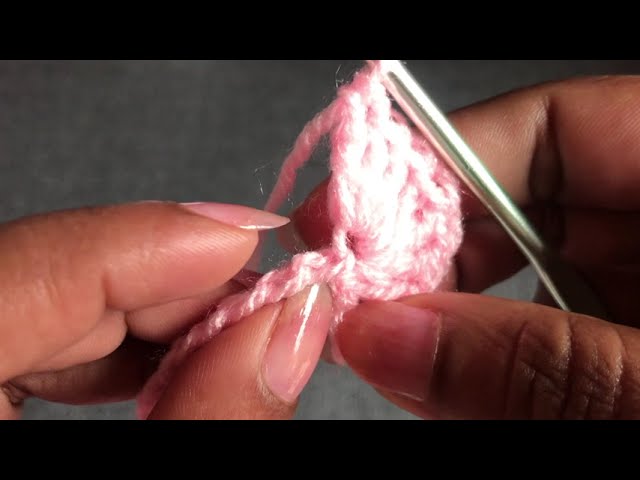
Step 3: Round 3 (Shells – MC Color)
- Switch back to Main Color (MC). Pull the new color through the loop on your hook (do not cut SC).
- Round 3 (Shells):
- Sl st into the ch-1 space of the first V-st .
- Ch 3 (counts as dc), 6 dc in the same ch-1 space (Shell made) .
- Anchor the shell: Sc into the 4th dc of the previous shell (the center stitch) to anchor the ch-5 space.
- *Shell in the ch-1 space of the next V-st. Sc into the center dc of the next previous shell.*
- Repeat from * until you reach the corner section.
- Corner Section: Shell in the first V-st. Sc into the ch-1 space that separates the two V-sts from the previous corner increase. Shell in the second V-st.
- Continue the side pattern: *Sc into the center dc of the previous shell. Shell in the ch-1 space of the next V-st.*
- Join with a sl st to the top of the beginning ch-3.
Step 4: Continue the Repeat
- Repeat Rounds 2 and 3 (alternating colors) until you have completed the total number of rounds required for your size.
- Important: The corner section in Rounds 2 and 3 always creates two new shells on that round, meaning you will increase your total shell count by 2 on every Shell Round (Rnd 3, Rnd 5, Rnd 7, etc.).
SECTION 2: LOWER BORDER
The border is worked over 3 rounds and is the same for all sizes, starting after your final main body round (e.g., after Rnd 23 for the 3-4 year size).
Border Round 1 (Framework)
- Round 24: Using Secondary Color (SC), work the same as Round 2 (Framework), but DO NOT make an increase at the corners.
- Work V-st, ch 5, V-st, ch 5… into the sc stitches all the way around, including at the corners, treating them like a normal sc.
- Join with a sl st to the 3rd chain of the beginning ch-4.
Border Round 2 (Shells)
- Round 25: Using Secondary Color (SC), work the same as Round 3 (Shells), but DO NOT make an increase at the corners.
- Work Shells in the V-sts and anchor them with an sc in the center dc of the previous shell all the way around, including the corner sections, treating them like a normal V-st/sc.
- Join with a sl st to the top of the beginning ch-3.
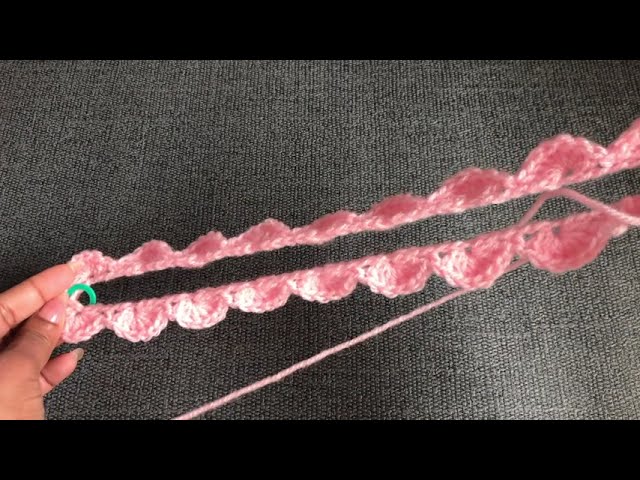
Border Round 3 (Picot Trim)
- Round 26: Use Secondary Color (SC) (or switch back to MC for contrast).
- Picots over Shells:
- Sc between the 1st and 2nd dc of the shell.
- Ch 3.
- *Sc between the next two dc stitches. Ch 3.*
- Repeat from * 4 more times. You will have 5 ch-3 loops (picots) on top of each shell.
- Skip the Anchor Stitch: Sk the sc between the shells and move to the next shell.
- Corner Detail: The corner has a special treatment to give it definition:
- Work the 5 picot loops on the shell right before the corner.
- In the sc stitch between the corner shells, work the following: (dc, ch 3, sl st into the first loop of the ch-3 for a picot) 3 times.
- Continue the picot loops on the next shell.
- Finish the round and sl st to join. Fasten off and weave in ends.
SECTION 3: THE NECKLINE
The neckline is worked back up along the initial foundation chain edge, creating a simple ribbing for a neat finish.
Neck Round 1 (Setup)
- Join Main Color (MC) in the chain 2 space near the corner.
- Ch 3 (counts as dc).
- Work 2 dc in the same ch-2 space.
- Work 1 dc in the next chain/gap.
- Continue all the way around, working 2 dc in the ch-2 spaces and 1 dc in the single chain/gap spaces.
- Corner Decrease: To prevent flaring, make a dc2tog in the corner section: dc into a space (last loop on hook), sk next space, dc in next space (last loop on hook), yarn over and pull through all loops.
- Sl st to the top of the beginning ch-3 to join.
Neck Rounds 2-5 (Ribbing)
- Round 2: Switch to Secondary Color (SC).
- Ch 3 (counts as BPDC).
- Work a FPDC around the next dc.
- Work a BPDC around the next dc.
- Continue in a FPDC, BPDC repeat all the way around.
- Corner Decrease: Decreases are incorporated into the ribbing pattern at the corners to maintain a snug fit. For example, you will combine two FPDC or two BPDC into a single stitch to reduce the stitch count.
- Sl st to the top of the beginning ch-3 to join.
- Rounds 3 & 4: Switch back to MC (Rnd 3), then SC (Rnd 4). Repeat the FPDC/BPDC pattern, maintaining the ribbing texture and incorporating the corner decreases.
- Round 5 (Final Round): Switch to MC. You can continue the ribbing, or work a final decrease round to cinch the neck. The video demonstrates a decrease where three front-post double crochet stitches are worked together at the corner and then skips the back-post stitches immediately following.
- Sl st to join, fasten off, and weave in all remaining ends!
Enjoy your beautiful, handmade baby poncho!
Video tutorial:


