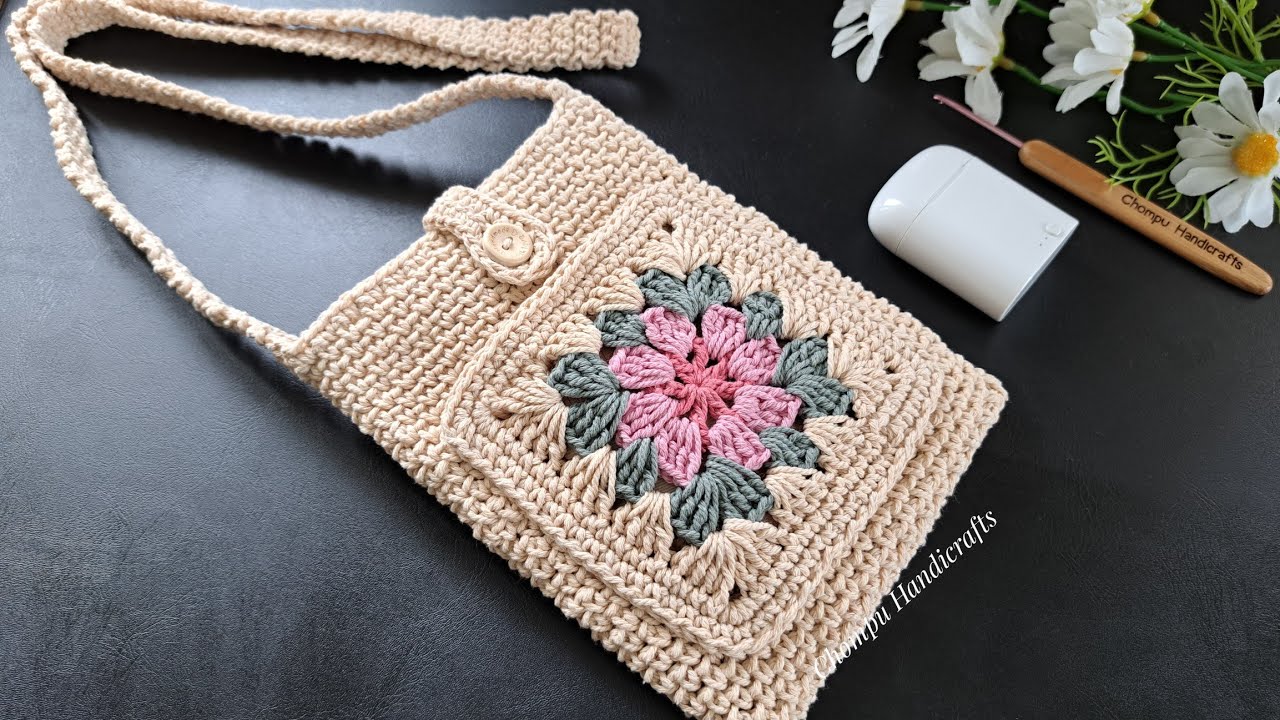
Granny squares are a timeless crochet motif that never goes out of style. When you combine floral patterns with these iconic squares, you get a beautiful, bohemian-inspired bag that’s perfect for festivals, markets, or everyday wear. This tutorial will teach you how to make your own Crochet Flower Granny Sling Bag — a functional, eye-catching, and satisfying project.

🧺 What Is a Flower Granny Sling Bag?
A Flower Granny Sling Bag is a crossbody or shoulder bag made by joining floral-themed granny squares. The “sling” refers to the long strap, allowing the bag to be worn across the body or over one shoulder.
It’s perfect for:
- Carrying small essentials
- Styling with boho or vintage outfits
- Gift-giving
The bag can be customized in size, color, and strap length.
🧵 Materials Needed
Before we start crocheting, gather the following materials:
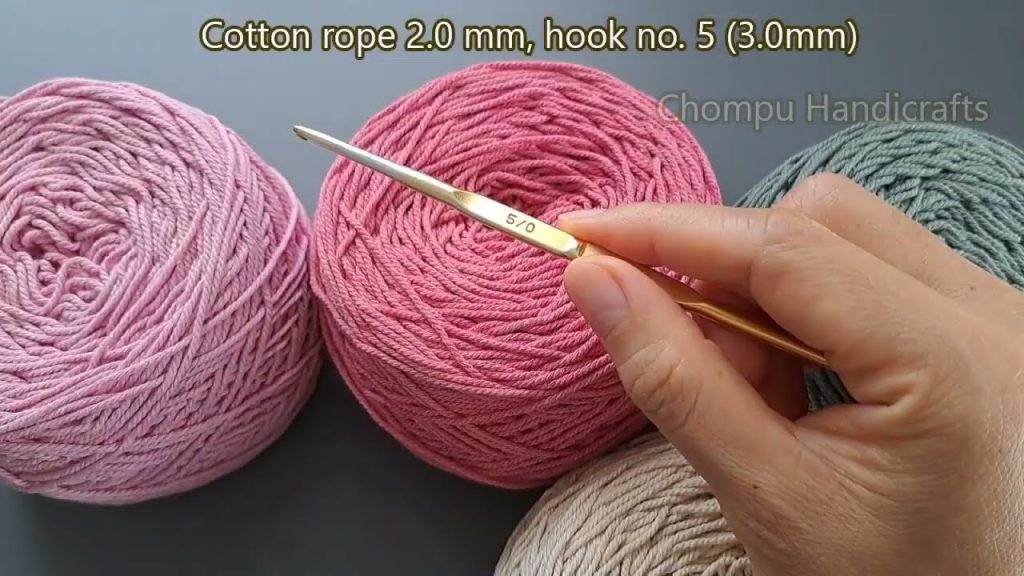
🧶 YARN:
- Worsted Weight Yarn (Medium #4) in:
- Petal color (e.g. pink, purple, red)
- Flower center color (e.g. yellow, brown)
- Background color (e.g. cream, white, black)
- Optional: Contrasting color for joining and edging
Cotton or acrylic yarn works well for durability.
🪝 HOOK:
- 5.0 mm (H/8) crochet hook (adjust if needed for your yarn)
✂️ SUPPLIES:
- Yarn needle
- Scissors
- Stitch markers (optional)
- Fabric lining, zipper, or magnetic snap (optional, for finishing)
- Measuring tape
🧶 Basic Crochet Skills Needed
- Magic ring (or magic circle)
- Chain (ch)
- Slip stitch (sl st)
- Single crochet (sc)
- Double crochet (dc)
- Treble crochet (tr) (optional for flower petals)
- Whip stitch or crochet join
This pattern is suitable for adventurous beginners and intermediate crocheters.
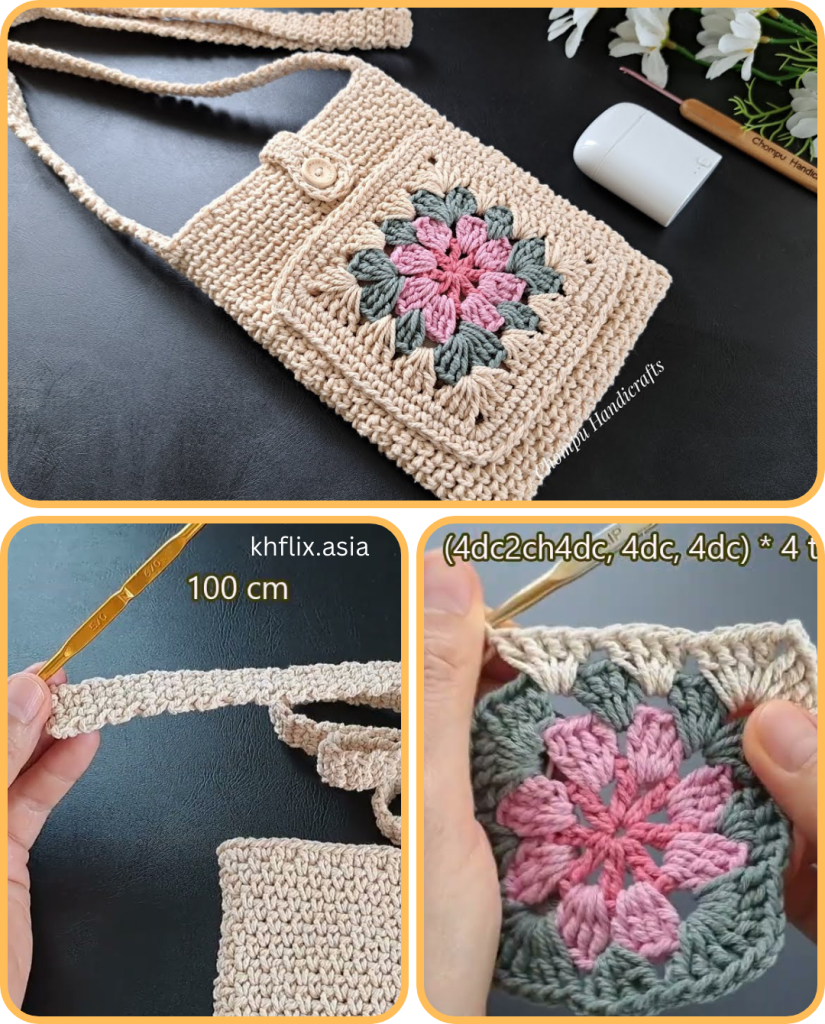
🟨 Step 1: Making the Flower Granny Squares
You’ll need to make 8 to 13 granny squares depending on the size of your bag. Typically, 13 squares create a medium-sized bag with a flap.
🌸 Round 1 – Flower Center
- Start with a magic ring.
- Ch 3 (counts as 1st dc), then work 11 dc into the ring. (12 dc total)
- Sl st to the top of ch-3 to join.
- Fasten off and change color for petals.
🌼 Round 2 – Petals
- Join petal color yarn in any dc.
- (Ch 2, 2 dc, ch 2, sl st) in the same stitch – first petal made.
- Repeat the petal pattern in each stitch around. You should have 12 petals.
- Fasten off.
Tip: You can make petals puffier by using treble crochet (tr) or puff stitch for added texture.
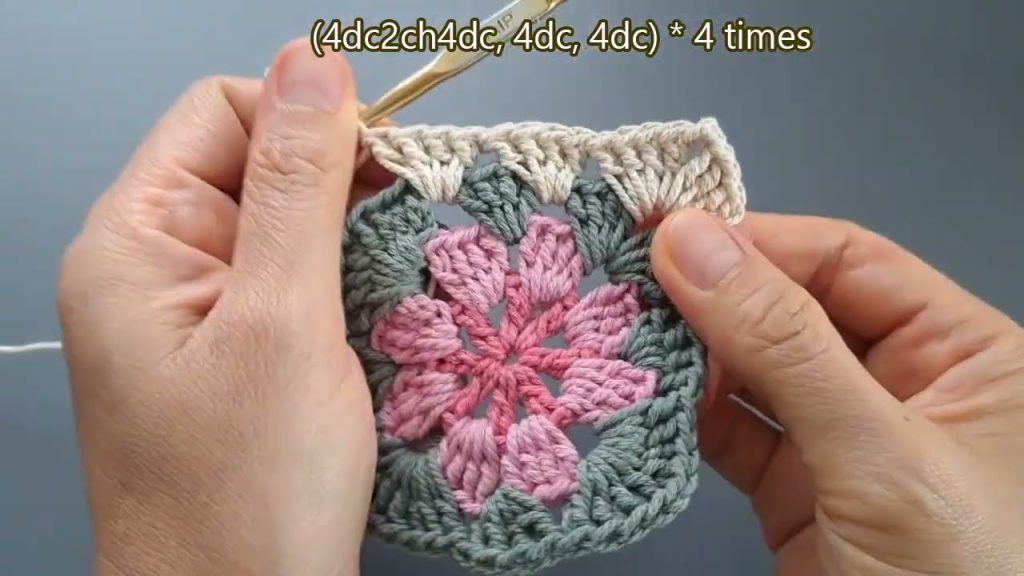
🌿 Round 3 – Square Background
- Join background color yarn between any two petals.
- (3 dc) in each space between petals around.
- In every 4th space, make a corner: (3 dc, ch 2, 3 dc).
- After forming four corners and filling sides with 3-dc clusters, sl st to close.
You now have a flower granny square. Block your squares for uniformity.
🧮 Step 2: Deciding Bag Size and Layout
Here’s a common layout for a medium-sized sling bag:
- Front & Back Panels: 3 squares each (3×1 grid)
- Bottom Panel: 1 square
- Side Panels: 2 squares (1 on each side)
- Flap (Optional): 1–2 squares
- Strap: Crocheted to desired length or made from fabric/leather
Feel free to change layout based on your design vision.
🔗 Step 3: Joining the Squares
You can join squares using two main methods:
1. Whip Stitch (Sewn Join)
- Lay squares right sides together.
- Use a yarn needle to whip stitch through the back loops only.
- This creates a flat, nearly invisible seam.
2. Single Crochet Join
- Hold squares right sides out.
- Insert hook through both squares’ edges, and sc across to join.
- Creates a raised, ridge-like join (adds texture).
Join your squares to form a cube-like shape with an open top:
- Attach the bottom square to the bottom edge of front, back, and both side squares.
- Seam all sides together into a box.
If adding a flap, attach a square to the top edge of the back panel.
🪡 Step 4: Lining and Closure (Optional but Recommended)
✨ Lining
- Cut fabric slightly larger than the bag’s dimensions.
- Sew the sides to form a pouch.
- Insert into the bag and hand-stitch or machine-sew to attach.
✨ Closure Options
- Sew in a zipper, magnetic snap, or a button loop on the flap.
- You can also crochet a loop and attach a button to the front panel.
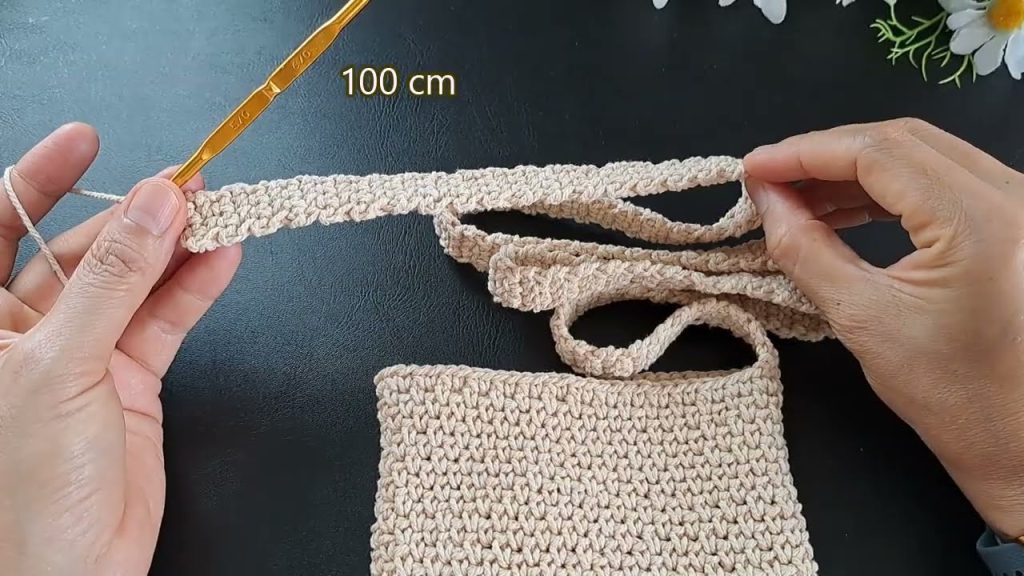
🧵 Step 5: Making the Sling Strap
The strap is key for the “sling” look. You can:
Crochet Strap (Adjustable Length)
- Chain the desired strap length (commonly 90–120 cm).
- Work sc or hdc in rows until strap is ~1 inch wide.
- Fasten off, sew or sl st strap to both sides of the bag.
Other Strap Options
- Use macramé cord, leather, fabric belt, or thick braided yarn.
- Reinforce the strap ends for durability.
Tip: Crochet a wider strap if the bag will carry heavier items.

🧼 Step 6: Edging and Finishing
- Work a single crochet border around the bag opening for a clean edge.
- Weave in all loose ends with a yarn needle.
- Block the entire bag gently to smooth out seams and square edges.
- Add decorative touches like tassels, beads, or floral appliqués if desired.
🧼 Washing Instructions
- Hand wash only in cold water with mild detergent.
- Do not wring.
- Lay flat to dry, shape with hands while damp.
- If lined, spot clean only.
🧶 Customization Ideas
- 🌈 Use gradient yarns for ombré flowers.
- 💎 Add beads to flower centers.
- ✨ Mix different flower types (e.g. daisies, poppies, sunflowers).
- 🎨 Use neutral backgrounds with colorful flowers for contrast.
- 👜 Add inside pockets or phone holders with fabric lining.
🌟 Final Thoughts
Creating a Crochet Flower Granny Sling Bag is a rewarding project that allows you to play with color, texture, and shape. It’s more than just a bag — it’s a handmade statement of style and skill. Perfect for gifting, selling, or proudly wearing yourself, this bag merges vintage charm with modern flair.
So, gather your yarn and hook, and start stitching together a bouquet of granny square flowers that you’ll carry with pride. 🌸👜✨
Video tutorial:


