
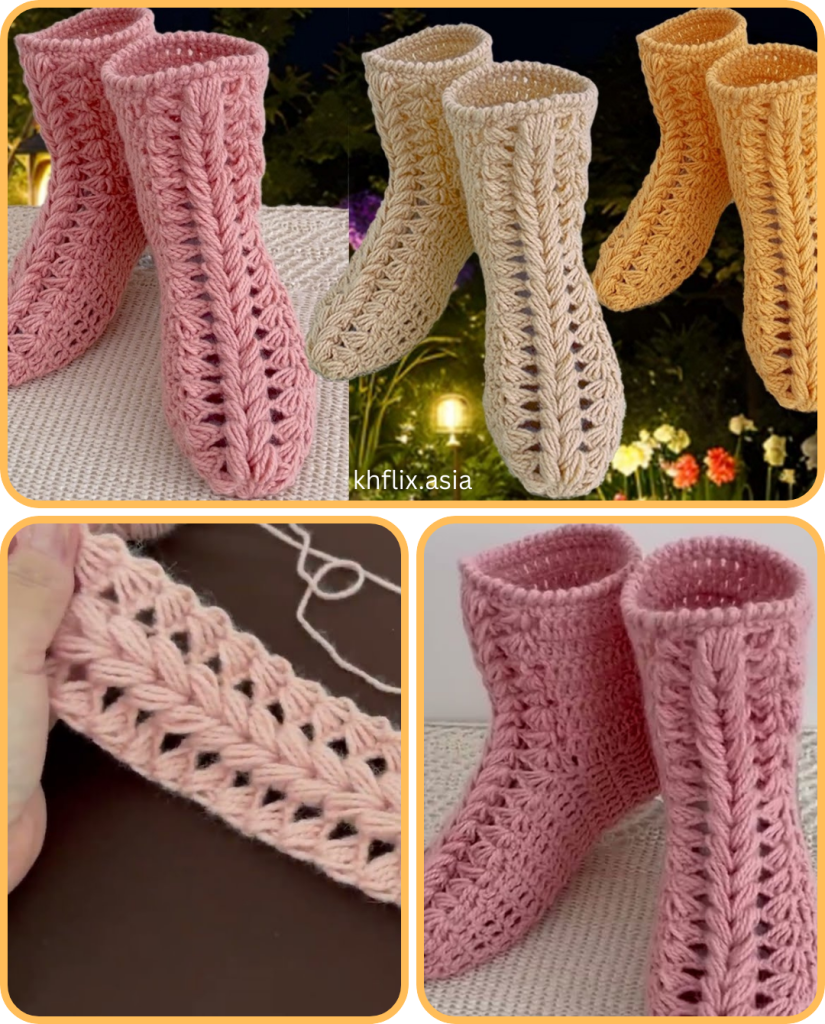
Crochet isn’t just for scarves and blankets — it’s also a powerful craft for creating fashionable, functional footwear. One of the most eye-catching designs you can make is a pair of crochet boots using the braided relief 3D stitch. This stitch not only offers gorgeous texture and depth but also provides structure and durability, which are essential for any crocheted footwear.
In this tutorial-style article, we’ll explore how to make beautiful crochet boots using the braided relief 3D stitch, including what makes this stitch special, how to work it, what materials you’ll need, and step-by-step instructions for creating your own pair of cozy, stylish boots.

🧶 What is the Braided Relief 3D Stitch?
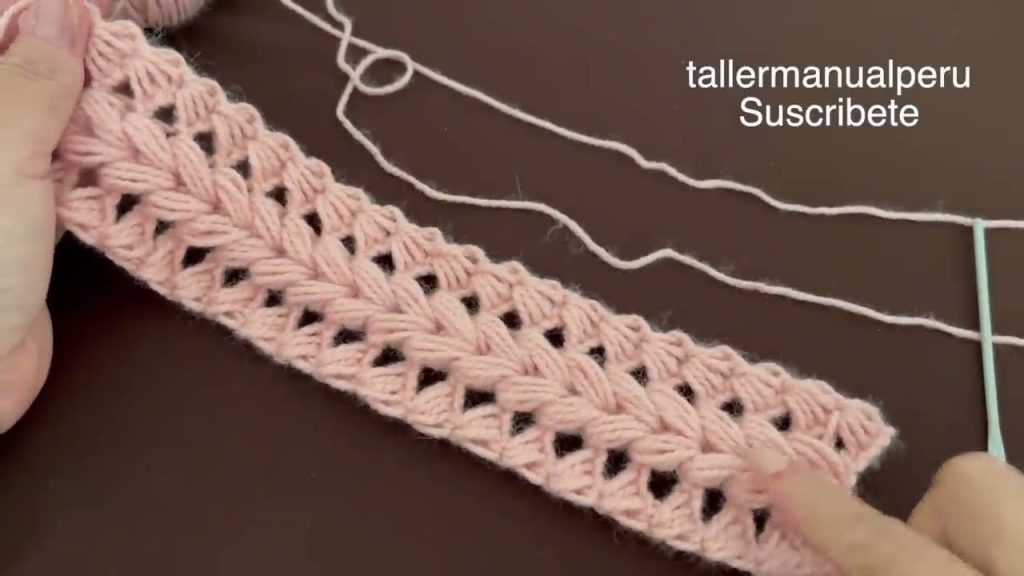
The braided relief 3D stitch, sometimes called the braid stitch, is a highly textured pattern created using front post and back post stitches. The technique gives the appearance of braided cables or twisted ropes, which adds incredible visual interest and structural integrity.
This stitch is ideal for:
- Boots and slippers – the texture adds warmth and elasticity.
- Bags and baskets – gives strong, sculptural form.
- Sweaters and winter accessories – for cozy, stylish looks.
The braided relief stitch typically uses front post double crochet (fpdc) and back post double crochet (bpdc) in a specific sequence to build the interwoven pattern.
🧵 Materials You’ll Need
To make your crochet boots durable and wearable, high-quality materials are key.
✂️ Yarn:
- Chunky/Bulky weight yarn (Category 5–6) – for warmth and structure
- Choose a wool blend or acrylic blend for durability
- Avoid yarns that stretch too much (like bamboo or silk)
Recommended: Use darker, solid colors to make the braid pattern pop!
🪡 Tools:
- Crochet hook: Usually 6.0 mm (J-10) or 6.5 mm (K-10.5) for bulky yarn
- Yarn needle
- Scissors
- Stitch markers (optional)
- Soles or slipper bottoms (rubber, cork, or even recycled flip-flop soles for structure)
- Hot glue gun or strong adhesive (if attaching soles)
- Buttons, zippers, or ties (optional for fastening)
🧷 Mastering the Braided Relief 3D Stitch
Before jumping into the boot project, it’s important to understand how the braided stitch works.
🧶 Basic Concepts:
- Front Post Double Crochet (FPdc): Yarn over, insert hook from front to back around the post of the stitch below, yarn over, pull through, and complete as a double crochet.
- Back Post Double Crochet (BPdc): Yarn over, insert hook from back to front around the post, yarn over, pull through, and complete as a double crochet.
🪢 Sample Stitch Pattern:
Here’s a simple braided stitch swatch pattern to practice:
- Foundation chain: Multiple of 6 + 2
- Row 1: Dc in 3rd ch from hook and each across
- Row 2: Fpdc around next 3 posts, Bpdc around next 3 posts, repeat to end
- Row 3: Repeat Row 2, but alternate groups of 3 Fpdc and 3 Bpdc to create the braid twist
Repeat until you get a raised, interwoven texture that resembles a braid or cable.
Practice this a few times — you’ll be using it as the main texture for the boot shaft.
👢 Step-by-Step: Crochet Boots with Braided Relief 3D Stitch
These instructions are written for a mid-calf adult-size boot, but can be customized for ankle boots or knee-highs.
🔹 Step 1: Create the Sole
You can crochet your own sole or use a ready-made slipper sole.
Crochet Sole Pattern (Medium Size):
- Chain 13
- Round 1: Hdc in 2nd ch from hook and in each ch across, 3 hdc in last ch. Rotate work, hdc in each chain back, 2 hdc in last ch. Join with sl st.
- Rounds 2–4: Continue in the round, increasing evenly at the toe and heel to maintain a rounded oval shape. End with a row of sc around.
Optional: Add non-slip soles or rubber grip fabric to the bottom using glue or sewing.
🔹 Step 2: Build the Foot (Instep and Heel)
This portion shapes the boot to your foot before working upward.
- Round 1: From the last round of the sole, sc in back loop only (BLO) in each stitch to create a sharp edge for the foot walls.
- Rounds 2–4: Work even in hdc or dc around.
- Mark the top center (toe) and work short rows back and forth over the heel section to shape it (usually 10–12 stitches wide), then sew or slip stitch it closed.
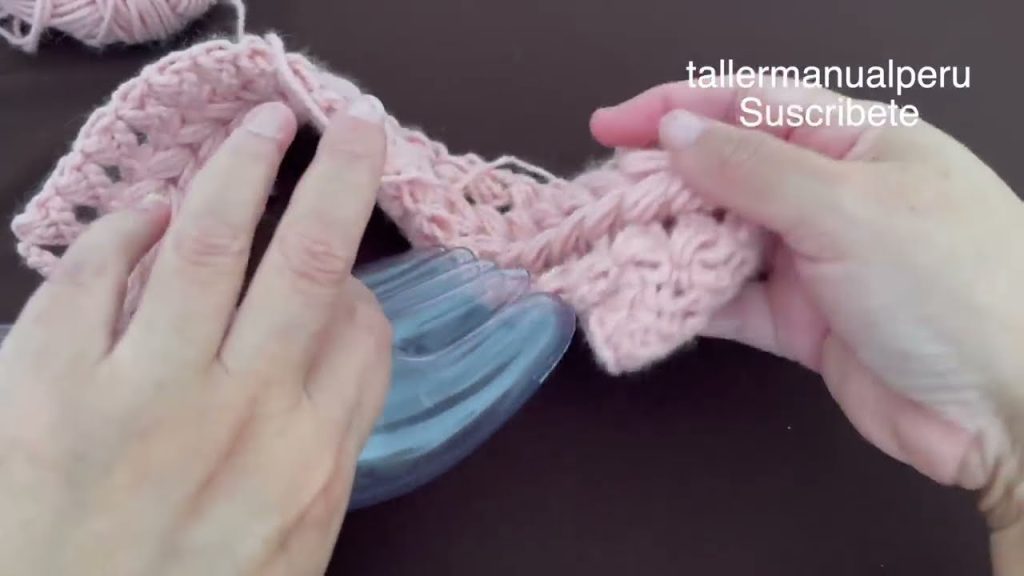
🔹 Step 3: Crochet the Shaft with Braided Relief Stitch
Now comes the star of the project — the braided 3D relief stitch.
- Round 1: Attach yarn to the top of the foot and work one round of dc around. Make sure the stitch count is a multiple of 6.
- Round 2: Fpdc around 3 stitches, Bpdc around next 3 stitches — repeat around.
- Rounds 3–15 (or until desired height): Repeat Round 2, alternating the groups every few rounds to create the braid twist.
Tip: You can adjust the height depending on the look you want — ankle boots, mid-calf, or knee-high.

🔹 Step 4: Add a Decorative Cuff (Optional)
Add a finishing touch with a fold-over cuff, ribbed trim, or fur edging.
Example cuff:
- Attach yarn at the back.
- Work in back-loop-only hdc rows around.
- Join the last row to the first with slip stitch to form a ring.
- Fold down for a cozy look.
🔹 Step 5: Add Fastenings or Embellishments
Customize your boots with:
- Buttons: Sew large decorative buttons down the side
- Toggles: Add leather toggle closures for a rustic feel
- Zippers: For a modern, functional touch
- Ties or laces: Crochet chains or i-cords for a lace-up look
🔹 Step 6: Final Assembly and Finishing Touches
- Weave in all ends using a yarn needle
- Block the boots by stuffing them with towels and lightly steaming if needed
- Attach soles, if using separate ones, with hot glue or strong adhesive

🖌️ Customization Tips
- 🎨 Colorwork: Use two-tone yarns to make the braid pattern stand out
- 🌟 Faux fur lining: Sew fleece or faux fur inside for extra warmth
- 👣 Sole inserts: Add foam insoles for comfort
- ✨ Sparkle yarn: Add a bit of glam with a metallic thread held together with your main yarn
🧼 Care Instructions
Handmade boots require some TLC:
- Spot clean or hand wash in cold water
- Air dry only, stuffed with paper towels to hold shape
- Avoid machine washing or drying, especially if using mixed materials like leather or rubber
💡 Final Thoughts
Crocheting your own boots might seem ambitious at first, but with the braided relief 3D stitch, you not only achieve a stunning look — you also create a functional, warm, and long-lasting pair of shoes. The bold texture gives your footwear an artisanal, high-fashion vibe, while the construction allows for comfort and durability.
Whether you’re making them for yourself, a gift, or even to sell, these boots will turn heads and warm hearts.
So grab your hook, pick your favorite yarn, and start stitching your way to cozy, custom, and chic crochet boots that you’ll love wearing every season. 🧶👢❤️
Video tutorial:


