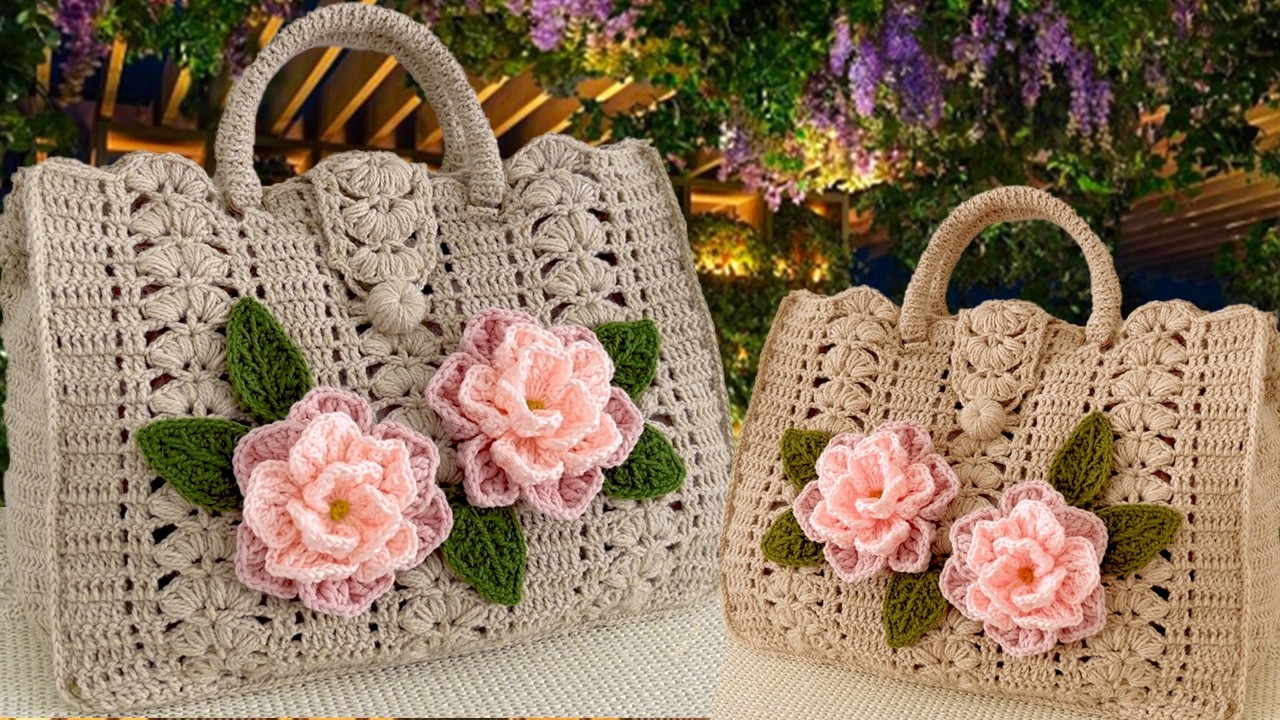
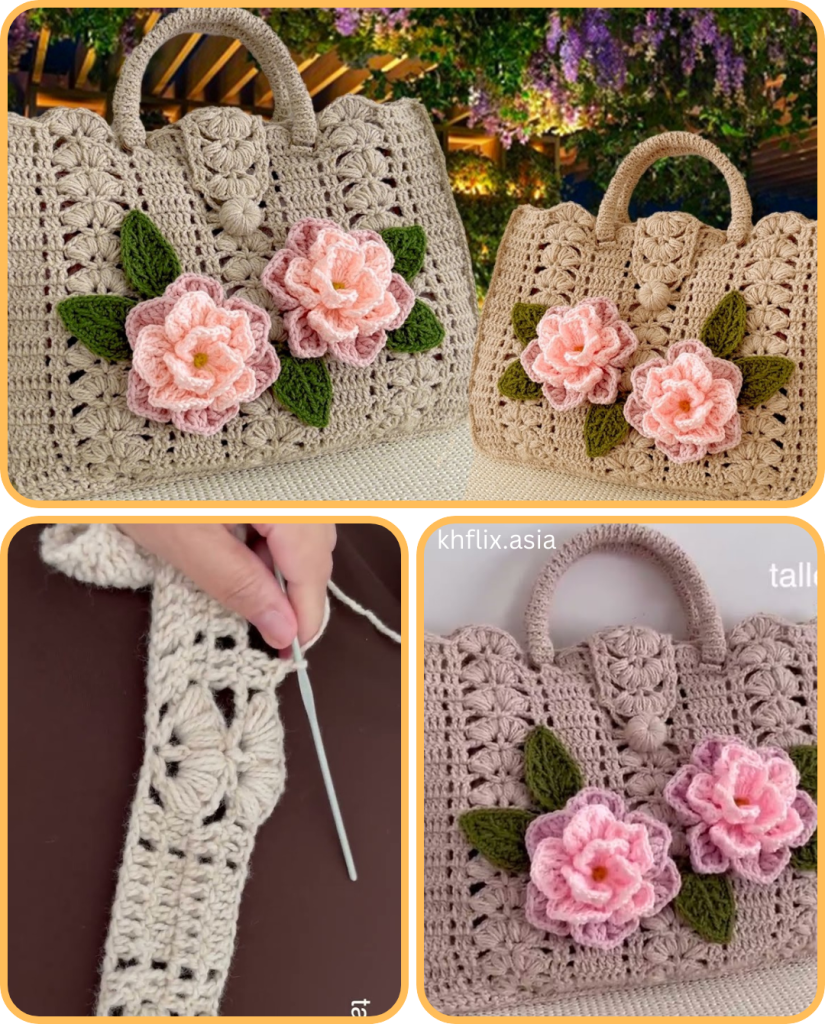
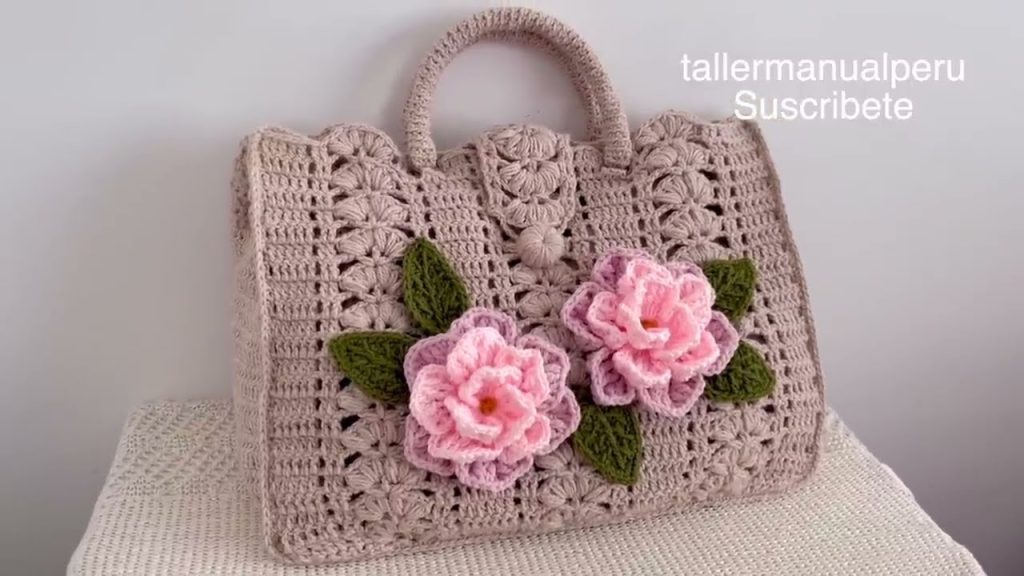
Crocheting your own accessories has always been a rewarding and creative pursuit, but there’s something especially exciting about crafting a 3D bag using the fan stitch. With its elegant texture and eye-catching dimensionality, this project is perfect for intermediate crocheters looking to expand their skills or advanced crafters wanting to create something uniquely stunning.
In this article, we’ll explore everything you need to know to crochet a beautiful 3D bag with the fan stitch, from selecting materials to step-by-step instructions, customization tips, and finishing techniques.

✨ Why Choose the Fan Stitch for a Bag?
The fan stitch is known for its ornate, layered appearance, resembling delicate fans or shell shapes. When used in 3D bag projects, this stitch adds:
- Volume and texture – perfect for a structured, dimensional look.
- Elegance and complexity – without requiring overly difficult techniques.
- Durability – when made with the right yarn and tension, fan stitches create a strong fabric that holds shape well.
This makes it an ideal choice for a bag that is not only functional but also beautiful and unique.
🧵 Materials You’ll Need
Before we jump into the pattern, gather your materials. Quality supplies will ensure the best results.
🧶 Yarn:
Choose a sturdy yarn that will hold shape, preferably:
- Worsted weight cotton or cotton-blend yarn – provides structure and a clean finish.
- Bulky acrylic or polyester – for a more robust, cushioned 3D effect.
Tip: Avoid slippery or too-stretchy yarns like bamboo or silk, as they won’t support the structure well.
🪡 Tools:
- Crochet hook: Usually a 5.0mm (H-8) or 5.5mm (I-9) hook for worsted weight, but check your yarn label for the suggested size.
- Scissors
- Stitch markers (optional but helpful)
- Yarn needle for weaving in ends
- Bag lining fabric (optional, for extra strength)
- Bag handles (leather, crochet, bamboo, or chain – your choice!)
- Magnetic clasp or zipper (optional for closure)
🧷 Understanding the Fan Stitch
Basic Fan Stitch Pattern:
A fan stitch is typically made by placing several double crochets (dc) into the same stitch or space. Here’s a simple version:
- 1 fan = 5 double crochets into one stitch or space
Foundation:
Make a chain in multiples of 6 + 1 (for turning)
Row 1:
- 1 dc in 4th chain from hook
- Skip 2 chains, 5 dc in next chain (fan made), skip 2 chains, 1 dc in next chain
- Repeat from * to end
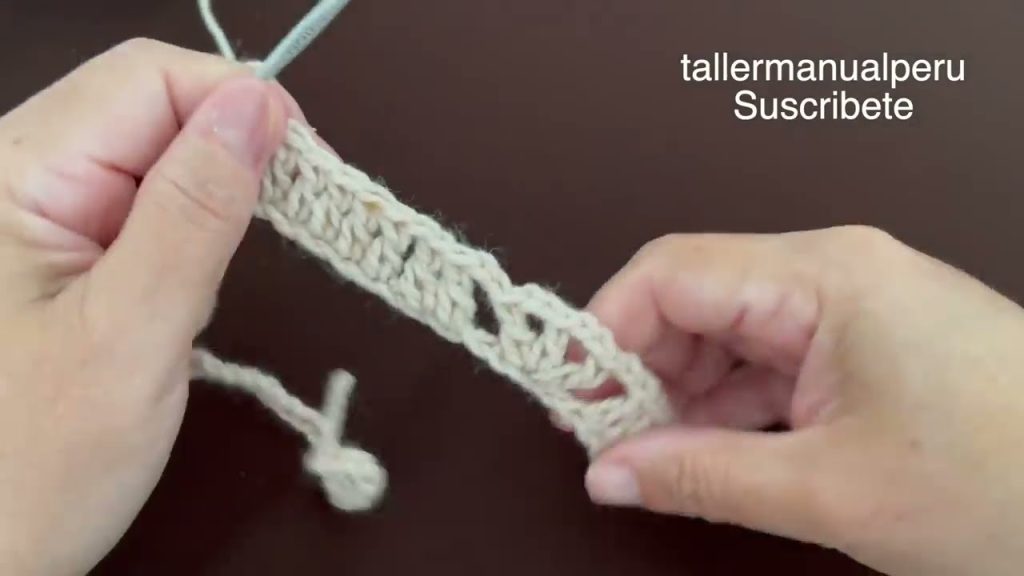
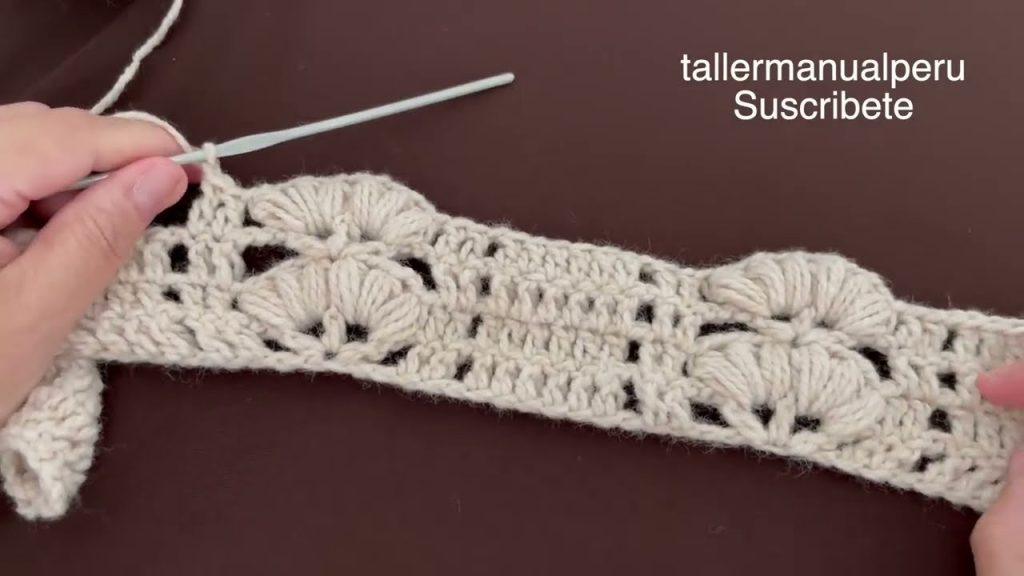
This creates a row of beautifully scalloped fans. By alternating the placement of fans in the next row, you’ll create a layered 3D texture that builds up beautifully for a bag.
🧺 Step-by-Step: How to Crochet the 3D Fan Stitch Bag
Let’s get started on your gorgeous bag project. This guide assumes basic familiarity with crochet terms and stitches.
🔹 Step 1: Base of the Bag
Start by making a flat oval base using single crochet or half-double crochet.
1. Chain 31 (for a medium-sized base)
2. Round 1: Work 1 hdc in 2nd ch from hook, hdc in each ch across, work 3 hdc in last ch.
   Turn to the opposite side of the chain and continue with hdc in each ch back down the other side.
   Work 2 more hdc in the first ch to round the corner. Join with sl st.
3. Round 2-4: Continue working in the round, increasing evenly at both ends to keep the oval shape.
Adjust the number of rounds depending on how large you want your bag base.
🔹 Step 2: Creating the Fan Stitch Body
Now, you’ll switch to working in rows or rounds using the fan stitch pattern.
1. Round 1: Ch 3 (counts as dc), *skip 2 sts, 5 dc in next st (fan), skip 2 sts, dc in next st*, repeat around.
2. Round 2: Ch 3, 2 dc in same st as ch 3, *skip 2 dc, dc in next dc (center of previous fan), skip 2 dc, 5 dc in next dc (above previous round’s dc)*.
3. Repeat round 2 to build the fan stitch texture until your bag reaches the desired height (approx. 20–25 rows).
You’ll see the 3D effect growing as the fans stack and alternate!
🔹 Step 3: Shaping the Opening
Once your desired height is reached:
- Switch to half double crochet or single crochet for the top few rows to tighten and shape the bag’s opening.
- You can also add a decorative edge like picot, crab stitch (reverse single crochet), or a scalloped trim.
🔹 Step 4: Handles and Finishing
Choose how you want your bag to be carried:
Options:
- Crochet handles: Use tightly stitched chains or tubular crochet pieces.
- Attach wooden or bamboo handles: Sew securely onto the inside top row.
- Metal chain straps: Use grommets or eyelets for a professional finish.
Optional Additions:
- Bag Lining: Sew a fabric lining with pockets and stitch it to the inside using a needle and thread or a sewing machine.
- Closure: Add a magnetic snap, zipper, or even a drawstring to keep your items secure.
🖌️ Customization Tips
Want to make your bag even more unique? Here are some ideas:
- 🎨 Color play: Use ombré yarn or alternate colors in each fan row for a dramatic effect.
- 🌸 Embellishments: Sew on beads, buttons, or small crochet flowers.
- 👜 Shape variety: Instead of an oval, try a circular base for a bucket-style bag or a square for a tote.
- 🧶 Add fringe: Add long yarn fringes to the bottom edge for a boho look.
🧼 Care Tips for Your Crochet Bag
To keep your handmade 3D fan stitch bag in great shape:
- Hand wash in cool water with gentle detergent
- Lay flat to dry, shaping it while damp
- Store upright or hanging to maintain structure
- Avoid overloading with heavy items, especially if unlined
💡 Final Thoughts
Crocheting a 3D bag using the fan stitch is a fun, stylish, and satisfying project that showcases your skills and creativity. Whether you’re making it for everyday use, as a gift, or even to sell, the texture and beauty of the fan stitch give your bag a truly luxurious, handmade look.
This project also offers plenty of room for personalization – from color choices to shapes and closures – allowing you to make a bag that’s as functional as it is fabulous.
So grab your yarn, pick your favorite hook, and start stitching your way to a gorgeous 3D crochet bag today. Happy crocheting! 🧶👜💖
Video tutorial:


