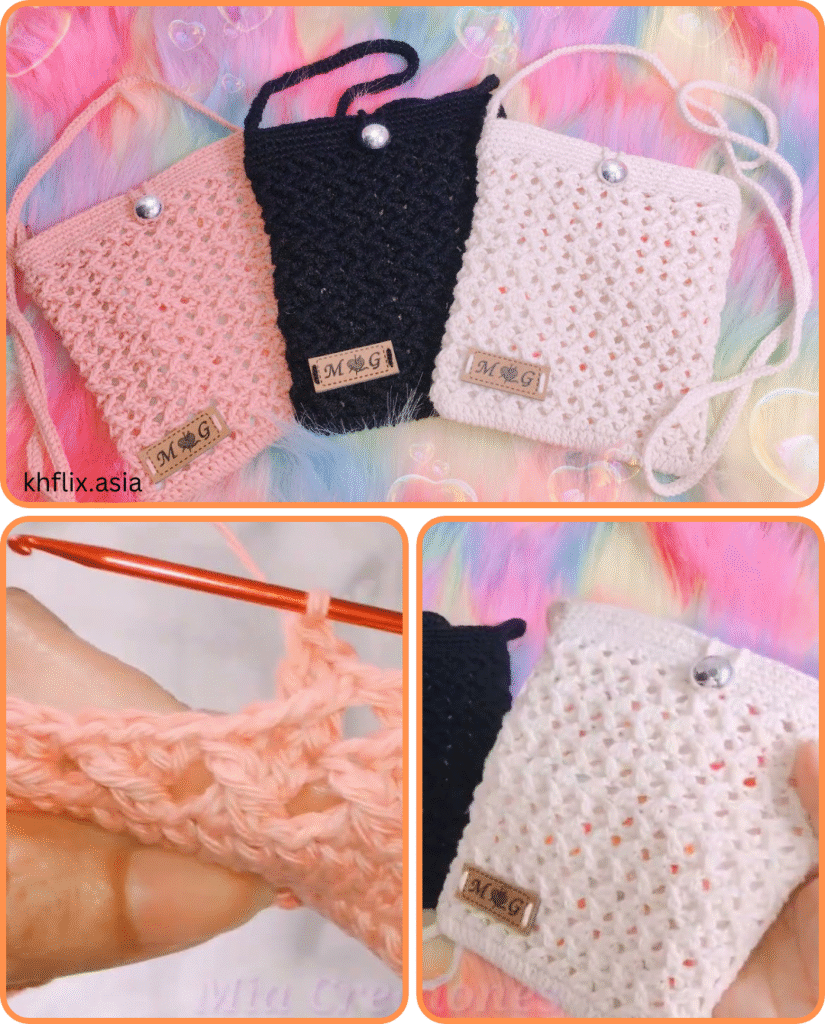
✨ Overview:
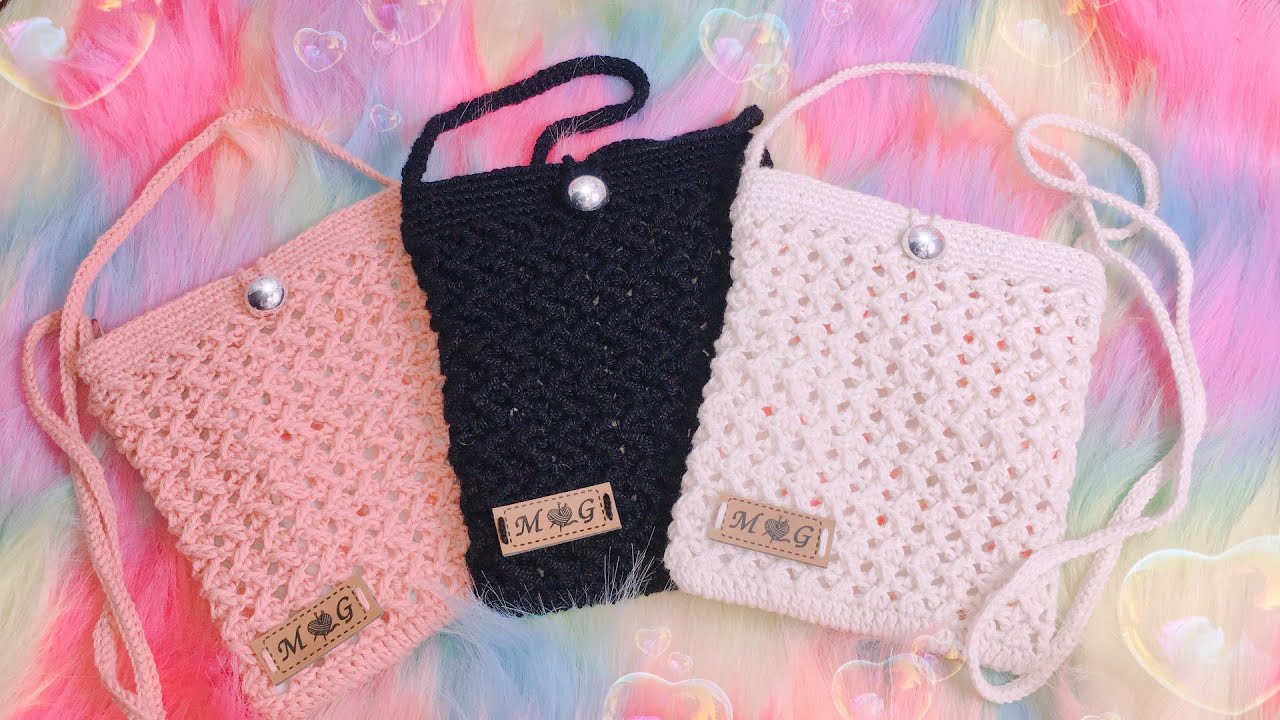
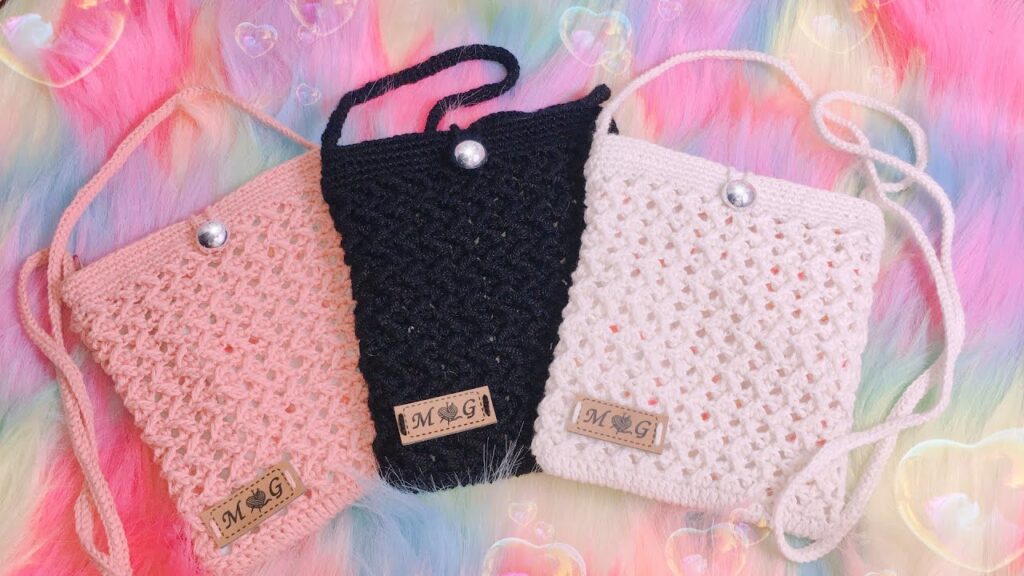
A mini crochet wallet is a compact pouch that can hold coins, cards, and other small items. This tutorial uses basic stitches and a simple rectangular shape folded and seamed to form the wallet.
📦 Materials Needed:
- Yarn: Worsted weight (category 4); cotton yarn is ideal for durability
- Hook: 4.0 mm (G-6) crochet hook
- Notions:
- Yarn needle (for weaving ends)
- Scissors
- Stitch marker (optional)
- Button or snap for closure
- Needle and thread (for attaching button)
- Optional: zipper or lining fabric
🧵 Stitches & Abbreviations (U.S. Terms):
- ch – chain
- sc – single crochet
- sl st – slip stitch
- st(s) – stitch(es)
- RS – right side
- WS – wrong side
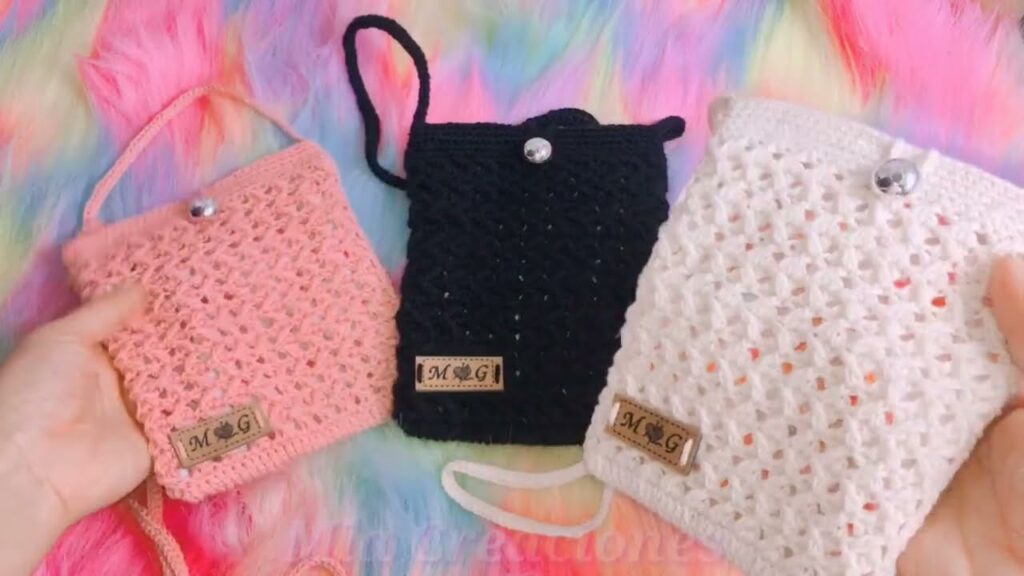
📐 Finished Size:
Approximately 4 x 3 inches (folded) – can be customized by adjusting foundation chain length and row count.
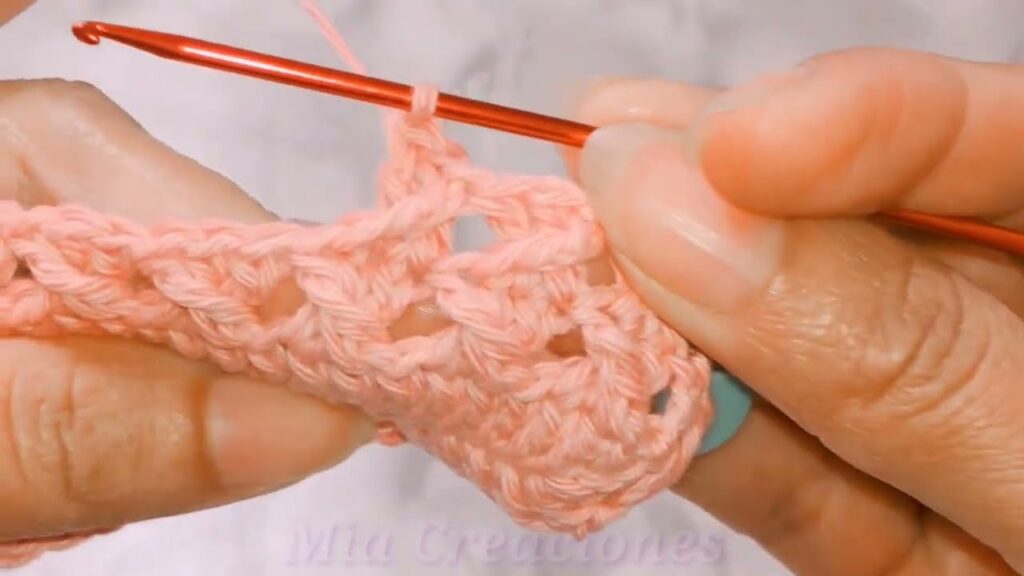
🪡 Instructions:
STEP 1: Make the Base Rectangle
This forms the body of your wallet.
Foundation Chain:
Ch 21 (or as wide as you want your wallet to be).
Row 1:
Sc in 2nd ch from hook and in each ch across. (20 sc)
Rows 2–24:
Ch 1, turn. Sc in each st across. (20 sc)
Tip: Adjust the number of rows depending on how tall you want your wallet. Fold your work into thirds to check proportions.
STEP 2: Create the Pocket Fold
Now that you have a rectangle, fold the bottom third upward to form the pocket part. Leave the top third as the flap.
STEP 3: Seam the Sides
Seam the sides of the pocket:
- Fold the bottom third up.
- Use a sl st or whip stitch with the yarn needle along each side to close the pocket.
- Weave in all ends securely.
STEP 4: Add a Buttonhole Flap (Optional)
If you want a buttonhole for closure:
Row A (on flap edge):
Find center 3 sts at top of the flap. Skip them, and sc in all other sts.
Row B (optional):
Ch 1, turn. Sc across, ch 2 over the skipped sts from previous row to form the hole.
Finish off and weave in end.
Alternatively, you can sew a snap button or a magnetic clasp.

STEP 5: Attach the Button
- Close the flap to find where it meets the body of the wallet.
- Sew a button in the matching spot using needle and thread.
- Make sure the flap can securely close over it.
STEP 6: Add Lining or Zipper (Optional)
For fabric lining:
- Cut a rectangle of fabric slightly smaller than your crochet piece.
- Fold and sew it inside the pocket using needle and thread.
For zipper:
- Use a needle and thread to hand-sew a zipper along the top edge of the pocket before attaching the flap.
- Make sure it opens/closes smoothly.
🧽 Finishing Touches
- Weave in all loose ends.
- Block your wallet gently if needed for shape.
- You can add decorative elements like embroidery, appliqués, or a tassel.
🎁 Variations:
- Use variegated yarn for color changes without weaving in ends.
- Add a keyring loop on one side.
- Try textured stitches like half-double crochet or moss stitch for a different look.
- Make it larger to hold a phone or passport.
Video tutorial:
👜 You’re Done!
You’ve just made a cute and practical mini crochet wallet! This easy project is a great stash-buster and can be completed in under an hour. Whether for personal use or gifting, it’s a handy little item with endless custom options.