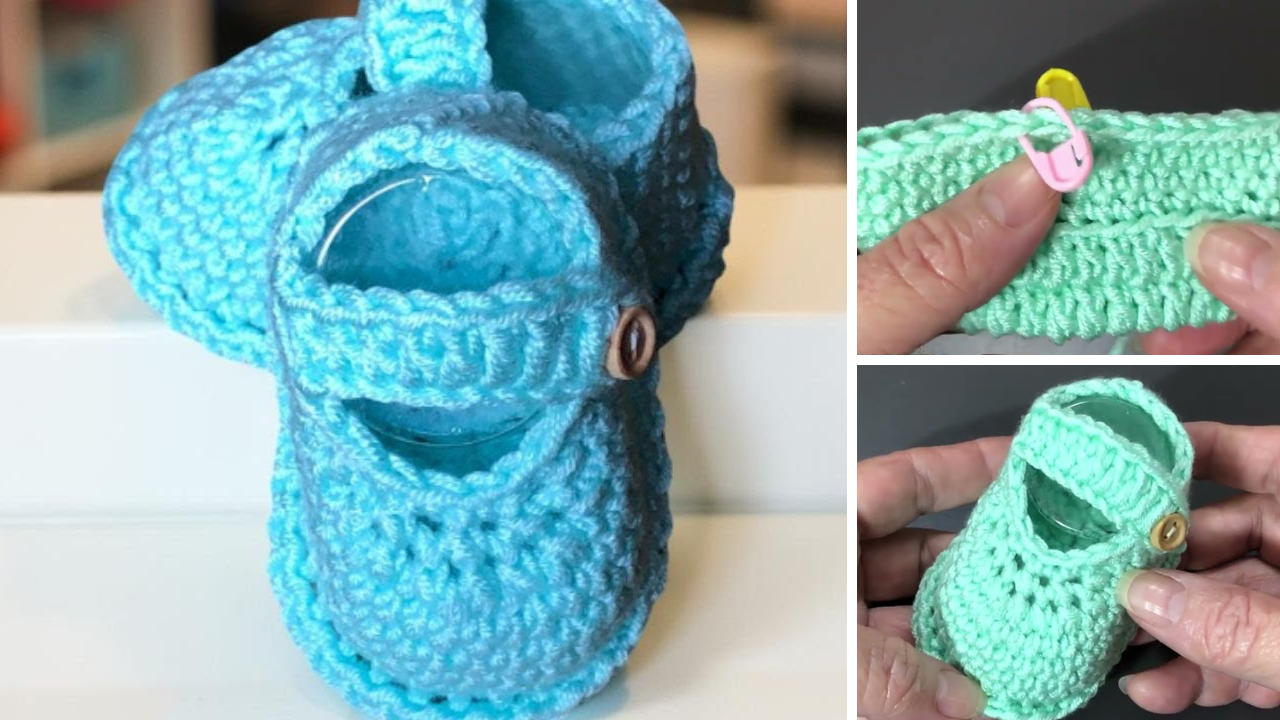
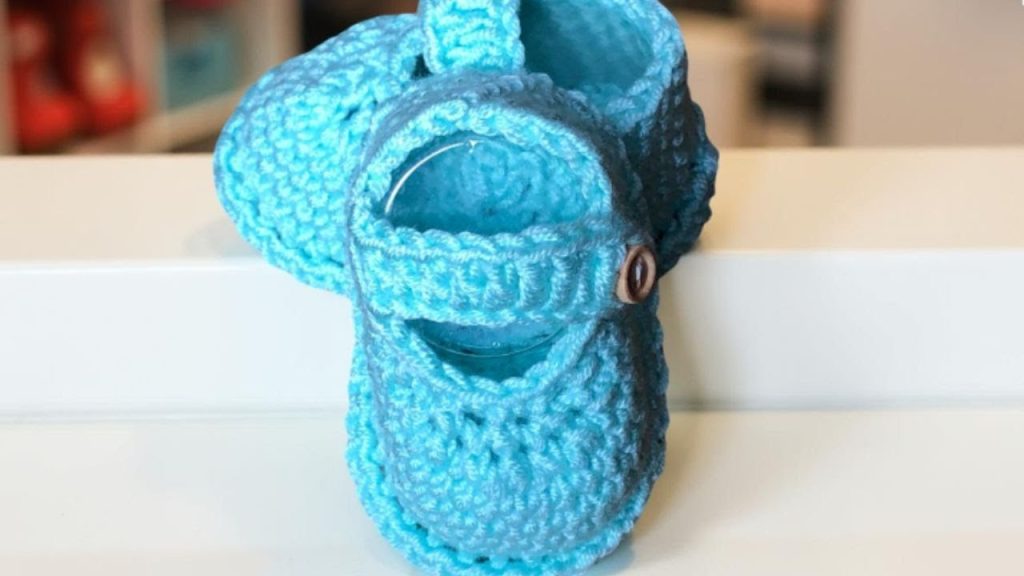
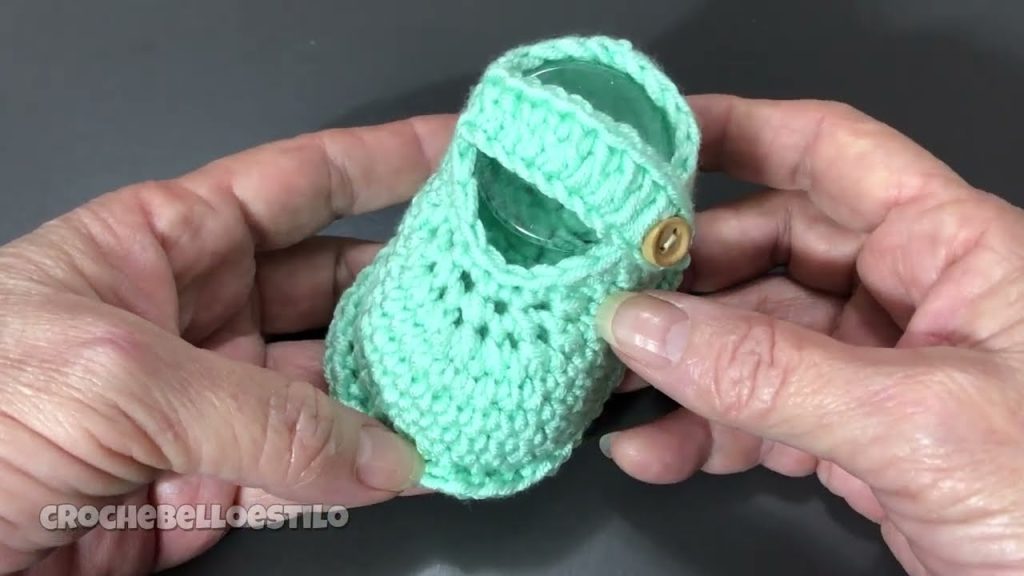
Hello, fellow makers! Are you ready to create something tiny, adorable, and incredibly practical? I’m excited to share this detailed pattern for the Little Steps Bootie, a sweet and simple crochet shoe for babies aged 0-3 months. This pattern is perfect for a baby shower gift, a thoughtful present for a new parent, or just to keep those tiny toes warm and cozy.
The pattern is designed to be a great project for all skill levels. We’ll start with a simple oval sole, build up the sides with basic stitches, and then add a charming strap for a secure fit. The final decorative edge and button closure give it a polished, professional look that will make everyone say, “Aww!” Let’s grab our hooks and yarn and get ready to create some little booties!
Why You’ll Love Crocheting These Booties:
- Quick to Make: The small size of this project means you can whip up a pair in an afternoon.
- Beginner-Friendly: The pattern uses a variety of basic stitches that are easy to master.
- Customizable: Easily change colors, yarn, and buttons to personalize each pair.
- Practical and Adorable: A perfect handmade gift that is both beautiful and functional.
What You’ll Need:
- Yarn: Hobby Baby Kids yarn or any light worsted / DK (Category 3) yarn.
- Crochet Hook: 4mm hook, or the size recommended for your yarn.
- Yarn Needle (Tapestry Needle): For weaving in all those ends.
- Scissors:
- 2 Small Buttons: For the strap closure.
Essential Crochet Abbreviations:
- ch: chain
- sl st: slip stitch
- sc: single crochet
- dc: double crochet
- st(s): stitch(es)
- inc: increase (2 stitches in the same space)
- dec: decrease (working two stitches together)
- FLO: front loop only
- BLO: back loop only
- FO: fasten off

The Pattern: The Little Steps Bootie
This pattern is worked in the round, starting with the sole and building up the sides.
Part 1: The Sole
- Starting Chain: Ch 12.
- Round 1: In the 4th ch from the hook, make
2 dc(first inc).1 dcin each of the next 7 chains. In the last ch, make6 dc(toe curve). Now, working on the other side of the chain,1 dcin each of the next 7 stitches. In the last st, make3 dc(heel curve). Close the round with asl stto the firstdc(the ch-3 does not count as a stitch). - Round 2:
Ch 3(counts as firstdc). Make2 dcin the next 3 sts (3 increases).1 dcin each of the next 7 sts. Make2 dcin each of the next 6 sts (6 increases for the toe).1 dcin each of the next 7 sts. Make2 dcin each of the next 3 sts (3 increases for the heel). Close the round with asl stto the top of the ch-3.
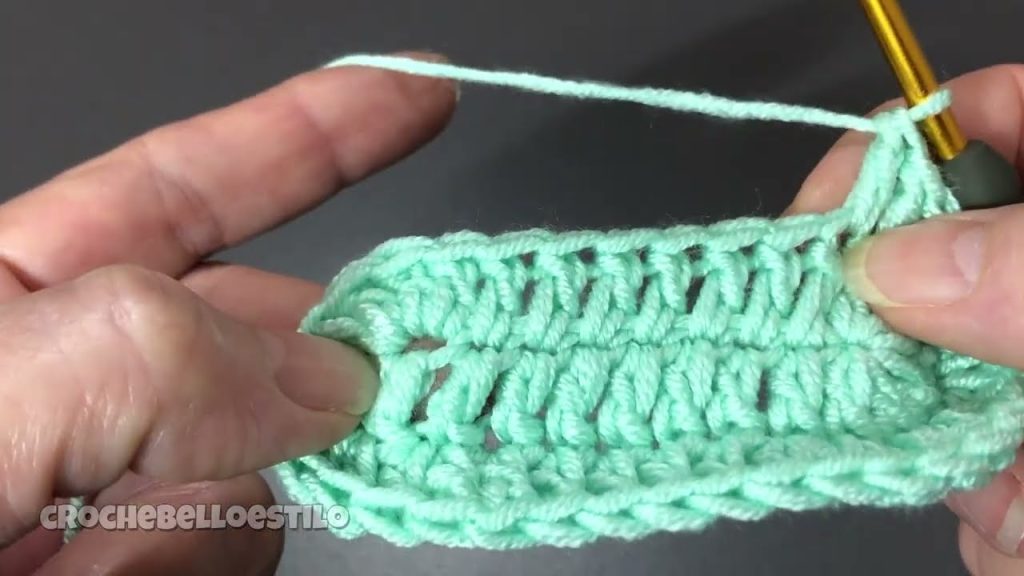
Part 2: The Upper Part of the Shoe
- Round 3:
Ch 1.Scin the back loop only around the entire sole. Close with asl stto the firstsc. (This creates a raised ridge that defines the sole). - Rounds 4-6:
Ch 1.Scin both loops around the entire shoe. Close with asl stto the firstsc. - Round 7 (Toe Shaping):
Ch 1. Workscin each st until you are at the center toe section.- Make 8
sc dec(decrease by working two single crochets together). - Work
scin each remaining st. Close with asl stto the firstsc.
- Round 8 (Final Toe Shaping):
Ch 1. Workscin each st until you are at the center toe section.- Make 5
sc dec. - Work
scin each remaining st. Close with asl stto the firstsc.
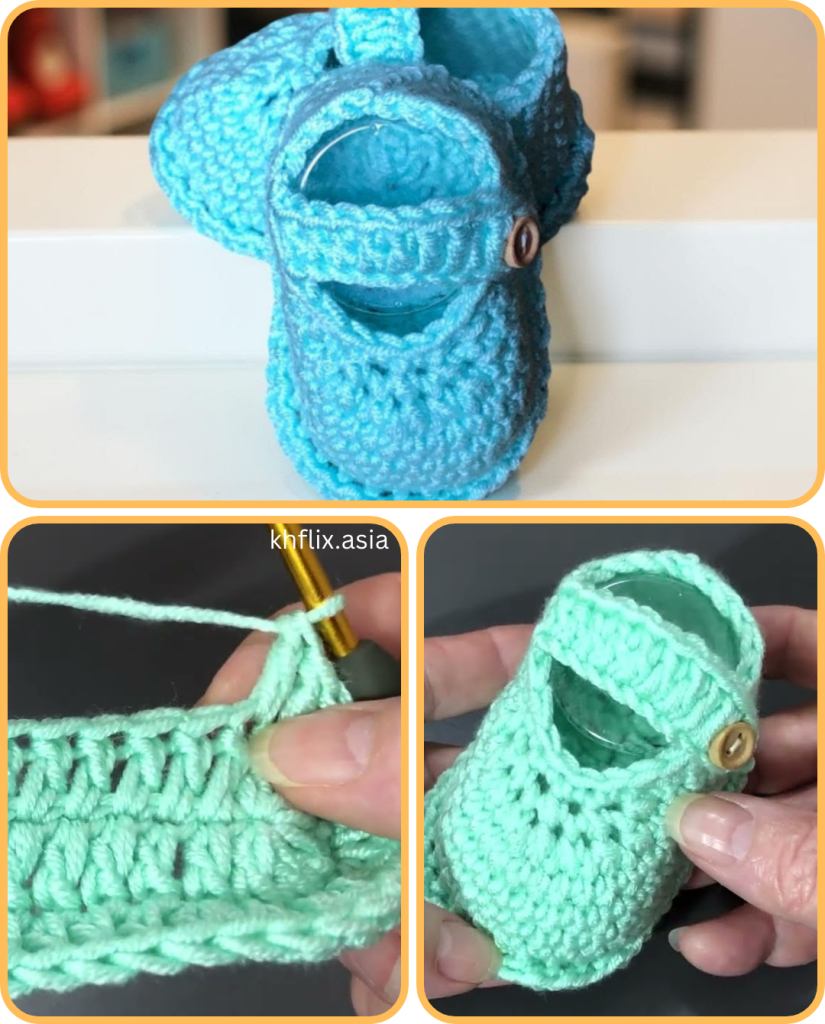
Part 3: The Strap
- Mark Strap Placement: Fold the shoe in half to find the center on both sides of the opening. Attach your yarn to one side of the shoe at the desired height for the strap.
- Create the Strap:
Ch 12.- Starting in the 3rd ch from the hook, make
1 dcin each of the next 10 stitches. - Skip one stitch on the shoe and attach the strap with a
sl stin the next st.
- FO, leaving a tail for weaving in.
- Note: For the second shoe, make sure to attach the strap on the opposite side.
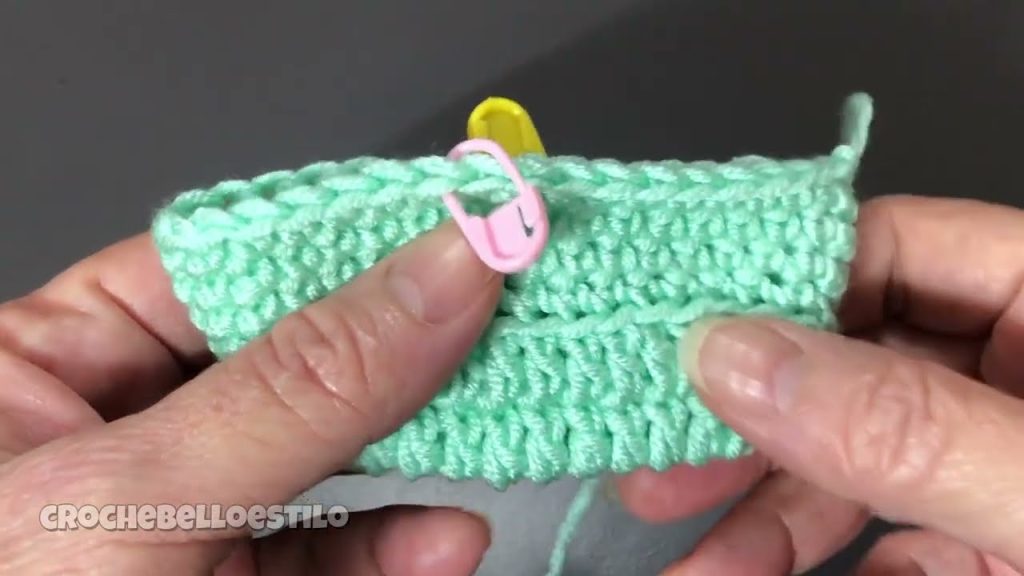
Part 4: Finishing Touches
- Decorative Edge: Join the yarn to the back of the shoe along the ridge you created in Round 3.
- Work a decorative edge by alternating between
sl standch 1in each of the back loops around the entire shoe.
- Work a decorative edge by alternating between
- FO, leaving a tail for weaving in.
- Attach the Button: Sew a button to the opposite side of the shoe from the strap. The button should fit through the small hole at the end of the strap.
- Weave in All Ends: Use your yarn needle to weave in all loose ends securely.
Congratulations, you’ve created a beautiful and unique pair of Little Steps Booties! Get ready to give them as a wonderful gift or to adorn the feet of a tiny one you love. Happy hooking!
Video tutorial:


