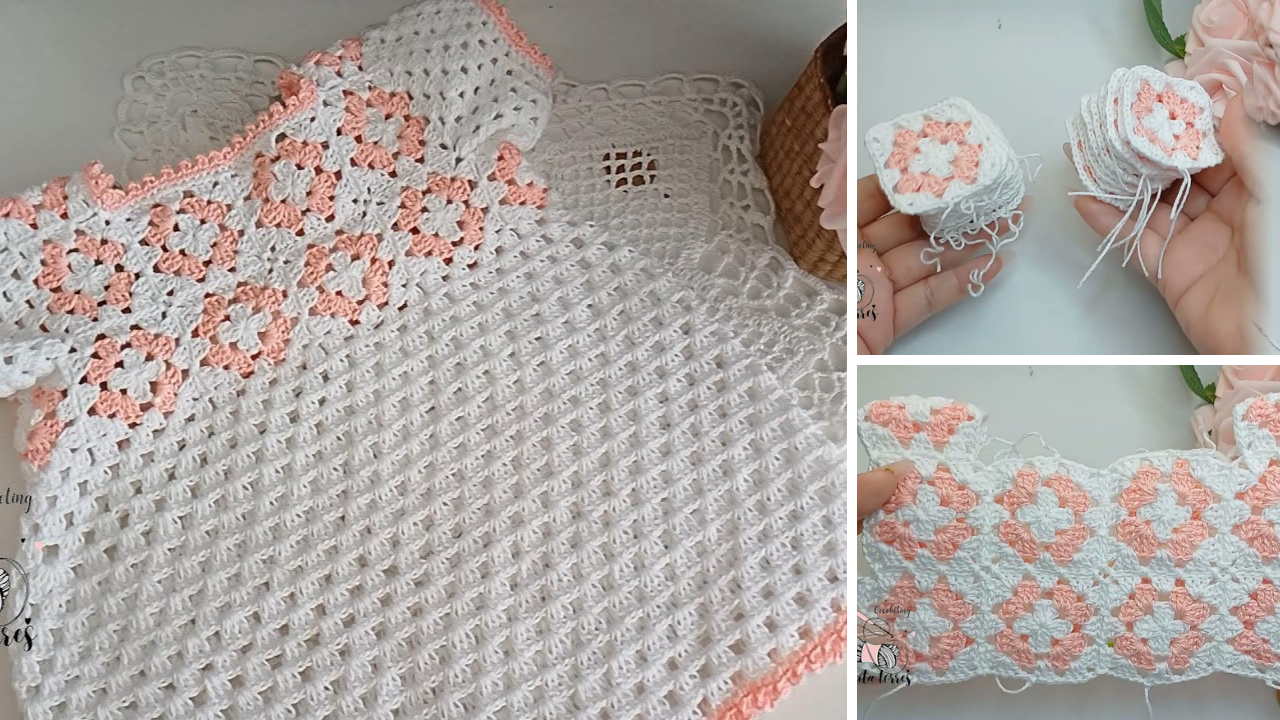
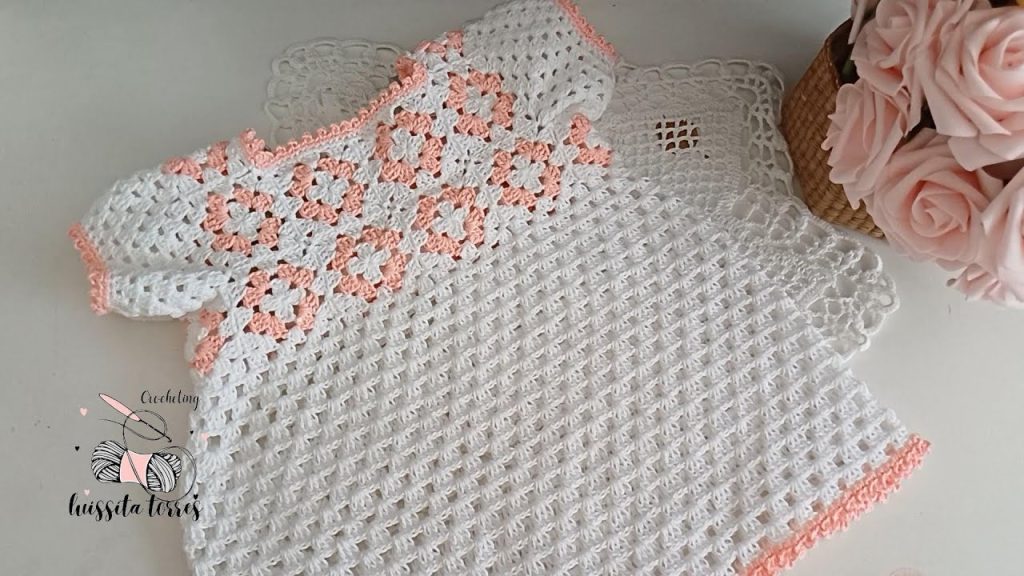
Hello, fellow makers! Are you looking to create a truly unique and beautiful dress for a special little girl in your life? I’m thrilled to share this detailed pattern for the Vintage Blossom Dress, a charming frock made entirely from classic granny squares. This dress has a wonderful retro feel, with a fitted bodice and a flowing skirt, perfect for a special occasion or just for adding a touch of handmade elegance to a baby’s wardrobe.
The dress is constructed from a total of 20 granny squares, allowing you to play with a variety of color combinations and yarn choices. The pattern is designed for a 9 to 12-month-old, but you can easily adjust the size by using a different yarn weight or hook size. The final picot edging on the sleeves, skirt, and collar adds a delicate and polished touch that makes this dress a true heirloom piece. Let’s grab our hooks and yarn and get ready to create something beautiful!
Why You’ll Love Crocheting This Dress:
- Unique Construction: The dress is built from individual granny squares, making it a fun and modular project.
- Versatile: You can use a single color for a classic look or use multiple colors for a vibrant, modern dress.
- Skill-Building: You’ll practice a variety of techniques, including creating granny squares, joining them, and working in the round.
- Perfect for Gifting: A handmade granny square dress is a thoughtful and cherished gift that will be treasured for years to come.
What You’ll Need:
- Yarn: Omega brand “Emily” yarn or any 1mm thick, 100% mercerized cotton yarn. You will need a few different colors.
- Crochet Hook: A 2mm crochet hook.
- Yarn Needle (Tapestry Needle): For weaving in all those ends.
- Scissors:
- Buttons: For the back opening.

Essential Crochet Abbreviations:
- ch: chain
- sl st: slip stitch
- sc: single crochet
- dc: double crochet
- st(s): stitch(es)
- sp: space
- fan: a group of
(3 dc, 2 ch, 3 dc)in a single space - picot: a decorative stitch of
(sl st, ch 3, sl st) - FO: fasten off
The Pattern: The Vintage Blossom Dress (9-12 months)
This dress is constructed by first making 20 granny squares, then joining them, and finally adding the sleeves, skirt, and finishing details.
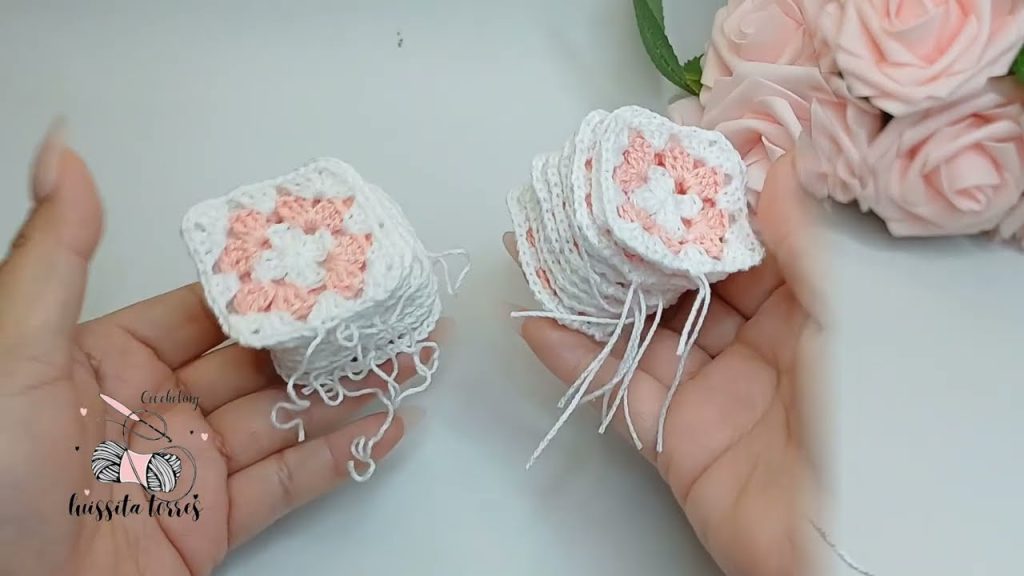
Part 1: The Granny Squares (Make 20)
- Start: Create a slip knot and
ch 4. Join with asl stto form a ring. - Round 1 (Color A):
Ch 3(counts as firstdc),2 dcin the ring,ch 2.3 dcin the ring,ch 2. Repeat this twice more.Sl stto the 3rd ch of the beginning ch-3 to join.
- Round 2 (Color B):
- Join the new yarn in any
ch 2space. Ch 3,2 dcin the space,ch 2,3 dcin the same space (first corner).Ch 1.- Repeat the corner and
ch 1in eachch 2space around. Sl stto the 3rd ch of the beginning ch-3 to join.
- Join the new yarn in any
- Round 3 (Color A):
- Join the new yarn in any
ch 1space. Ch 3,2 dcin the space,ch 1.- In the next corner
ch 2space, make a fan. Ch 1. In the nextch 1space, make3 dc.- Repeat this pattern around, alternating a fan in the corners and
3 dcin the side spaces. Sl stto the 3rd ch of the beginning ch-3 to join.
- Join the new yarn in any
- FO, leaving a long tail for weaving in.
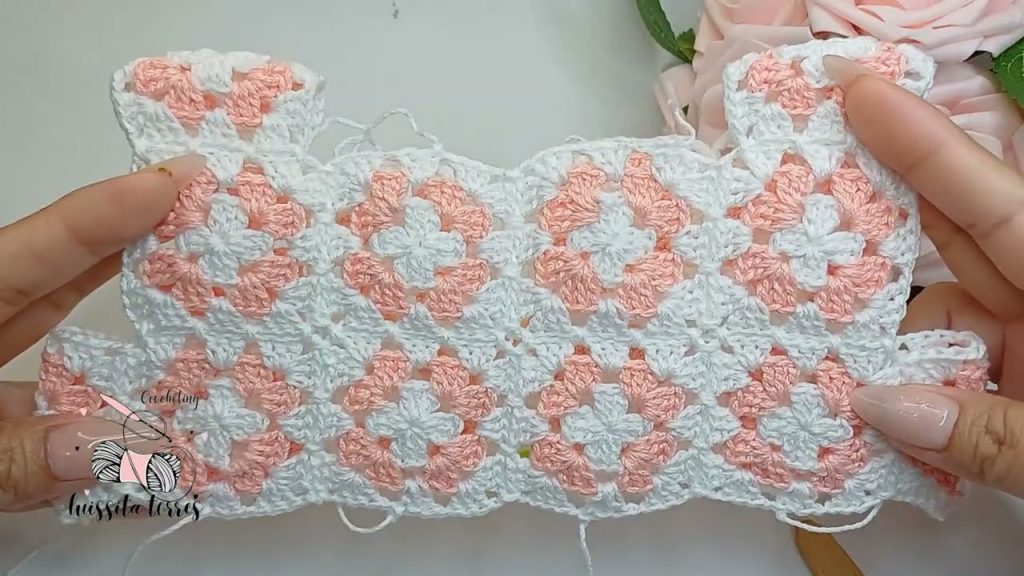
Part 2: Joining the Squares
- The squares are joined by placing them right side to right side and using a slip stitch or single crochet to connect the chain spaces.
- Assemble the squares into three sections:
- Waist: A group of 10 squares.
- Back: A group of 4 squares.
- Shoulders/Straps: The remaining squares are used for the shoulder straps and to form the dress’s top.
Part 3: The Sleeves
- Attach yarn to the armhole opening.
- Work a total of five rounds of
(3 dc, ch 1)in each chain space around the armhole, making sure to work a singledcwhere the squares join. - Reducing the Sleeve (Rounds 6 & 7): Work
2 dcin each chain space around, without a separating chain, to create a tighter fit. - Final Edging:
Scin the first st,ch 3,sl stin the same st to create a picot.Sl stin the next st, and then repeat the picot stitch around the entire sleeve opening.
Part 4: The Skirt and Edging
- Attach yarn to the bottom of the waist section.
- Work in the round, creating a pattern of
(3 dc, ch 1)in each chain space. - Repeat this pattern for a total of 22 rows, or until the skirt reaches the desired length.
- Final Edging: Add a picot edging to the hem of the skirt, following the same instructions as for the sleeves.

Part 5: Finishing Touches
- Back Opening:
- On one side of the back opening, work a few rows of
sc. In the third row, create buttonholes by making a series ofsc, followed bych 2, skipping two stitches, and then continuing withsc. - On the other side of the back opening, work four rows of
scto create a stable base for the buttons.
- On one side of the back opening, work a few rows of
- Collar: Work a final picot edging around the entire neckline and down the back opening on the buttonhole side.
- Weave in All Ends: Use your yarn needle to weave in all loose ends securely.
- Attach Buttons: Sew the buttons onto the appropriate side of the back opening.
Congratulations, you’ve created a beautiful and unique Vintage Blossom Dress! This will be a special and cherished piece for any little girl. Happy hooking!
Video tutorial:


