
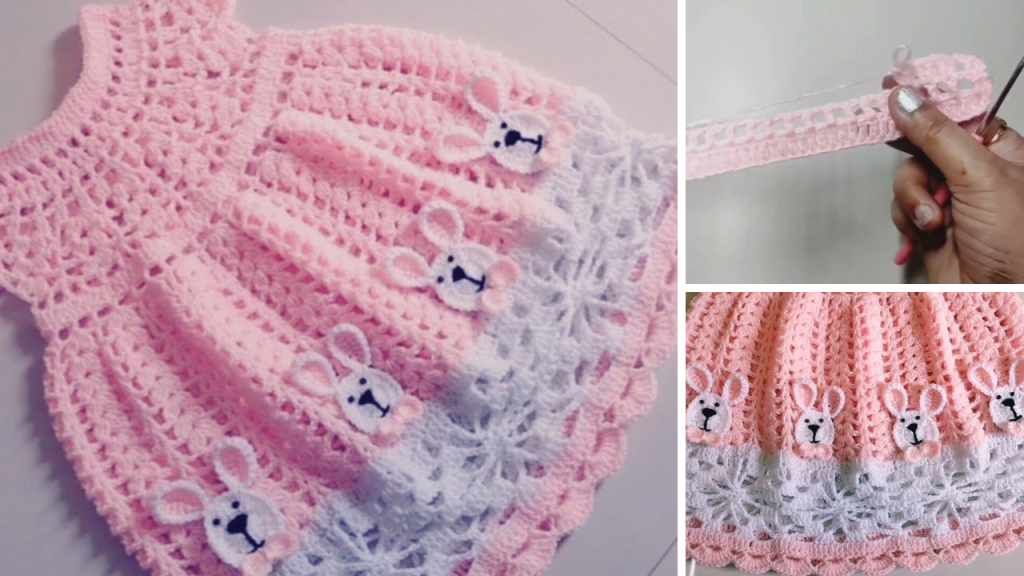
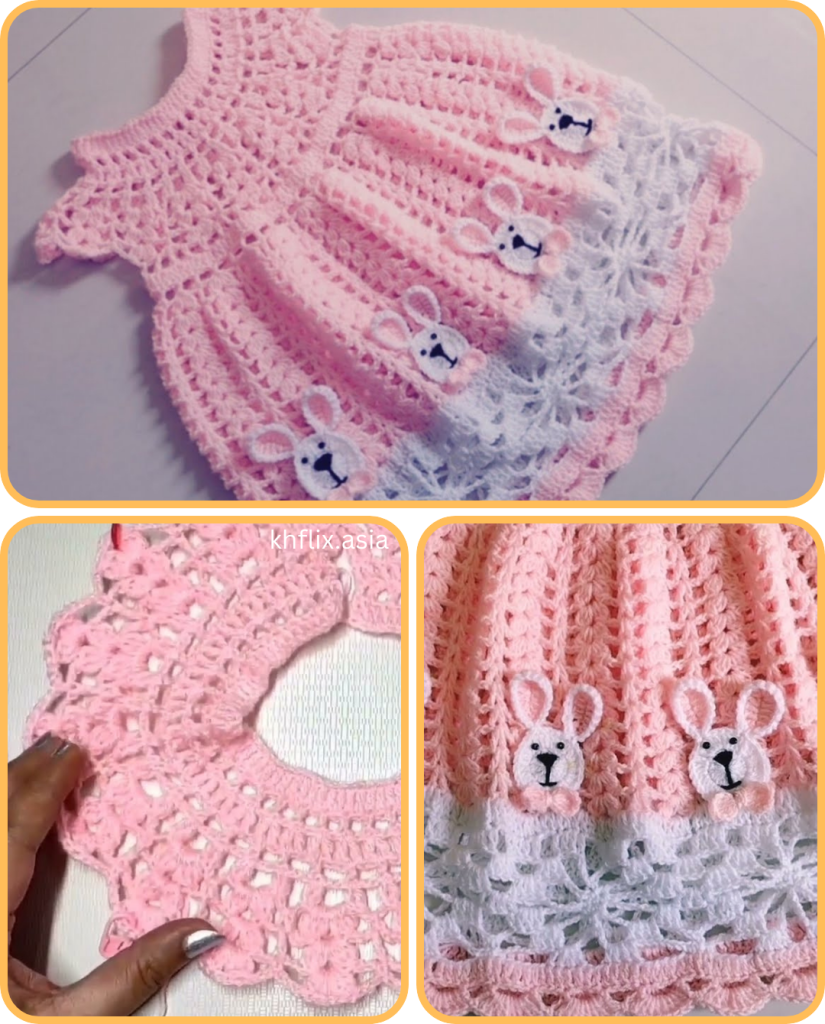
Hello, fellow makers! Are you looking for the perfect project to create for a little one in your life? Something charming, handmade, and absolutely adorable? I’m excited to share this detailed pattern for the Meadow Melody Frock, a beautiful crochet dress for baby girls. This frock features a classic round yoke, a delicate fan-stitch skirt, and a decorative border that gives it a sweet, finished look. It’s the perfect project for a baby shower gift, a first birthday outfit, or just to show some love to a precious little one.
What makes this pattern so special is its timeless design and the clear, step-by-step instructions that make it accessible for a variety of skill levels. The pattern is provided in multiple sizes, from 3 months all the way up to 6 years, so you can make one for every stage of a child’s growth. Let’s grab our hooks and yarn and get ready to create something truly magical!

Why You’ll Love Crocheting This Frock:
- Stunning Design: The combination of the round yoke and fan-stitch skirt creates a classic, elegant look.
- Versatile: The pattern includes multiple sizes, so you can make it for a range of ages.
- Skill-Building: You’ll practice a variety of stitches, including fan stitches, double crochet clusters, and a decorative shell border.
- Customizable: Easily change colors, add appliques, or adjust the skirt length to personalize the frock.
- Heartfelt Gift: A handmade baby frock is a thoughtful and cherished gift that will be treasured for years to come.
What You’ll Need:
- Yarn: 4-ply wool is recommended for a soft and durable finish. The amount will vary by size.
- Crochet Hook:
- 3-6 months: 2.5 mm hook
- 9-12 months: 3.5 mm hook (for the featured frock)
- 2-4 years: 3.0 mm hook
- 4-6 years: 3.5 mm hook
- Yarn Needle (Tapestry Needle): For weaving in all those ends.
- Scissors:
- Stitch Markers: To mark the sleeve divisions.
- Buttons: For the back opening.
Essential Crochet Abbreviations:
- ch: chain
- sl st: slip stitch
- dc: double crochet
- st(s): stitch(es)
- sp: space
- fan st: fan stitch (a cluster of stitches in one space)
- FO: fasten off
The Pattern: The Meadow Melody Frock
This pattern is worked from the top down, starting with the round yoke.
Part 1: The Yoke
Size: 9-12 months (for other sizes, refer to the “Sizing and Materials” section above)
- Starting Chain: Ch 76 + 3 (the 3 chains count as your first
dc). - Row 1: Work
dcin the 4th ch from the hook and in each ch across. You should have a total of 76dcstitches. - Row 2 (Create Chain Spaces):
1 dcin the first st,ch 1,sk 1 st. Repeat this across the row. You should have 36ch 1spaces. - Row 3 (Building the Yoke): This row begins the fan stitch pattern. Work 2-dc clusters and fan stitches, following the instructions from the video to build out the yoke pattern.
- Continue building the yoke with rows of different stitches until the yoke is the desired size. The final row should have a total of 18 fan stitch groups.
Part 2: Dividing for Sleeves and Body
- Mark Divisions: Lay the yoke flat and use stitch markers to divide the fan stitch groups.
- Front: 6 fan stitch groups.
- Back: 6 fan stitch groups (3 on each side).
- Sleeves: 3 fan stitch groups on each side.
- Join the Body: Join the sleeve sections and continue working in the round to form the main body of the frock. This will close the armholes and create a single, continuous round for the skirt.
- First Skirt Row: In the first fan row of the skirt, you should have a total of 20 fan stitches.

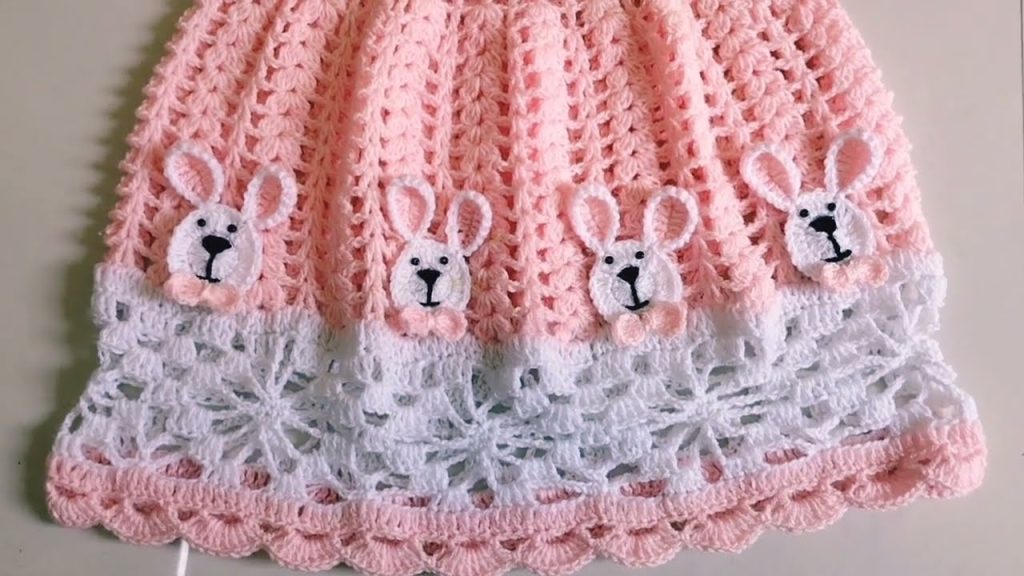
Part 3: The Skirt
- Continue Fan Stitch Pattern: Continue working in the round, repeating the fan stitch pattern for a total of 14 rows, or until the skirt reaches the desired length.
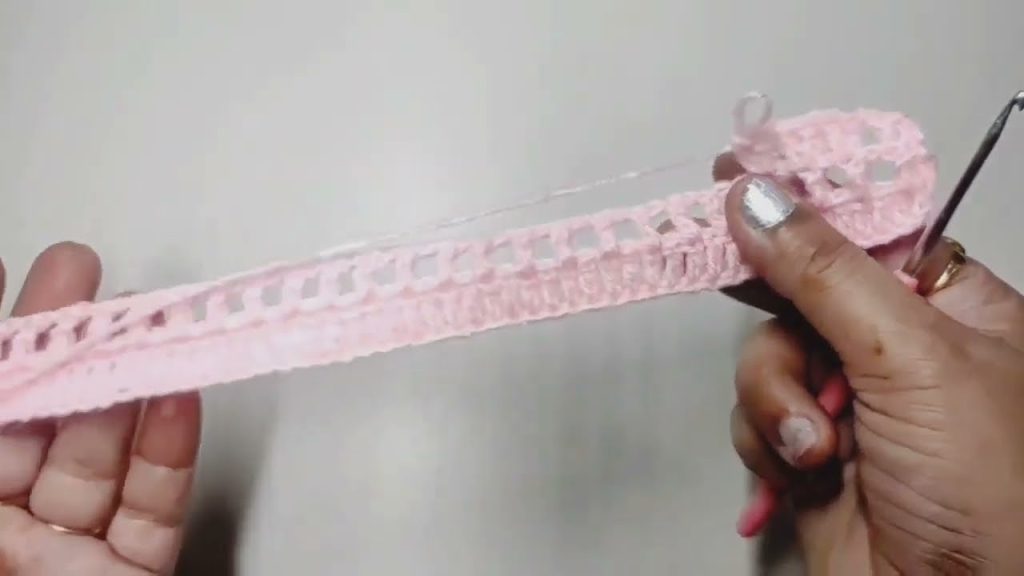
Part 4: The Border
- Skirt Border (Color Change): Join a new color to the hem of the skirt. Work a few rows with a pattern of double crochet groups and chain spaces, as shown in the video, to create a decorative border.
- Hem Border: Add a final border to the hem with a shell stitch pattern (e.g., 8
dcin a space). - Neckline and Back Opening: Work a single crochet border around the back opening and the neckline for a clean finish.
- Add Buttons: Attach buttons to the back opening to complete the frock.
Final Steps:
- Weave in All Ends: Use your yarn needle to weave in all loose ends securely for a neat and professional finish.
- Block the Frock: For a polished look, gently block the finished frock to help the stitches and shape set nicely.
- Enjoy your beautiful handmade frock!
Video tutorial:


