Amigurumi, the Japanese art of crocheting small, stuffed yarn creatures, has captured hearts around the globe. Among the countless designs that exist, one of the most heart-melting and charming characters is the baby bull in a diaper—an adorable mashup of cuddly farm animal and sweet baby features.
Whether you’re crocheting as a hobby, gifting to a loved one, or stocking a handmade store, a baby bull amigurumi wearing a diaper is a delightful project that’s both fun and rewarding. In this guide, we’ll walk through everything you need to know—from tools and skills to pattern elements and customization tips.

📌 Table of Contents
- Introduction: Why Make a Baby Bull in Diaper?
- What You’ll Need
- Essential Crochet Techniques
- Pattern Overview
- Step-by-Step Instructions
- Finishing Touches
- Customization Ideas
- Tips for Beginners
- Displaying, Gifting, or Selling Your Bull
- Final Thoughts
1. 🐄 Introduction: Why Make a Baby Bull in Diaper?
Baby animals already have an inherent cuteness, but when you add a diaper, pacifier, or bib, the “aww” factor skyrockets. The baby bull in diaper amigurumi is a whimsical and gentle representation of a strong farm creature in its most vulnerable, huggable form.
This project is perfect for:
- Baby shower gifts
- Nursery decorations
- Farm animal collections
- Year of the Ox/Bull gifts
- Valentine’s Day or Springtime themes
Crocheters love this project for its balance of simplicity and detail—you get the ease of basic shapes with the fun of creative accessories.
2. 🧶 What You’ll Need
Before diving into the pattern, gather your tools and materials.
Materials:
- Worsted weight yarn in:
- Brown or beige (bull body)
- Cream or white (diaper)
- Pink (snout and cheeks)
- Black (hooves, eyes, or nostrils)
- Optional: blue or green for pacifier, yellow for bell
- Crochet hook (3.0mm–4.0mm depending on yarn weight)
- Fiberfill stuffing
- Safety eyes (6mm–10mm)
- Tapestry needle for sewing pieces together
- Stitch marker to keep track of rounds
- Scissors
- Optional: pipe cleaners or craft wire (for poseable tail)
Yarn Suggestions:
- Red Heart Soft
- YarnArt Jeans
- Paintbox Cotton Aran
- Lion Brand Vanna’s Choice
3. 🧵 Essential Crochet Techniques
You’ll need to know these stitches and techniques:
- Magic Ring (MR) – to start in the round
- Single Crochet (sc)
- Increase (inc) – 2 sc in one stitch
- Decrease (dec) – sc two stitches together
- Slip Stitch (sl st)
- Chain (ch)
- Crocheting in the round – for creating 3D shapes
- Color changes – for snout and diaper
4. 📋 Pattern Overview
The pattern consists of several basic parts:
- Head and Body (often made in one piece)
- Arms and Legs
- Ears and Horns
- Tail
- Diaper (separate piece)
- Snout/Muzzle
- Facial features
- Optional: Pacifier, Bib, Bell
We’ll go through a simplified version of each element below. You can then modify or enhance the pattern with your own creativity.
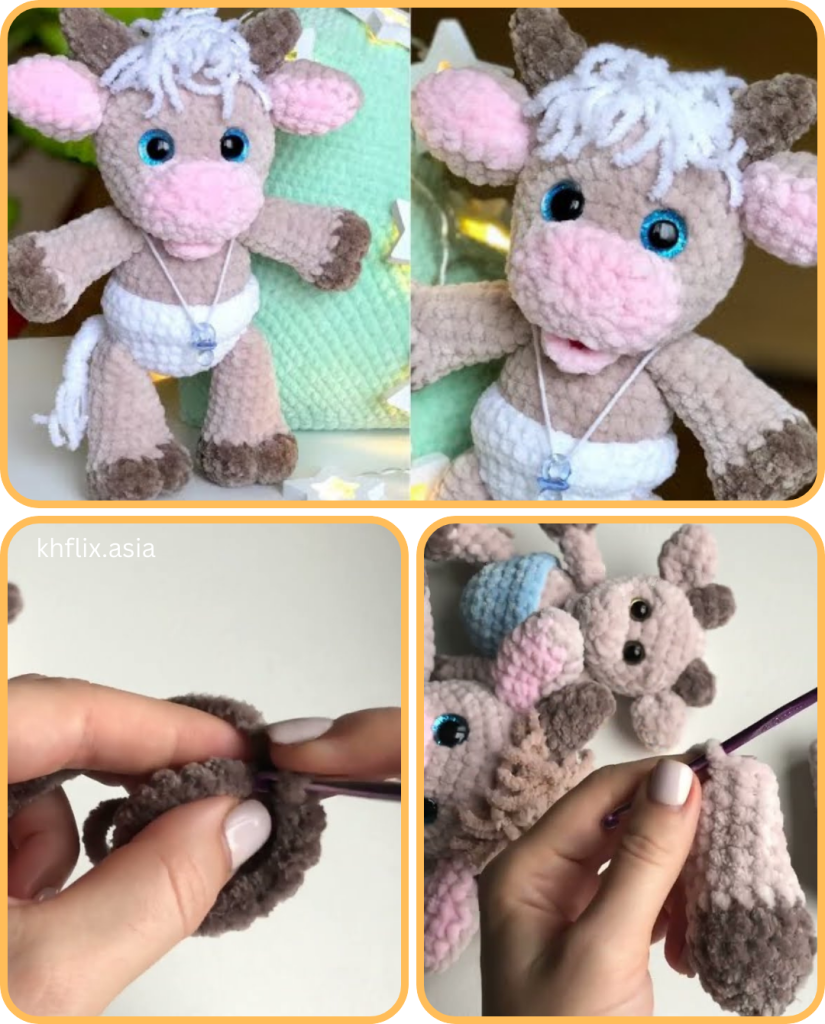
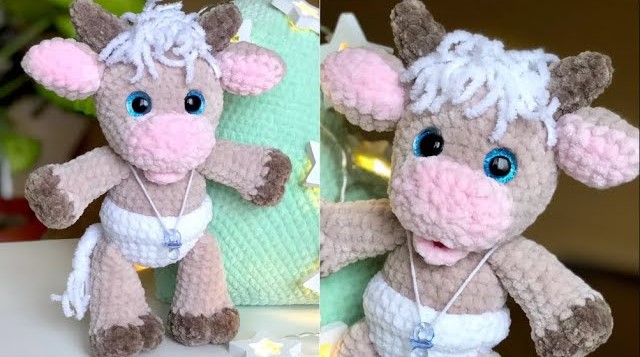
5. 🧸 Step-by-Step Instructions
🐮 Head and Body (worked from top down)
Round 1: MR, 6 sc (6)
Round 2: inc x6 (12)
Round 3: (sc, inc) x6 (18)
Round 4: (2 sc, inc) x6 (24)
Round 5: (3 sc, inc) x6 (30)
Round 6–12: sc in each st (30)

Insert safety eyes between rounds 8–9, about 5–6 stitches apart.

Round 13: (3 sc, dec) x6 (24)
Round 14: (2 sc, dec) x6 (18)

Stuff head firmly with fiberfill.

Round 15: (sc, dec) x6 (12)
Round 16: sc in each st (12) → beginning of body
Round 17: (sc, inc) x6 (18)
Round 18: (2 sc, inc) x6 (24)
Round 19–24: sc in each st (24)
Round 25: (2 sc, dec) x6 (18)
Round 26: (sc, dec) x6 (12)
Round 27: dec x6 (6)

Fasten off, weave in tail.
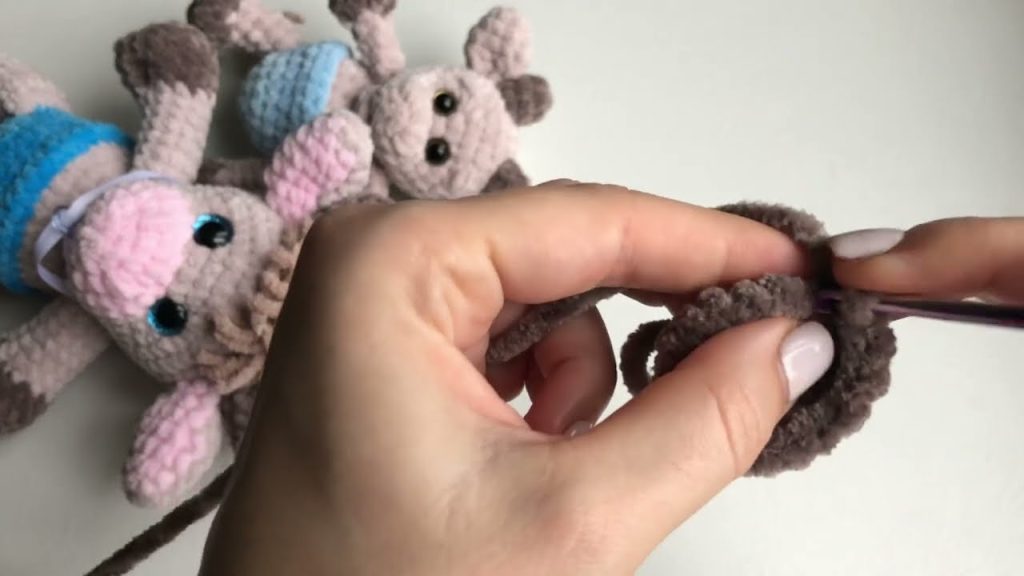
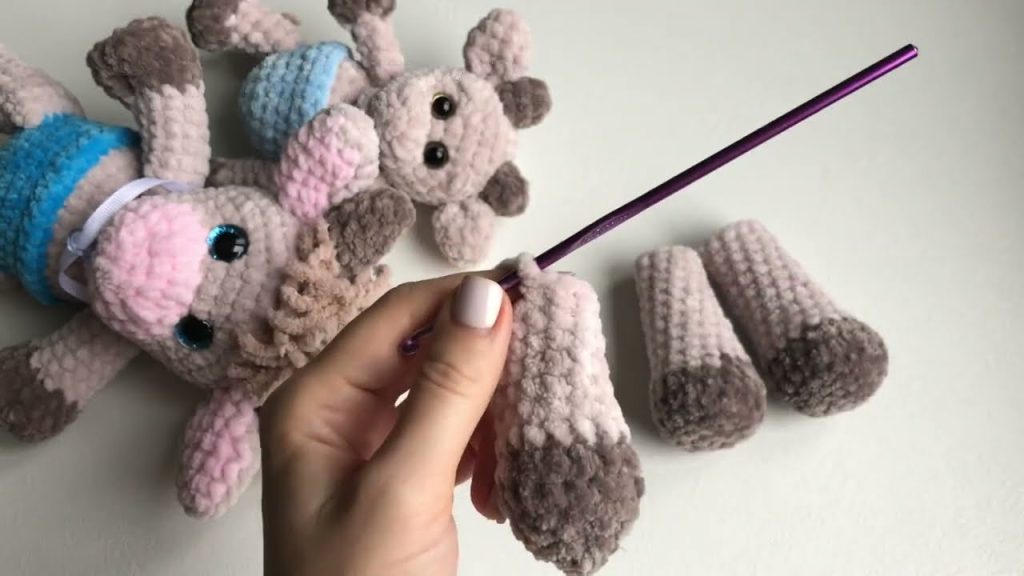
🦵 Legs (Make 2)
With black (for hooves):
Rnd 1: MR, 6 sc (6)
Rnd 2: inc x6 (12)
Rnd 3: (sc, dec) x4 (8)
Switch to brown:
Rnd 4–6: sc in each st (8)

Stuff lightly. Fasten off, leave tail for sewing.
💪 Arms (Make 2)
Same as legs but shorter (fewer rows).
MR, 6 sc (6)
inc x6 (12)
sc x12 for 2 rounds
dec x4 (8)
sc x2 rounds

Stuff lightly, fasten off.
👂 Ears (Make 2)
MR, 4 sc (4)
inc x4 (8)
sc in each st for 2 rounds
Fold flat and sew onto head sides.
🦏 Horns (Make 2)
Use light grey or tan yarn.
MR, 4 sc (4)
sc for 3–4 rounds
Stuff lightly, sew near ears.
🐷 Muzzle / Snout
Use pink yarn.
MR, 6 sc (6)
inc x6 (12)
sc x2 rounds
Fasten off, stuff slightly, sew to front of face
Optional: embroider nostrils with black yarn.
🐣 Diaper
You can crochet a flat panel and wrap it like a diaper, or make it fitted.
Basic Diaper:
Row 1: ch 18, sc in 2nd ch from hook and across (17)
Row 2–6: ch 1, turn, sc across (17)
Decrease 1 st at both ends for next 3 rows to taper

Add button or Velcro closures on each side.
Optional: Crochet a border in contrasting color.
Sew the diaper around the lower body.
🐮 Tail
ch 8, sc back across (7)
Add small puff or tuft at end with bobble stitch or scrap yarn
6. 🌟 Finishing Touches
- Sew all parts together carefully with the tapestry needle.
- Embroider eyebrows or eyelashes for expression.
- Add blush using pink embroidery thread or gently rub in pastel or fabric-safe paint.
- Attach any extras like:
- Mini pacifier
- Bell on a collar
- Baby bottle (crocheted or sewn)
7. 🎨 Customization Ideas
Make your bull truly unique:
| Feature | Idea |
|---|---|
| Diaper color | Blue, pink, rainbow, pastel |
| Accessories | Hat, bow, pacifier, pacifier clip |
| Horn shape | Curled, twisted, or sparkly |
| Body color | Spotted cow, golden bull, white fur |
| Expressions | Smiling, sleepy, surprised |
8. ✨ Tips for Beginners
- Start with safety eyes before assembling the body.
- Use stitch markers to avoid losing track of your rounds.
- Stuff parts gradually and shape them as you go.
- Use pins to position pieces before sewing them on.
- Don’t worry if it’s not perfect—each handmade plush is unique!
9. 🎁 Displaying, Gifting, or Selling Your Bull
- Gift ideas: Place it in a baby gift basket, or wrap in a crochet blanket.
- Display: Use a mini cradle or shelf for a nursery theme.
- Selling: Be sure to credit pattern designers if you use a commercial pattern. Use tags like #babybullamigurumi or #cutebullcrochet on Etsy or Instagram.
10. 🧡 Final Thoughts
The Cute Baby Bull in Diaper Amigurumi project blends farmyard charm with nursery softness. It’s a project filled with opportunities for personalization and creativity, and it’s perfect for crocheters who love making cuddly characters with a dash of humor and heart.
Whether you’re creating your bull for fun, gifting,
Video tutorial:


